
Affiliate Disclosure: We earn a commission if you purchase through one of our links at no additional cost to you.
Sometimes you need to take a portrait and the background stinks. If you can’t move or fix it, you can use light falloff to isolate a subject.
How to Deal with Distracting Backgrounds Using Light Falloff
When you’re in a studio environment, you have control. A studio is just a box. You can bring things in or strip it down to bare essentials. You also have complete control of the light falling on your subject.
Photography in the field comes with challenges. You can’t always move things out of your way and you have to deal with the existing light.
If you really want to exacerbate your problems photographing a subject at a location in the field, try doing it as part of a group shoot. Not only are you competing for your own space, but then you run the risk of other people wandering into your composition.
You have a couple of tools at your disposal to isolate a subject.
One method is to use a shallow depth of field. All of the distractions behind your subject just fade away into a blur. Here’s an example.

It’s a good technique and one that I enjoy. However, it doesn’t work for every environment.
That’s because using bokeh to blur your background requires you to shoot with your widest aperture. Whether that works well for your exposure is one of the issues you have to consider.
Another issue is that you may lose detail on your subject if the depth of field is too shallow. In the photo above, you can see that the model’s ear and right shoulder are out of focus. I’m OK with that for this shot, but it may not work for every portrait.
Now let’s take a look at an example of a portrait in a pool hall.
Light Falloff vs. Shallow Depth of Field
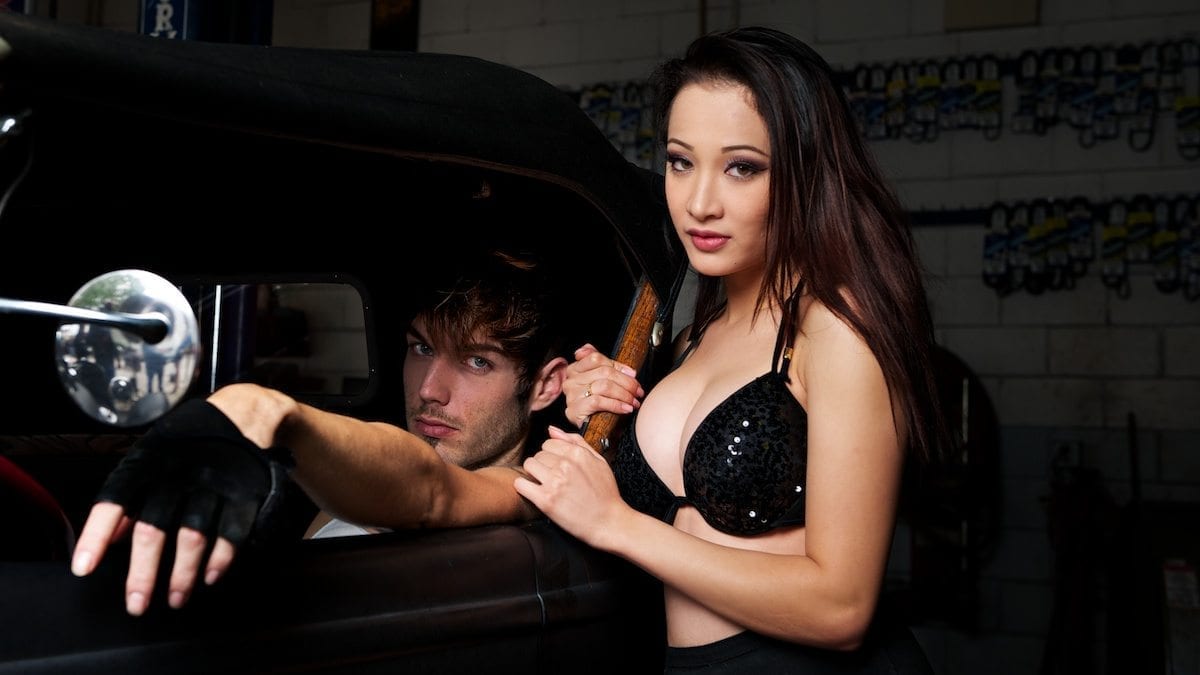
A friend who was with me decided to deal with the distracting background using a shallow depth of field. We both shot the model in a similar pose, but our images were very different.
The concept was to shoot some pinup-style and period piece photos in a pool hall.
Unfortunately, it was a modern place in a strip mall. That meant the environment didn’t really match the concept. OK, so sometimes you don’t get everything handed to you on a platter.
We tried some shots with the environment and a few worked. Most didn’t. Trying to salvage what was left of the shooting opportunity, my friend and I decided to go for isolation shots. He used his 85mm f/1.4 lens and I used my flash.
The pool hall had plenty of light from a wall of floor-to-ceiling glass panels. My friend put that to use with his lens using an aperture of f/1.4. That let in plenty of light, but also gave a pleasing bokeh to the background.
For me, it still didn’t work for my taste. Although the background was out of focus, I thought the background was still distracting. Instead of a solid color, there were just different blurry colors behind her.
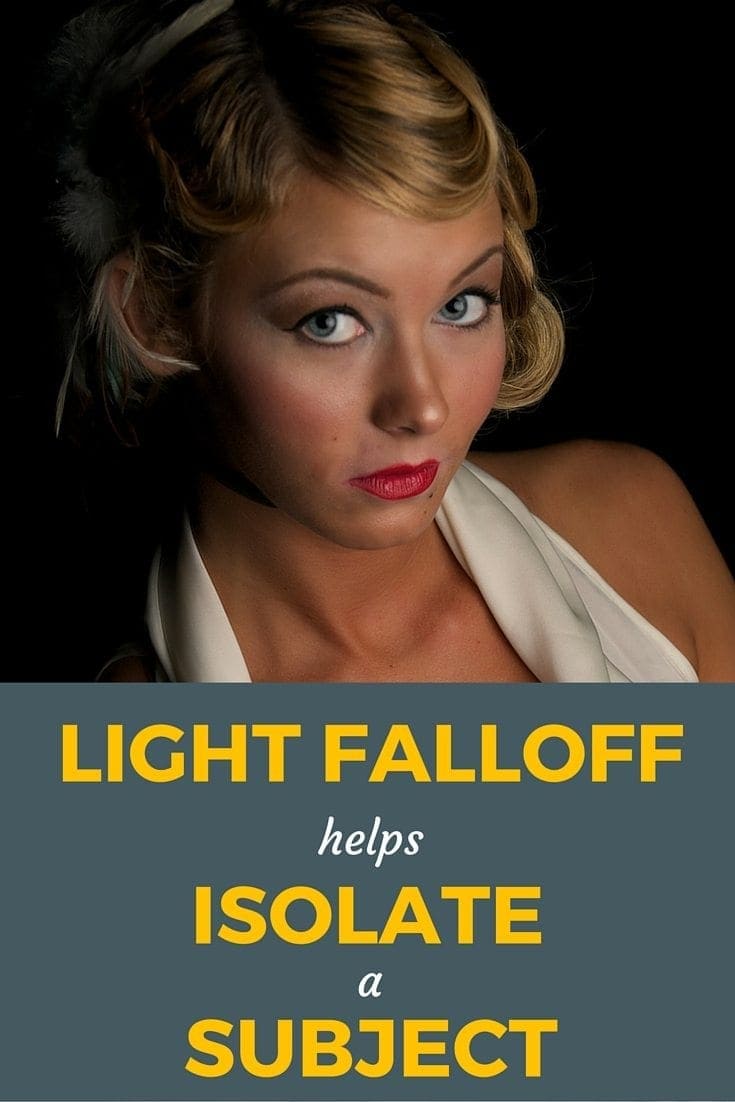
Using light falloff, I knew I could basically eliminate all of the light from the background and my model would appear on a black background. Choosing between that or the distracting background, I decided to go with the light falloff technique.

Understanding Light Falloff
The concept is pretty simple, though it’s often described in a confusing manner. People bring up the Inverse Square Law when discussing light falloff. Although that’s the correct principle at work, you really only need to understand one simple concept.
That statement sums up what you need to know about the Inverse Square Law. Now you just need to know how it applies to you as a photographer. The answer depends upon some key exposure variables.
Flash Duration
Flash duration is much shorter than your exposure. Most cameras can only sync up to their flash at 1/200th of a second. The flash duration is much shorter, though – over 1/1000th of a second.
That means your shutter speed isn’t the deciding factor in controlling light falloff from a flash. I set my shutter speed at 1/125th for this image. Reasonably quick, but still below the sync speed requirement for my flash.
ISO
Your ISO controls your camera’s sensitivity to light. The lower you can set it, the less its affected by light hitting the sensor. One of the first places to start with your ISO is at its lowest setting because you’re trying to eliminate background light.
I shot this photo at ISO 200, which is the native setting for the camera I used, the Nikon D700.
Changing the Exposure Variables
The next part of the exposure triangle would be aperture, but dealing with flash introduces two new variables into the exposure equation. Your flash power is one, and the distance from your flash to your subject is another. I kept the flash on a light stand, so the distance from flash to subject remained constant.
That leaves you with your aperture and flash power to adjust light falloff. Before introducing the flash, I adjusted my aperture to f/9. That, along with the ISO and shutter speed settings I mentioned above, is what it took to eliminate the ambient light from my exposure.
Without ambient light, I can’t see the distractions in the background. Now all I need to do is light my subject.
If I opened my aperture from this point, I would start to let ambient light creep back into the shot. That would also mean bringing back the distracting background.
Now I could start introducing the flash to the exposure. I needed at least enough power to evenly light my subject with the exposure variables I set on my camera. However, the distance between my flash and the subject mattered in two other ways.
The first is one we discussed with light falloff. The closer I could get my light to my subject, the faster the light would fall off. The other is how hard or soft the light falls on my subject. As I bring it closer, the shadows are much softer.
Let’s take a look at light falloff in more detail.
How to Create Lighting Zones
Remember, every time I double the distance the light has to travel, I lose 75% of its brightness, or two stops.
That distance can be very small. If my subject is an inch away from the light, then moving the light back two inches means I’ve lost 75% of the brightness output by the flash. The next move to double the distance is four inches, then 8 inches, 16 inches, then 32 inches.
If I want rapid light falloff, then my flash must be very close to my subject. Of course, that depends upon the power and other exposure variables remaining consistent.
Another way to achieve the same result is to vary my flash power or vary my aperture. Which is more convenient for you as a photographer? The aperture, of course, since it’s right there on your camera to control.
With all other exposure variables remaining consistent, your aperture determines how much light enters your sensor. Using a smaller aperture lets in less light. The light we eliminate is less bright than the light that enters.
Every time you reduce your aperture, you control light falloff by only allowing the more powerful, brighter light to enter your camera. If you look at the model above, you can see the light fading is it travels from one side to the other.
Eventually, we don’t see anything else because we’ve configured out exposure to ignore anything below a given power of brightness.
Light Falloff Can Tax Your Lighting Gear
You need to make sure that your flash has enough power to generate the level of brightness you need. My Nikon SB-900 was screaming in pain during this part of the photoshoot.
Using light falloff is a matter of measuring and controlling your light. If you have a light meter, you can do it very quickly and efficiently.
It’s still quite possible without using a meter. Take a few shots to measure the ambient light and eliminate it from your camera exposure variables. As you add light from your flash, you can control how far it travels by adjusting its power and distance, and by adjusting your aperture.
Working with Concepts
One of the things I mentioned is that we had a concept for this photo shoot. I made the mistake of letting someone else choose the location. The concept was fine, but it didn’t work in just any pool hall.
As a result, I learned another lesson about photography. Don’t just go along for the ride. If you have a shot in mind, you have to work like a producer. Make sure you know what to expect when you show up on location to create your images.
Otherwise, you have to reach into your bag of tricks to get a shot that’s different than your vision.


Great Post! Your explanation is clear and to the point!
Thank you very much for this tip William. I was searching the Web for this, and this is exactly I need. Unfortunately, this is not possible (I believe) with popup flash, so I have to wait to collect some money for external Flash 😉