Affiliate Disclosure: We earn a commission if you purchase through one of our links at no additional cost to you.
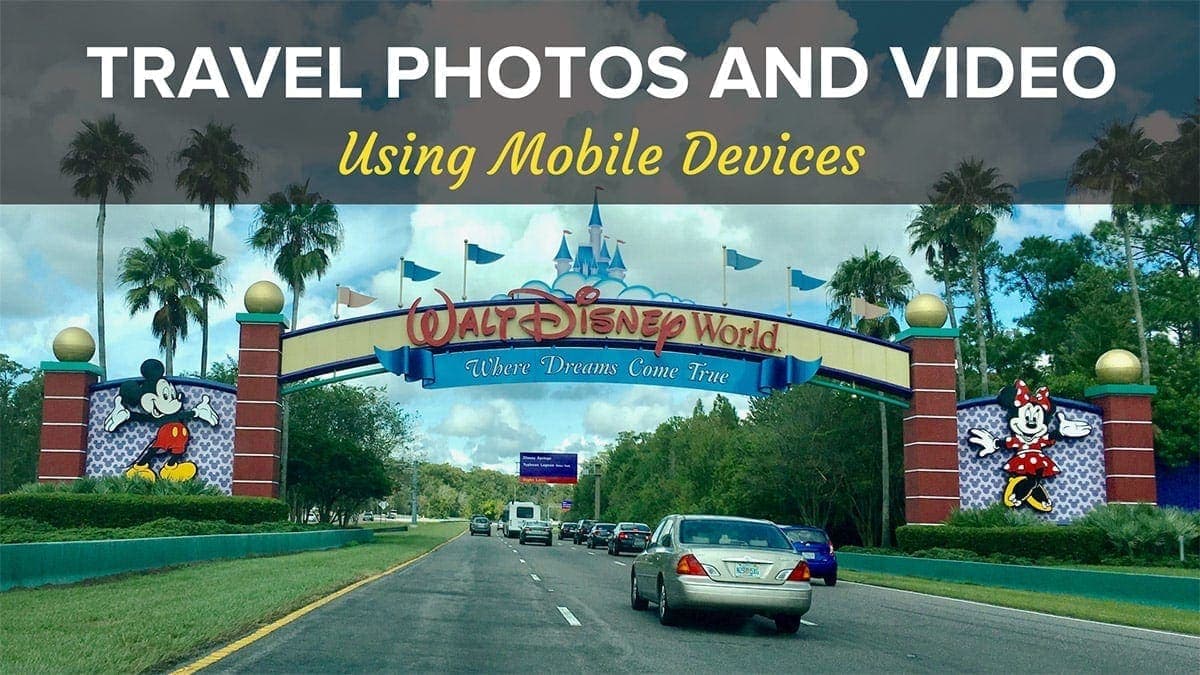
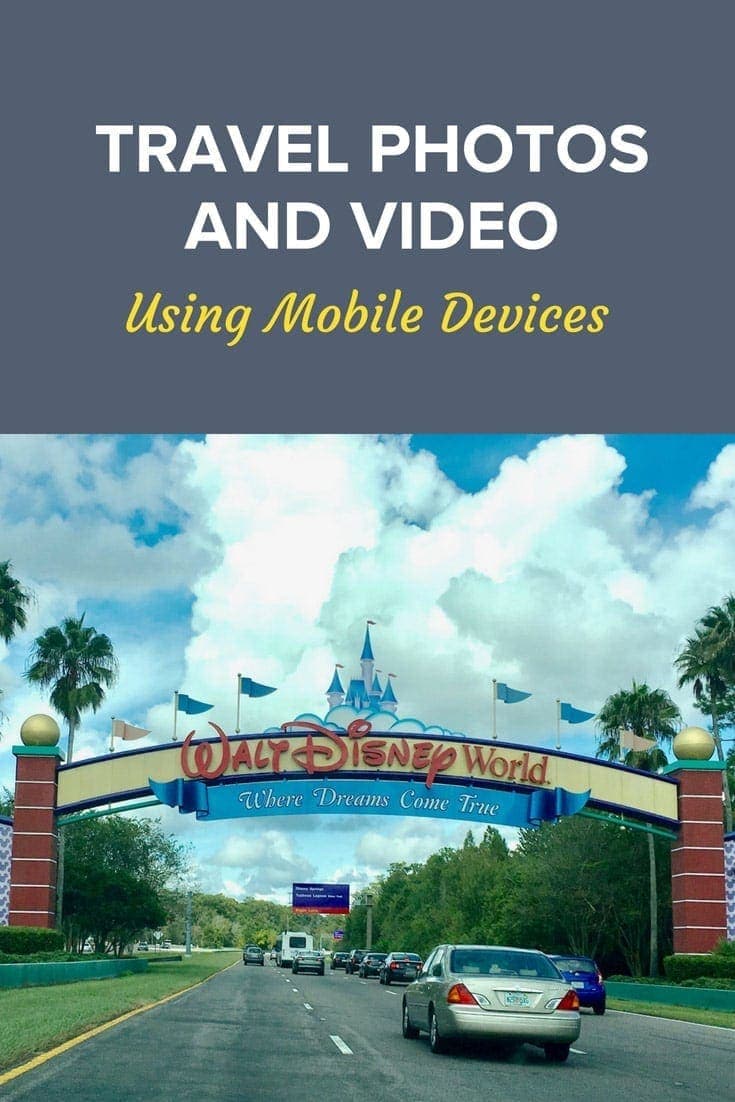
Capturing great travel photos and video using mobile devices like an iPhone, GoPro or a point and shoot like the Canon G7x Mark II is easier than you may think. We discuss what worked for us on a recent trip and something that didn’t live up to the hype.
Why You May Want to Leave Your DSLR at Home
Think about the purpose of your trip. Is it a photography or video trip, or is it a vacation?
One thing I’ve learned is that it’s really very hard to combine the two types of trips into one. If you’re on a family vacation and you bring a lot of gear to take photos, then you’re missing out on the purpose of your trip. Maybe your family understands, but you miss time with them and vice versa.
In other words, you may not be together while taking photos.
If it’s a photo or video trip, no worries. Go explore. Plan a list of shots that you want to take and execute your plan. I’ve done this plenty of times when I was single. I didn’t disappoint anyone.
Thinking about lugging your DSLR along to capture nice photos with your family?
It sounds like a great idea. If you’re not on the move, it may truly be a great idea. The time it becomes a lousy idea is when you’re out away from your room or rental home. As you wander the streets with your DSLR, it gains weight. Seriously, you’d think the camera was munching on snacks and putting on pounds as you walk.
If the weight of your camera isn’t manageable, you probably won’t take it with you. If you do lug it along, you may end up miserable with it.
Smart Phones are Ubiquitous
If you decide to shoot with your smart phone, you won’t stand out in the crowd. Nearly everyone carries a smart phone these days. Nobody bats an eye if you whip out an iPhone to take a few photos or video.
The reaction you get with a DSLR may be a bit different. While most times I was out shooting photos with my Nikon were trouble-free, I had a few incidents because of my “professional camera.”
Some places really don’t care for people with DSLRs.
Twice I’ve had officials at Walt Disney World harass me for taking photos with my Nikon DSLR. Never mind that almost everyone else was taking photos of the same thing, I had a “professional” camera and it drew attention. Yet I’ve never seen them harass a photographer with an iPhone, GoPro or Point & Shoot camera.
These cameras are lightweight, inconspicuous and actually create some very nice results these days. You may end up with better travel photos and video as a result. They give you the freedom to involve yourself in the location and still capture nice images when the right subject or moment appears.
Should You Plan in Advance or Get Lost in the Destination?
A lot of travel photographers share the advice that you should allow yourself to get lost in your destination. It’s not a bad thought. You’ll discover things you never knew existed. Maybe you’ll get some photos that others missed.
Some people love to plan, though. I’m actually one of them. There are some benefits to making shot lists and plans before you go. This is particularly true for video.
That’s because you need to tell a cohesive story with your video clips, and understand how your shots will transition from one clip to the next.
Don’t overthink those transitions, though. They can be nice and perhaps clever, but people don’t really care how clever you are. They just want a nice video with a story. Something that tells them about the place, what you did, or better yet, what they can do if they visit.
So should you be a planner or a wanderer? I think you can succeed either way. Go with your gut feeling. Do what makes you happy. Just remember that busting out of your comfort zone every once in a while may lead to some new results you like.
What is Your Travel Story?
The point of capturing travel photos and video is to tell a story. Entertain people with your antics, educate them about a destination or just make them want to go to there because of the awesome food, scenery or people found in your destination.
Here are a few story examples:
Remember, a story has a beginning, a middle and an end. If you’re creating a travel video, think about where your story starts and when it ends, and what’s the twist in the middle?
Many travel videos on YouTube start with the trip to the airport, or even on the plane during takeoff. That can work, but it doesn’t have to be the beginning of your story.
Maybe your story starts when you open the curtains in your room. If you’re going to the beach, maybe your story starts the first time your toes touch the water.
Rather than having a predictable start, such as we’re all going to the airport, choose something that may have a personal touch or emotional impact.
When I visited St. Lucia, my story didn’t start on the plane or on the ride to my resort. Not even when I opened the door to my room. Instead, my story really started when I looked out and saw the Piton mountains.

That’s where my trip truly began.
The twist in the middle was my reason for being there. I was on a lighting workshop with great people.

We took photos of amazing subjects.

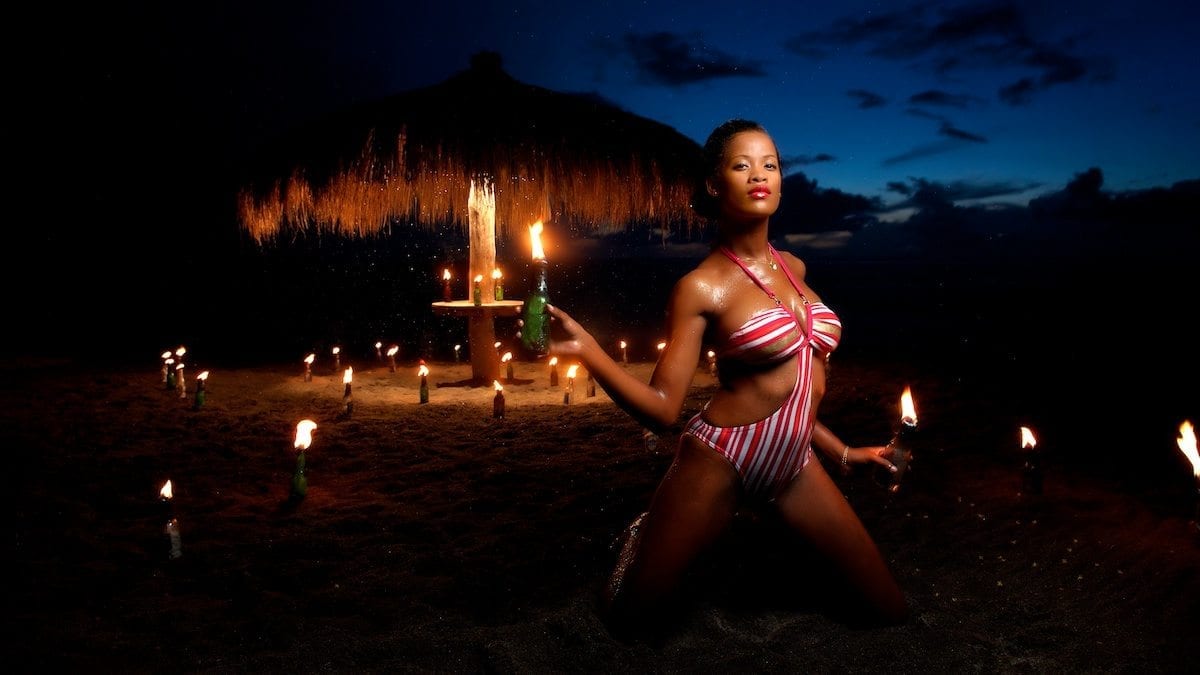
I knew it was all over when I saw my last sunset over the beach.

That was my beginning, middle, and end for a travel story. It doesn’t have to be complicated, and it doesn’t have to show a single piece of transportation. Travel isn’t about traveling. It’s about your experiences.
Show your experiences.
Some Travel Photo and Video Tools to Help Tell Your Story
I mentioned the cameras that we used:
You don’t need to use the same gear, but this should give you an idea of what we mean by mobile devices. They’re small, light, and easy to use.
However, it doesn’t hurt to add some accessories. We used a few apps for the iPhone to help with different ways to capture video and hyper lapse. I bought some add-on lenses for the iPhone for Wide Angle and Telephoto shots. We had some small tripods and grips for the cameras, and I used a gimbal to help stabilize our video.
1: Manfrotto Pixi Tripod and Universal Smart Phone Clamp
This tripod works well as a table-top tripod, but it also a very comfortable grip. The clamp is very basic but reliable. The top portion allows a large smartphone like my iPhone 8 Plus, which automatically squeezes down to hold your phone in place.
I use this for both my iPhone and Canon G7x video. You can get excellent footage with a few basic camera moves (discussed below).
It’s not a gimbal, so it doesn’t eliminate every shake and bounce. However, you can easily stabilize your video using the camera motions for tilts and pans – maybe even some dolly or trucking shots that don’t go beyond the length of your arm.
It’s also great if you want to vlog while walking around or just mounting it on a table.

The Manfrotto PIXI tripod is the perfect way to get great videos without all the shaking. With its lightweight and easy-to-use design, this tripod is ideal for anyone who wants to get pro-level shots without all the hassle. Just close the legs and use it as a comfortable grip to keep your camera steady while you capture those hard-to-get video shots. Plus, with the new push-button mechanism, you can easily position and lock the ball head in one swift move. The smartphone clamp makes it easy to hold any sized smartphone in place.
2: DJI Osmo Mobile 5
For better video stabilization for your smartphone, a gimbal is a great tool.
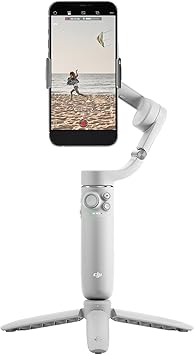
The DJI OM 5 is a lightweight and versatile tool that unlocks the full potential of your smartphone, so you can enjoy flawless selfies, super-smooth video, automatic tracking, and so much more.
The built-in extension rod lets you include more friends in a selfie or film your pets from lower angles. At the same time, the ShotGuides feature automatically recognizes your environment and recommends a corresponding shot sequence. Thanks to the magnetic technology, securing your smartphone onto the gimbal is quick and easy – no balancing or calibration necessary.
I say that because there is some inherent but minor bobble when you shoot video while walking. Some people do the Ninja Walk, where you bend your knees and walk carefully to avoid bobbing.
You lose your ability to blend in when you walk like a duck ninja. I have another trick that works for me.
Shooting at a faster frame rate and then slightly slowing down your output frame rate seems to make your video much smoother. The opposite also works. Shoot a hyper lapse, and you won’t have any bobbing effect.
You can use the DJI app for your hyper-lapse, providing a nice feature to lock on to a subject as you walk around it. For time-lapse, the DJI app allows you to set a starting and ending point, so the camera moves from one spot to another as it creates your time-lapse.
Another helpful feature is object recognition which causes the gimbal to follow your object wherever it goes.
You can use the gimbal with the iPhone app, Filmic Pro, or others, but some tracking features work only with the DJI app.
There’s a downside to slowing your frame rate in post-processing if you’re recording sound. It gets slowed down and sounds much deeper. My advice is to separate your video from your sound. If you need to talk over the walk, do it in post-processing so you sound normal as your smooth video goes by. Another option is to just play some background music for the video.
3: Waterproof Floating Handgrip
I use this grip for my GoPro for one simple reason.
It floats.
Yes, it has the GoPro mount so it’s easier to use than the Manfrotto Pixi tripod, but it doesn’t stand up like a tripod. It also has a wrist strap, which means you can get into hair-raising situations with less chance of losing your camera.
I mainly want something that keeps my GoPro from sinking like a stone. It’s my only waterproof camera, so I take it underwater.
Water makes things slippery. This has a nice rubberized grip; if that fails me, and the wrist strap fails me, it floats.
That’s about all I have to say about that.

Drowning is not an option with this Waterproof Floating Hand Grip. The floaty body design keeps your camera on the water's surface, while the bright color cup at the bottom of the grip makes it easy to spot and retrieve if it happens underwater. The high-quality, non-slip foam handle provides a tight grip and extra comfort so that you can capture various angles with increased stability and control. This pocket-size, portable, and the lightweight hand grip is only 7 inches tall and weighs under 80 grams, making it perfect for taking on all your adventures. Plus, the watertight compartment can store your valuable small items or achieve neutral buoyancy when diving or snorkeling.
4: Filmic Pro with Creative Pack (App)
Filmic Pro is an app for iOS or Android that gives you more options to control your smartphone camera and get better results. You can save presets that allow you to change your resolution, frame rate, bitrate, and more. It supports the DJI Osmo Mobile and a few other accessories.
Be sure to get the add-on Creative pack so you can change your color profiles to use Flat or Log mode. Those settings give you a flat result, so you can do your color grading, contrast, and other changes in post-processing with more dynamic range.
There’s a little content management system inside the app so you can name your clips and add a Time Code Track.
Filmic Pro is about $10, and the Creative pack is an in-app purchase for another $5. If you see a bundle to get them both together for less, grab it.
5: Hyperlapse from Instagram
If you don’t plan on shooting feature-length movies on your smartphone (that’s a thing now), but you’d like a nice Hyperlapse program, check out Hyperlapse from Instagram on iOS.
Android users, I’m sorry that there isn’t a version of this app for you. I can see there are other hyper-lapse apps on the Google Play Store, but I don’t have any experience with them and would hate to make a bad recommendation.
You may want to use a Hyperlapse app instead of your built-in camera app, which is the same as why you may want Filmic Pro.
Control.
The iPhone photos app doesn’t give you any options for hyper lapse. It’s all automated inside the app. Now that sounds convenient, and it is. However, it doesn’t give you control over the frame interval, shutter duration and other factors. If you want to show your own creativity, get a better app for Hyperlapse.
Story Telling with Camera Moves
Motion in video is a great way to up your game and create a cinematic video. Just remember something important about motion, and you’ll be fine.
Motion is like nudity. There are good motions and bad motions.
If you watch some travel videos on YouTube, the ones that stand out use standard camera movement found in motion pictures. Then there are the ones that make a lot of mistakes. Let’s take a look at each.
1: Camera Movement Mistakes
Here are a few amateur mistakes you want to avoid when moving your camera.
The essential idea is not to look like a GoPro mounted on the back of a hyena. It’s tiring, doesn’t tell a good story, and may induce vomiting.
Here’s what you want to do, instead.
Practice with those camera moves. Take short clips, not long walks down the beach or through a casino. People have a limited attention span, and you can tell a better story by showing a little quality instead of a lot of unnecessary footage.
My Moment Lens Experience
Before my recent trip, I ordered a pair of Moment lenses and the required iPhone case. You can’t mount the lenses without the case. They line up, twist and lock into place.
These things have a bit of heft and are highly praised by others. I did my research and expected to love them. For over $200 for these lenses, I very well expected to love them.
Turns out I don’t love them.
The wide-angle lens suffers from flare and a lot of distortion. The telephone lens has a vignetting problem.
Both lenses obscure the flash and second camera lens on my iPhone 8 Plus.
As a result of the optical issues, I have to spend time manually correcting my photos in Lightroom or another tool. That’s because there isn’t a profile in these tools that recognize that you added a lens to your iPhone, so you can’t just click a button to have it automatically fix the problems.
Given the cost, the optical defects, and the need to fix them in post, I’m returning my Moment lenses.
I would not recommend Moment Lenses after my experience with them.
Mobile Devices Let You Enjoy the Moment When You Travel
I’ll add one more benefit of these mobile devices over my DSLR. You typically don’t use them pressed up to your eye. That means you aren’t obscured and hidden by your camera. You can participate. Working with these screens instead of a viewfinder let you enjoy the moment.
Too often, photographers are so worried about capturing moments instead of enjoying them. Pull your face out of the camera and you can do both.
This post wasn’t meant to bash DSLR shooters, as I’m still one of them. It’s just a reminder that we have some great alternatives that are light, low cost, and can deliver some outstanding results with just a little bit of attention.
On top of that, you can even share to social media rather quickly, if you choose.
Skylum Coupon Code
I mentioned at the show’s end that you could save $10 on Skylum software using my coupon code – BEEM.
When you check out, use my Skylum coupon code: BEEM
Luminar Neo is an AI-powered photo editor that turns any portrait into a stunning masterpiece. With FaceAI and SkinAI, you can easily retouch portraits, removing blemishes and highlighting facial features. And with the Portrait BokehAI tool, you can create a beautiful bokeh effect in any light. Plus, the Background Removal tool makes it easy to remove backgrounds without spending hours masking.
Skylum now offers Luminar Neo as either a stand-alone tool or part of a membership with extensions to offer more valuable tools like:
- HDR Merge
- Noiseless AI
- Upscale AI
- AI Background Removal
- GenErase
- GenExpand
- GenRemove
Additional extensions are coming.
Luminar Neo's exposure correction and color vibrancy features for all your travel memories will keep your photos looking natural and beautiful.
Finally, Luminar Neo's SkinAI and FaceAI provide the perfect finishing touches for your portraits, ensuring stunning results every time.
You can get everything with different pricing plans. Monthly, Annual or even Lifetime plans are available.
SAVE: You can save $10 using my coupon code - Beem10off
- Promo Code: Beem10off
- Easy to use
- Get great results fast
- Plenty of post-processing features
- Professional extensions are available
- May be slow on older computers
- File management is rudimentary
Subscribe to The Photo Flunky Show
Thank you for listening to The Photo Flunky Show. Make sure you get every episode by subscribing.
iTunes – https://williambeem.com/itunes
Stitcher – https://williambeem.com/stitcher
Google Play – https://williambeem.com/googleplay
Blubrry – https://williambeem.com/blubrry
Want to learn more about Travel Photography? Click below to check out more Travel Photography articles.
Travel Photography Articles