Affiliate Disclosure: We earn a commission if you purchase through one of our links at no additional cost to you.
Photography rules are great for learning composition, lighting and other elements of photography. As you grow in your abilities, you should also learn that photography rules are more like guidelines. It’s OK to go on the other side of the fence if to get a photo that others may miss.
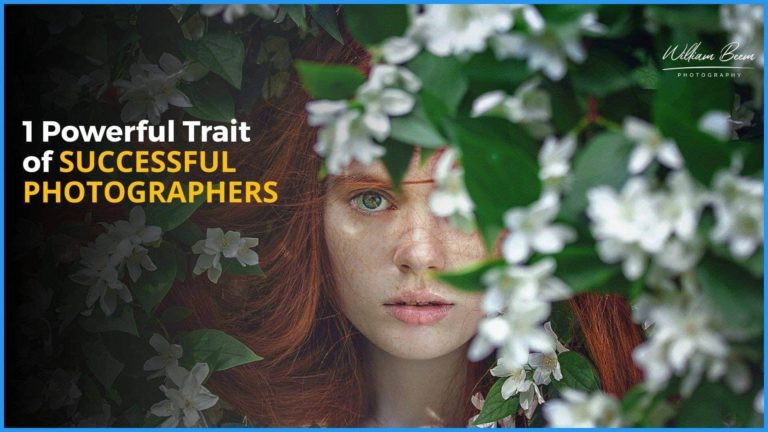
This episode has 10 photography rules that are good to know, but I also remind you that you shouldn’t be bound by the rules.
Links
Thanks for Listening!
I really appreciate you for joining me again this week. Do you have some feedback about this episode or suggestions for the show? Please leave a comment below.
If you enjoyed this show, please share it using the social media links above or below the post.
Ratings and Reviews in iTunes are incredibly helpful for the show. They help the ranking of the show and I read everyone of them. Please leave an honest rating and review for The Photo Flunky Show on iTunes.
While you’re there, don’t forget to subscribe to the show on iTunes to get automatic updates.
Many thanks to you until next time.
Transcript
PHOTO FLUNKY: Episode 12
I’m your host, William Beem. Welcome to the Photo Flunky Show, Episode number twelve.
Our topic for today: Photography Rules You Should Break
Hi, thanks for joining the Photo Flunky Show, available at photoflunky.com. Show notes for this episode are going to be available at williambeem.com/episode12.
Before we get into the main topic, I’ve got a little bit of news that came from Macphun. The nice folks over there provided a discount code for everybody that’s paying attention to me. If you’ve got a Mac and you want to get some Macphun software, I can give you a ten percent discount. The code is my last name, BEEM and just follow my link. It is at williambeem.com/macphun and that will save you ten percent on their software. That includes the Creative Kit and Aurora HDR. I hope that helps you and hope you enjoy it. It’s wonderful software. I use it. I love it, and I happily recommend it to you.
If you have any problems whatsoever, let me know and I’ll be happy to help you with the software whether you’re using it or installing it. Anything at all. I hope you enjoy it.
Let’s get into it.
Photography Rules You Should Break.
Rules are not necessarily a bad thing. They are a good thing. They help you understand basic concepts and help you get nice photos. The problem with following the rules to the letter is that it can stifle your own curiosity and your own creativity. Rules are great to get you nice photos, but you can also – if you follow them too much – limit yourself. You can hinder yourself and you can end up coming up with the same type of photos that everybody else is because they are following the same rules.
So with that in mind we’re going to go through ten different rules and tell you why you can break them.
- This is one I’ve never really liked. It’s called the histogram bell curve. There’s a prevailing thought out there that when you take a photo, the perfect photo has a histogram that looks just like a bell curve. So it is very low on the left end where your shadows are, it’s very low on the right end where your highlights are and all your detail is in the middle. The problem is life doesn’t always look like that. You may not always be taking a photo that’s going to be perfectly lit in the center. Sometimes you might be looking for something dark, something edgy and you’re going to have a histogram that looks nothing at all like a bell curve and yet you can still come up with a beautiful photograph.
Don’t let the histogram blind you to what is inside the photo itself. Don’t let anyone else tell you that your histogram is off so your photo is bad. Look at the photo. You either like it or you don’t like it. It’s that simple. So this is kind of a rule, right off the bat, please go ahead and break the histogram rule. What you’re really looking for in the histogram is whether you’re clipping, either in the shadows or in the highlights. If you’re losing detail, that’s where a histogram really helps you. All the stuff that’s in the middle, I don’t really care. If you look at the photo and you haven’t lost detail and you’re happy with it, then you’ve got a good photo.
- Next one: Use the right white balance. There are times when using a proper white balance is perfectly acceptable and it’s the right decision. If you’re doing product photography you want to make sure that you’ve got the right color and you’ve got the right white balance. Most of your photos aren’t going to look necessarily good if your subject’s skin is green. But on the other hand, it also is an artistic statement. You can change the white balance and make things cool or warm, more so than they need to be and give a sense of story, a sense of creativity to it. Maybe you’re looking for an overall blue cast; maybe you’re looking for an overall warm cast. Play with your white balance. See what you like. It doesn’t always have to be scientifically correct. I love my gray card, I shoot with it and it’s nice that I can nail it either in camera to do a custom white balance or after the fact to do it in Lightroom, but sometimes you just want to play with your white balance and see creatively if it gives you a different mood.
After all, photography, if you’re not doing photojournalism or commercial photography or something that has to be accurately correct, if you’re doing it for a creative reason, be creative. Go ahead and change the white balance around. You might like the results that you get.
- Rule of Thirds. We’ve heard this one over and over again. Your photos will look better if you use the rule of thirds. In other words, imagine a little tic tac toe board. Most of your cameras will probably have a gridline in there and you can line up just perfectly where your subject falls. The problem is, it’s not really always the perfect thing to do to put something just to the left or just to the right or below or above. You kind of want to avoid things dead center until it makes sense. If you look at it and you’ve got a strong portrait, for example. I’ve seen wonderful, lovely portraits, just square shoulders looking straight at you and dead on. That presents a sense of impact; a sense of importance; a sense of presence. You don’t always have to put things off to the left or right. Look at your subject and let your subject inform what it demands of you.
If you want to use the rule of thirds, that’s great, but don’t feel like you have to do it just because it’s a rule.
- Shoot with the sun behind you. The idea makes sense. You want to make sure that there’s light on your subject, you want to see his or her face, you want to see whatever landscape you’re doing, but that’s not the only light that’s available to you. It is perfectly fine to shoot your subject with the sun behind it or behind the person, or off to the side. I love side light. I love silhouettes. You’re not going to get those if you shoot with the sun behind you. So yes, shoot with the sun behind you, and then move. Walk around your subject. Try different angles, look at different lighting conditions. You might find a background you like better, you might find lighting conditions that you like better, but don’t feel that you always have to shoot with the sun behind you.
- Related to this one is: Don’t shoot at high noon. I get it! People always want to tell you that the best times to shoot outdoors are in the morning and at sunset. You get beautiful soft light coming in. That’s not the only kind of light that we shoot with. Sometimes photography demands hard light. Sometimes you don’t have a choice but to shoot at high noon. You can manipulate sunlight.
Go out there with a nice scrim or a white silk. Do something do kind of block over the sun and you can get a beautiful glow on your subject. And sometimes the harsh light and the shadows that are there are exactly what you want. You may want hard shadows on the subject to kind of sense dimension, shape and form. So don’t think that you can’t shoot at high noon. There is no such thing as bad light. There is simply light that may not be appropriate for the subject or the mood that you’re going for. If all you have is light at high noon, then look for something that works with the light that you have. It’s not bad light. It just simply is what is appropriate for your subject.
- This is one of my favourites. Blurry photos are bad photos.
Except, of course, when you want to give a sense of motion. This could be anything moving. It could be a dancer; it could be a race car, a bicycle. One of my favorite photos that’s showing motion is just the Dumbo ride over at Walt Disney World. I set up with a long exposure at sunset when all the lights were on the ride, Dumbo’s blurring around going in circles. You can’t really almost tell it’s Dumbo. It’s the sense of motion that you get from it. People look at that photo and they just want to go on the ride. It’s that simple.
Another example would be giving a sense of motion with using a flash to stop and freeze in certain places. This is one of the example Joe McNally gave on a workshop I attended with him. This was fun! We got out with some mountain bikers, they’re coming down a path and you’re panning along with them and you’re snapping. At the same you’re triggering your flash so you see motion in the bike and the wheels. There’s turning and spinning. Yet the flash captures the subject’s face so you can see the grit and the intensity on them. It’s nice to be able to combine light and motion together. Blurriness is not necessarily a bad thing.
One of the things I did when I was there was I visited Club Tropicana. It’s a wonderful environment. The lights are changing all the time, the dancers are moving all over the place. Dancers need a sense of motion. If you capture them at a peak, that might be great. But you don’t get a sense of motion or feel if you just freeze them where they are. It almost looks fake. You want a sense of motion to show that they are shaking their hips, that they’re moving through and that their arms are moving. The same thing could be true of ballet or other types of dance. You want to show that there is movement and life in the photograph. A little bit of blur will give you that. Blurry photos do not necessarily mean bad photos.
- Another piece of advice that we get is to leave active space for your subject. So imagine your subjects are walking in the frame. Typically, advice is that you don’t want to have them walking out of the frame; you want to have them walking into the frame. And you know what? It depends. I’ve got some lovely photos where people are walking in the frame and they’ve got room to move. If you’re shooting a race car, you want to have a little bit of leading active space so that you know the car is going this way. Your creative story telling can also work just as well if you have them walking out of the frame. So if they are on the left edge of the frame and they’re facing the left edge and they’re walking out, you get a clear signal: these people are leaving. They’re getting the hell out of here. That’s great. Use that! Don’t think that you always have to leave room.
Shoot it both ways if you have time. Sometimes your subjects are moving fast and you can’t necessarily get them and again, if you’re at a race, you’ve got cars, motorcycles, bicycles or runners, do it both ways. Show them running into the frame, show them running out of the frame and then go back and review. See which ones you like best. Sometimes you may be surprised that you like the ones that are just getting out of here.
- Another favorite of mine is: Fill the frame.
You want to draw attention to your subject, you want to eliminate distractions. I do this quite frequently. I love seeing photos that are completely full. You want to get in close to the detail.
The problem with doing that when you’re shooting is if you like to crop with a non standard crop. And there are some people who say they never crop their photos and that’s fine. You shoot everything and it’s going to be 3:2, that’s perfect. I like to post my photos mostly as 16:9 and sometimes as a square photo. That means I’m going to be going in there and cropping. And if I’m going to go do a 16:9 crop and I’ve filled up the frame at 3:2, I don’t have room to crop down and show my subject. It’s good to fill your frame, but think ahead as to how you’re going to use the photo. If you’re going to be cropping it down to a different size than what comes out of your camera, give yourself a little room on the edges. Just make sure that you’ve got room to crop the way that you want to.
- Here’s another one that I think was kind of blown out of the water a few years ago: Never shoot your subject from behind.
People don’t want to see someone else from the back of the head and if it’s a portrait, yeah, that’s unflattering. Unless you happen to be a Russian couple that is going on vacation.
Back in 2011 there’s a Russian producer named Murad Osmann and his girlfriend Natalia Zakharova. You’ve probably seen some of these photos before, but in case you haven’t, it is an Instagram filled with her leading him, holding his hand and they are travelling around the world, she’s facing in front her, she’s reaching behind and holding his hand and he’s taking pictures of her wherever they go. The photography is beautiful. The connection between them is beautiful and they are all shot from behind.
I will have links to his Instagram in the show notes so by all means, I recommend that you visit the site at williambeem.com/epidsode12, check out Murad’s Instagram feed; it is beautiful photography. It’s a wonderful look at a relationship and it is proof that you should ignore the rules sometimes of never shoot behind your subject.
- Finally: Use the correct exposure. A lot of times correct exposure is a good thing. I’ve got a light meter and I like to go out and find what the correct exposure is. If you are shooting for artistic reasons, the correct exposure is really whatever you want.
Again, kind of what we talked about earlier with the histogram. You may be going for a dark and edgy look; you may be going for a high key look. Use your artistic sense rather than worrying too much about what the light meter says.
I would recommend, first go in and nail it with the light meter. Get the correct exposure. Then look at it and think about your purpose. Am I going for high key? Am I going for low key? Am I going for something edgy? And then move your shutter speed around, move your aperture around and choose the exposure that you want. Do it for the way the photograph looks rather than for the rule of using the correct exposure.
Basically my advice to you is, know the rules. They are very helpful, but don’t be bound by them. If you have an artistic reason to change the rules, don’t think that you can’t break the rules. You should.
Thank you for listening to the Photo Flunky Show. Again, show notes are available at williambeem.com/episode12. You can find a transcript of the show there for free. I’d love it if you subscribe on iTunes. Just go to photoflunky.com and you’ll find a link there to subscribe on either iTunes or Stitcher Radio. And if you’re going to iTunes, I would really love your honest rating and review. It helps the show grow.
I’m William Beem. Thank you very much. I’ll talk to you next time.