Affiliate Disclosure: We earn a commission if you purchase through one of our links at no additional cost to you.
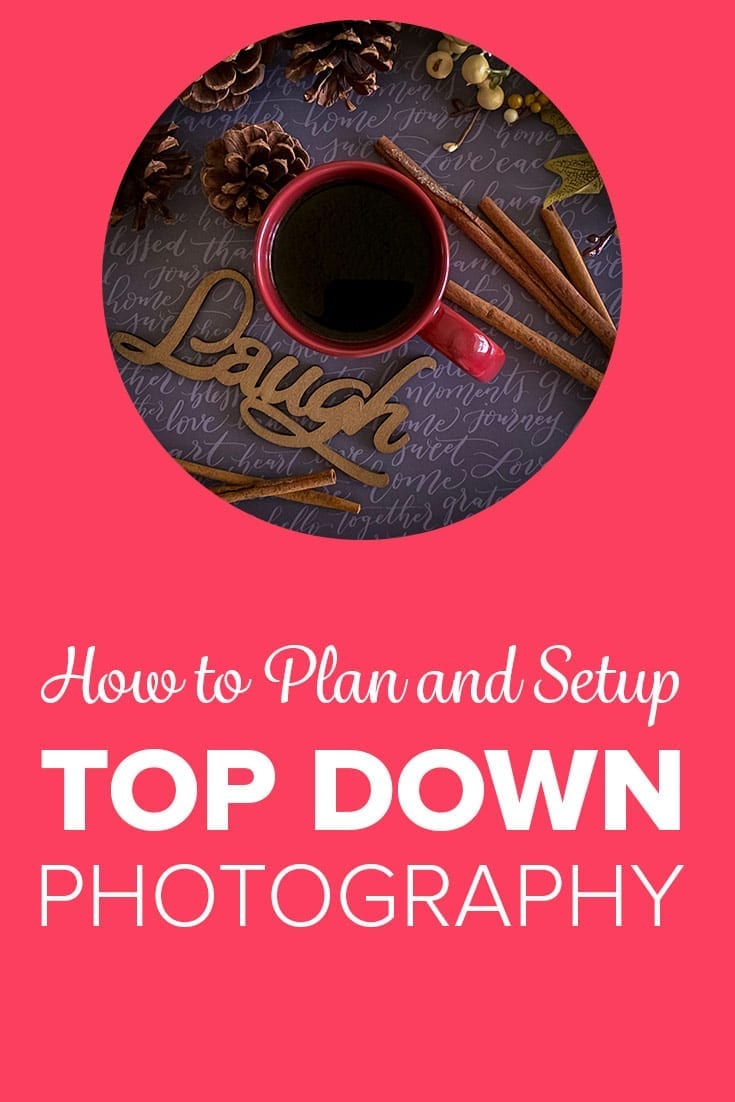
Top-down photos, sometimes called Bird’s Eye photos, typically get attention from viewers because it’s not the normal perspective we have to view a subject. It’s great for food photography, and you frequently see top-down photos used in magazines and advertisements for meals.
Lee always enjoys some food photography, and she recently started a new Instagram with a series of top-down photos of coffee, often dressed in an interesting set.
I asked her to share what she does and give some suggestions for others who may want to start some top-down photography of their own.
Why Does Anyone Need Top-Down Photos?
Here’s the thing I like about doing some top-down photography, or event table-top photography. You have the choice of collaborating with someone to dress the set or doing it all on your own.
I’m mostly interested in portrait photography. That pretty much requires collaboration to create your photos. However, there’s just one problem I have with portrait photography.
It’s because I’m an introvert.
Dealing with people, even nice people, drains my energy. I can only do it for so long before I have to step out and recharge.
Top-down photography is something you can do all by yourself. In the privacy of your own home or studio. That gives you a different kind of creative outlet, also.
You’re not just a photographer, but you’re also the person who:
In other words, top-down photography can be very rewarding as a personal project – as well as an art form of it’s own.
Set Design: How to Make a Hero Out of Your Subject
You can dress the set to the nines or use a very minimalist take on your set. Lee prefers dressing the set to create a mood for her coffee photos.
Here’s an example.
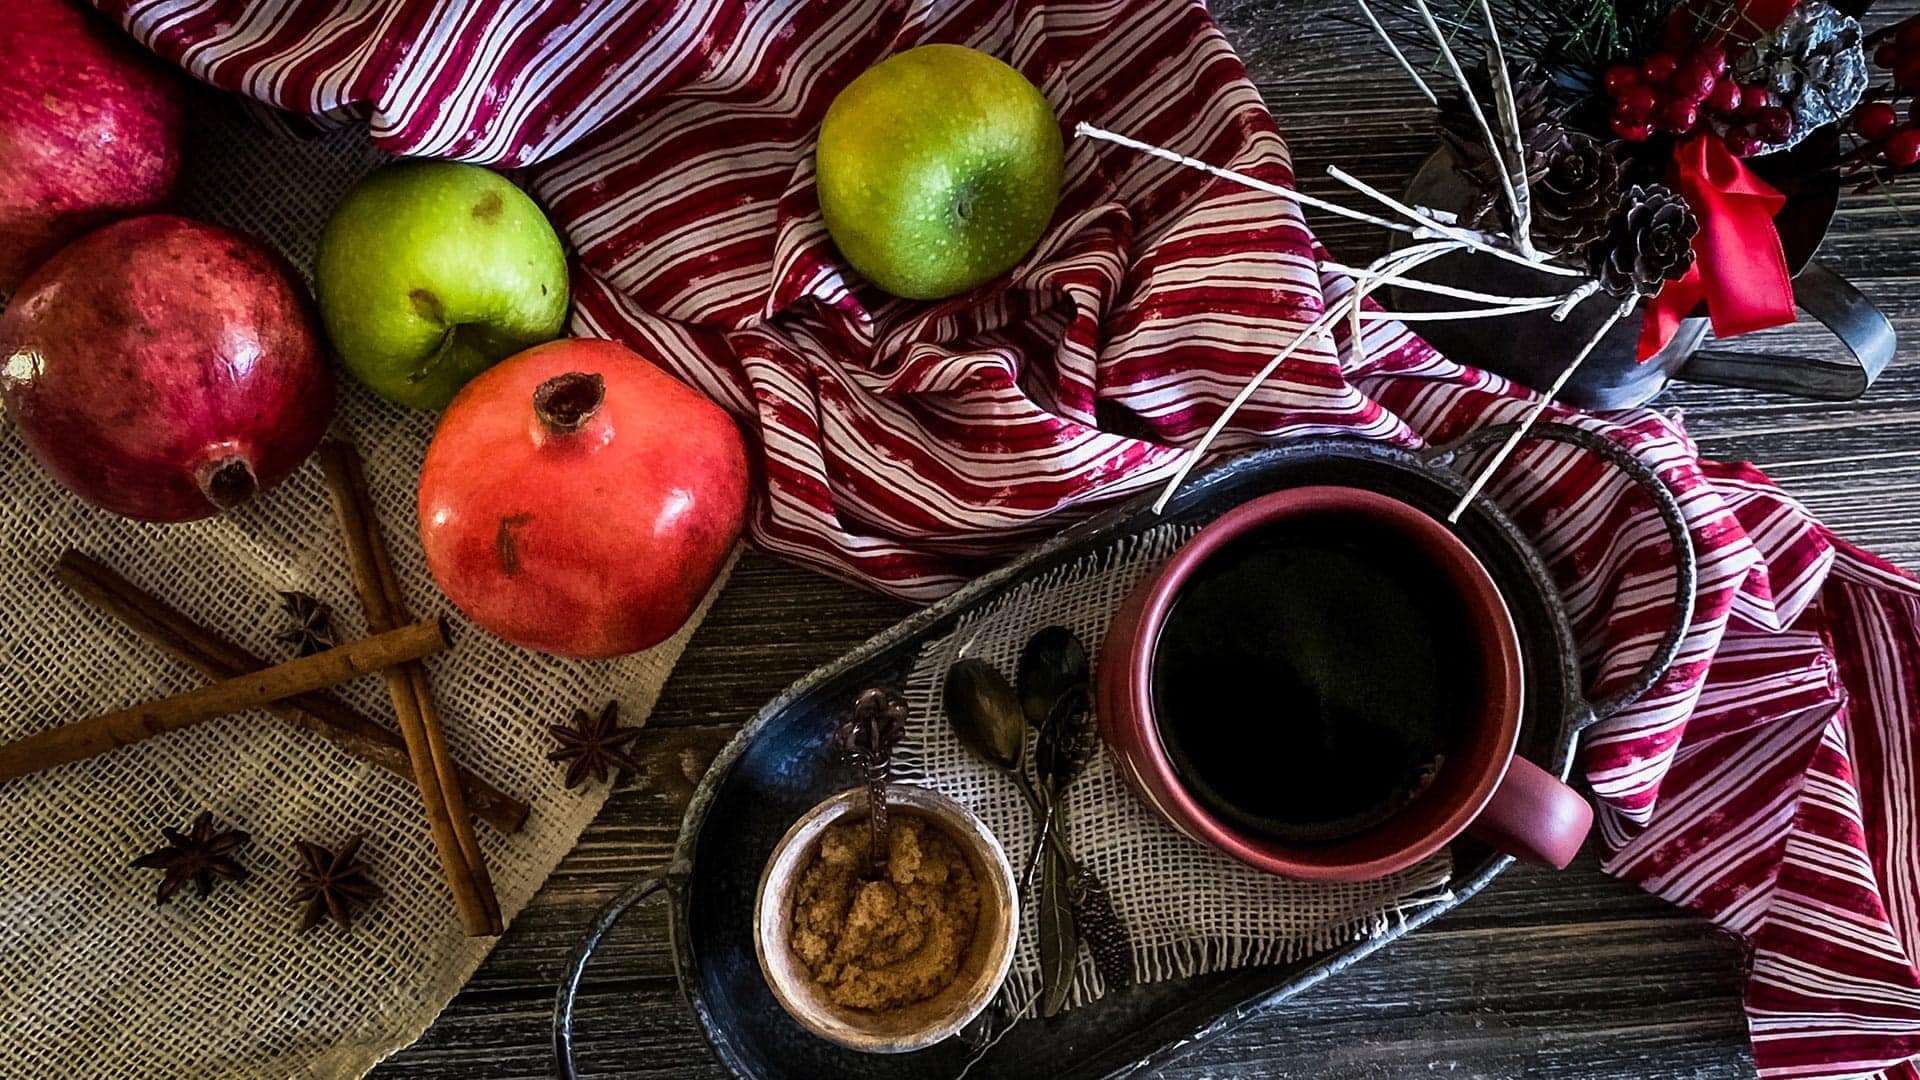
Here’s the thing. Coffee isn’t the hero of the photo. None of the items in the photo, individually, are the hero of the photo.
It’s about her story.
This is about Lee’s morning quiet time. It’s where she gets some space for her thoughts before tackling whatever comes in the day.
These photos and the story behind them are where she gets to tell the world to hold off for just a few minutes. Sort of how many coffee drinkers feel during their first cup of the day.
Don’t bug me. Let me have my coffee and a little bit of peace. Then we can engage with everyone for the rest of the day.
While Lee prefers dressing the set with various pieces to create her story, you could do the complete opposite with a minimalist approach.
Take a piece of foam core and wrap it in grey paper. Then just put one subject on it. Anything you like. Flows, toys, pieces of junk you find at a flea market, old family heirlooms. It’s your call.
Now you can very easily create a composite using textures to change the background under your subject. Your post-processing can be as creative as your composition.
Where to Find Pieces to Dress Your Set
There are numerous art and craft stores to visit. Anything from flea markets to Crate & Barrel could have some nice pieces to use. We tend to rely upon three popular craft stores near us, which happen to be almost everywhere else.
Hobby Lobby is an arts and craft store that’s been around for a while. It’s very new for us, but we enjoyed our visits and plan to go back. It isn’t the least expensive place, but it’s very large and has a broad selection of items you could potentially use to dress your set.
Joann Fabrics is the place where we find the best deals. As you can tell by the name, most of the emphasis is on fabric and sewers love this place. Lee uses a lot of fabric in her set designs to add color, and patterns, or to emphasize a sense of place. She tends to go for a rustic setting. That works great with a bit of burlap and some cast iron pieces.
The big thing here is how coupon-friendly Joann Fabrics is for buyers. They will stack coupons on top of more coupons and you can really save. Their default prices aren’t the best, but the coupons (and their smartphone app) really make it the most cost-effective craft store for us.
Michael’s is an art supply, craft, and framing store. It’s the most expensive place of the three, but sometimes they have things we need that the other stores lack – particularly when we need paints or art supplies. They don’t offer discounts or coupons with as many savings as the other two stores listed here.
Of the three, we get the most variety from Hobby Lobby, the most savings from Joann, and the art supplies from Michael’s.
How to Support Your Camera
If you’re going to use a DSLR, you have a few options.
I’ve done things each way. The standing thing gets old, though. It’s also the one most prone to screwing up your angle from shot to shot. Yet it’s quicker than the other methods. If you’re doing just one subject, this is a tempting option. It works well by an open door, too. Put your set on the floor and use available light coming from the door.
Unless you’re standing on a chair and may break your neck by falling. Not so desirable if you put your safety at risk.
I’m not a fan of the tripod method. You need a ball-head that allows you to move your camera off the center, which puts it at risk for tipping over. After all, the whole point of a tripod is to provide a safe, stable platform for your camera.
However, this can work. Your camera has to center looking down between two of the legs – which is where it’s most vulnerable to tipping off balance.
Using a C-Stand is my favorite option. It takes a little bit of fiddling to make sure it’s right, but then you can really get to work.
In addition to using a remote shutter release, I’d also suggest tethering to your computer to see your photos. Not only does it give you a bigger display, but it also helps keep you from climbing up on your rig to see what you just captured.
I’d recommend getting a solid support system for your top-down photos and tethering for the best results, particularly if you have a lot of subjects to photograph.
How to Light Your Set
You don’t have to spend a lot of money on lighting. However, you still need to control the light and shadows.
Lee prefers using window light for most of her coffee photos. It’s quick and conveniently located by our dining room table.
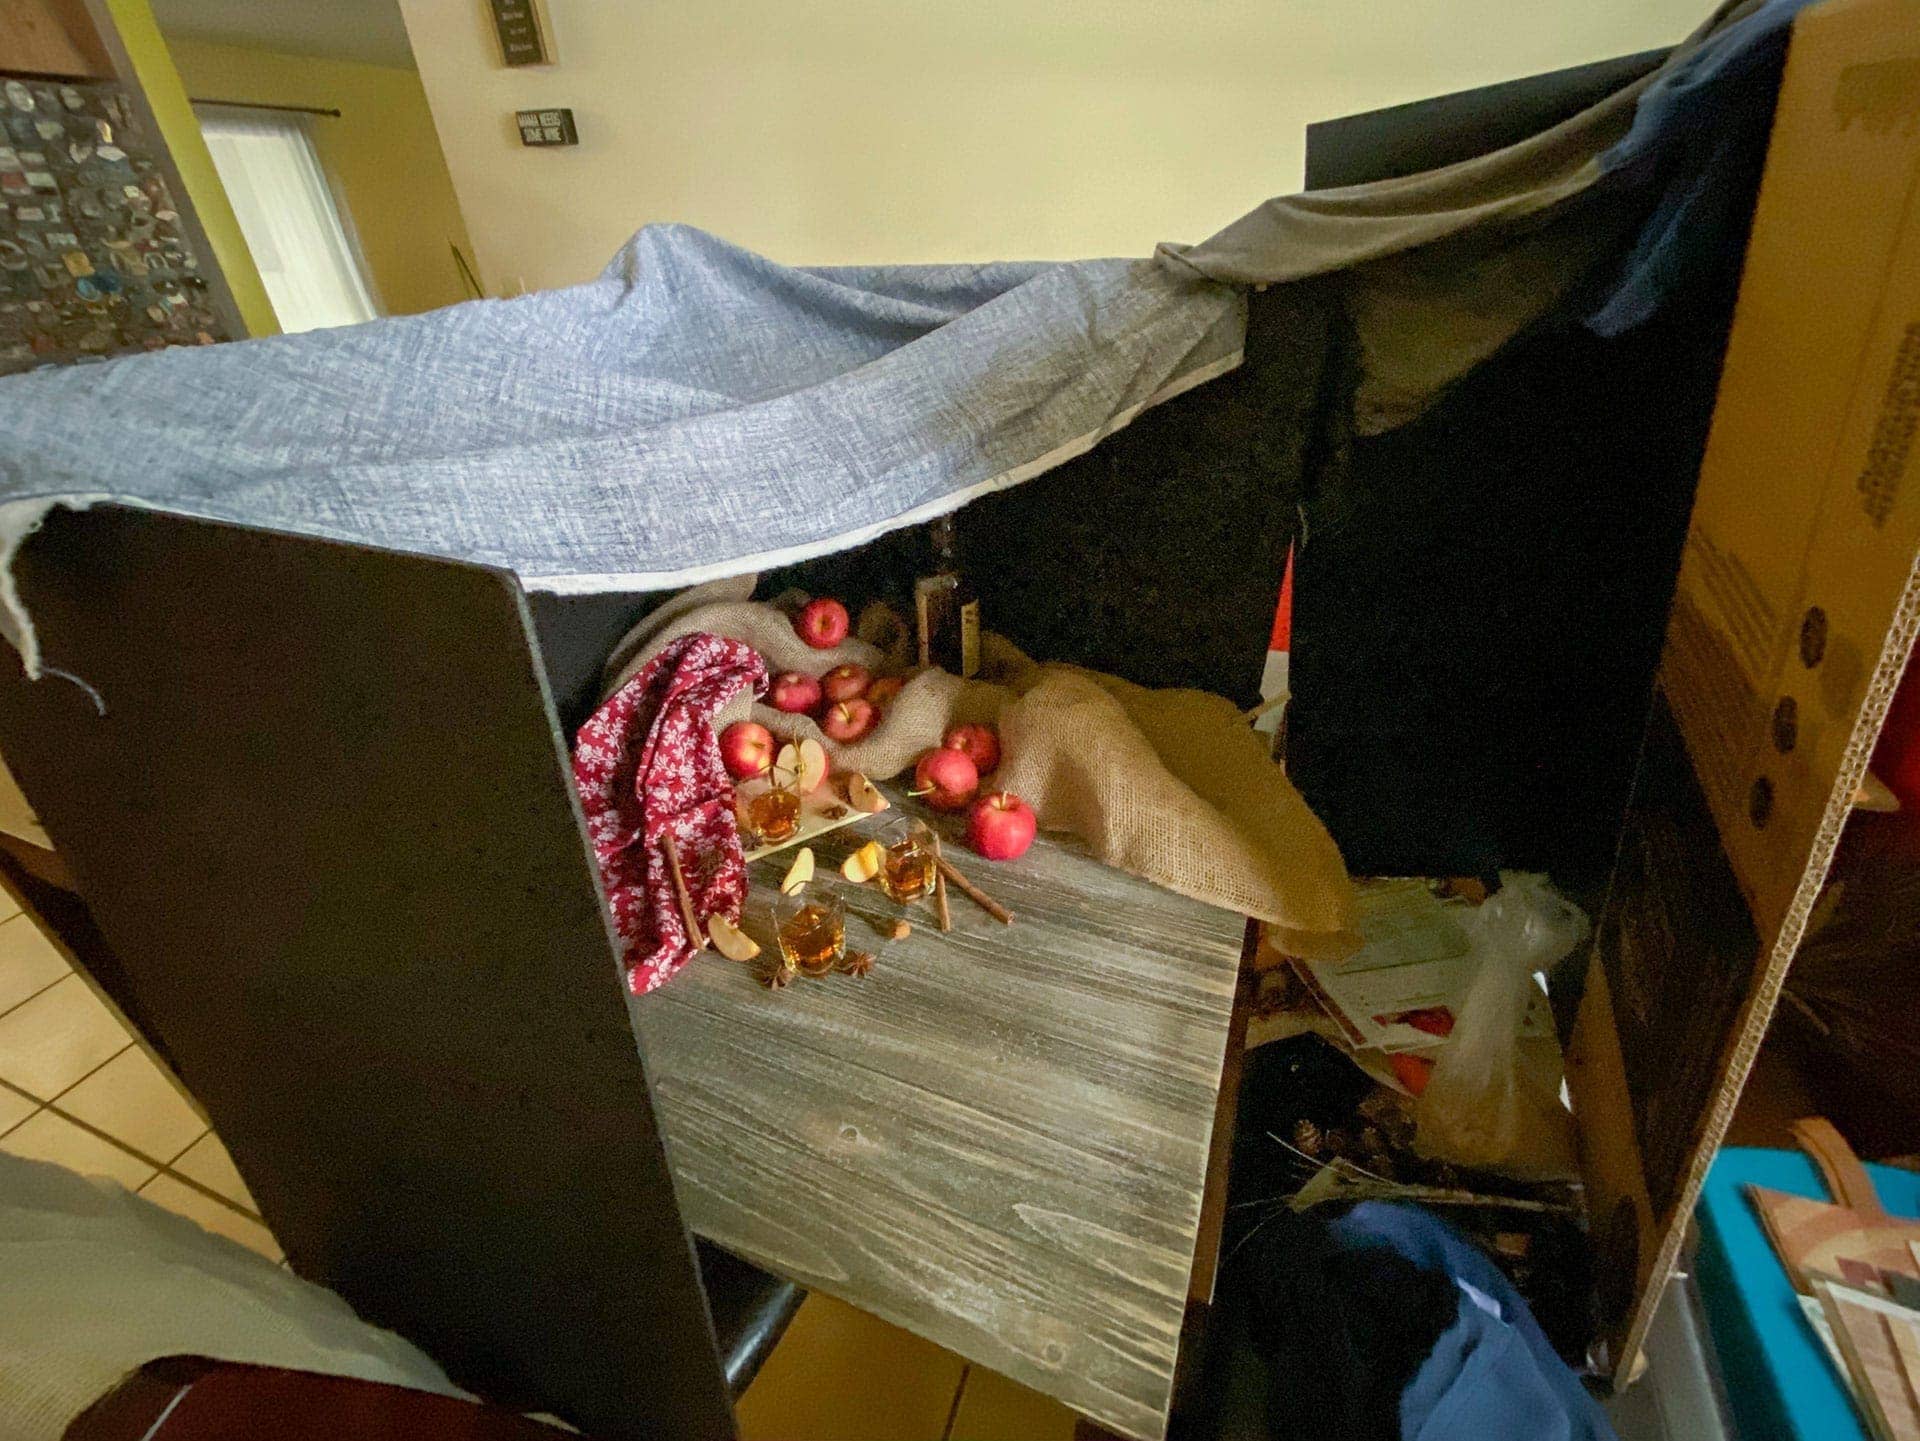
So how do you control window light? Well, sometimes it looks like this:
It’s just as important to block light as it is to provide it. That goes back to the old photographer’s advice:
If you want to make something look interesting, don’t light all of it.
Shadows are your friend. They define edges and provide depth & dimension to objects in your photo. If you just blast light at everything, it isn’t quite as interesting to the viewer. So block light strategically, whatever you use for a source.
There are times when window light isn’t sufficient, though. The night would be one of those times. That’s when we turn to our friendly flash.
In most cases, we use a Flashpoint eVOLV 200, but any flash will work. You could use an umbrella or softbox, or even some diffuser material. The idea is to soften the light and avoid harsh shadows on your set pieces.
This particular photo turned out to be something different than a top-down photo, but here’s what this cacophony of cardboard helped to create.
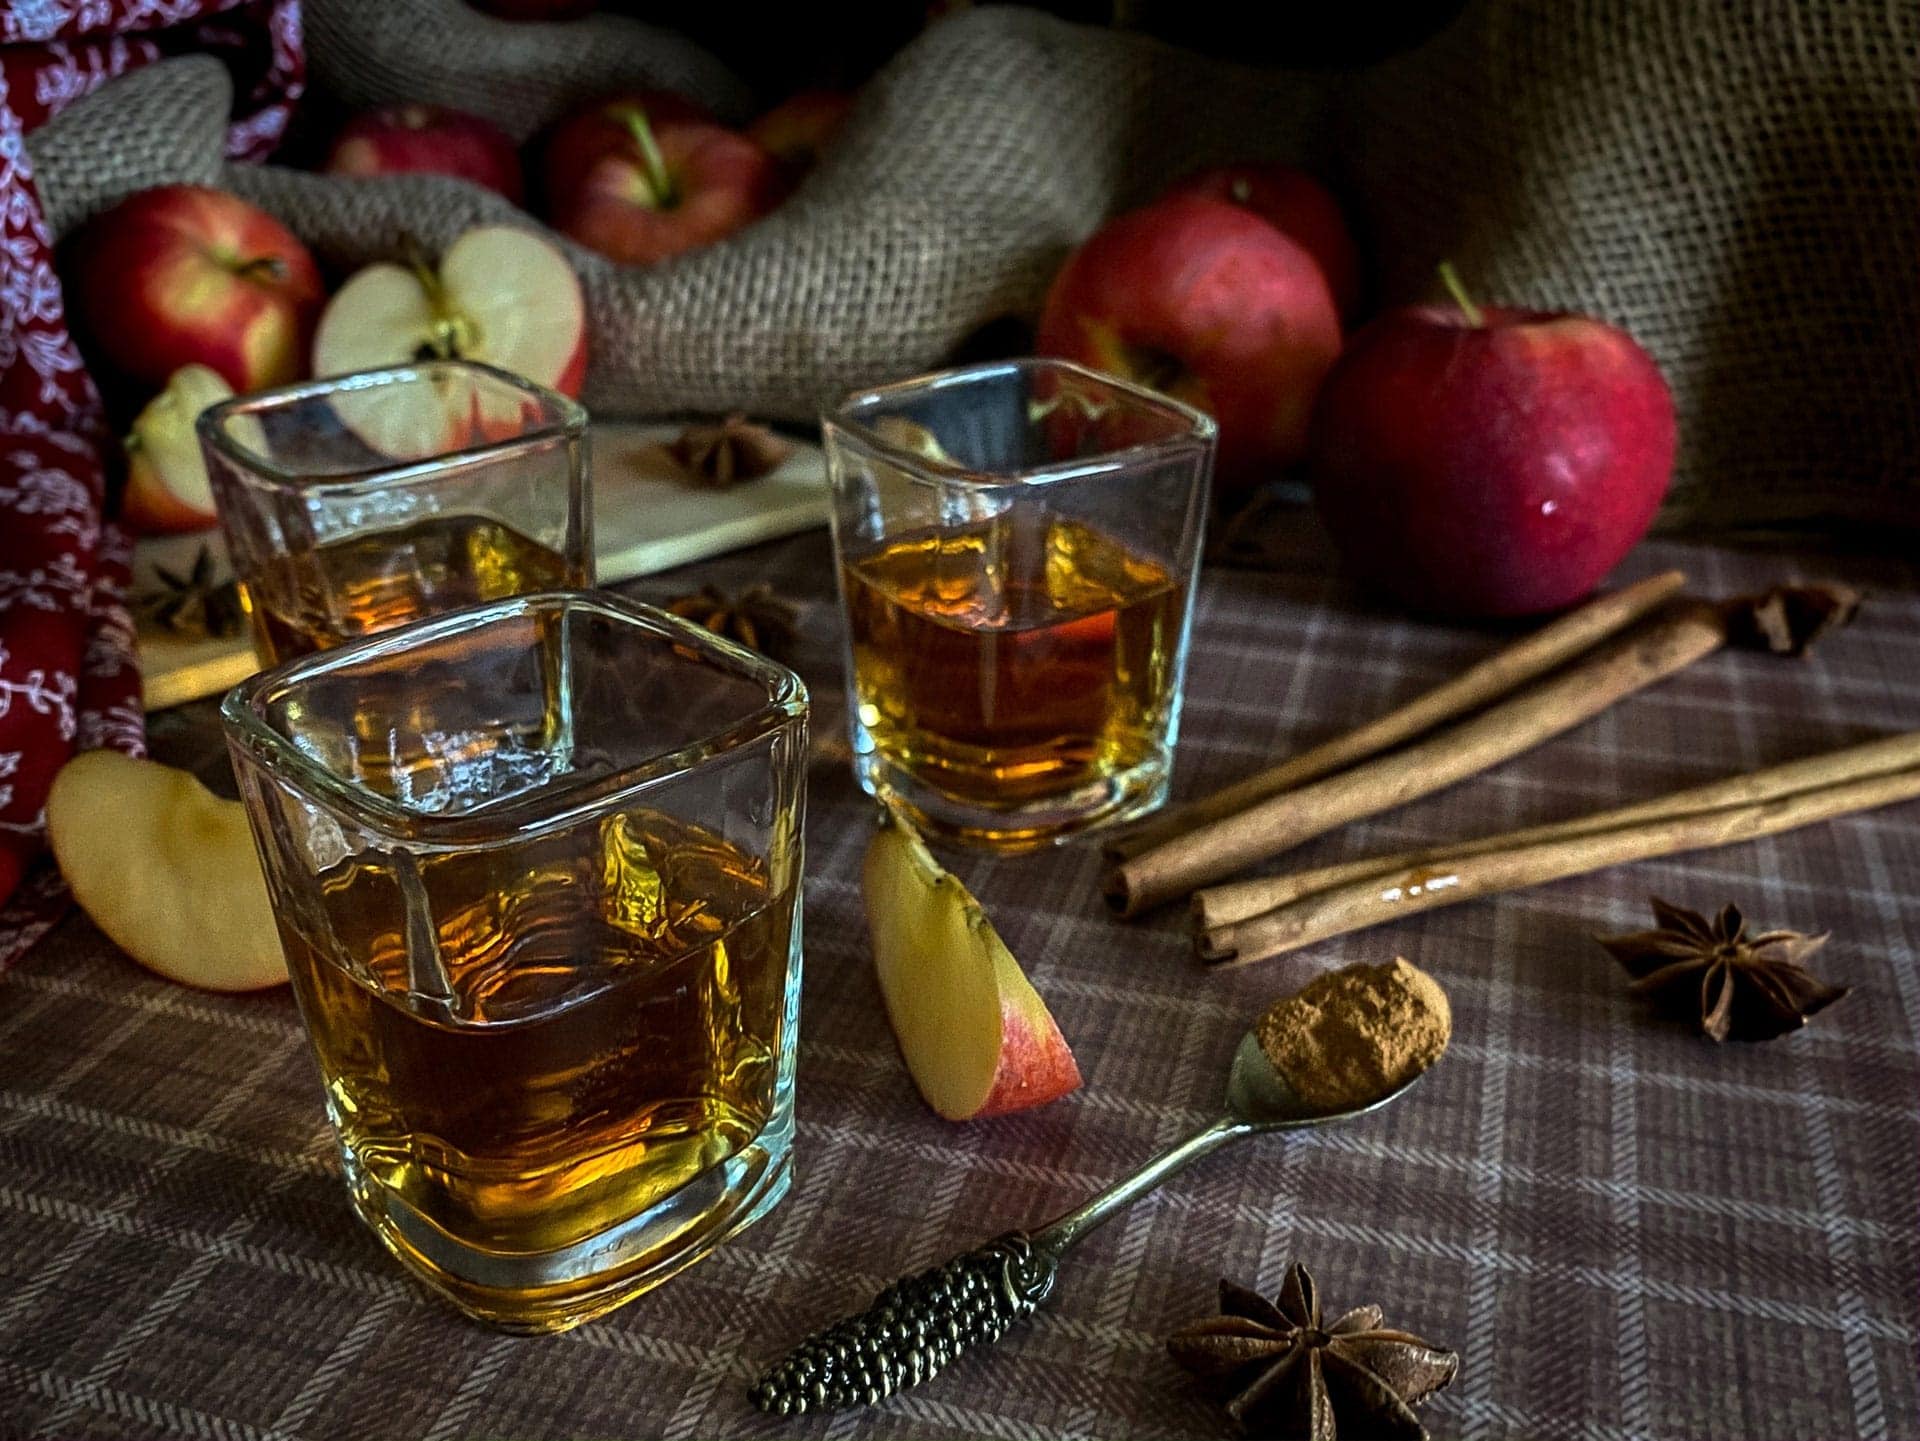
The result was a nice gradation of light from the source to the background. Good highlights on the glass, spoon and some of the apples helped.
Why apples? Because it was Sailor Jerry’s Savage Apple rum. Worth a try, in my opinion.
Top-Down Photos Are Great for Smart Phones
Photography isn’t about the camera. Some of these photos were taken with an iPhone and available window light. You don’t have to spend a lot of time or money to get some very nice results.
The idea is to concentrate on your story and tell it, rather than get hung up on gear. So don’t overlook the easy path. Sometimes it works well.


Like it. Very detailed about the process.
Forget the first comment. It was an error.
It’s perfect. Very detailed about the process.