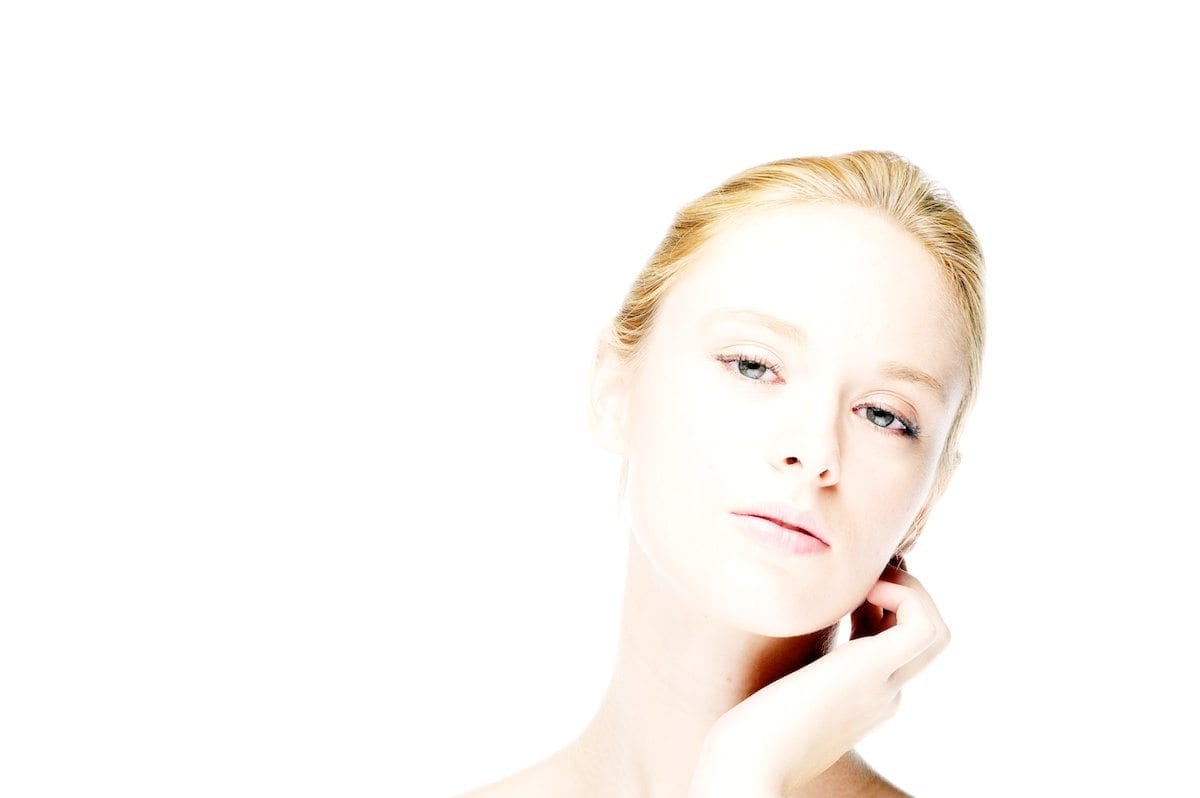

High Key Post Processing is the second half of creating an image with a lot of light and washing out the tones a bit. There are plenty of plug-in tools to give you a high key look, but I’ll show you an easy way to do it yourself.
The Original Image
Here’s where we start.
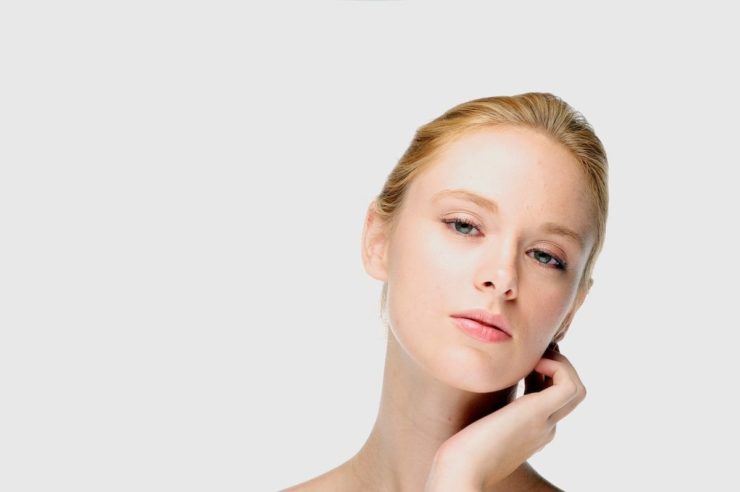
This is one of the outtakes I shot at Scott Kelby’s hands-on workshop for his Light It, Shoot It, Retouch It tour. Had a great time and learned quite a bit. The concept for this shot was to get a beauty shot, much like some of the Dove soap advertising was prevalent for a while.
The first part of this look is the lighting setup. Scott showed this with three lights, but you could pull off the same thing with two lights and a reflector. There is a beauty dish with a sock diffuser angled down at 45 degrees for the main light. A small soft box (or reflector) under her to add some fill. Behind her is a large soft box angled up to create the white background. As you can see on her jawline, it also creates a bit of rim lighting.
That’s it. Simple, easy lighting and background.
High Key Post Processing Steps
I performed the high key post processing in Apple Aperture, but you can do this in Lightroom, Photoshop or other tools that have the same adjustment tools that I used here.
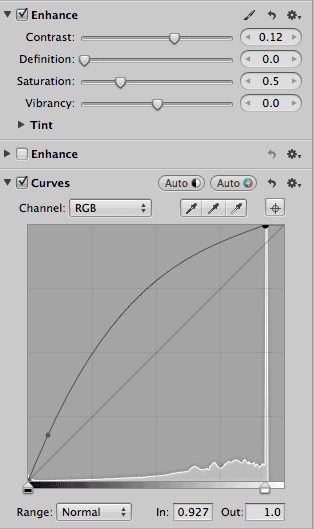 1: Curves
A lot of people are bypassing Curves these days because the sliders in their post processing tools have really improved. Why use Curves to adjust contrast when you can move a slider to get great results? The problem with ignoring Curves for those common uses is that we tend to forget there are other things that Curves can do for us.
In this case, Curves does the heavy lifting of our high key post processing. The best part is that it’s rather easy to do.
The first thing you notice is the high spike of the white line on the right side. I brought the right level slider a little to the left to line up with that line. The more you drag it to the left, the brighter it makes your image. In this case, it washed out her face a bit, but also pulled the background toward White. You may not need to do this step, as it depends upon your histogram.
The key step here is the Curve itself. It’s a bit like cooking where you season to taste. I typically grab a spot in the lower left section3 and pull it to the left. You’ll immediately see the results. Don’t be afraid to move that spot on the Curve slightly up, down, left or right. It’s your call when you have it in the right spot.
2: Saturation
The next step is going to take all of your concentration. You see that Saturation slider? I’ll be you were told to never use it. That’s probably true if you wanted to push it up, but now you can use it. Pull it about halfway toward desaturation.
That’s it. You’ve now completed your high key post processing.
That Doesn’t Mean You’re Finished
This doesn’t mean it’s the end of your portrait retouching, but it gives you an easy starting point for your high key portrait. For this image, the only other adjustment I made was to increase the Contrast slider and brush it selectively into her iris.
These two steps can start you with a bright, washed-out look. You can play with other techniques to give it some edge, though.
- Selectively increase the blacks
- Make it into a Black & White or Split Tone image
- Take it into Photoshop and blend it with a B&W layer in Soft Light to enhance the contrast
One of the things I like about high key post processing is that it works well on skin, almost eliminating the need for any skin softening. That’s because high key eliminates shadows that may define imperfections.
The thing I like about high key images is that you can create a somewhat ethereal or dreamy impact with them. It doesn’t mean it’s something to use on every image, but it’s good to have another tool at your disposal when you need it.