Affiliate Disclosure: We earn a commission if you purchase through one of our links at no additional cost to you.
We can use texture in photography to engage the people viewing them. Using texture in art helps engage the senses of the viewer.
Think about it for a moment. When you see something with texture, you imagine how it feels. Even if only for a split second. That time may not seem like much, but the human mind is a pretty impressive calculating machine.
If we can get someone to stop for a moment and think about something in our photos, then they’ve engaged with us. Using texture is a way to get your hooks into an audience. Make them curious and incite their tactile senses.
That’s just the start, though. You can use texture to do more in your compositions to excite the mind and draw people into your photo.
10 Elements of Composition in Photography
This episode and blog post are part of a series we’re creating to expand upon this blog post.

Like a list of 10 elements of composition, I thought the post touched on some useful ideas. However, I decided that it may help if we expanded a bit more on each of those elements. I hope this gives you some ideas to use in your compositions.
Why Are Tactile Senses Important in Photography?
Tactile sense, or the sense of touch, is something we do from our earliest days. It’s the way we explore as children. Before we can make out sights and sounds, we know what feels good and what doesn’t. We’re programmed to respond to our sense of touch.
Tactile response, or the sense of touch, is the only sense we have that allows us to come into direct contact with a stimulus. We see can see things or hear things. Sometimes we even smell things. Those all have impact upon us, but the sense of touch has very powerful, non-verbal communication.
Do you remember being a child and your mother running her fingers through your hair to show you how much she cares? Whether you shake hands or hold someone close, that sense of touch provides a very powerful message.
We remember those feelings we get when we touch something. The fur on your favorite dog, or maybe a comfortable piece of fabric. It’s all inside of your memories, and waiting to come back to you when something triggers a memory or sparks curiosity about something you’ve never touched before.
If you’ve been to a museum or some other kind of display that was just out of reach, didn’t you always want to cross the barrier and feel it? We connect with people, animals, and objects using the power of touch. Being deprived of touch is an emotional experience in itself.
So when you see something with texture, your mind either recall previous experiences that tell you how it feels or it engages your curiosity to wonder how it feels. Either way, you’ve engaged your audience.
Use Texture in Photography to Add a Third Dimension to Photos
In a previous article, we talked about the importance of depth and dimension in photos. Texture is a part of that discussion. It just doesn’t need to have much depth from front to back in order to communicate something real or tangible within your photo.

Have you ever touched an alligator?
I have.
As a child, I thought of them as slimy, scaly monsters. Two out of three of those perceptions were wrong. Alligators have remarkable and tough texture on their hides. The texture changes from one part of the gator to the next, too. Some areas have very large and wide areas of texture, and just a few inches away are textures that are even smaller and softer.
You can see that change in texture in the photo, and it provides a 3D sense when you look at the animals. It’s not just that some of the gators are closer to the camera than others. You can see how the ridges and texture on their skin protrude and recess to give them the appearance of dimension and depth – on a small scale.
Try to imagine them with completely flat skin.
It just doesn’t reach your mind the same way, does it? Something about that texture on their hide tells you about their nature. Even baby gators have that texture. Human babies are soft and smooth.
Even if you’ve never touched a gator or crocodile in your life, you know something about that texture and you can contrast it to other textures you’ve experienced in life.
Use Texture to Lead the Eye
I’ll admit this is a heavy-handed example of how to use texture, but there’s a point here. Sometimes, texture provides you with leading lines to direct the viewer’s eye where you want it to go. More important, using texture in leading lines is often more interesting than just another set of railroad tracks or an empty road leading to the horizon.

You probably think I’m going to talk about the ferns, but there are other textures going on here that help direct your eye. Her hair provides texture that frames her face, contrasting it with the smooth skin on her face.
Texture often works best when it contrasts something smooth with something a bit busier.
You can flip this contrast combination around as you like. Textured subject on a smooth background or a smooth subject on a textured background. Either way works.
Don’t Use Too Much Texture
Texture can be rough or smooth. It can be silky or scaly. Imagine things you can touch and there’s a type of texture to go with it. However, I want to caution you against having textures invading so much of your photograph’s composition that it just becomes a meaningless mess.
Contrast your subject’s texture with something that is its opposite. Don’t follow this example.

They say you should only show your best photos, but I’m here to educate, inform and entertain with some of my worst photos.
This furry little fellow checked me out some years ago at Zion National Park, so I grabbed a quick photo. I thought the space between the branches framed him nicely and went on with my day (which mostly consisted of slipping and falling on icy paths).
I get home and realize this is something I should never show anyone. It’s just too busy. Yes, there’s a frame for the furry little fellow. However, the branches in front, the fur on the fellow, and the grass behind it just assaults your mind with too much information. Too much texture!
So I’m embarrassing myself here for two reasons:
Maybe I could’ve gotten a better photo of him in a different location, but he wasn’t really the reason I was in Zion. This was a snapshot and it shows.
It shows that I’m no wildlife photographer because I don’t have the patience to wait in the right location for a nice critter photo. However, it also shows not to get too caught up in only one element of the composition. All I thought about was the frame. I should’ve considered the competing textures and just enjoyed the moment with this little guy.
How to Use Texture in Post Processing
Some photographers prefer an air-conditioned studio to trek through the wilderness amongst wild animals that may lick or eat you. As I get older, I see the wisdom of this approach.
What is a studio, anyway? It’s really just a big box where you have to bring stuff in to take a photo, rather than going out to take photos on location. Both have their merits. The nice thing about studios is that you can fill them with your imagination, control your lighting, and be within a comfortable distance of a place to have lunch.
You can get backgrounds with texture and use them in your studio.
The problem with this approach is two-fold. It takes time and money to get those interesting backgrounds, props, and wardrobe. Sometimes you can borrow, trade, or negotiate, but you’re still spending time.
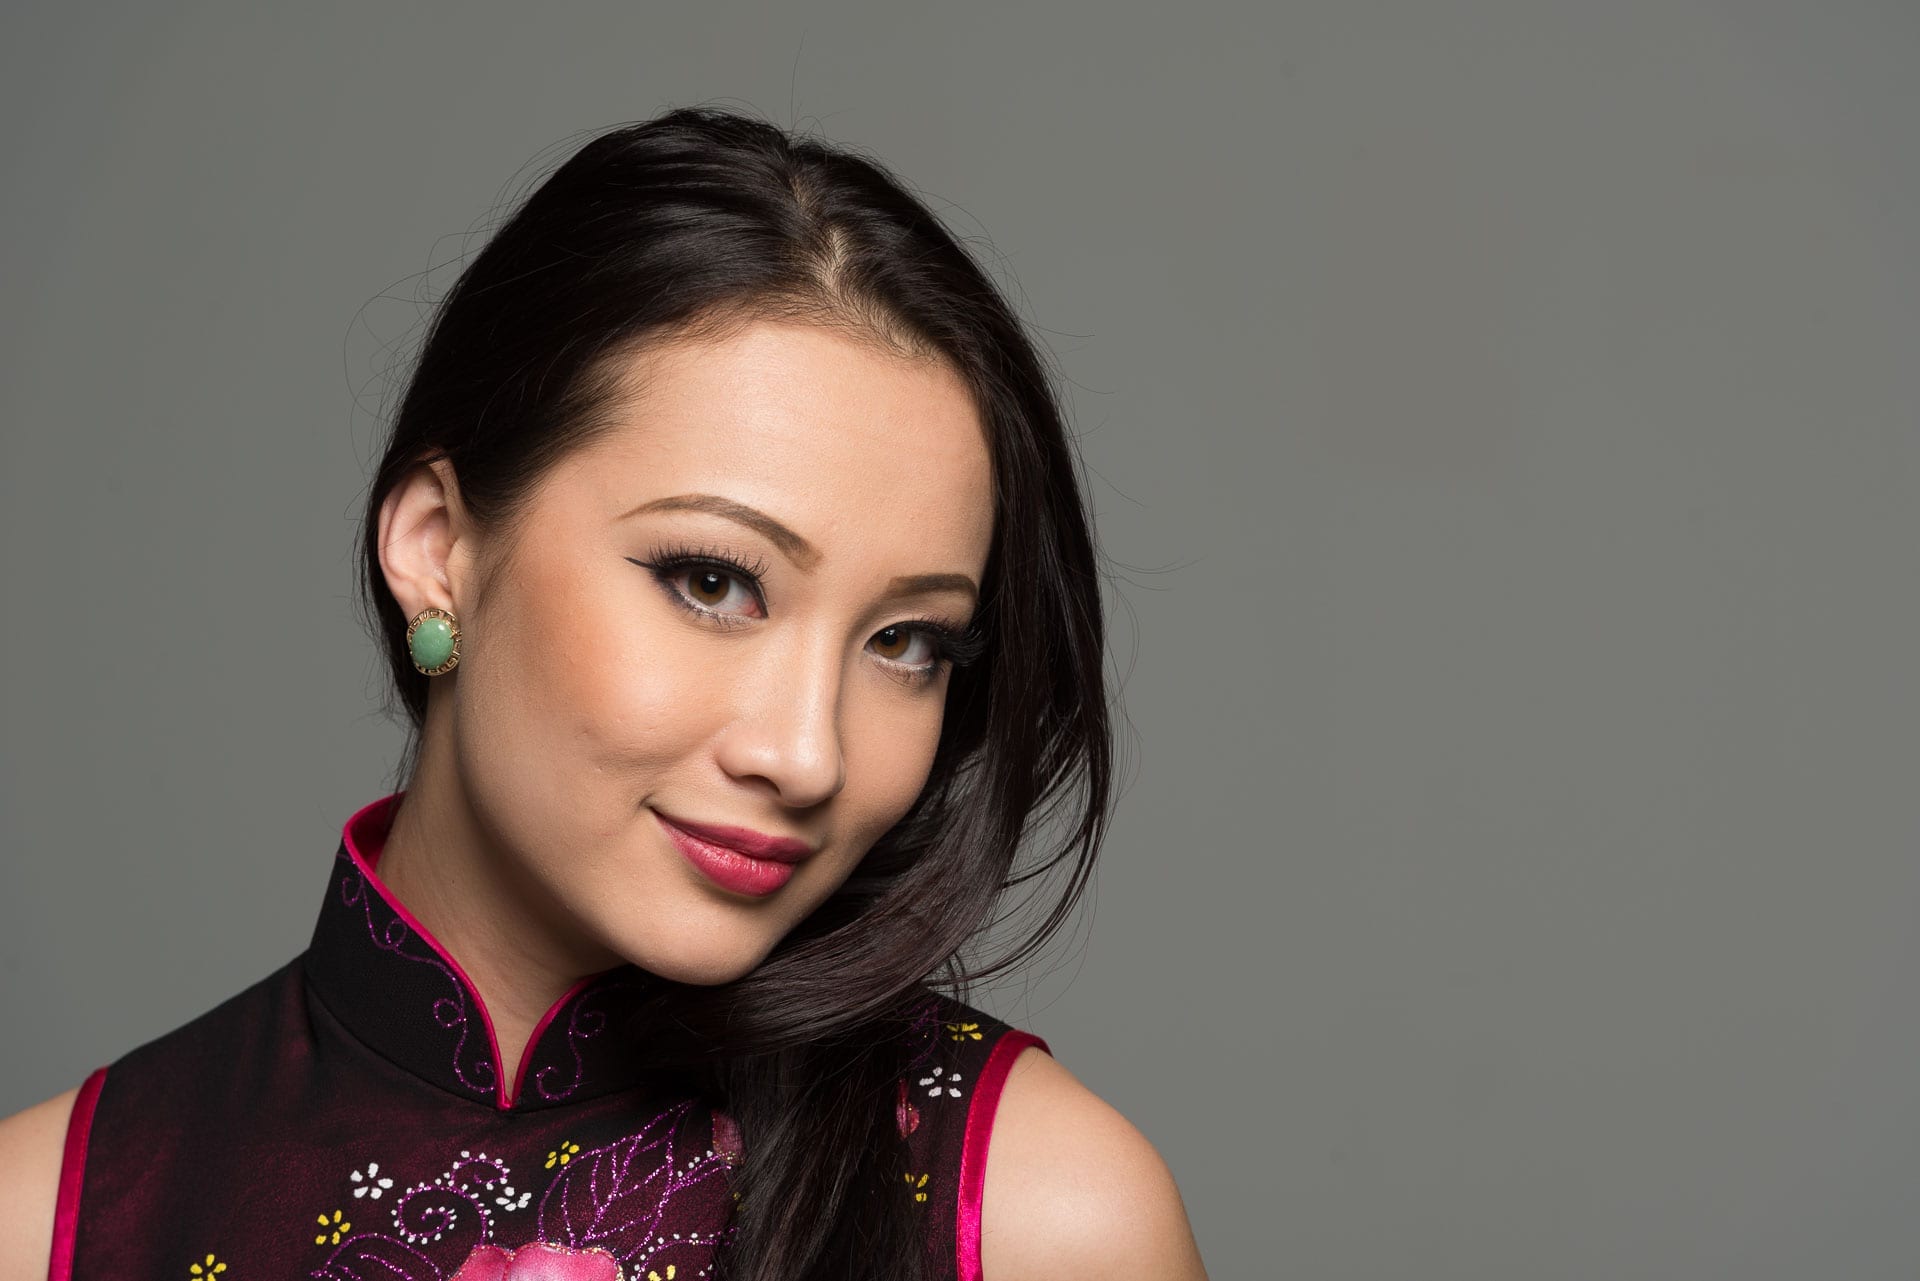
An alternative approach is to take your photos on a plain background, and then add texture later. Here’s an example of an unedited portrait shot on a white background.
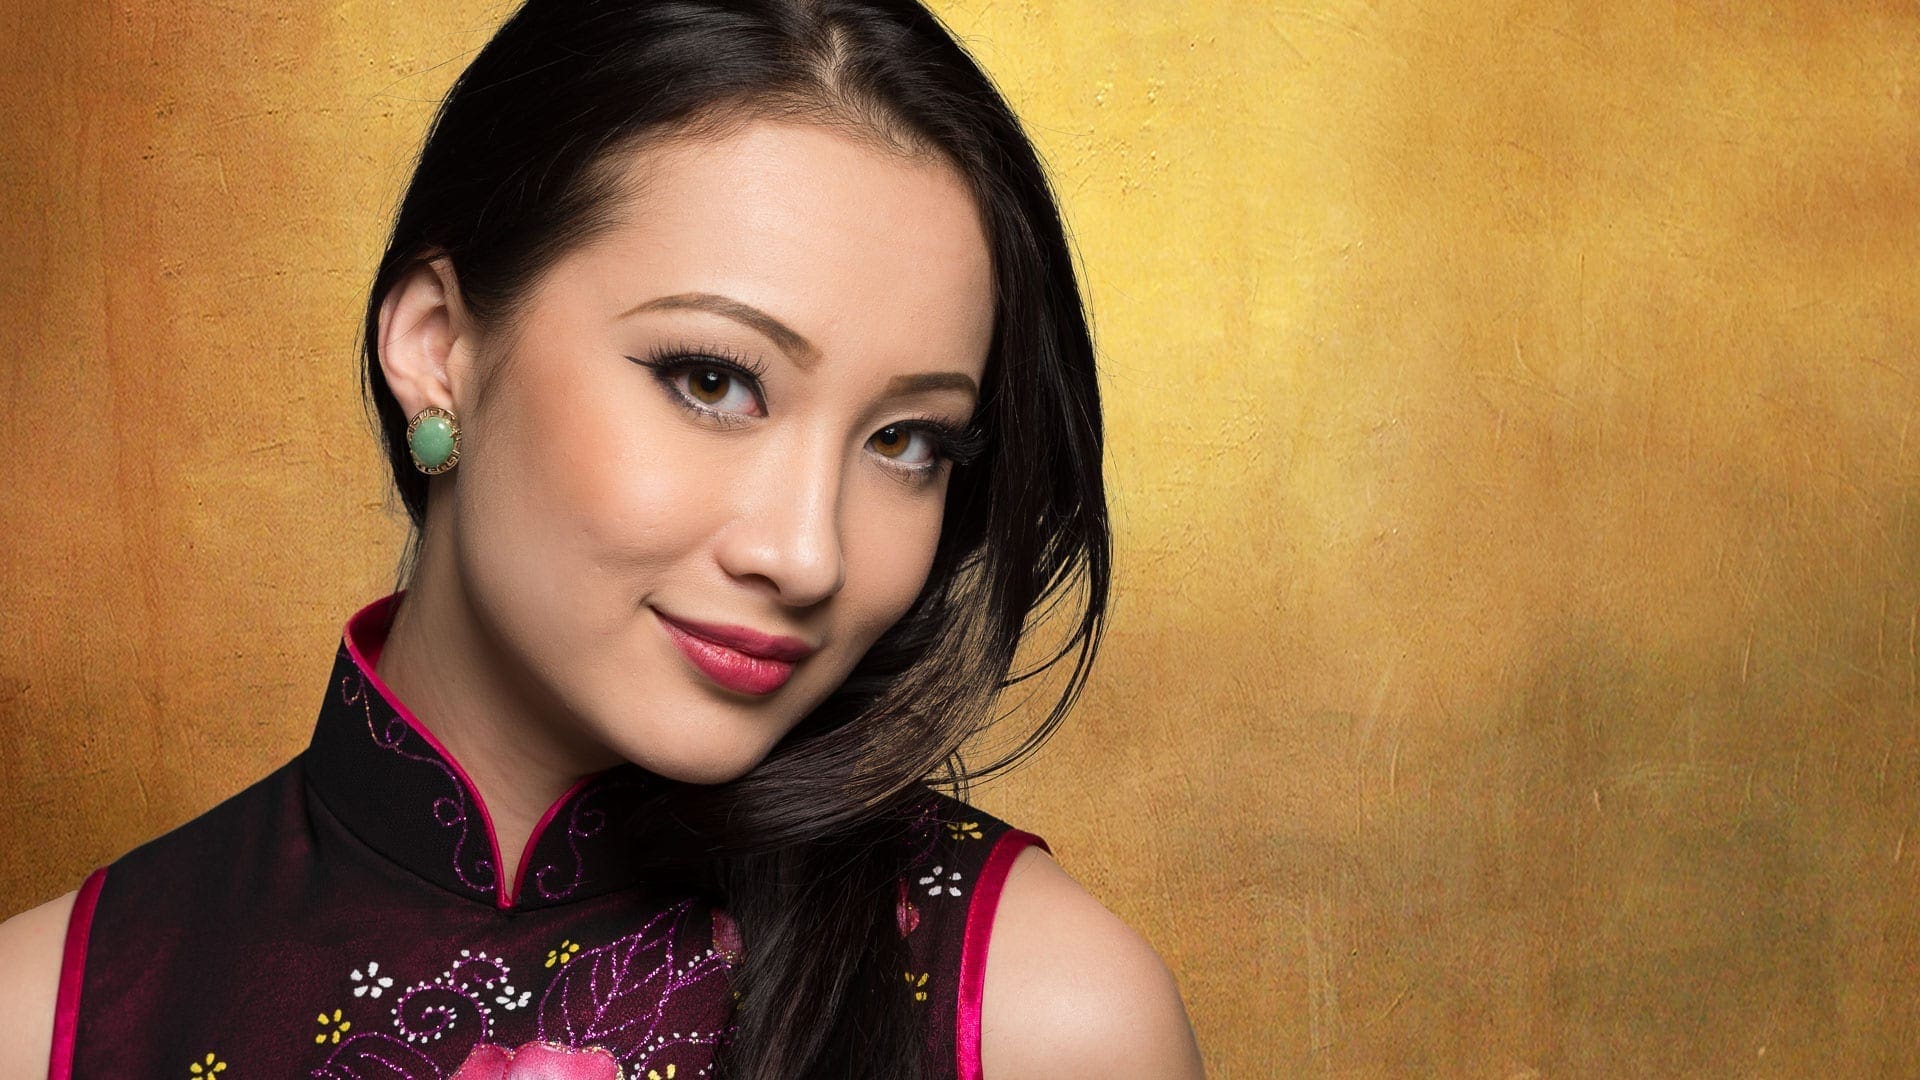
I used Photoshop to replace the background with another photo of a texture that I liked, giving this result.
The advantage of this approach is that you can change texture or colors very easily. You can use the same photo a number of times, or use the same texture background on multiple portraits.
Keep an eye on the lighting of your subject and the direction of light on your background. If they don’t match, your audience will realize that something is off and it just turns them away from the photo. They may not even know it’s the lighting. They just know something just doesn’t look right.
As important as lighting is, so is adding a subtle shadow behind your subject. Again, the mind knows that light has direction. Something blocking that light should cast a shadow – even a very soft shadow.
Texture Adds Realism to Your Photos
Not every photo is about realism. Some people do great work with abstract or surrealistic photos. I’m not one of them, but I can enjoy an interesting piece of work.
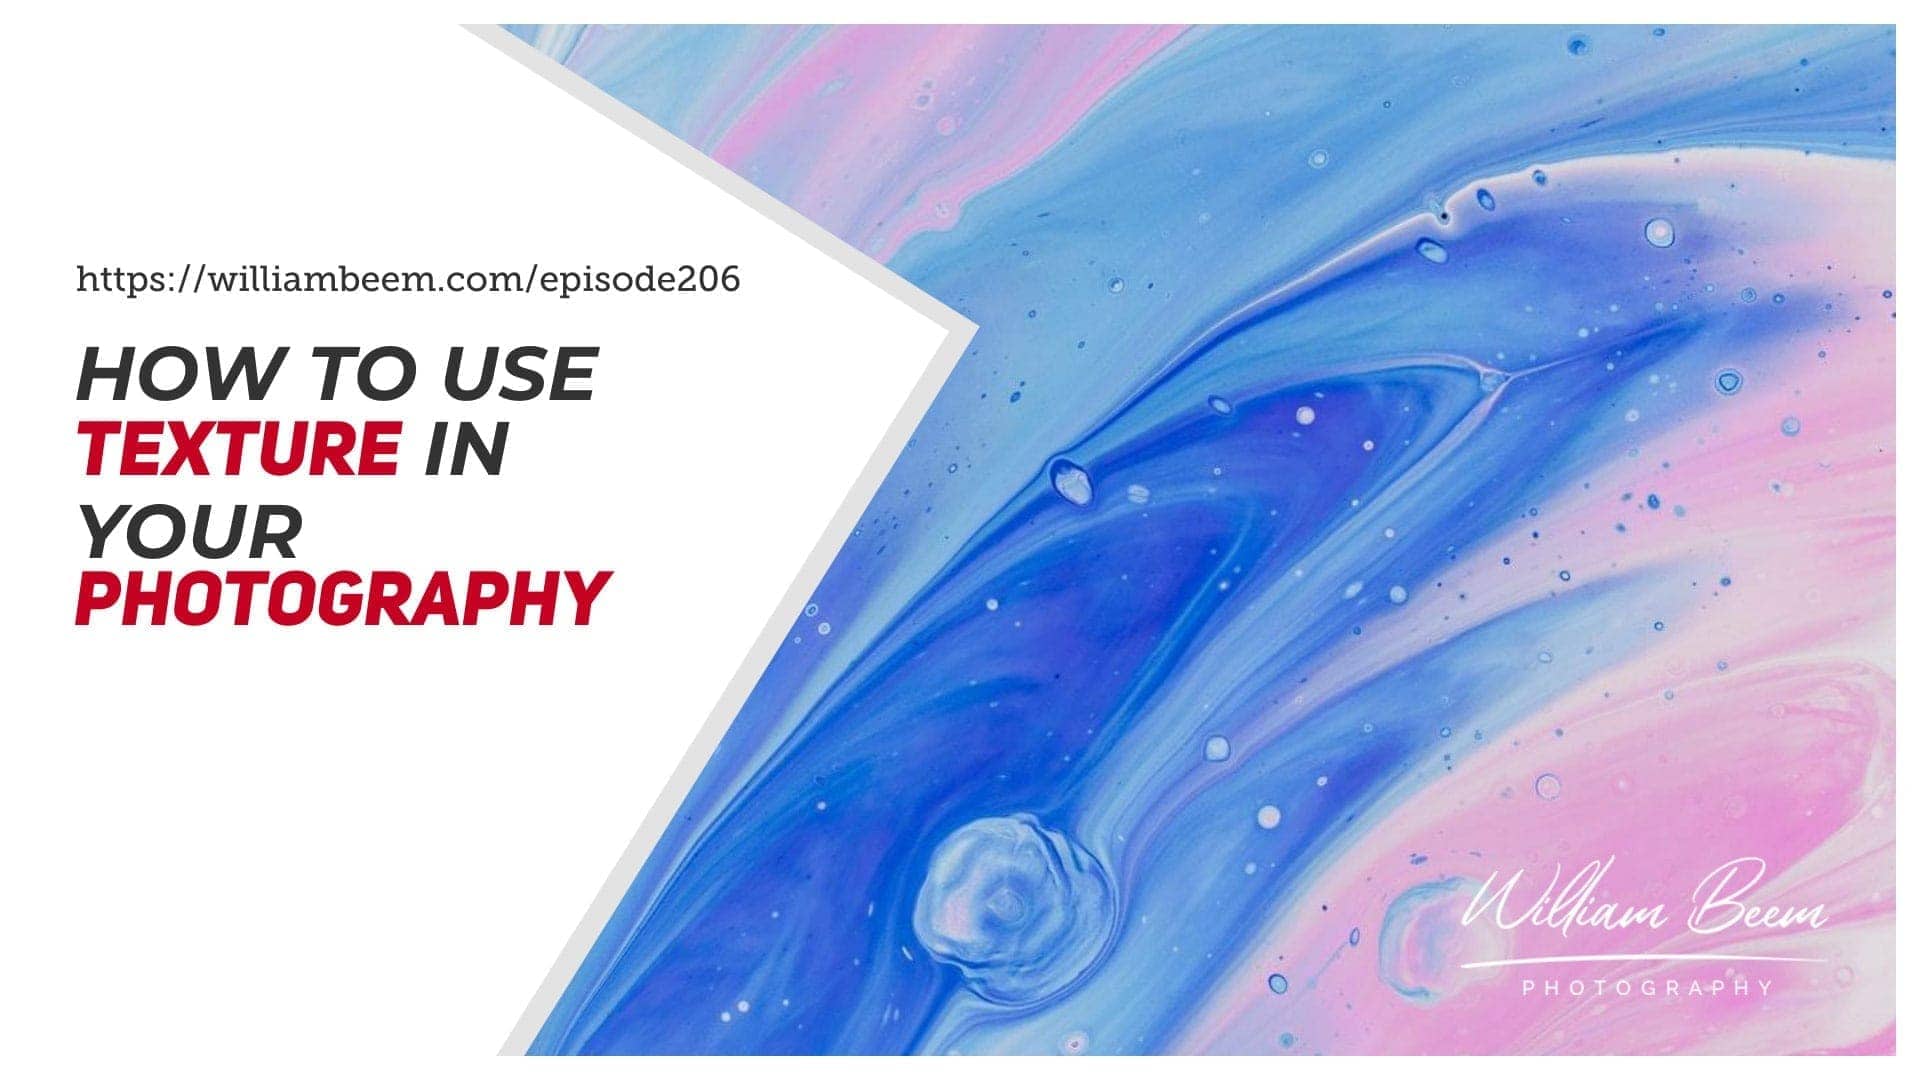
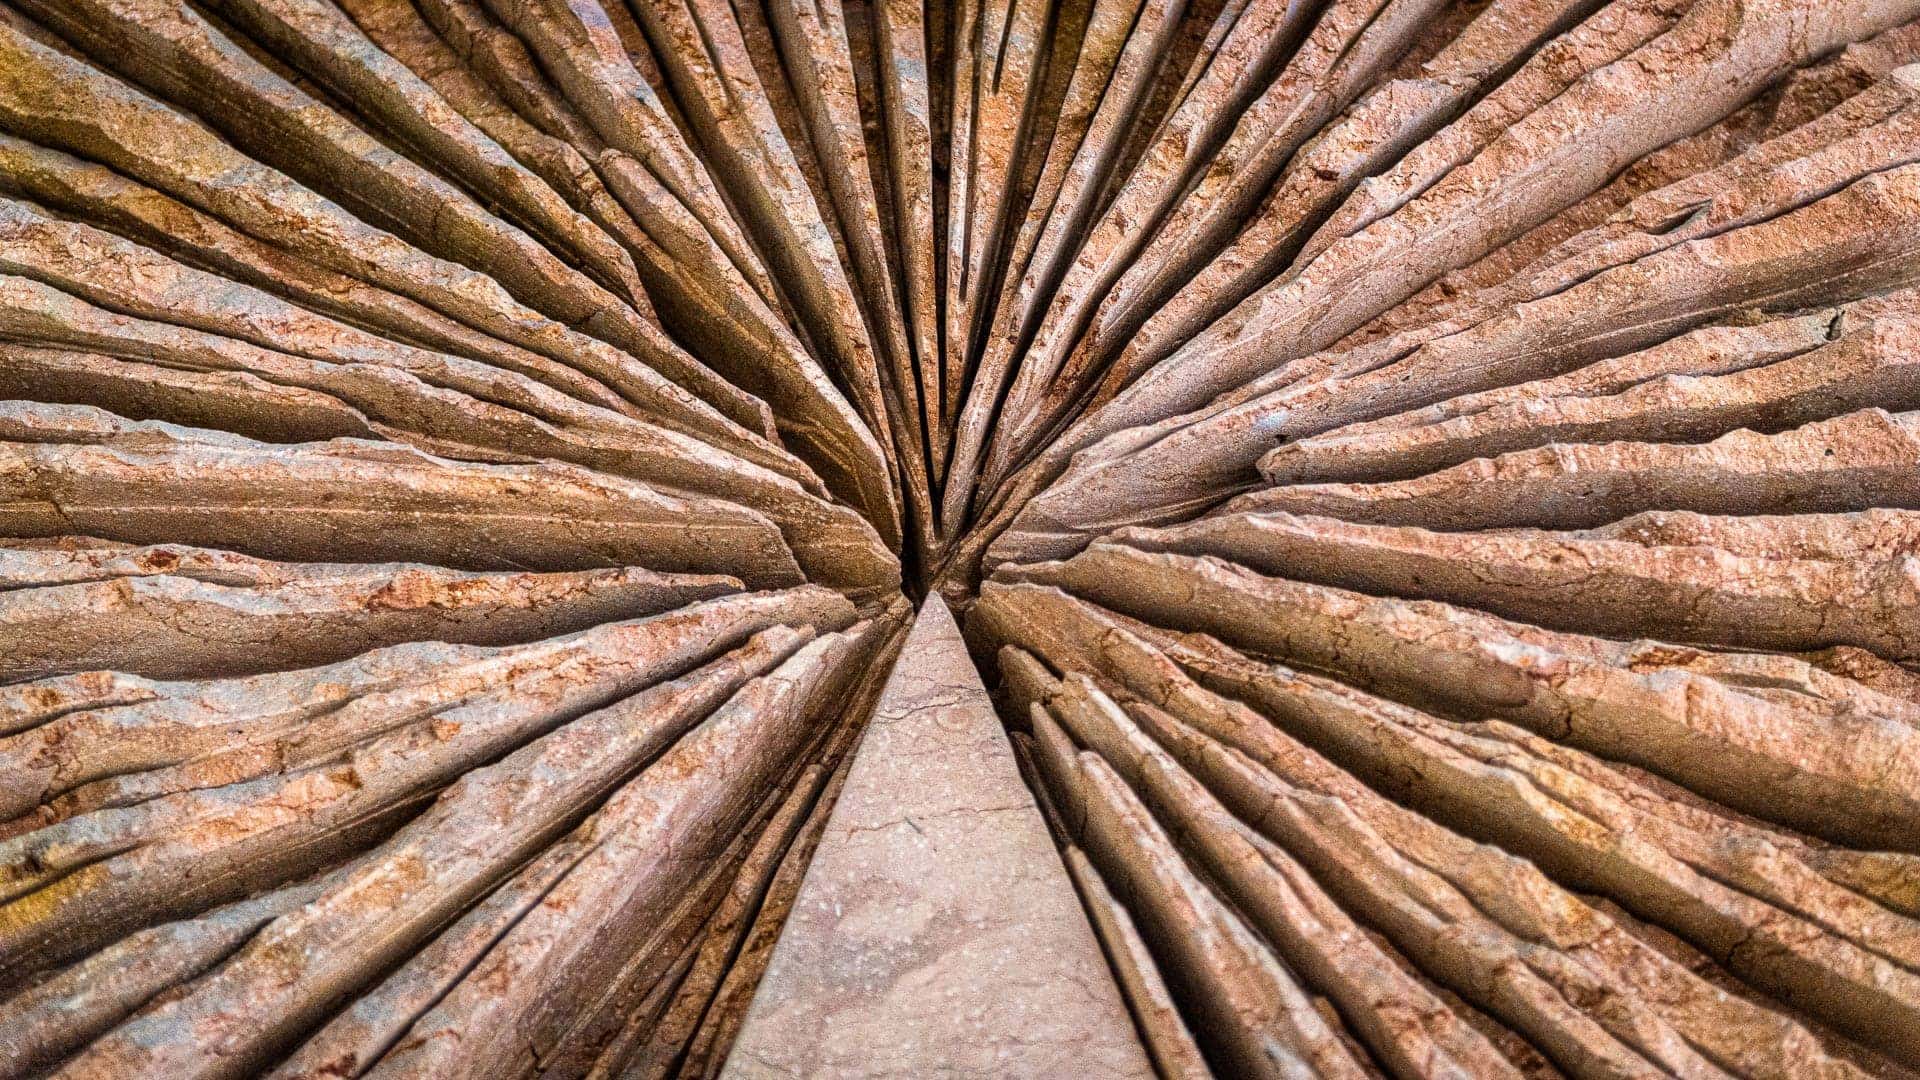
Even when reality isn’t you objective, it’s not something you can ignore. Viewers are rooted in reality and they need something they can understand, even if they want to escape from reality. That’s why I chose a header photo for this article that’s a bit abstract, yet still rooted in reality with texture.
Texture brings out our memories and curiosity about the sense of touch. It’s one of the most powerful and subtle things you can consider in your photo compositions.
Transcript
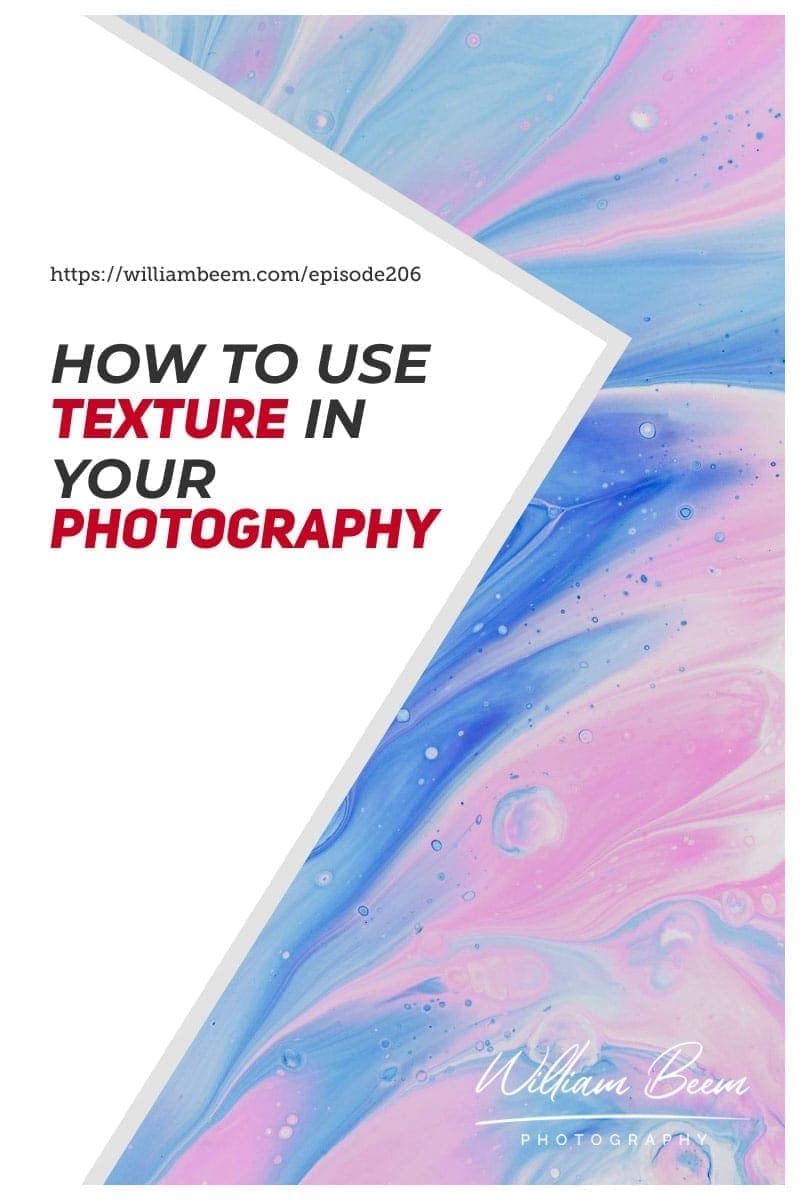
We're going on with our series about 10 elements of composition in photography and today we're going to be talking about texture on I Like Your Picture. I'm William Beem. Welcome to, I Like Your Picture, the show that helps you improve your photography with visual storytelling. What is visual storytelling? It's the method of approaching your photography with a knowledge of who you're trying to serve with your photos and what emotion you want to make them feel.
We encourage you to concentrate on your subject, light, and background to create a photo your audience loves. I'm glad you found us. Hi, my name is William Beem and so like I said, we're continuing on with this series that we're doing about an article I wrote over a year ago. About 10 elements in composition and your photography and texture is one of them,
and we talked about texture briefly on the previous episode when we were looking at contrast and texture in itself leads kind of naturally with contrast because you're talking about something that has a little bit of depth and dimension to it. It's kind of like a 3D sense within your photos. We want you to understand that texture can kind of lead the eye. It's a good way to use texture to direct your eye to something else.
It creates this little tactile sense with your subjects. Almost like you can reach into the photograph and touch it, but we're also going to warn you that too much texture could ruin a photograph. Let's start off with Lee talking about how texture adds that little 3d effect to your photographs. You use this quite a lot. I do. I'm going to talk about what I'm still doing right now for my hobby and,
and focus and that's strictly top-down photos. It can be incredibly difficult to make something look three-dimensional as opposed to flat when you're going straight from the top down because your use of shadows, you have to use your shadows differently. And I use texture a lot. Partly for the contrast, partly because there are always some kind of shadows or there's some kind of contrast in the texture.
And then you know, I don't want to stray away from this, but also I use it as part of flow and movements and you know, leading the eye. The texture gives a bit of depth to my photos, which I found is that a little more challenging going top-down or perhaps just with the subjects that I'm using. And this is kind of like a topic we discussed before back in episode203,
we were talking about how to use depth and dimension in your photography. That was pretty much concentrating on a larger sense of depth and dimension. So in other words, if you were looking at a window, you saw something that was close to you, you saw something in the middle and you saw something in the background and that was an amount of depth and dimension.
Your photographs, this kind of 3D effect we're talking about with texture is the same concept only it's much closer together. So in other words, you might be looking at hair or fur. You could be looking at texture on a wall or texture on an animal. You could be looking at the plants, you know, with the different leaves they have.
And that would be the texture of that showing up. In other words, it's something definable, something that looks like it's got a little bit of a tactile response if you were to touch. Texture brings things to life. Um, in my view and in many cases it's, you know, you, if I look at pictures that I'm taking where I've got something that's very smooth or glossy,
they offer sometimes your subject or something in your photo or maybe the main elements or your, maybe it's your background that's, that's very smooth and you want to use texture for your subject or to lead the eye into your subject. It's, um, they, these smooth things often have very clean hard lines have got a very defined edge to them. You can see where it starts and ends and texture kind of softens that.
And I, you know, I like to use my texture in that way. It kind of gives a softness that adds a bit of almost movement and flow to it. You can really play with texture and it depends what you're setting up and what you have to work with. Does that mean you may not be able to use the textures, move them around?
I mean if your texture is your background, that's absolutely great. Um, but you, then you're moving your subject rather than the texture. I use a lot of soft things that I can move pics. I'm working on small sets and everything is kind of moveable. So today I had uh, some, it was not burlap was kind of like a rough texture piece of ribbon and I put that in to add more texture.
Actually had quite a lot of texture in my photo this morning, which is a little different to what I do usually. But I also wanted texture all around the um, the coffee mug because the coffee mug was glossy and smooth and left the coffee to stand for a while while I was messing around. And so I didn't have, you know, when you pour coffee he get the little bubbles and that bit of foam and stuff cause they drink coffee really strong.
And that wasn't present, that it all kind of settled in in the mug. So everything did look very flat with sharp edges and clean lines and I actually added more texture than, than what I had planned when I took the things out to set up the set. And that's kind of going back to what we did on the previous episode of episode 205 we were talking about contrast and photography.
Texture naturally leaves to being used with contrast. So for example, in the case of her flat-lay coffee, the coffee is smooth and you want that to be offset by something else. The best way to offset that if it's not going to be color, is probably going to be texture. Now the other thing that I could have done is actually just brewed a fresh Coffee,
but I was lazy like that. So I decided to add more texture into the background. But I was looking for something to bring things to life. Now if I'd had more kind of apparent texture and the coffee mug with maybe a bit of the foam and different lights and darks, I would not have added in a couple of extra textured elements that I had because they wouldn't have been necessary.
And that's why we said too much texture can ruin a photo. So let's take an example of what I like to do with portrait photography. If I have a younger subject I want to have in the background because that subject skin is going to be smooth and that way there's a bit of contrast between the texture and the background and the smooth skin in the foreground.
However, if I'm photographing someone who's a bit older, they've got some wrinkles and lines on their face, I don't want to have a busier textured background because that's just going to be too much. You want to have some contrast, so I'm going to use of a low texture or no texture background with a subject like that. Well, it comes down to isolating your subject.
If your subject is textured and your background is textured, everything blends in. I mean that's the same as lighting everything or not having enough lights on anything. If you don't have some kind of contrast, you're not able to isolate your subject and basically you want your subject to stand out. Now if you don't have a place where you're taking your photograph, you don't capture a texture in camera,
there are still ways that you can do this in your post-processing. So for example, one of the things that composite artists do all the time is they will photograph their portrait subjects on, you know, kind of a mid-gray background paper and then they'll use that because it's easier to composite to a textured background. And I'll, I'll include some of my portraits where I've done this.
You can go find textures available for purchase or you can go around and take your own photographs with textures on them. And those could, you could use those either as replacement backgrounds for something that you've photographed on a neutral gray background or you might be able to blend them in to kind of add some texture overall as a finishing touch to your photographs. And it's,
it's really an artistic choice. You see people do this all the time and it's going to change the color and composition, a little bit of your main subject unless you mask it out. So this, it gives you some options to do this either in-camera, if you can find a nice background with textual or you can add things that have texture or if not,
you know, you can photograph it on a plain gray background and then add that texture in later on in Photoshop. So it's not for everybody but it is an option that you can find. I've bought a number of uh, texture packs stuff. I think the first one I got was from Trey Ratcliff because he had traveled around the world and he captured some interesting textures and I still use some of those.
There are a lot of vendors available who still have textured backgrounds. You probably find a creative market or Envato or some places like that. If you don't find a photographer, you know that that sells them. Likely. I was even thinking about selling them at one point. I just never did. But that's okay. That's like adding texture in your post-processing rather than at the point of capture when the viewer looks at it.
As long as you do it well, I don't think they really care. What they do hear about is if your background has a lot of texture and your subject has a lot of texture and things look too busy or too cluttered, then I think that's what really ruins the photograph just takes away from the glory of your subject, you know? So that's where it's like texture is a good thing used in moderation.
It's, and I'm not saying how much texture or how little texture. All I'm saying is if there's not a balance between your subject and your background, whichever one has the texture, then I think nothing is standing out. Nothing's really going to pop in that photograph and it just becomes a big mess. See what I was doing a lot of scrapbooking. I used to take tons of texture photos for backgrounds,
but these were for backing sheets. I don't use Photoshop. I didn't and I still don't, so I'm not using them for composites, but I did. It's kind of the same principle I suppose. I wanted to print it off and then put things on it and then take my photo and use that as my backing page and that was great. But one thing I will tell you is when I took a photo for a textured background,
I didn't share it as a photo. If you're taking photos of a texture that you want to use for a textured background, make it clear. If you share the photo that this is a background photo or this is a texture photo. I've seen so many people taking, getting like right close up on some tree bark and that's great for a background photo.
Then they go and post, I think what? What is this? It's like there's no subject, there's no descriptions. Sometimes, you just, I know the argument goes back and forth about having to describe your photos or explain them or caption them and you know that's kind of open-ended, but sometimes he needs to be clear about why you took the photo and something like that is where I would be clear.
I just, I didn't share those. Those were for me for part of something. They weren't a standalone picture. If you want to go out and capture textures, there are a ton of places that you can, but it seems like when you're looking in your own area, you'd never noticed them and that's because it's something you probably see everyday. You don't think anybody else would be interested in them.
But there are people who will go off to factories, you know, those old kind of rusted out places and take some pictures of metal or something that's got a lot of patina on it or old buildings that are um, you know, kind of faded with urban decay. Those things. People love that stuff for texture. And I'm not suggesting you go someplace where you're not supposed to do to go or to get into trouble or injured yourself.
Lee will take chances like that. I was, I was an Eagle scout. I don't do things like that. I'm a law abiding citizen. I haven't actually been, if it says keep on private property, I've never actually violated that. But I've got an open OpenGov. I don't condemn people who do always just say, um, you know, be bold.
Be smart. If you get away with it, you're smart. If you get caught, you got to own the consequences. You know, this is one of the things many years ago I went down to Cuba for a trip with Southwest of photographic workshops. Wonderful people. If you've ever considered going on one of their workshops either in where their, their location in Santa Fe or traveling ones,
I really had a wonderful time. I think it's a good organization. One of the things I really regret is that when I was down in Cuba with all this patina and decay around me, I didn't spend time taking texture photographs and you don't have to go to Cuba, find texture. You can go to Miami or you can go to Walt Disney World.
You know? You don't have to go that far. What I'm saying is in your area, there are things that someone else might think are really wonderful and interesting and you're just walking by them because it's stuff you see every day. Yeah. Give it some thought. You know? I don't know if there's an old barn, I don't know if you're in an urban decay area or maybe just some building materials.
It could be you know, a brick wall that looks interesting to you. It could be maybe not even brick but you know some other kinds of, I guess stone or stucco. I was kind of lost for words there, but anything that could be a background that you might use for a portrait, you want to kind of capture it where you don't have harsh light on.
Well actually you know what, maybe a harsh light would be interesting in some cases just to see a little bit of the shadows on it. But if you can capture it on an overcast day that might be interesting to you. Don't just want to have a big harsh shadow line going across is what I was trying to think about. Look around where you are.
There might be some very interesting textures that you could capture to use as a background in your photos. They might be interesting for other people if you want to sell them and it might be you find some places, new portrait locations if that's what you're after. Now, one of the things we wanted to talk about and we kind of mentioned a little bit is that texture can lead the eye and the whole idea is to use something that is complementary to your subject.
So if this is the texture you want in a subject that's probably not quite so rough, you can look at the lines of direction that are going on with your subject or your background, whatever the texture is and have that kind of lead into your subject and leave. That's kind of what you were talking about. What you do with your photographs. Yeah,
the, the texture leads it to, I mean today I actually pulled it out of my foot. I had a piece of burlap that I've edge that I kind of liked to send them to use as a soft coaster for a coffee cup. There was a point where I put that in, but it was just, when I looked at it from the top-down,
it just didn't work. But I use that burlap a lot of the time because I've put a fringe on the end, like on the edges. That fringe kind of gives a bit of direction for the eye. Sometimes if you're a travel photographer you can find ways to use texture and a bit of perspective to lead to your subject. So for example, when I was in Washington DC at night,
the Vietnam Memorial wall, you know, it has all that texture from the names that are etched into the wall and it was a nice way to lead right into the Washington monument. So it made a nice way to kind of carry the eye back to the subject. Uh, the same thing, you know, even at a place like Walt Disney world,
you can look down main street and there's all this texture from the buildings on either side and it will lead you straight into that Cinderella castle, which at the distance you don't really see much texture on that. You kind of identify that by the shape. So even if your subject has a lot of texture, maybe if it's far enough away, you don't see as much of that texture,
then you can find some kind of a textured item that kind of leads you into it. And even something smaller, like Lee's talking with her flat lay photography that has the cup of coffee, you put a texture background on that and you look at the lines whether the direction that the texture is going and you can turn or angle that. So it kind of leads the eye right into that cup of coffee.
So no matter what kind of photography you're into, start looking at some texture. Think about how it can direct the, I think how it can complement your subject or maybe even kind of excite the little tactile senses that people have when they look at your photos. Thank you so much for listening to us today on, I Like Your Picture. Show notes are going to be available at williambeem.com
/episode206 and as I mentioned, I'll put in some example photographs. You can kind of get an idea of what we're talking about with how to use texture in your photography. I hope this helped enjoy yourself. We'll see you again next week.