Affiliate Disclosure: We earn a commission if you purchase through one of our links at no additional cost to you.
I started with HDR photography in 2009. Not because it was a fad, but because I was struggling to understand why my images were lacking and HDR seemed like something I could try. I spent years gleefully injecting some wretched images on the universe, but I’m changing my ways.
My First HDR
The only thing lacking in that sub-title is the word “pony.”
Here’s the first image I ever tried with HDR. I’m not proud.
Oh, where do I begin?
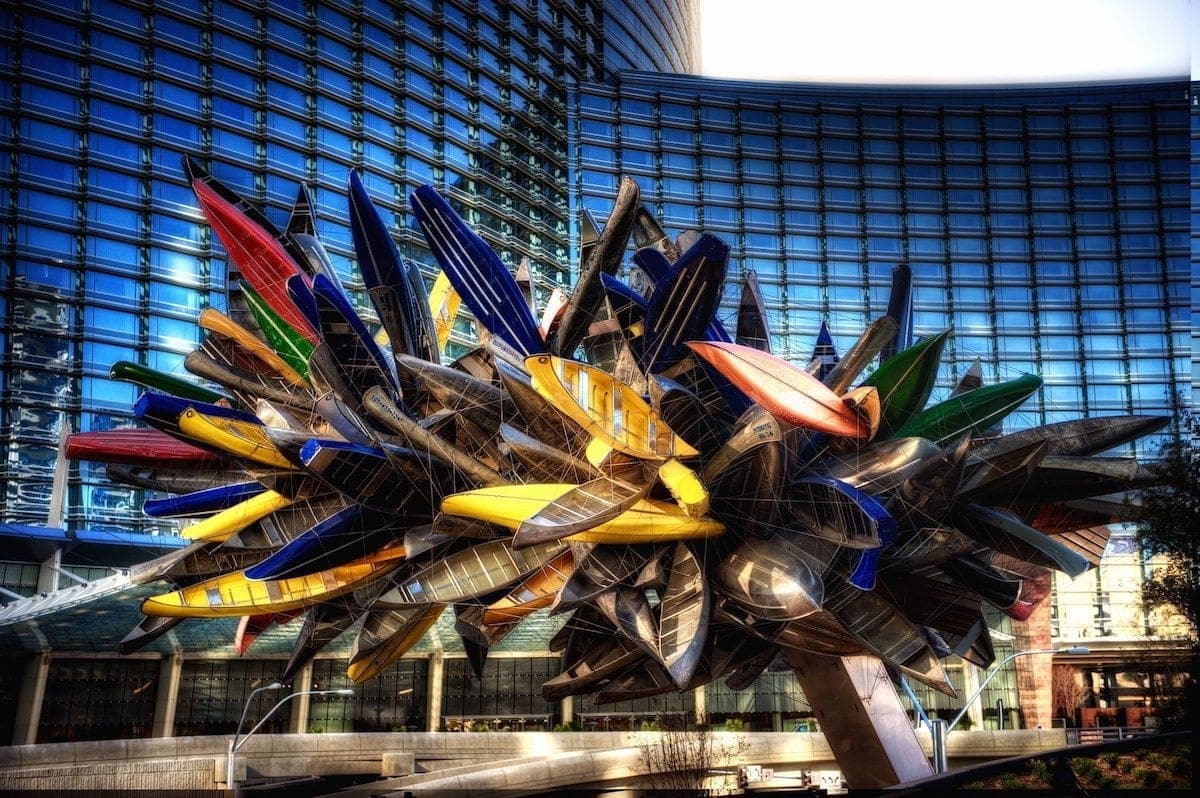
I’m shooting a clump of canoes in the middle of the day and decided to turn it into HDR. There’s an enormous hot top of the frame and I’ve blurred the snot out of it. Clearly, I discovered the Glamour Glow effect in Nik Software’s Color Efex Pro at this stage of my photography. Just slather on some more awesome sauce, right?
The program of choice for HDR was Photomatix. For some, it’s still the go-to program. Photomatix has gone through a number of versions, and I’m not pleased with the latest iteration. It seems to have taken a step into the bizarre compared to the previous version. Also, development seems to have languished for a while.
My takeaway is that Photomatix doesn’t have much life left in it, and that’s not a bad thing. We’ve endured some truly garish HDR images (including mine) using Photomatix.
Evolving HDR Photography
The photography part of HDR hasn’t changed that much. It’s pretty much a range of under-exposed to over-exposed images in a series that get forcefully managed into one result that has more exposure range, from highlights to shadows, than any single frame could reach.
For some photographers, they only wanted the -2, 0 and +2 exposures. The -1 and +1 exposures were just a waste of card space.
That may be true for the HDR image process itself, but I never felt it was true for the entire post-processing workflow. Like many others, I preferred to blend parts of different exposures in Photoshop Layers to achieve my final result. That often required the -1 or +1 exposure in the bracket.
I lost my love for Photomatix when I realized that I was blending over so much of the image that there really wasn’t much of the HDR result from Photomatix in the final piece. Why bother going through the machinations of Photomatix? I clearly didn’t want the “HDR look” for my images. Instead, my HDR photography taste evolved to the point where I wanted a realistic photo (which is a falsehood in itself) rather than the hallucinogenic results you could get from Photomatix or HDR Efex Pro.
Masking various parts of different exposures together is annoying, but it also gave me a sense of greater creative control over the results.
Then a few things changed the playing field.
New Technology Disrupts
The first change was in camera sensor technology. We’re seeing much better sensors with greater dynamic range. I can pull details out of my Nikon D800 that blew away the results of my Nikon D700.
Software improved, also. New versions of Aperture and Adobe Camera RAW/Lightroom allowed more manipulation with a few sliders. I could pull detail out of shots that I never knew were hidden in my old D700 files.
The biggest change happened in Photoshop, though. I watched Julianne Kost give a simple presentation at Photoshop World about creating a 32-bit image using Photoshop and the Merge to HDR feature. The possibilities were wonderful.
First, it was much simpler than Photomatix. You had fewer controls, so there was less chance of screwing up the result. The resulting files didn’t have issues with noise like many results from Photomatix.
Most importantly, the technique allowed the already improved controls in Adobe Camera RAW/Lightroom to pull out even more detail. You could reach deep into the shadows to pull out detail using a familiar set of tools. Most important to me, the results didn’t look like a hippie acid trip. You can get dynamic range without resorting to cartoon colors.
The changes in technology didn’t stop there. Folks like Jimmy McIntyre have done wonderful work with luminance masks. You can see some samples of his work and read a brief tutorial in his article on 500px.
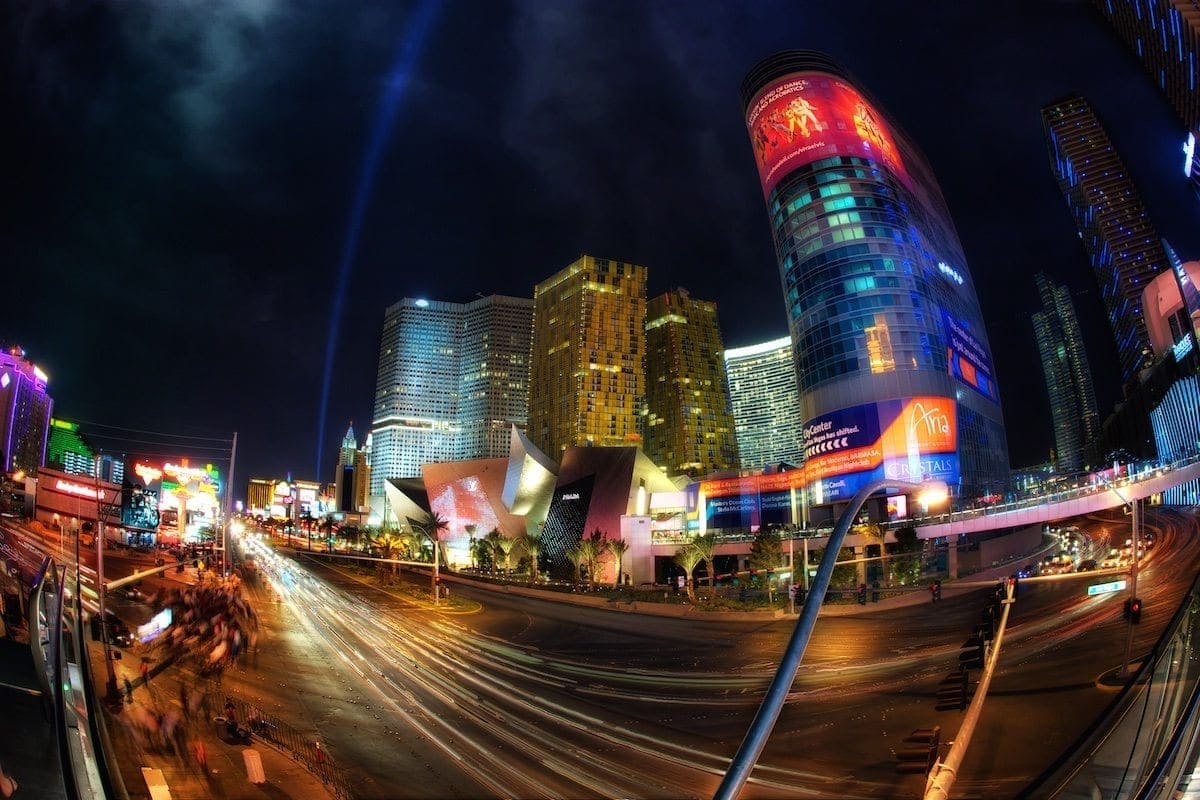
Old vs. New
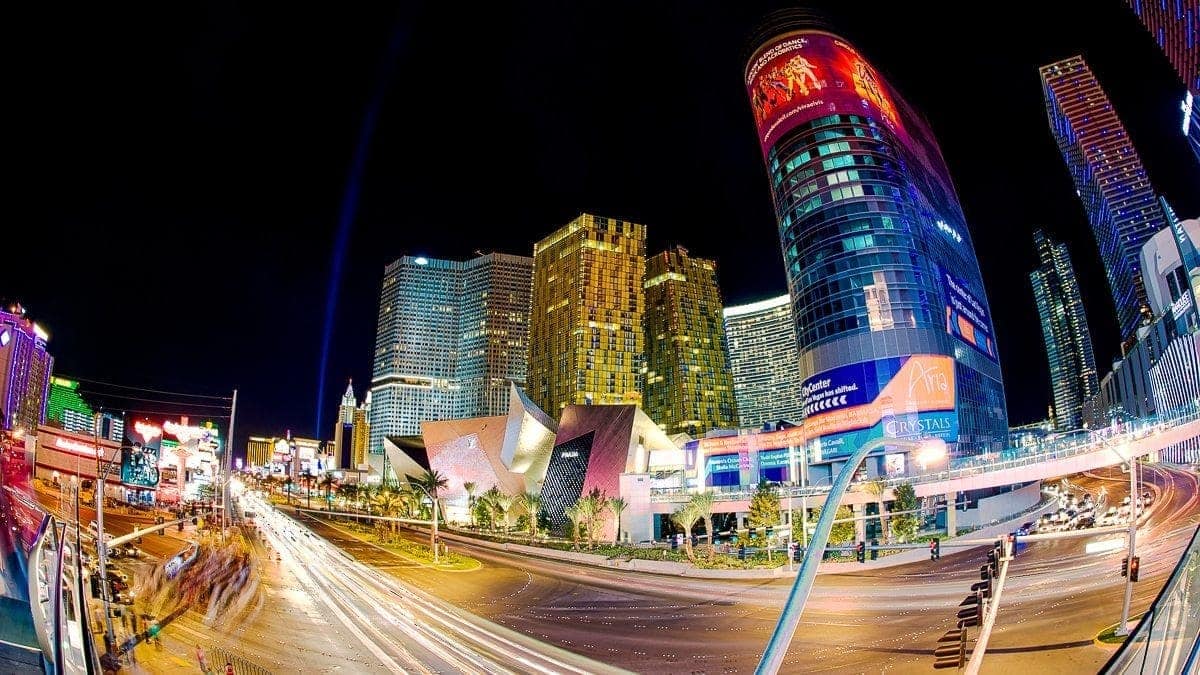
I recently decided to go back to one of my older photos from 2011 and see how those D700 files would work as a 32 bit TIFF. Here’s a comparison of the old Photomatix/Photoshop version and a newer result from a 32 bit TIFF.
Now for the 32-bit file.
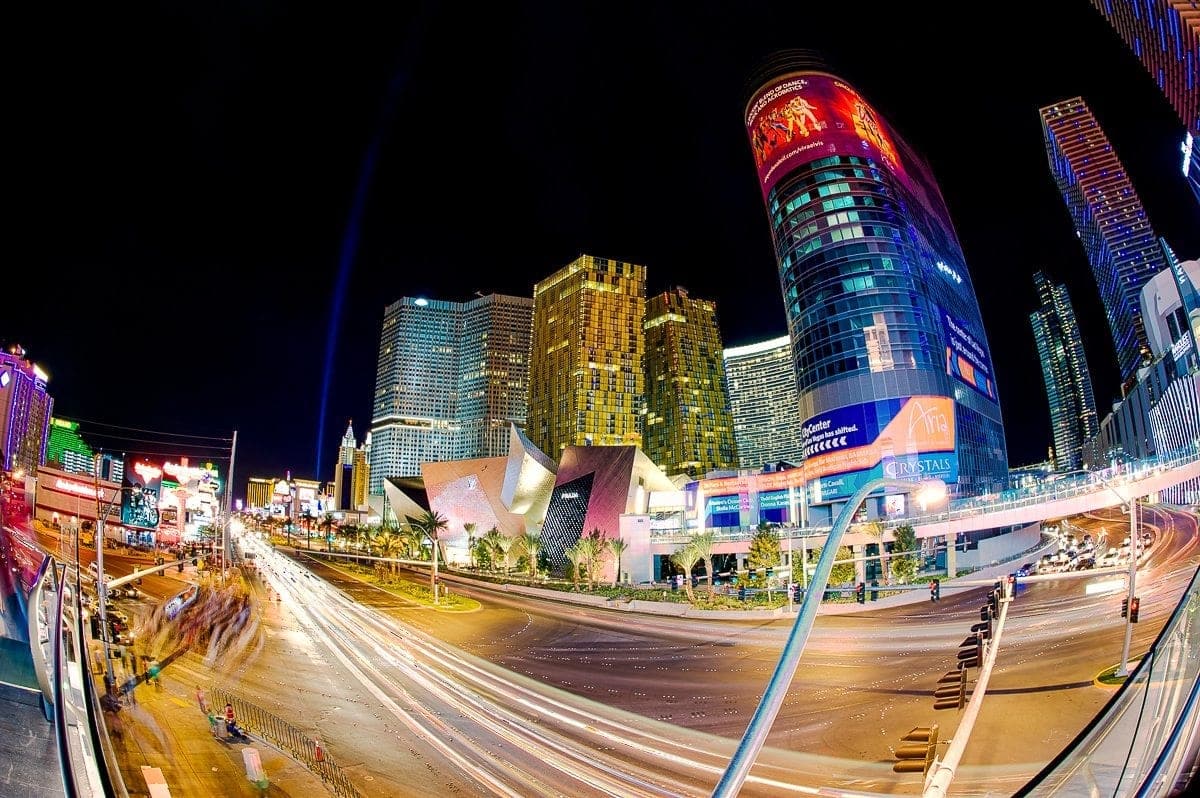
The older version is a darker image. I actually like the fact that the Las Vegas Strip and the light post are much darker than the new version. I also like the way the headlights stream in the newer version compared to the Photomatix version.
I think those changes are clearly due to trying to manipulate the old image by blending different exposures together. The newer style does a better job of conveying motion and doesn’t have the lamentable side effect of gritty skies.
That doesn’t mean you still couldn’t take your original exposures into Photoshop as layers to blend images together, but why bother now? It used to take me 30-60 minutes to work up an HDR image to completion with Photomatix and Photoshop. Creating a 32-bit TIFF and adjusting it in Lightroom is less than a 10-minute job…with better results.
IS HDR Dead?
This article on Digital Photography School rankled the HDR faithful when it proclaimed the death of HDR is coming. I don’t believe that HDR is dead because we still want the result of high dynamic range. You’re just not as likely to use tone mapping to achieve that result. HDR isn’t dead.
Photomatix is dead to me, though.