Affiliate Disclosure: We earn a commission if you purchase through one of our links at no additional cost to you.
Flash photography is a technique that can be used to create stunning images, especially when it comes to capturing close-up details. The flash has been around since the late 1800s and was originally only available on high end cameras for studio work.
But flash photography evolved over time, becoming more accessible and available for everyday use in any situation.
With flash photography, you can capture all sorts of creative shots with detail and clarity that are difficult or impossible using natural light alone. This article will explore how flash photography became what it is today, as well as some tips on how you can use this incredible tool in your own photos.
In order to get started exploring flash techniques, there are plenty of tutorials online to teach you. A good flash photography class will teach you how flash photography is a technique that can make all the difference in your photos. You will also get some basic information on how flash charges up and when it is best to use flash.
Some flash photography techniques are more complex than others, but with flash photography you have the opportunity to capture all sorts of images. This includes portraits, outdoor settings, reflective shots, and flash art.
What is Flash Photography?
Flash photography is a camera technique that uses an external flash unit to light the subject when taking photos in low-light situations or at night. This flash can also be used for artistic shots and to maximize creativity.
The flash emits a burst of light from one side, which is bounced off a surface on the other side. This flash can be reflected off an object in the frame for a cool effect.
You can also use flash photography to optimize your photos by using bounce flash. For this technique, you need to have the flash close enough so that the camera will pick up both the subject and the light source on the same frame and adjust accordingly.
You can use flash photography in any type of setting:
There are flash techniques you can use to maximize creativity. One flash technique is “off-camera flash.“
How Flash Photography Changed Over Time
Early flash photography goes back to the late 1800s. A man named Arthur Korn invented flash photography during the years after Thomas Edison’s invention of the light bulb.
In 1887, flash photography took off before flashbulbs were even used and when flash powder was still being used as flash (and this sometimes resulted in dangerous explosions).
However, it wasn’t until much later that flash photography became more accessible through innovations like flash bulbs and strobes with automatic exposure control.
A photographer named David Muybridge invented the first flash bulb in 1931. Soon after, strobes were around in 1939. The flash units for these cameras allowed photographers to take more natural looking photos without having to use lighting from candles or torches.
Do You Need a Flash for Photography?
You don’t need a flash for photography if there is sufficient ambient light. However, flash allows you to add creative possibilities by controlling the characteristics of light, such as:
In flash photography, the flash may be a single light source or blend with ambient light.
For some types of flash photography, the flash is part of the subject. For example, you may use a flash in the photo to add light, color and interest to the composition. You can even use flash with a gel to imitate the Sun.
For flash to work well, you need flash units which are compatible with your camera and flash accessories such as reflectors, diffusers, lights stands etc.
The quality of flash lighting varies greatly depending on flash power and the characteristics of flash equipment, called “light modifiers.”
1: Are Photos Better with Flash?
Some photos benefit from using flash, and others don’t. It’s important to understand the intent of adding light to a photo and determine if flash is the right choice.
You can have flash photos that appear either natural or unnatural and it’s important to know which one you want.
When flash is used properly, flash photography adds an interesting effect to pictures by enhancing the mood in a photo.
Some photography techniques rely on the use of flash and off-camera flash in particular can be used creatively for stunning results. Using flash doesn’t mean the photo has to look like a snapshot taken at a wedding though; some very creative styles of flash photography exist today.
When used well, flash enhances the feel or mood of a photo without overpowering its subject.
Lighting becomes an element of composition rather than something glaringly obvious such as sunlight or moonlight.
2: How Does Flash Affect the Quality of a Picture?
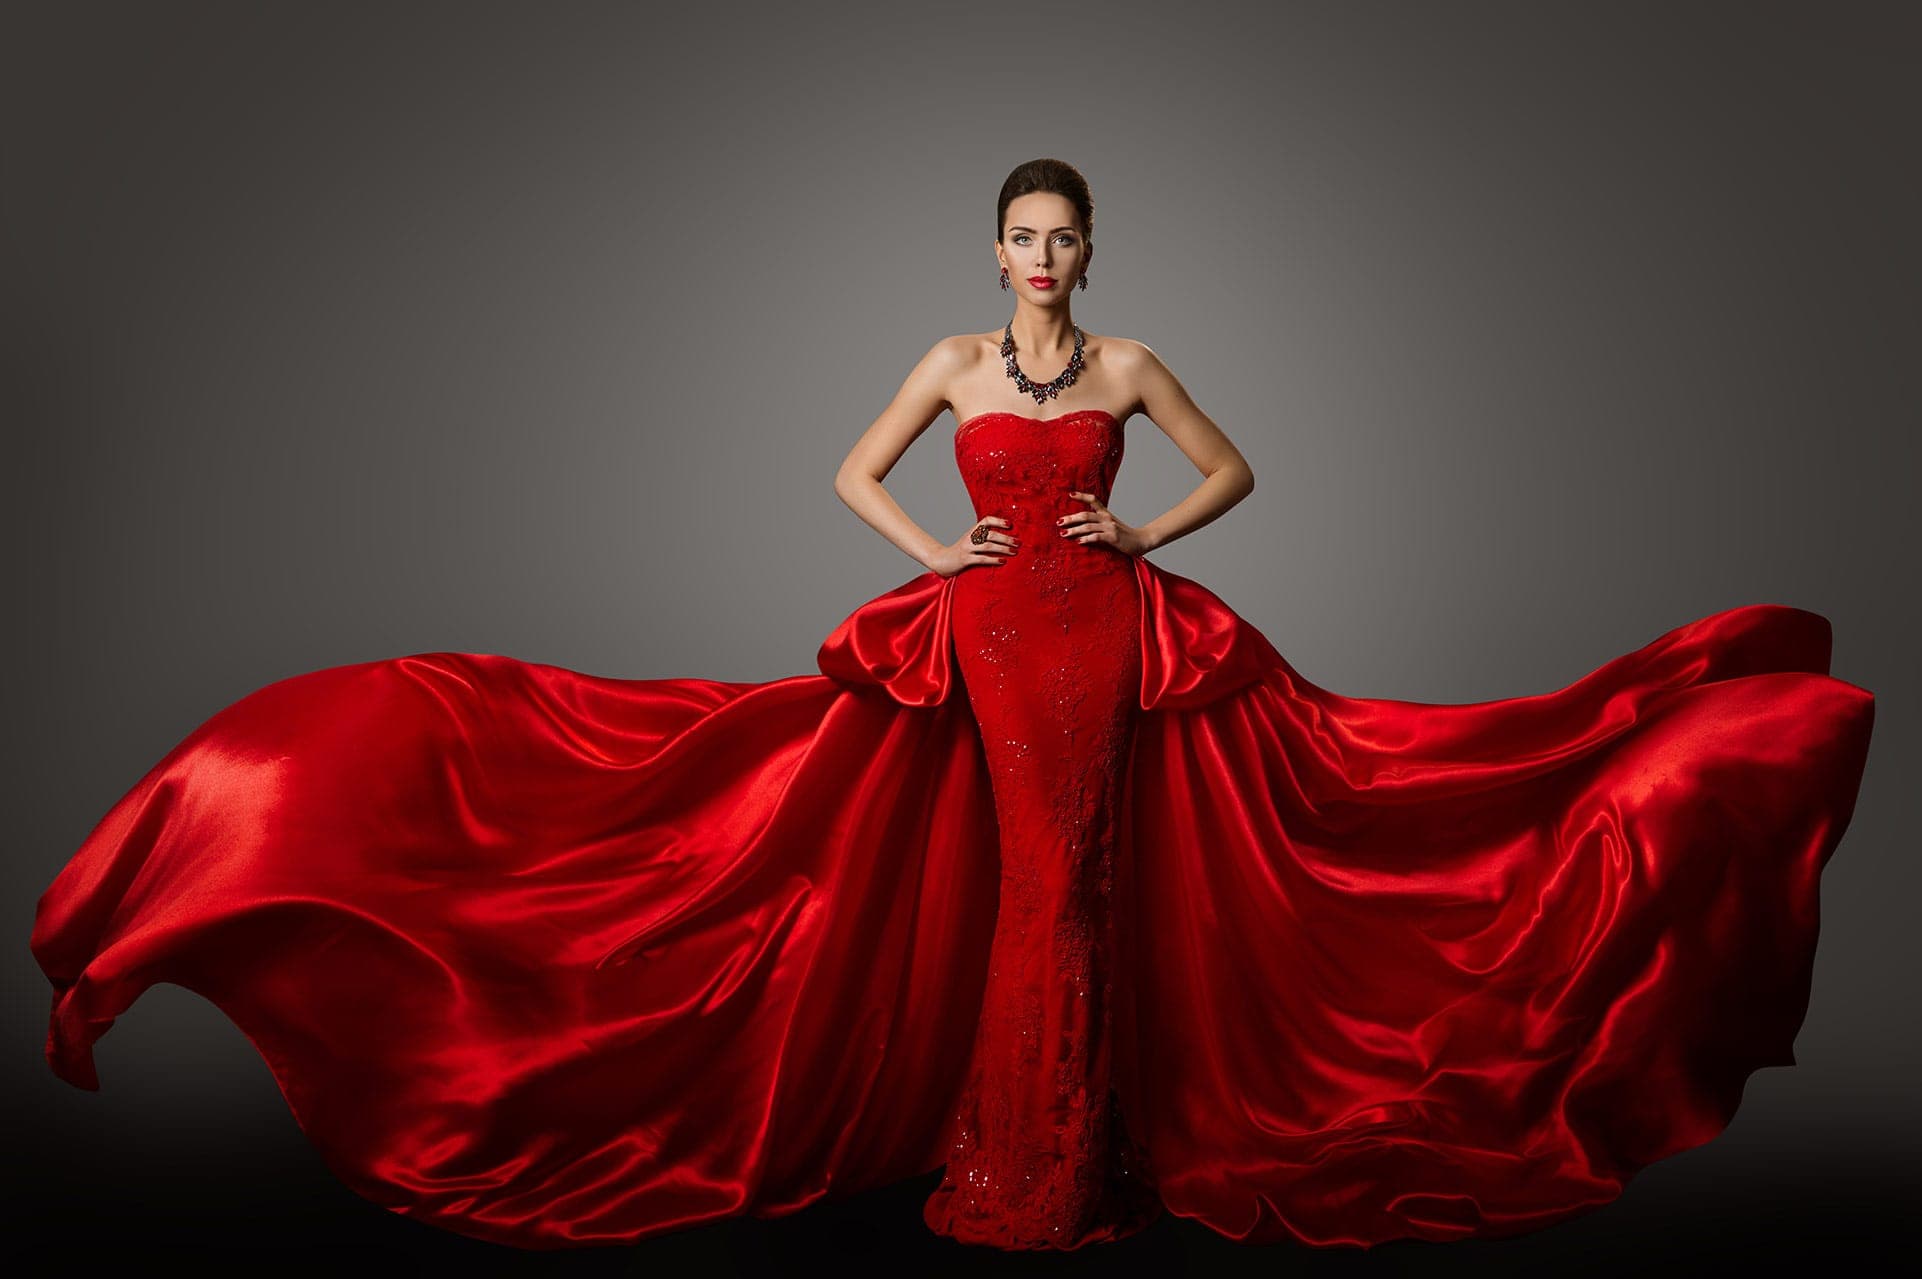
Different techniques with flash allow you to sculpt the light in a photo. You may use flash to fill light in some shadows, create a spotlight or even add color to your scene.
Flash photography makes your human subjects look more alive. Due to the short time flash light hits a person’s skin, it gives a healthier-looking appearance because it freezes the ever-changing blood flow under the skin.
In flash photographs, almost all objects appear sharper due to flash illumination compared with ambient-light pictures when flash illumination is not used.
That’s due to the short flash duration, which means the time that the light is on the subject prevents movement by the subject or camera shake while the shutter is open.
People perceive higher quality results from flash portrait photos than without flash.
Flash improves color accuracy and reduces noise levels for flash pictures compared with no flash when shooting at high ISO levels with camera sensors.
When to Use Flash Photography
You know when to use flash photography when you’re dissatisfied with the results you get without a flash.
Adding a pop of light with a different quality, color or direction can create a massive difference in the appearance in your photo.
You can use flash to add some light to fill in shadows or illuminate your entire scene. Whether you use one flash or multiple flashes, you have more control over the lighting of your subject and background when you use flash.
Bounce flash aims at reflecting surfaces and lights your subject, instead of just lighting it directly. This is a good example of using fill flash to avoid harsh shadows under a person’s chin if you’re also lighting them from above.
Use flash to create shadows on the subject/background for a different visual texture.
Obviously, you can use flash photography when you are taking photos in low light or dark conditions.
1: Ways Flash Photography can be used Creatively
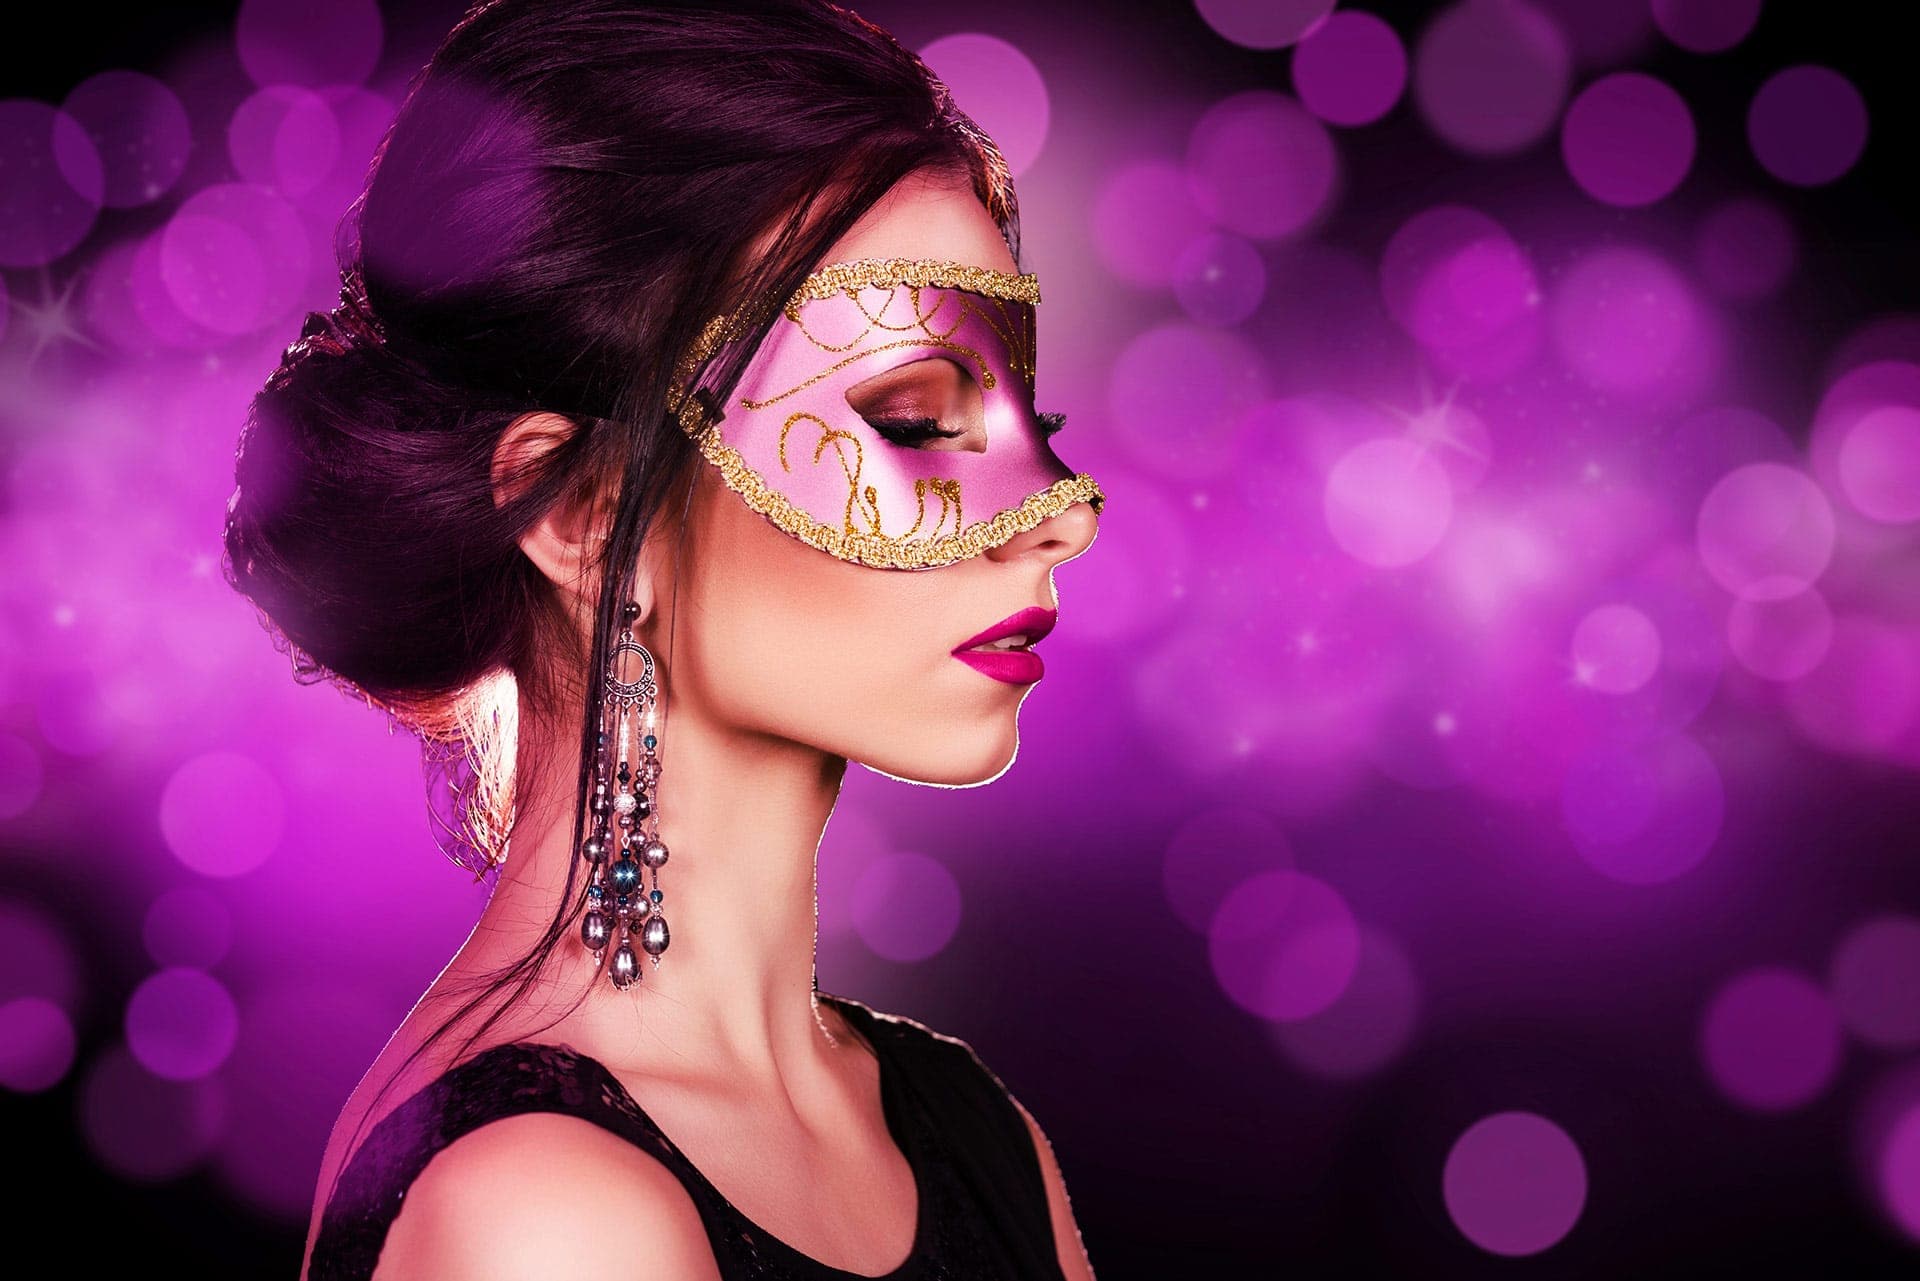
Think of using flash as a means of sculpting with light to enhance your subject and background.
The photo above is a good example. It shows soft light on the subject, but you also see she’s backlit, creating a rim light on the edges of her body. The background uses a flash with a purple gel and the circles come from a shallow depth of field to create the bokeh effect.
One of the first creative ways to use flash is to get it off the camera. Putting a flash on top of your camera is unflattering to any subject. Off-camera flash begins to show creativity by using direction of light.
If you flash directly towards your subject it looks harsh, but at an angle it is soft. You can turn flash upwards to create a rim-light on your subject’s face, or flash back behind your subject for a beautiful natural vignette.
Flash allows you to freeze motion in low light conditions that would otherwise be impossible without flash.
Using flash correctly creates professional photos that look amazing and makes people feel good about themselves as if they were in front of a photographer with an expensive DSLR camera instead of just using their phone.
Adding light modifiers changes the direction and quality of light, or even the color of light with gels. Light modifiers are items that convert the bright burst of light coming from the flash into something soft and directional.
Gels are thin slices of acetate (or some other material) with a particular color. As the light passes through the gel, it transforms from white light to the color of the gel. Using multiple flashes with different gels allows you to bring color harmony and energy to your photos.
2: Appropriate Occasions for Flash Photography
There are places where flash photography isn’t a problem and other places where it’s inappropriate or even rude to use a flash.
Since everyone sees flash, there are places where using one is strictly forbidden. One common example of flash photography being banned is a concert or stage performance. The flash distracts the people on stage, so it’s always best to turn off flash at these events.
Another place where flash photography is inappropriate is museums and galleries; most of the art there are either fragile or priceless antiques so having flash photography around them damages the piece permanently.
Theme park rides are another place that prohibit flash photography. The burst of light ruins the environment for the ride. Besides, the results of using a bare flash on a dark ride never turns out well.
Some people also consider flash photography as rude. Using flash on a very intimate moment such as between two lovers or when a man proposes to a woman, flash photography is considered impolite or even insulting, so the participants will surely be offended.
It’s best to ask before you try it if you’re unsure about flash usage in that particular place.
There still are places where flash photography is appreciated and appropriate; capturing an active family gathering or any birthday celebration with flash can be perfect for some people, especially those who aren’t present in the actual event but want to join in through photographs.
3: Types of Settings to Take Photos with Flash, Including Indoor and Outdoor Shots
Using flash indoors works well if you can bounce the light off a white wall or ceiling to create a larger, softer result on your subject.
Place the flash off your camera and hold it up at a 90-degree angle to light the entire room. Existing light will bounce around and create a softer, more natural look on your subject.
Indoors with flash also works well in low light situations where flash shows up better than regular bulbs or dim lighting.
Outside flash generally eliminates shadows by bouncing flash against walls, sidewalks and even ceilings of taller buildings in order to achieve the largest burst of white light for your subject.
The idea is that you have an unlimited source of soft light that illuminates everything evenly while not causing harsh shadows or other unwanted effects.
Another method to use flash outdoors is having your subject face away from the sun to avoid squinting. This position also creates a nice rim light on their body. You can then use flash to fill in the shadow on their face, since their back is to the sun.
4: When Should You use Flash on a Camera?
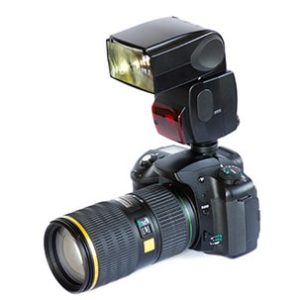
On-camera flash often works best when you redirect the flash head to bounce off a large reflective surface.
Placing your flash on-camera to fire forward is known as “on axis” flash. It creates an extremely unflattering look, which is why most photographers prefer off-camera flash.
However, it isn’t always feasible to work with off-camera flash. Event photographers who need to work on the run often use light modifiers, or bounce their light off a reflector, ceiling or wall.
The intent is to create a softer, flattering light and to change the direction of the light source to your subject. You can do this with on-camera flash by changing the direction of the flash head to a reflective surface.
The result is not only convenient for the photographer, but also creates a flattering light source for the subject.
Remember, the flash isn’t necessarily the light source for a subject. If you redirect or bounce the flash, the last thing the light hits before landing on your subject is the light source.
5: Tips on How to Shoot with Off-Camera Flash
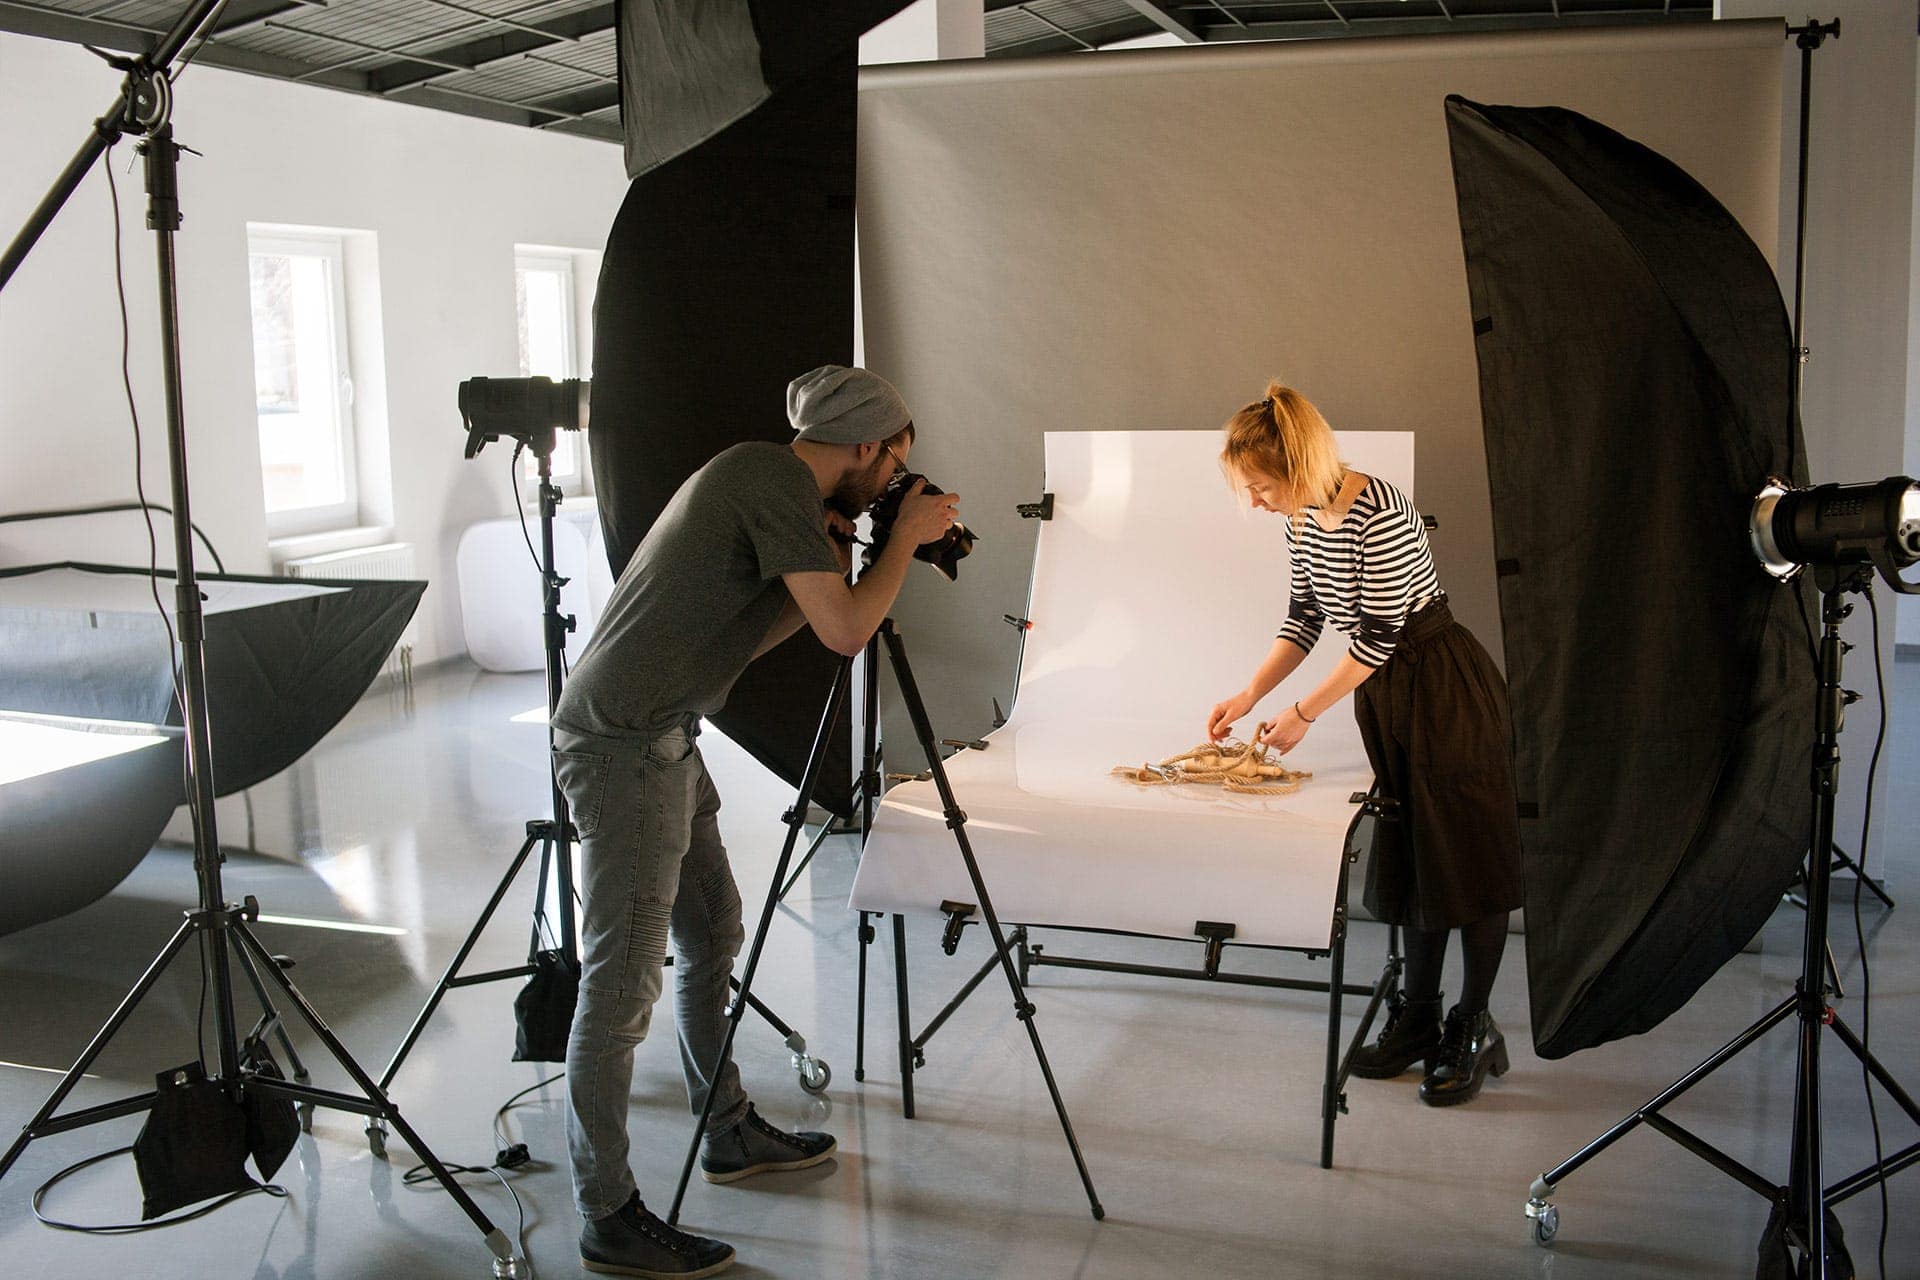
Getting your flash off-camera is one of the best things you can do to improve the look of the light from your flash. Using the flash on-camera, direct at your subject, creates a very harsh looking result.
Use a light stand to position your flash so the direction to your subject or background gives the result that you want.
You’ll need a way to trigger the flash when you take a photo. Most modern flashes include a radio receiver, so you’ll need a radio transmitter attached to the hotshoe of your camera to send the signal for the flash to fire.
Modern flash radio systems allow you to control multiple flashes. You can assign them individually or in groups. That allows you to change the flash power or output so you get the right amount of light where you need it.
If the flash you’re using has a built-in optical sensor, it’ll only fire when your flash is on. Most flash units have some sort of manual power setting so you can control the flash even if the flash unit doesn’t have an optical sensor in it (e.g., if you’re using a flash from an older camera).
When shooting portraits with off-camera flash, consider adding some flash fill light to the front of your subject’s face as well as behind to prevent shadows and make them look more natural.
In addition to softbox or umbrella light modifier, diffuser screens are something else that you can use to soften the results from off-camera flash.
What Should I Look for When Buying a Camera Flash?
Choosing an external flash for your camera may seem like a daunting task as there are numerous types to choose from. Here are a few things to consider.
The larger and pricier models will have higher guide numbers that provide more light.
When buying flash for your camera you should first know what kind of flash and power you need. If your goal is to create stunning images using external flash then you will want at least some control over the flash such.
Look for the option to manually configure the flash and trigger it from a radio system.
The radio triggers allow you to use flash off-camera, which can create some stunning effects such as rim lighting and adding fill flash for an evenly exposed image.
The recycle time of a flash is important. Recycle time determines how long the flash takes after firing before it charges to fire again. The flash power setting affects the recycle time. Lower power settings recycle faster than higher power settings.
The flash duration is the length of flash. The flash power setting affects flash duration too. However, at a certain flash power level, the flash duration will not be affected as much by the flash power setting. Continuous lights are always on, but the short duration of flash can freeze motion.
If you are trying to use an external flash for creative lighting then looking for features such as bouncing, swiveling, zooming, rotating and tilting are all important to consider too.
Additionally, if you want to control the exposure with your camera in Aperture Priority Mode, then getting TTL flash is helpful. TTL stands for Through The Lens (the light sensor reads info through the lens).
If you plan to flash your subject very close or within a certain distance then having flash with adjustable flash zoom is helpful. Adjustable flash zoom allows you to focus the flash on your subject for better lighting.
Larger flash power will allow further flash reach, so if you want to shoot subjects at longer distances, then look for a flash with more lumens and higher guide numbers.
Eventually, you’ll want to use light modifiers with your flash to add things like a soft box, barn doors or other light shaping tools. Make sure that your flash uses a mounting system compatible with your light modifiers.
You may need to research the flash guide number of various camera flashes online and compare them in order to pick out which one has the smallest difference from the next highest model price wise.
Then think about what feature that specific flash offers as an advantage over another similar priced one before committing yourself as they all do different things.
Finally, consider your growth. Flash systems are generally from the same manufacturer and work together with a common radio transceiver system. They likely won’t work with flashes from a different vendor.
Do All Flashes Work on Any Camera?
For on-camera flash use, you need a flash designed to work with your camera manufacturer. A flash designed to work on a Nikon won’t work on a Sony or Canon camera.
However, there are off-camera flashes that work based upon a radio signal only. If you get the correct camera transmitter for your brand of camera, then you can use it with all of the flashes in the vendor’s system.
If you switch to another brand of camera, then you only need to buy a new transmitter for that camera. Your off-camera flashes will continue to work.
Only hot-shoe flashes or transmitters need a camera brand-specific version in order to work with your camera.
In Conclusion
Flash photography has evolved from a standard camera feature to an art form in its own right. The flash power setting and flash duration, along with other factors such as the proximity of your subject or whether you want to control exposure through your camera settings are all important considerations when buying flash for your camera.
Additionally consider where you plan on using it: off-camera flash is often more versatile than on-camera flash because it doesn’t require any physical connection between the two devices (such as hot shoe flashes).
Think about what features that specific flash offers over others similar priced models before committing yourself – they each do different things!
Finally, if you’re thinking long term growth potential then make sure that the flashes work together with a common radio transmitter and receiver system.

