
Using Glamour Glow is fun, but what if you don’t own plugins to use those filters? It’s easy to roll your own in Photoshop.
I’ve been a big fan of the Glamour Glow filter in Nik Software’s Color Efex Pro. Another favorite is the Charge More Money glow in the Perfect Photo Suite by onOne Software. These filters are quick and easy to use, producing some wonderful results. There are two problems for some people, though.
1: Not everyone has Color Efex Pro or Perfect Effects to use these filters.
2: Some people have the plugins, but they don’t use the filters selectively.
How to Create a Glamour Glow in Photoshop
Lately, I’ve been using Photoshop to create a selective glow in my images instead of using my plugins. That’s not because there is anything wrong with the plugins at all. It’s just that sometimes I only need one effect and it’s faster for me to do it in Photoshop than to launch a plugin, select the filter and apply it where I want it.
I think too many people just smear the glow all over the entire photo. That’s a mistake, because you want to have some sharp elements in your image. Also, it’s good to make the pixel peepers wonder a bit by only applying your glow to certain parts of your image.
In the spirit of total honesty, my method is just plain stupid. It works for my needs, though, so I thought I’d share it.
- Duplicate the layer of your image and select the new layer on top.
- Go to the menu and select Filter | Blur | Gaussian Blur
- Move the slider up to 50.0 (I just type it in the box)
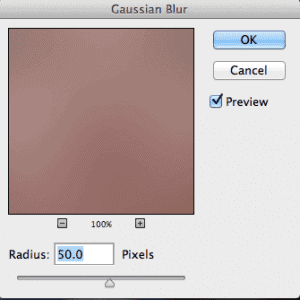
At this point, you’ve blurred the snot out of your photo. Don’t believe me? Here’s a screenshot of a woman’s nose with this much Gaussian Blur. Look, no snot!
- Change the Blend Mode of the layer to Soft Light
- Add a Black Layer Mask
- Select the Brush Tool and change your color to White
- Brush where you want the glow to appear
This is the part that I enjoy. Keep in mind that the human eye tends to go for two things – brightness and sharpness. The glow tends to darken and (not surprisingly) blur whatever you paint. In essence, you’re applying this glow to places where you don’t want the eye to go. If you want to direct attention to a face, it should be a bit lighter and sharper than other parts of the photo.
I’ll grant you that this technique lays it on pretty thick. You can change that in a couple of ways. If you want to have the same measure of glow in all parts of your photo, just lower the opacity of the layer until you’re satisfied.
Another method I use is to change the opacity of my brush to a lower amount, and then vary how much I apply to difference sections of my photo.
This tip also works in Pixelmator. You can duplicate the layer, select a Gaussian Blur from the Effects palette and apply a layer mask as I mentioned above. Basically, you can add glow to your photos for just under $15 if you have a Mac. Such interesting times.