Affiliate Disclosure: We earn a commission if you purchase through one of our links at no additional cost to you.
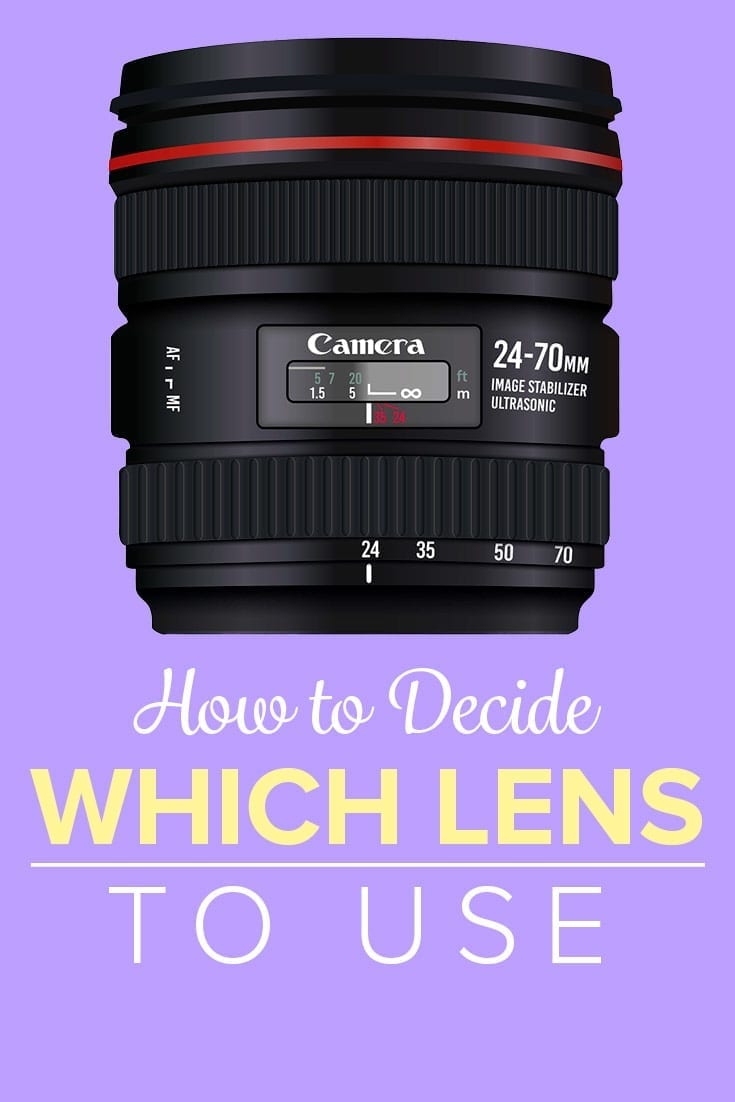
Either you have a lot of lenses or you’re thinking about buying another one. How do you decide which lens is right for your needs?
Let’s put aside all the hype about some of the magical lenses that everyone says are so great and look at things a bit more carefully. A lens has great potential to tell your stories, but only if you use the right one.
We’ll review how lens selection affects your composition, why you may want to distort your subject with some lenses, and how to tell your story with the right lens.
Avoid the Hype
If I could go back in time, this is the lesson I wish someone taught me. I would’ve saved thousands of dollars, lots of time, and likely created better compositions.
Let’s use the Nikon 85mm f/1.4 lens as an example. It’s one of the Nikon “Holy Trinity” of prime lenses that people talk about. They proclaim its glory and magical abilities.
Yeah, I really like this lens. However, I didn’t need it.

While the bokeh from the 85mm f/1.4 is glorious, the shallow depth of field makes it very difficult to get sharp focus on both eyes of a portrait subject. Meanwhile, I could get glorious bokeh from the 70-200mm lens that I already owned.
There’s a thing called Gear Acquisition Syndrome. It’s where you get fixated on a piece of gear with magical abilities. Don’t fall for it. I’ve purchased all that magical stuff and I can tell you that you don’t get great results from a piece of gear.
You get great results from knowing what gear to choose and how to use it.
What Composition Do You Need to Tell Your Story?
This is the big question you need to answer in order to decide which lens to use.
If you hear someone say that you need to visualize the photo before you take it, they’re trying to help you realize that you can craft your photos rather than just capture something.
Crafting your photos means knowing the end result you desire. Then choosing the tools that you need to make your vision appear in the photo.
Sure, you can put on a 35mm lens, take street photos and have a wonderful time. You end up fitting everything you see into that 35mm frame. I think my Nikon 24-70 lens is a better choice for street photography.
Maybe 35mm works and maybe it doesn’t. Either you let some photos get away because you don’t have the right lens, or worse, you try to fit every potential subject into that 35mm point of view.
On the other hand, you can take your time. Visualize the result you want. Spend your time crafting one photo, or set of photos, that all work with your vision.
It’s a different type of photography when you’re crafting instead of capturing. You spend as much time producing and directing your photo session as you do taking photos. Maybe more.
Lens choice is part of that vision. You get to decide what tool supports your creative and technical storytelling needs. We’ll go over some of those decisions below.
Decide Which Lens Features You Need
Lenses have a number of options, which is great and potentially confusing at the same time. We’ll concentrate on some of the most common issues for you to consider, and discuss how they may impact your photo and story.
What Depth of Field Do You Need?
The phrase “depth of field” refers to the area of the photo that’s in focus – from the front to the back of your focus point.
Think of it as a plane. Not an airplane, but one of those geometric planes of existence. It’s a vertical plane from the top of your frame to the bottom, or a horizontal plane from the left to the right.
The thing about this plane is that its thickness varies.
That’s how to think about depth of field. How thick is your area of focus, from front to back. The front of the plane starts at your focus point.
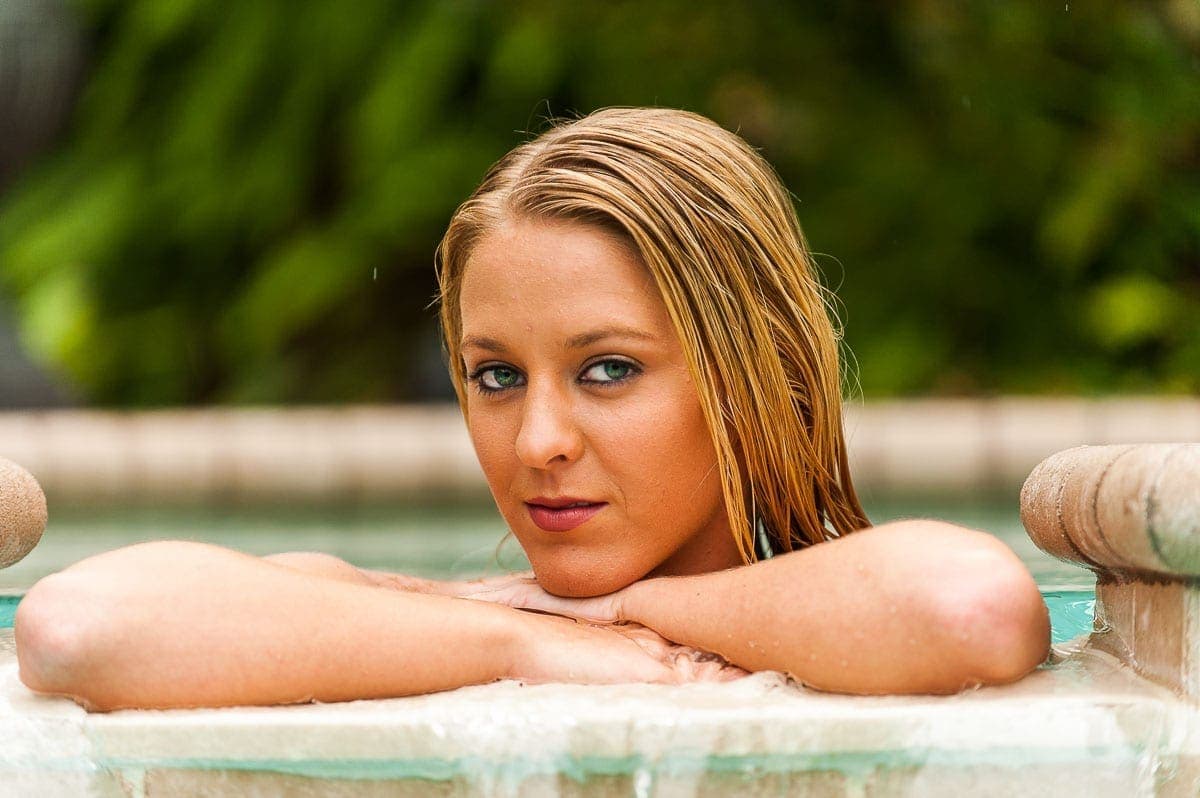
A very thin plane is something we call a shallow depth of field. The portrait above has a very shallow depth of field. I’m focusing on her eye.
At f/1.4, the depth of field is so shallow that focusing on one eye could leave the other eye out of focus if her head were turned slightly away.
Take a good look. The tip of her nose is soft because it isn’t in the plane with the depth of field that’s sharp. Her hair by her ears and behind is also soft and out of focus.
The advantage of this shallow depth of field is that it eliminates distractions in the background and really helps the subject to stand out of isolation.
On the other extreme, you could choose a smaller aperture that leaves everything in focus. It’s all tack sharp at f/22.
Do you want your subject isolated or captured in perfect detail? That’s the story decision you need to make. Most lenses will let you keep everything in sharp detail, but you pay extra for those lenses with very shallow depth of field.
What Angle of View Do You Need?
The angle of view in a lens can vary from wide angle to telephoto. As you increase your focal length, your angle of view narrows.
Ultra-wide angle lenses, like a fisheye or my Nikon 14-24mm lens, show a lot of the area in front and to both sides of the center.

This photo of the crypt in the US Capitol building is an example of a wide angle lens. I used my Nikon 14-24mm in portrait orientation to try and capture the grand nature of this room, from floor to ceiling. A telephoto lens with a narrow angle of view wouldn’t give you a sense of the scale here.
Side note: The idea for this crypt was to provide a place for George Washington to lie after his death. He had other plans in his will, though.
A telephoto lens, with its narrow angle of view, does more to eliminate distractions on either side of your subject. The idea is to get close and fill the frame, not show a lot of detail that could diminish your subject in the final image.
I took the photo above with my Nikon 70-200mm lens. The comparison between the angle of view in both photos gives you an idea of the differences.
Here’s something else to consider when you decide which lens to use. Do you need to show a lot of area in your story, or to get close and feature your subject?
Trying to use a wide-angle lens to get close causes distortion. We’ll review that in just a bit.
Do You Need Image Stabilization in Your Lens?
Image stabilization (Vibration Reduction for Nikon folks) is a feature that compensates for lens movement or shake. Basically, it helps you get sharper photos than you otherwise could while hand-holding your camera.
This used to be something primarily for longer focal lengths, but it isn’t always the case.
The longer your focal length, the more susceptible it is to showing the effects of vibration by blurring your photos. You need to have a shorter shutter speed to compensate. The old rule is to have a shutter speed at least as long as your focal length to eliminate problems with vibration.
For a 200mm lens, you’d want a shutter speed of at least 1/200th of a second.
That isn’t always practical, or even desirable. So image stabilization compensates for vibration and allows you to take sharp photos by minimizing the effects of vibration.
You may need to use IS in low light because you just can’t get the shutter speed where you need it to follow the old rule.
IS is also helpful when you’re photographing moving objects, or on a moving object while taking photos. Let’s use an example of panning.
The idea is to use a slow shutter speed to blur the background while moving the camera along with a moving subject. Ideally, the subject stays sharp against the blurred background to provide a sense of movement in the photo.
IS helps you keep that sharpness while moving the lens with a slow shutter speed.
Are You Taking Photos in Low Light?
We don’t always get to take our photos in ideal lighting conditions. In fact, some of the most interesting photos are those taken in darkness, hiding details in shadows so as not to reveal everything.
You have a few options.
Crank up the ISO, but you risk grain. Reduce the shutter speed, but then you risk blur if your camera or the subject moves.
That leaves you with two things that can help you in low light.
We’ve already discussed both of these features in a different context. A wide aperture gives you a shallow depth of field. However, it also lets more light hit the sensor while the shutter is open.
If you’re into concert photography, wide apertures are your friend. Lighting changes frequently and it seems there’s never enough of it.
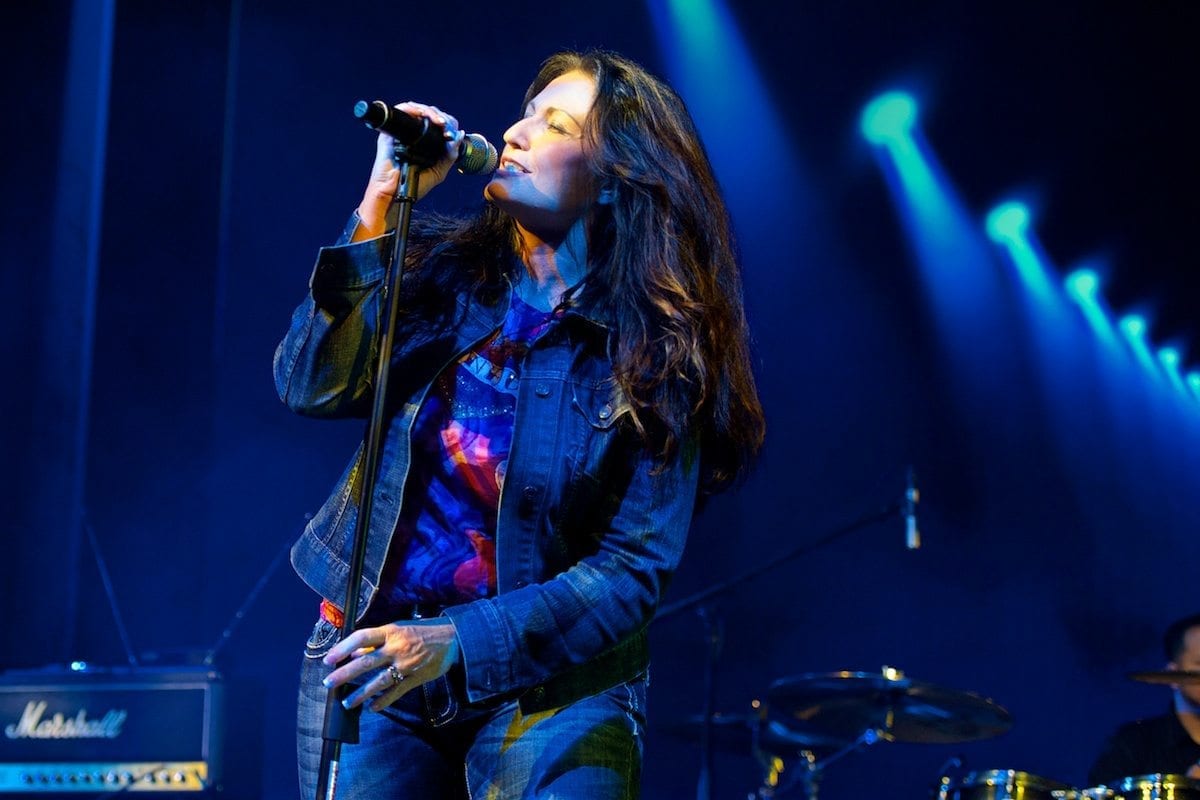
Fast lenses – those with apertures of f/2.8 or faster, are wonderful for capturing photos in low light environments.
Toss in some image stabilization to compensate for some slower shutter speeds and you have a powerful low-light combination.
Of course, that IS feature won’t compensate for a moving subject in your frame during the longer shutter speed in the exposure. Moving objects collecting light are still going to be blurry, even with IS.
Are You Correcting for Distortion or Perspective?
Perspective control lenses, or tilt-shift lenses, allow photographers to avoid the kind of distortion typically found in wide-angle lenses when photographing architecture or other subjects with straight lines.
They tend to curve or lean inward at drastic angles, rather than appearing vertically as they should.
Tilt-shift lenses are a specialty lens that most photographers don’t keep around, but they’re essential for architectural photographers.
They also have a unique ability to take photos that make objects seem like toys. Cars, trucks and vans – even buildings – look like a Hot Wheels or Matchbox toy set with some tilt-shift lenses.
Do You Need a Specialty Lens?
There are other types of specialty lenses, of course.
A fisheye lens is just fun! It’s designed to provide an ultra-wide angle view, and they are unapologetic about bending lines.
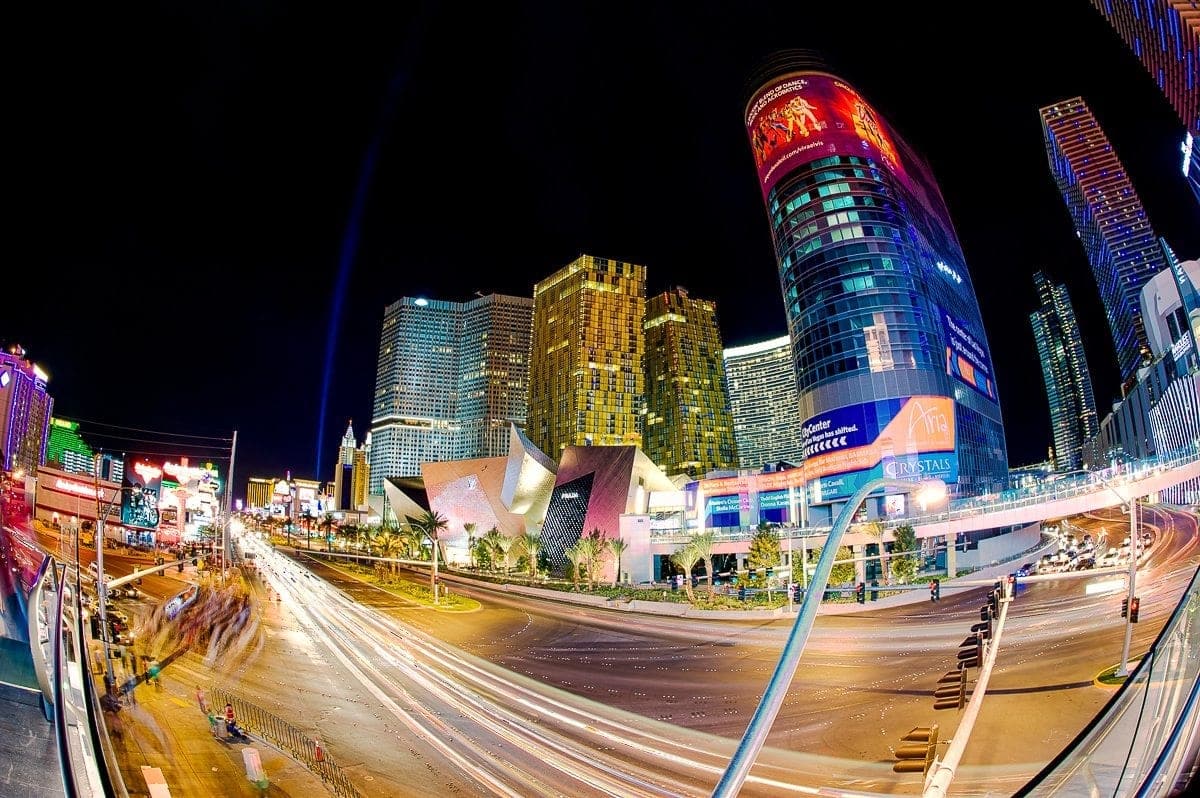
I shot this photo of the Las Vegas Strip using a Nikon 16mm Fisheye lens. You can see the curvature on the buildings as a result. However, I also got an ultra-wide angle of view that allowed me to bring in more of the Strip than I’d get using a medium or telephoto lens.
Macro lenses are essential for photographing small subjects, like jewelry or insects. Some people love a macro lens for close-up detail shots of flowers and other objects.
Why not just use a telephoto lens instead of a macro lens? It has to do with the “minimum focusing distance.”
Macro lenses allow you to get very close to your subject and still focus. On the other hand, my Nikon 70-200mm lens has a minimum focusing distance of about six feet. It just doesn’t offer the same results for a small subject.
How Does a Lens Affect Bokeh?
Bokeh is what we call the blurred background when using a shallow depth of field. Part of it also refers to the way lenses translate highlights that are out of focus.

Not all bokeh is the same.
While part of it may depends upon your sensor size (full frame lenses do better than crop sensor), part of the result depends upon the aperture blades in your lens.
Sometimes these highlights appear as round, as above. Other times they may look a bit choppier, like a hexagon. There are two factors that determine what you get.
Some lenses may use only six aperture blades while others may use nine. The more blades you have, the more then resulting bokeh highlights get defined as round rather than blocky edges.
The other factor is the shape of the end of the blade. Rounded blades also contribute to a rounder bokeh shape. Some lenses may have sharp edged blades rather than rounded blades, leading to more sharp-edged bokeh.
Typically, less expensive lenses have fewer blades with sharp edges. More expensive lenses have more blades with rounded ends.
Decide Which Lens to Use Based Upon Your Vision
I hope this gives you a good understanding of how to evaluate how a lens will perform, but mostly how to select the right lens for your composition and story.
This isn’t about buying the most expensive lens, because you may not need to pay money for the features they offer. Instead, I want you to know what you need and know what you’re getting with each lens.
Mostly, don’t waste money on feature you don’t need.


Amazing. I’d recommend it for anyone.