Affiliate Disclosure: We earn a commission if you purchase through one of our links at no additional cost to you.
Did you ever consider that you could use depth to impress people with your photos? Try this.
Remember a time when you saw a photo that really impressed you. Think about it. Did you get the feeling that you could almost reach inside and touch things because they seemed so real to you?
Depth gives your photos a sense of reality.
Understanding Depth
Many photographers talk about the importance and power of shapes, and they’re right. We’re comfortable with circles, squares, rectangular shapes, triangles and other shapes.
The problem with shapes is that they’re flat.
Circles are round. Grapes are also round. The difference is that a grape has dimension. There’s a depth that you can see from front to back. You can see how light gradually fades around the grape.
That depth and dimension is what makes something feel real to you, because that’s how we perceive real objects in life. It’s why artists would sketch light fading from one side to another with their subjects.
We do the same with photography, only much faster.
Of course, not all photos have a sense of depth. We call those photos flat. It was quite trendy last year or so. In my opinion, those photos suck.
We want to see things that either are, or could be, real. Not every photo has to be grounded in the reality of our world, but we need to perceive it as possibly real using our predefined understanding of the universe.
You don’t need much depth to make something appear real. It could a matter of placing your subject before a mountain range, or simply lighting something to reveal its texture. You can have depth with millimeters.
There are a number of ways to show depth. Here are five of my favorites.
1: Foreground, Middle, Background
You probably heard this advice before, but let’s repeat it because it’s solid advice. A great way to show depth in your photo is to have something in the foreground, something in the middle, and something in the background.

Here’s in interior shot example of foreground, middle and background. Your eye progresses from the chair to the table and overhead light, to the background. There’s a sense that you could walk inside this room.
There are a number of ways to approach a scene with foreground, middle and background. However, not every photo opportunity is going to give you this kind of depth.
As I mentioned before, the depth doesn’t have to be very large. It merely has to be perceptible.

Does your subject go in the foreground or the middle? Maybe even the background?
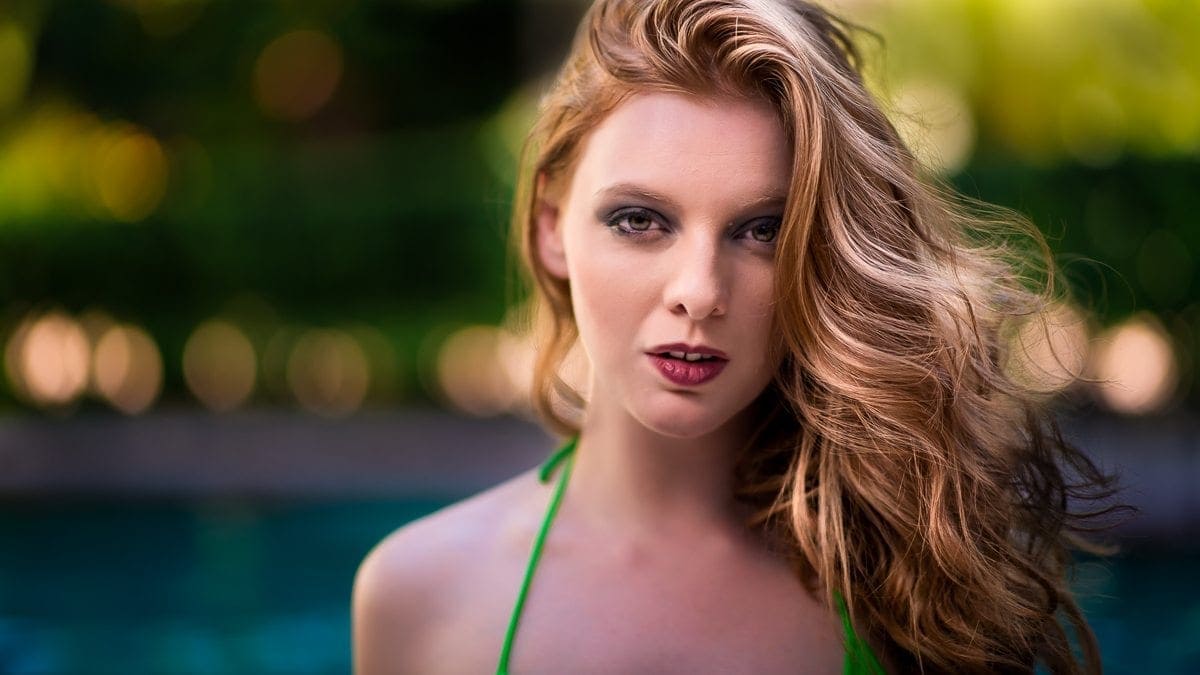
It doesn’t matter. What’s more important is to compose your photo to flatter the subject. In this case, my subject is the young woman in the pool. There’s water in the middle and mountains in the background.
I could’ve made this photo about the mountains with a slightly different composition, using the foreground and middle to lead your eye to the mountains. No matter where you place your emphasis, the sense of depth creates a sense of reality the viewer can immediately understand.
People relate to depth.
2: Use Leading Lines
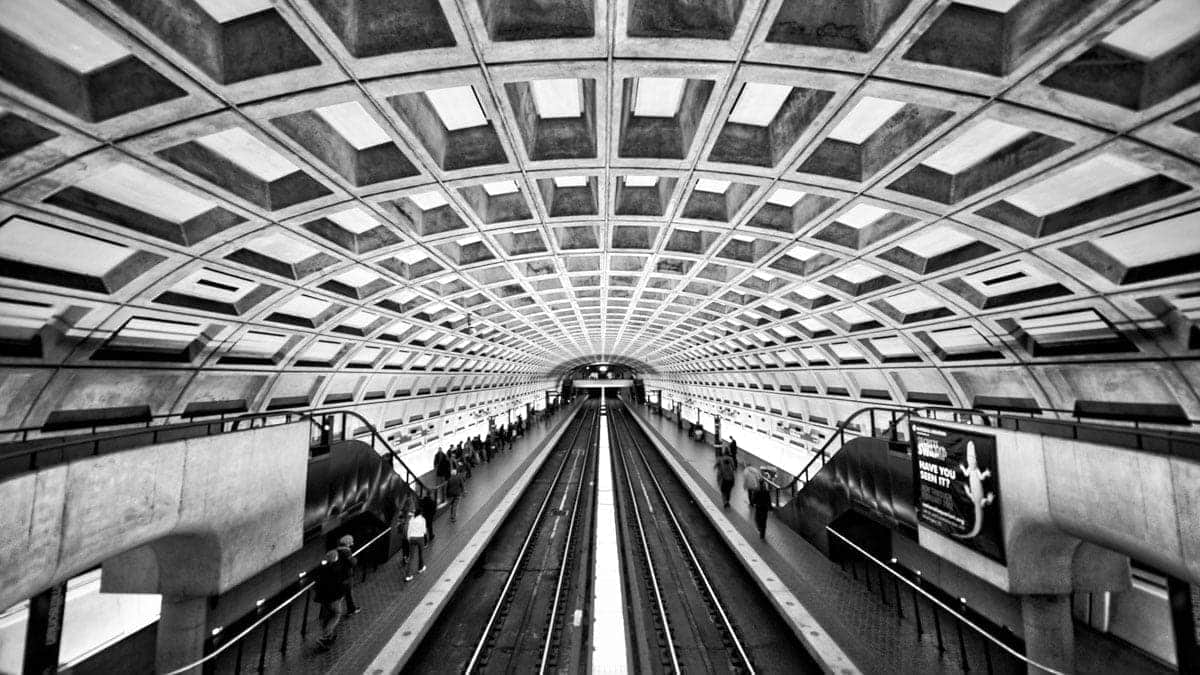
Leading lines tend to draw you eye. It’s hard to look at this photo and not be drawn into the center. Not just because the rails lead there, but so do the lines overheard.
Combine that with the platforms on either side of the rails and you develop a sense of distance and depth in this frame.
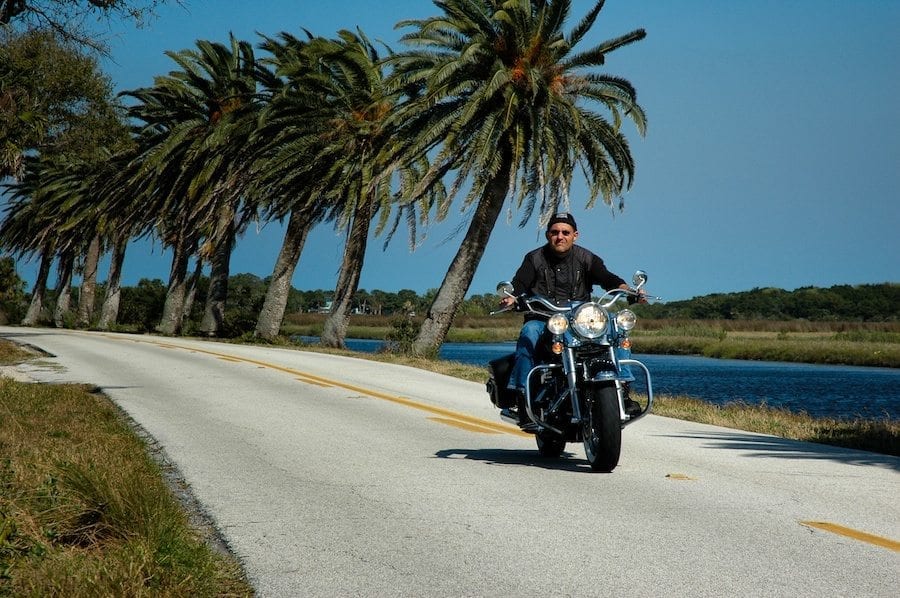
Leading lines don’t always have to lead you straight back or toward the center. Sometimes your subject can emerge from within the lines to grab you head-on. This photo of a biker grabs your attention up front as he leaves the open road behind him.
3: Use Perspective to Create Leading Lines

You can use buildings, architecture and mountains to create leading lines through perspective. This is an interior photo of the Vehicle Assembly Building (VAB) at Kennedy Space Center. It’s one of the most massive buildings you’ll ever experience.
The area closest to you seems large and the building angles back toward the center as you view it. That perspective shows depth and distance, since it’s a pretty long way to the other end.
Again, the leading lines created by perspective don’t have to go toward the center of your frame. You can find a large building or other feature and use it to create diagonal lines.
It’s all about where you place your camera.
4: Use Depth of Field

The first suggestion I made was to have a foreground, middle and background. I chose this photo to demonstrate something.
Sometimes your backgrounds suck. I photographed this model in a field with a wood panel fence in the background. It was too busy and the background competed with the subject. Using a shallow depth of field was a good way to tame it down.
However, it serves another purpose by creating a sense of depth through separation.
You can tell there’s something in the distance behind the model. You don’t always have to tell someone (or show them) just how crappy the background is by keeping it in focus. Depth of field creates a shallow area of focus, and blurs out things in the distance.
Shallow depth of field can be tricky, though. If you look at this example, you see the model’s shoulder is out of focus. That’s what happens when you’re in love with your f/1.4 aperture lens more than your photo result.
Still, you can see the progression with depth of field is gradual. Her face is sharp and the focus gets softer on her ear and shoulder. Then it’s full on blur by the time you get to the opposite side of the pool.
There’s still a progression of depth here, due to the depth of field caused by the aperture.
5: Use Color Separation

Sometimes you can use colors to show depth. The change in color, whether gradual or opposite, lets the brain know that one thing is in front of (or behind) the other.
This example plays on a familiar background after sunset – often called Blue Hour. Choosing a warm toned subject like this Tori Gate helps the eye place it in distance and depth.
You could do the same with tints or shades of the same color to show distance.
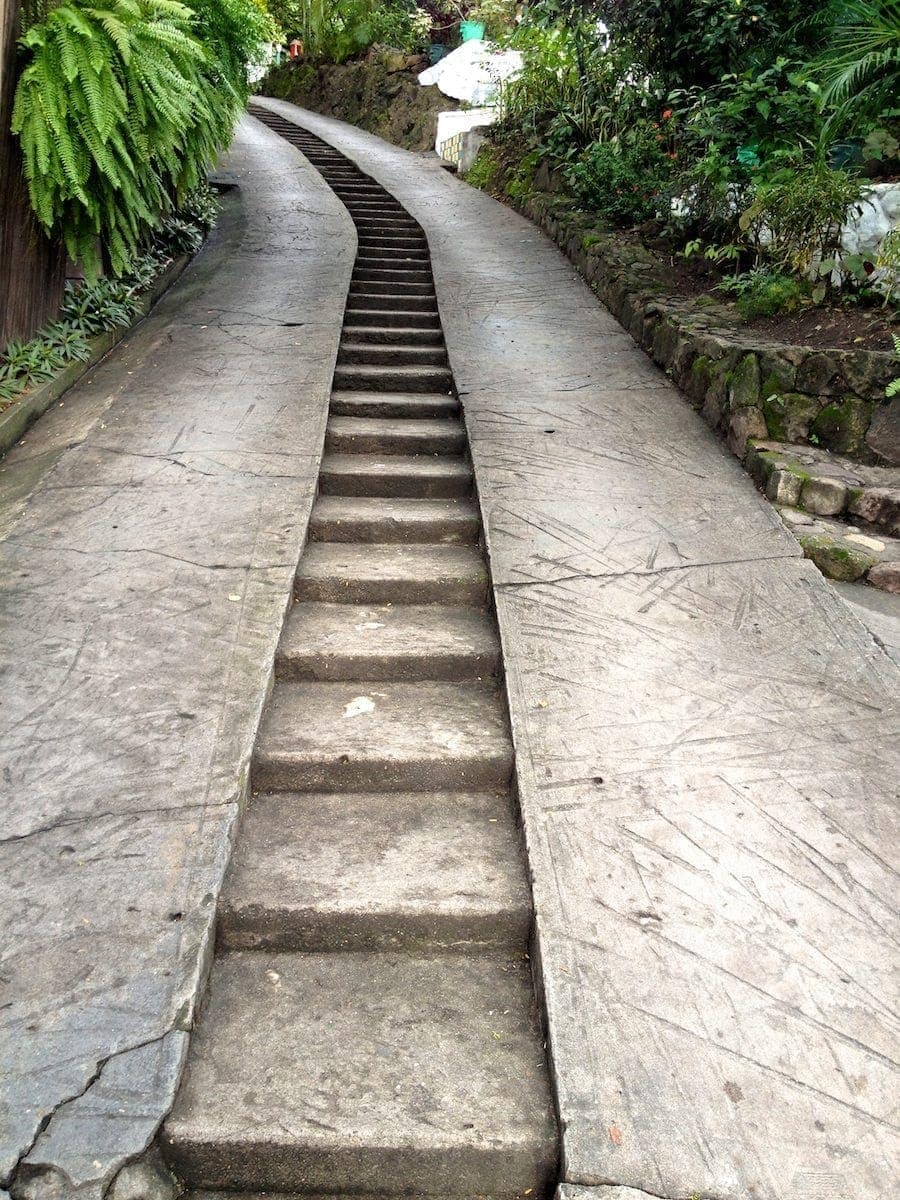
Photographers seem to love stairs. I also loved them, until I had to walk on these nasty things in the rain.
That said, take a look at how each step gets subtly darker as it progresses up the hill. Also note how the side of a step is a slightly darker shade than the top. Both of those differences in the same color provide a sense of depth.
It’s simple shading, but it works to create separation and distance. It works vertically and horizontally.
This one serves as a bonus tip, since it’s using light to create the shading and sense of depth. Imagine how you can use light to show depth in your photos.
Use Depth to Impress
Remember, depth doesn’t have to be huge in order to create a sense of reality. If you think about the most impressive photos you’ve seen, I’m betting that a use of depth created a sense of reality in the image.
Try to put these techniques to use in your photos. Give some thought to how you’re showing depth and separation. It’ll make your viewers want to crawl inside your photos.
Subscribe to The Photo Flunky Show
Thank you for listening to The Photo Flunky Show. Make sure you get every episode delivered for free by subscribing on iTunes
iTunes – https://williambeem.com/itunes