Affiliate Disclosure: We earn a commission if you purchase through one of our links at no additional cost to you.
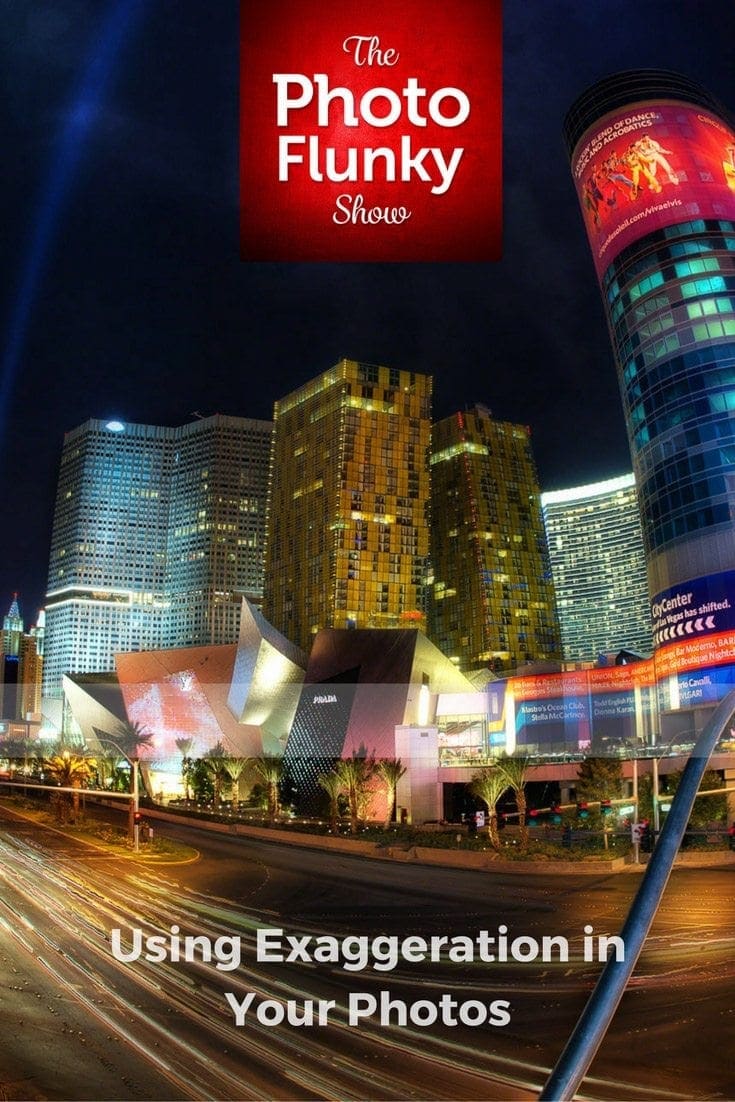
Why Using Exaggeration in Your Photos Can Enhance Your Subject
Hello, and thank you for listening to The Photo Flunky Show. We hope this gives you some ideas to try out.
In this episode, we talked about using exaggeration in your photos as a creative and fun way to bring out your subject. It doesn’t work for every subject, but it’s another tool in your bag to use when you think it’s appropriate.
We discussed three ways to use exaggeration.
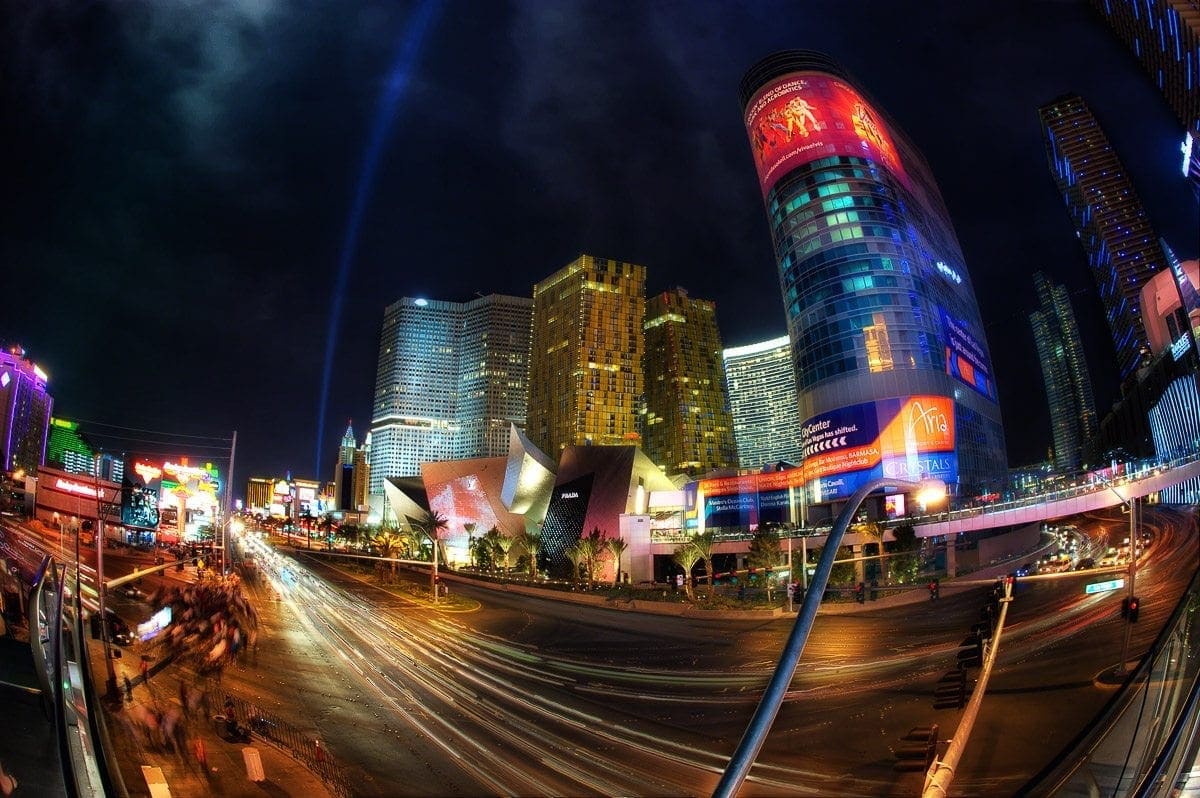
With a fisheye lens.
It’s a specialty lens and you may not own one. However, it’s relatively inexpensive to rent and can be a lot of fun to use.
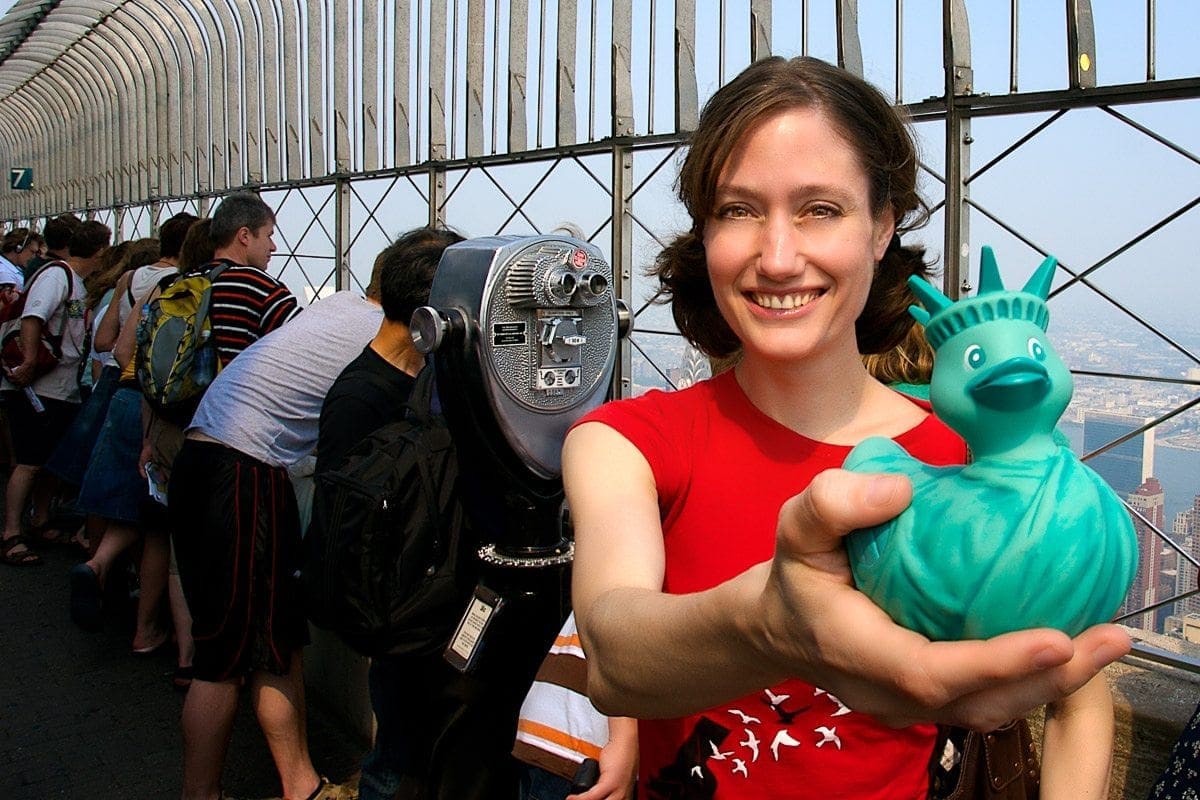
Breaking the plane
Objects closer to the lens than your subject can distort and appear larger. In this case, I made a portrait of a friend in New York City who has an extensive collection of rubber ducks. This isn’t a technique that I would normally recommend for a portrait, but it worked for her case.
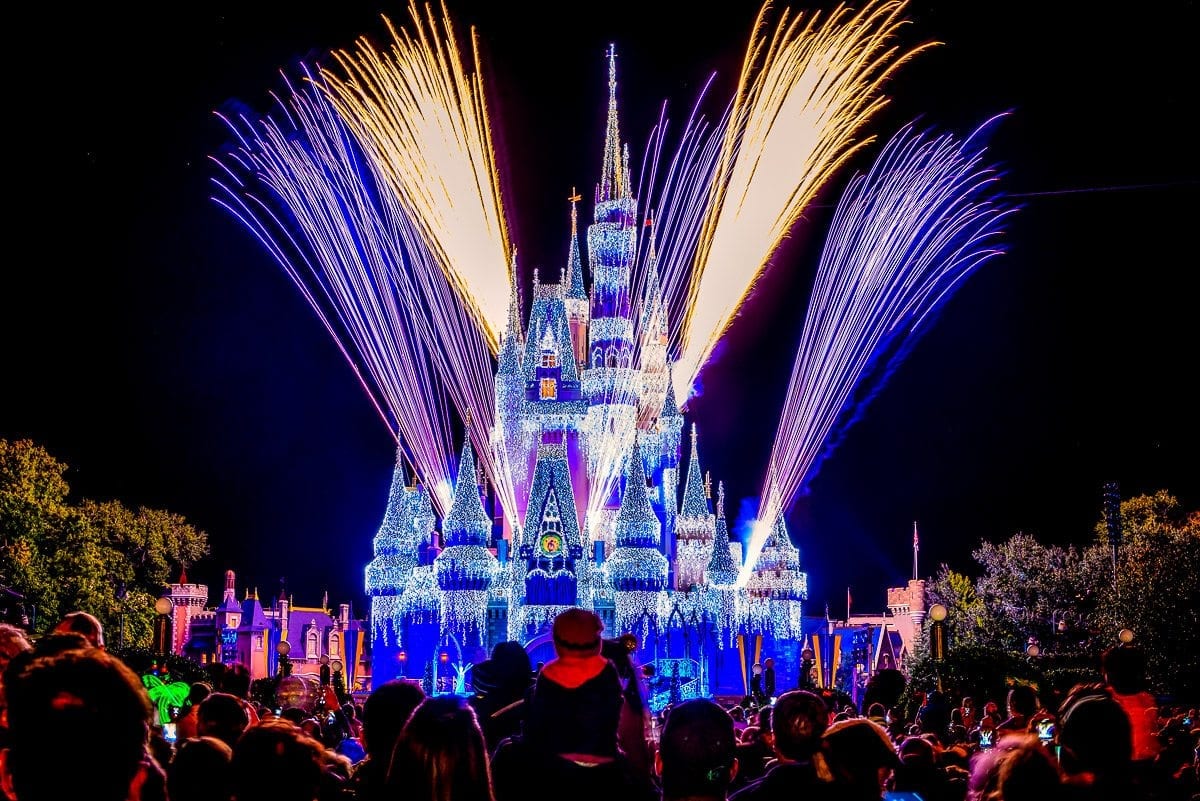
Selective Saturation and Vibrance
Normally, the Saturation slider can get you into a lot of trouble with a photo. It can make some colors rather garish. Used selectively, such as on the fireworks in this photo, it brings out a lot of color to show the subject.
Check out the show for details.
Subscribe to The Photo Flunky Show
Thank you for listening to The Photo Flunky Show. Make sure you get every episode by subscribing.
iTunes – https://williambeem.com/itunes
Stitcher – https://williambeem.com/stitcher
Google Play – https://williambeem.com/googleplay
Blubrry – https://williambeem.com/blubrry
Transcript
THE PHOTO FLUNKY SHOW: Episode 58
Links to subscribe to the show:
You can find links to this episode and all of the other ones at photoflunky.com
iTunes: williambeem.com/itunes
Google Play Music: williambeem.com/googleplay
Stitcher Radio: williambeem.com/stitcher
Blubrry: williambeem.com/blubrry
Transcript
William: Welcome to the Photo Flunky Show, Episode number fifty-eight.
Today we are going to be talking about how you can use exaggeration to accentuate your photos.
Exaggeration sounds kind of funky in itself.
Lee: It sounds really cool, actually.
William: I hope so. Otherwise this show is going to suck.
Hi, my name is William Beem.
Lee: Hi, I’m Lee Beem.
William: First off we want to tell you: Happy New Year! This is our first show of 2017. We’ve gotten up to 58 shows already. I’m actually kind of excited.
Lee: Yes. I mean this has just become part of our lifestyle now, hasn’t it?
William: It has and it’s become a lot of fun for me and we are seeing the numbers starting to tick upward as far as downloads and things. It’s kind of exciting to start something and see it grow.
I know with podcasts they tell you: you need about two years before you ever really get any traction. We saw some stuff late last year that just kind of jumped up and I though hey!
Lee: Was it last week?
William: Well I can say last year because that was 2016.
Lee: Oh that’s right! I get confused with this.
William: It’s OK. Time travel is weird.
OK, before we get started I want to tell you a couple of things. First off, show notes are going to be available at williambeem.com/episode58 and of course you can get a transcript of the show there for free. We would love it if you would subscribe to Photo Flunky and get it delivered to you directly. Just go to photoflunky.com. There are links on the player there, or at the link I told you before for episode fifty-eight. You can find links to subscribe to the show. It’s not hard.
Lee: No, it’s pretty straightforward.
William: If you go ahead and get the transcript, the links are always inside of each transcript we put out.
Lee: Yes.
William: I’ve got something new to share with you too. I created a free eBook and this is going to be on Creative Portraiture. Basically it’s an eBook that’s about thirty-five, thirty-six pages – some of which are actually useful!
Lee: It’s really nice!
William: It is about portraiture. I’ve got a lot of photos in there, a lot of examples and this eBook isn’t really talking about the technical aspects. It’s talking about the creative aspects; things that you need to consider when you’re coming up with your concepts for a portrait or even if you’re out in the field shooting. So I hope it’s really helpful for you. You can get it at willliambeem.com/freebook So not “free ebook” because that would have been confusing. Just free book.
I hope you like that and of course there are plenty of links on williambeem.com to get the free book.
So it’s called Creative Portraiture. I hope you like it and if you’ve got some comments on it, let me know. And this is free. You can share it with other people if you like and we hope that it’s ...
Lee: Helpful and useful.
William: Yeah.
Lee: It’s got lots of cool pictures in it as well. I like to have visual examples when I’m reading through something.
William: Why do you want to use exaggeration in photos?
Really, this is just a technique that you can use to kind of draw interest and attention either to the whole photo or to a specific subject in the photo. A lot of the things I do with exaggeration really are for specific subjects in the photo, but if you’re talking about the whole photo there are some specialty lenses, specialty filters and things that you can use.
Lee: Yes.
William: But you don’t have to necessarily buy that. You most likely already have the equipment that you need. A wide angle lens will help you with this quite a bit and your post processing software will help you.
Let’s get into how. This is the first one we are going to start with: It is a specialty lens, but a fisheye lens is really an exaggerated look.
Lee: It really is. And you get varying degrees of distortion in different fisheyes, so you want to have a look and look at example photos if you are seriously thinking about renting or buying one, to see what you want.
William: Renting is a good option for this because not everybody needs to have a fisheye all the time. I used to have one and I think it’s the same one you used. It was the Nikon 10.5 mm fisheye for the crop sensor cameras.
I loved that thing.
Lee: Oh, that was just the most amazing lens. I honestly do not think I’ve had so much fun with a lens, ever, as what I did with that one.
William: I got some wonderful shots with that. It was just fun. You could go out and do all sorts of things with it. I’ve also used a Nikon 16 mm lens and I’ve got an example of that I’ll put in the show notes.
It’s really going to distort your images, but it does it in a fun way.
Lee: Actually the 10.5 mm wasn’t quite as distorted as what you usually get with a fisheye. You get some that are more extreme.
William: Let’s kind of try to describe it a little bit. With a fisheye lens it’s almost like you’ve got a bowl around your subject.
Lee: Yes. Living in a fish bowl and watching everyone.
William: Yeah, I mean it’s kind of like looking at – I don’t know if it’s got quite 180 degree view – if you’re into architecture photography and you want those perfectly clean lines, you’re not going to get it with that.
Lee: No you’re not, but you can have some fun with it. Do you know when you were a kid – I don’t know if you ever did this – when your mom used to give you your soup spoon, we used to turn around the shiny silverware and look at ourselves and our distorted image in the back of the spoon. That’s pretty much what a fisheye is going to do.
William: The reason I like a fisheye for exaggeration is because whatever is in the center, your eye is going to go there because you’ve got all these distorted lines kind of curving around the edges. It’s just going to direct you into the center.
Lee: Yes.
William: It’s fun. You get really close to your subjects too.
Lee: Ultra wide angle lenses will do something similar – not to the same extreme – but if you’ve got a really wide angle lens it’s going to give you some kind of extreme distortion, at least.
William: Not quite the same as a fisheye, but it gets close. But that’s kind of really leading us into the next thing that we are going to get into. You can do this in ultra wide and it doesn’t even have to be an ultra wide; you can do this with a wide angle lens. It’s something I call “breaking the plane.”
When you are taking a photo of a subject you’ve got a certain distance between your camera and the subject and where the subject is, is kind of the plane that you’re focused on.
But if you have your subject or some foreground element closer to the lens, it becomes much larger. It becomes distorted. But it’s kind of like a comic way of showing something off.
I’ve got a photo that I’m going to put in the show notes. It’s a friend of mine. She is a New Yorker. We were at the top of the Empire State Building, but she is also into rubber ducks. This woman has a collection of rubber ducks that goes beyond the norm.
Lee: Significantly beyond the norm!
William: But for an environmental photo of her, that was kind of what really worked. She had a rubber duck that was kind of like the Statue of Liberty. It’s green, it’s got the little crown on top, we’re standing on top of the Empire State Building and she’s holding her hand out with the duck on top of it, closer to the lens.
It says everything you want to know about her. She lives in New York. She’s into rubber ducks. It’s both environmental and a big exaggerated.
You know, obviously her hand underneath it and the duck are going to be much larger, but it’s kind of an interesting way of telling a story.
Lee: Well it really tells you this is her, but this is a big deal to her.
William: Exactly. It’s something that it’s a matter of connection. She really, really likes her rubber ducks. She really loves New York. Putting her in that place and putting that duck up closer where it kind of takes over a bit of the frame was just a simple way of showing her connection to something that was important to her.
Lee: It really says this is who she is.
William: Yeah. And that’s exactly why we took that shot.
Alright, the last thing that we’re going to talk about with exaggeration happens in post processing. This is a bit of a – not a tricky thing – but it’s more of a selective thing.
Lee: Yes.
William: And that is using color and either enhancing it with saturation and vibrance, or maybe desaturating part of the photo and then having your main subject really popping out with color.
Lee: Yeah, we’re not talking about selective color!
William: No! This is not selective color. That’s horrible and bad and if you do that you should be punished.
Lee: Absolutely. Severely punished.
William: But this is something we do in our fireworks photos. Why don’t you give a description of how you handle the colors like the fireworks?
Lee: Well, I usually have a subject in my fireworks photos. I don’t like it to be just fireworks. It’s not always possible, depending where you are shooting them. I’ve got various photos that were taken at different places, but typically we shoot our fireworks at the Disney parks so you’ve usually always got an icon. You’ve got - at least at Magic Kingdom, for example, you’ve got the castle.
So what I would do was expose the castle, I would not enhance the colors on the castle; I would only enhance the colors on the fireworks. So it increased the saturation – and it’s one of the rare times that I touch the saturation slider – but I would do it selectively with the brush and increase it slightly. And then I would bump up the vibrance. Vibrance you can actually get away with a lot more.
William: You can crank it up a little.
Lee: I work in Lightroom. I just wanted to clarify, because other software might operate differently.
William: I don’t think it matters which tool you’re using. The concept really is that you’re amping up something you want to draw out attention. And we are not saying just turn up the slider for saturation. You will get horrible, garish colors if you do this to your entire photograph.
Lee: Yes.
William: It’s not just for fireworks, but if you can find a subject that you want to stand out in your photos and then selectively maybe amp up the colors with that, or draw back the colors of something else, it’s kind of an exaggeration and that’s what really kind of pulls people in. It’s like, wow! Look at the vibrant colors of [whatever your subject is that you’ve done].
Lee: Or you might want to desaturate your background slightly.
William: Yes. So those are some of the techniques that we are using for exaggeration. The whole idea of this is really you want to draw attention. You want to draw interest.
We’ve talked about things and you can do this with what was it? A radial filter we’ve talked about in the past; using light and vignettes and things like that. Those draw attention. But this is going beyond that. This is about exaggerating it to get attention,.
Lee: Yeah, rather than enhancing.
William: And that is our list for today for exaggeration. We hope you enjoyed this and found it useful. Give it a try and let us know what works for you.
Thank you once again for listening to the Photo Flunky Show. Again, Happy New Year! Happy 2017!
Show notes for this episode are going to be available at williambeem.com/episode58. And there is a transcript of the show there for free, which includes the links that you want to subscribe to this show, because I know you want to subscribe to the show.
Lee: Of course you do! We’re going to be famous. Stick with us!
William: Exactly! And of course we have links at photoflunky.com on the player so you can subscribe to the show.
And lastly, don’t forget to claim your free copy of Creative Portraiture at willliambeem.com/freebook.
Thanks so much. We’ll see you next week.