Affiliate Disclosure: We earn a commission if you purchase through one of our links at no additional cost to you.
Help Your Travel Photography With Five Common and Lightweight Items
Welcome to episode 23 of The Photo Flunky Show.
On this episode, Lee and I have a few travel photography tips. Sometimes the difference between getting “a shot” and “the shot” can be how well prepared you are to deal with adverse conditions or see things that others miss.
We’ll tell you about some very simple, common and lightweight items you can carry while working on your travel photography. There’s a good chance you already have some of them, and these items are easy and (mostly) inexpensive.
Macphun Coupon Code
I mentioned at the start of the show that you can save 10% (or $10) on Macphun software using my coupon code. This is my affiliate code, which means that I make a small commission if you purchase from me, but it also means that you save money.
For Macphun products like Luminar and Aurora HDR, you save $10.
For other Macphun products, like the Creative Kit, you save 10%.
Just visit: https://williambeem.com/macphun
When you check out, use my Macphun coupon code: BEEM
ON1 Coupon Code
Save money when you buy ON1 Photo RAW. This is my affiliate code, which means that I make a small commission if you purchase from me, but it also means that you save money.
Just visit https://williambeem.com/on1 and enter the code WBEEM16 to save 20%when you check out.
Subscribe to The Photo Flunky Show
Thank you for listening to The Photo Flunky Show. Make sure you get every episode by subscribing.
iTunes – https://williambeem.com/itunes
Stitcher – https://williambeem.com/stitcher
Google Play – https://williambeem.com/googleplay
Blubrry – https://williambeem.com/blubrry
Social Media Links
We love seeing your photos and keeping in touch with you on social media. Here’s where you can find us.
Transcript
THE PHOTO FLUNKY SHOW: Episode 23
Hi, welcome to the Photo Flunky Show, Episode number twenty-three.
Today’s topic is about five everyday items to help you with your travel photography.
William: Hey, welcome back to the show! Thanks for joining us. My name is William Beem.
Lee: Hi, I’m Lee.
William: You can find a free transcript of this show and the show notes are going to be at williambeem.com/episode23. Also, if you want, there are links there to subscribe to the show on iTunes, Google Play Music and Stitcher Radio. And of course if you’re going to be going to iTunes it wouldn’t hurt to go ahead and give us a rating and review. We’d love it and we’d like to see those.
Also, I mentioned last week and I’m going to bring it up again this week. We’ve got a new discount code from On1 and it is for twenty percent off. You can go to williambeem.com/on1 and use the coupon code WBEEM16. It’s worth twenty percent off and that doesn’t suck so we get a little bit of something for that from On1, you save twenty percent; seems like a good deal all the way round.
Today we’re going to be talking about travel photography and these are small little hacks. They are easy things to carry with you, but they can be very useful.
What happens is you can be walking around doing your travel photography and you may just have a camera in your hand, but usually these things are some things that probably are going to work best if you’ve got a small bag with you. They don’t take up too much space, but they might be a little bit more than you want to carry if you’ve just got your camera on your shoulder.
Let’s start off with number one, and that is just a clear plastic bag. So Lee, you’ve tried this. Go ahead and tell us.
Lee: I have because I’ve taken photos in many wet and rainy conditions and also sometimes you get unexpected showers and I’ve just learned through experience of doing silly things or not being prepared , to have something with me.
Now I could not afford the proper waterproof housing for my DSLR so a clear plastic bag works well. You also get something called and Optec rainsleeve, which is just a cheap glorified plastic bag with a drawstring. But they are not terribly durable and honestly, if you can get your hands on a clear plastic bag it’s just something you can fold up, crumple it up and you can throw it away when you’re done with it. Just keep it with you to slip the camera into it.
William: The nice thing about the plastic bag is you fold it up very small and it can fit in just one of those little side pockets that you’ve got in your camera bag. You know, one of those things that is clear plastic, you can see through it. It folds flat in there. There are, as Lee mentioned, something from Optec. Also ThinkTank has a really good heavy duty rainsleeve, but that’s going to take up a good chunk of space.
Lee: That’s the other problem. And drying it out as well, when it gets wet, because you don’t want to put something wet back into your bag. With a clear plastic bag, if you know that you’re safe and you can go and get another one when you get back to your car or when you get back to your hotel or your house, you can actually just ditch it once you’re done with it.
William: Yeah, you find a nice trash bag, use it when you need to; it’s kind of a just-in-case item. You may not need it. It might be a nice clear day and you don’t have to worry about it. It’s not taking up too much space.
But if the weather looks a little bit iffy and you’ve got it in your bag, it’s kind of insurance or protection in case a little bit of rain comes down and you still want to be out there getting your shots. So just a little protection for your camera, but it doesn’t take too much space.
Lee: It’s also great if you want to cover your camera bag. If you hit a sudden downpour, assuming that your gear is packed away and you haven’t ripped any holes in it yet, I have also put it over the top of my camera bag which is a backpack, and just carried it like a bundle in my arms so that the water could run off.
Sometimes when you get really heavy downpours, even the weather proof things are not waterproof; they’re kind of showerproof and they will take some water for a while. Like my camera bag I know will take a bit of water, but after a while it is going to start getting saturated and especially in humid conditions, that makes it damp inside and you don’t want that.
William: And that can happen with almost any bag, because even if the bag itself is water resistant enough, the zipper linings are still going to let water come through.
Lee: Yeah!
William: So you put a bag over the bag. It’s small, folds flat, it’s cheap and easy to use and easy to discard when you’re done with it. So it’s just a simple little hack to take with you.
The next item on our list, surprisingly, is just a black hat. And we are talking about a ball cap, but it could be a fedora or whatever kind of hat you like. And the reason for it is pretty simple. If you’re doing long exposures there are times when you want to kind of take a break from what’s going on; you don’t necessarily want to capture it on your sensor, but you don’t necessarily want to stop the exposure.
A good example of this is fireworks photography.
Lee: Yes, you get to a point where you know there’s going to be a sudden bright burst of light and you can actually cover the lens while the long exposure is going on without stopping it and it just stops that little area from getting hot spots in it.
William: And this is kind of a trick that a lot of people use with fireworks photography. There may be a burst going here and a burst going there, but you see the final photo that just has bursts all over the place. Well, that’s what they’re doing. They’re doing a long exposure. They are not necessarily trying to time each burst. They are just simply putting something over the top of their lens.
A black hat is an easy thing to use. Particularly if it’s a ball cap, you just hold it up by the bill, take it off to expose when the fireworks are right the way you want them and then put it back on. So your shutter is still open. Obviously you’re going to be shooting in bulb mode for this, but it’s just a simple little trick to let you get a lot of fireworks up in the sky.
And you could do it with any other kind of long exposure as well. there may be something that’s going by that you just don’t want inside of your exposure; or you don’t want too much light collecting between events that you do want in your exposure. So black hat: easy! Put it on your head and then just put it on your camera when you need it.
Lee: And also the baseball caps are great because they are pretty compact. So if, like me, you don’t look good in a hat, you can stick it in your bag.
William: And you know if you just really don’t like wearing it on your head, wad it up and stick it in your back pocket or something like that. Walk around with it. It might work more in the country places than in the city!
And the reason we say black is that obviously you want something that’s going to be dark and neutral. You don’t want to put something out there that’s going to be getting light coming through it or light coming through that has a color cast.
So for example if you had a red hat and you’re putting that over your lens and there’s something light that’s still coming through that hat, then that red is going to put a color cast on your photo. So get a black hat. Just make sure you’ve got something neutral that it’s not going to be messing up your photo.
Alright, next item on the list is kind of a small white sheet or white cloth. And there’s really two things you can do with this.
One, I’ve shown examples of this on the blog before. It is an instant diffuser. If you’re out in harsh sun, you want to take a shot of somebody, you may need a little bit of help like that, but if you can get someone to hold up the white cloth and get it close to the person’s face, it is a wonderful diffuser in the sunlight.
Lee: Yeah, I’ve done this even inside sometimes, to bounce flash. I know that I once was sitting in a coffee shop and I was taking photos of the cake and coffee and I wanted to bounce or diffuse the flash and I picked up one of the restaurant’s white paper napkins. The manager did actually come over and ask me to stop flashing. I thought he was just a spoil sport who needed to get a life! But anyways. So even the white napkins and things can work. It wasn’t ideal. A white cloth probably would have been better.
William: Exactly and again, it’s something small that can fit in the pocket of your bag. You probably don’t want to be carrying this around if you just have your camera on your shoulder, but if you’ve got a spot in your bag you can fold it up very small. It doesn’t have to be really large. It could be the size of a pillowcase; or larger if you’ve got room for it. But something the size of a pillowcase will do you very well.
If you do want to bounce it, that’s actually a decent size bounce for either a portrait or for food photography. Kind of like Lee was talking about. So you can get your flash, put it on a little footstand, turn it away from your food and hold up the white cloth behind it and then you’ll get some nice light coming back on your food. I mean most restaurants, unless you’ve got a window seat or something like that, you really don’t have good light in a lot of restaurants.
Lee: They are terrible. They can be very orange and some of them even have kind of bluish or purple or green toned lights. It just depends on the setting. It doesn’t look good.
William: Exactly. And the nice thing about the white sheet is it’s going to reflect just what you send at it. So if you’re sending bright white light at it, you’re going to get that back. If you want to warm it up you can put a gel on your flash and it will reflect that back, but it gives you a larger light source so you don’t have this harsh kind of light from a flash on your food.
I’ve also tried what Lee was talking about. If you shoot through it. That doesn’t work. That just doesn’t work. You want to bounce away from your food into the white sheet and back on your food and that will give you actually a nice little look. If the manager comes by and asks you to stop, well then that’s OK!
Lee: He didn’t ask me to stop taking photos. He asked me to stop flashing! He was probably worried that I was going to get all the tips!
William: Well, next time tell the manager to bring us out some prettier food and we’ll send you some nice photographs of it.
Lee: Exactly!
William: Work a deal out with him.
The thing about the black hat and the white sheet is like I said, with the white sheet you can use it to diffuse light, but the black hat is not just for covering your lens when you’re doing long exposure photography, but sometimes you might just need something to use as a flag. Just something to block a little bit of light that’s coming in.
Every once in a while I’ve been in a situation where something looks nice except for there is just one hotspot of light coming in on your subject.
You want something to be able to block that out. Just hold your hat up and make sure that your subject is nice and evenly lit or has the light where you want it and there are no hotspots coming in.
Lee: Or glare coming in on the lens as well. Sometimes your lens hood just doesn’t quite catch it and you need maybe an extra inch or half inch and you can just hold it slightly above the lens.
William: So that’s really what we’re looking at with the hat and the sheet. It’s like we’re looking at things that can block light, we’re looking at things that can diffuse light and we’re looking at things that can bounce light. Those two items are very small, easy to carry around with you in a bag (or your pocket if you just want to stuff the hat back there). It’s easy to carry but it’s so useful.
Another item that we’ve got on the list is a beanbag.
Lee: Yeah! Beanbags. Not just for kids!
William: Not just for kids anymore.
Lee: No!
William: And we’re talking about something just a little bit larger than the palm of your hand, but Lee, go ahead. You’ve used this a few times.
Lee: I have. It’s not actually mine. I’ve gone out with my brother, who loves his beanbag and it’s really great if you want to get your camera down onto low level or ground level. Sometimes a tripod will go so low and that’s it, unless you’ve got something that’s specifically designed to collapse all the way to the ground. And you want to level your camera out because anyone who’s used a big camera knows that you set that thing down on any surface and it tends to tip forward. It’s not actually perfectly level and you’ve got the weight of the lens on the front, which pulls it.
So it kind of helps you when you can put it under the lens if necessary, or even under the base of the camera if you want to angle it differently. And you can just kind of squish the beans around to get it to the position where you want it.
William: And the nice part about this is you don’t have to walk around carrying a tripod all the time. You can be in a city someplace and just put this on top of a trashcan, level your camera out and take a shot that way so you’ve got stability and you’ve got a little bit of shape to it. And as Lee said, it could be under the base of the camera body itself or under the lens. It depends on what you need and if you get tired of taking photos you can go ahead and play with the beanbag.
Lee: Or if you take two you can take a friend and then if you have to sit on a hard surface or a cold surface (or hot!) you can grab the two and sit on them.
William: That works. And there are actually photography vendors that make beanbags with camera mounts on them. I’m not really suggesting that you go and get something like that. I’m just talking about a regular ordinary beanbag.
Lee: Yeah, they are inexpensive and you can make one if you’re into that kind of thing. I guess you could take a sock or something and stuff some beans in and tie it up. I don’t know. There are things you can do in a pinch without having to order something. Especially if it’s not something you are likely to use regularly. I don’t believe in spending money on something I’m going to use once.
William: And that’s kind of like the idea of this whole list. It’s just things that you can easily have with you, without spending a whole lot of money. Except for the last item. It’s going to cost you quite a bit, but the chances are you may already have one. And that is a smartphone with a camera on it.
Lee: Yeah, you have t have a smartphone.
William: Alright, this one is Lee’s little creation, so I’m going to let her talk about it. You’ve got your camera already. Why do you need a camera on your smartphone?
Lee: The funny thing is, until a few years ago, I never ever took photos with my phone. Ever! Unless I needed something because I couldn’t write it down, just as a reminder. I just couldn’t understand why anyone would use a phone to take photos when a camera would do a better job.
Having said that, I kind of started getting into my iPhone photography on the go, just because it’s convenient for little snapshots. My brain says phone is a snapshot and camera is a photo. But there have been times when I’ve grabbed the phone because I’ve seen something and thought it would make a great snapshot, taken the snapshot and then looked and thought, you know what? There’s potential in here for a photo; then setting up and pulling the camera out the bag or switching it on and using that.
Sometimes you need to see what you’ve captured before you see what you are capable of capturing, if that makes sense.
William: It does. Particularly if you’re walking along and you’ve got your camera in your bag. It’s not ready to go. You can use your smartphone just for working at your composition. You see something and alright, maybe you’ve got a snapshot, but if you look at it and say, you know what? It would be nice if I could change the focus on this, or it would be nice if I could change the depth of field or something along those lines.
That’s the nice thing about it. You don’t have to go, stop, pull your camera out, assemble everything and then do it. Take a quick snapshot with your phone. If you like what you’ve got on your phone, great! That’s a snapshot. And if you think I can do a little bit more with this, then you’ve had a compositional aid without having to stop and take your camera out to find out.
Lee: That’s exactly how it is and I think that day that I went out to Epcot to do the photo assignment there were a few shots where I wasn’t specifically trying to get a photo with the camera and I looked and thought, that would make a nice snapshot. I had the camera over my shoulder so it was on me and ready to go, but I pulled out the iPhone and took a shot with that and then I looked at it and thought, you know what? This is actually going to work even better as a photo and I ended up taking it with the camera as well.
William: And there you go! Those are our five tools for travel photography. Hope you’ve learned a little bit from this and maybe you’ve got some ideas of your own. If you do, leave us a comment at williambeem.com/episode23. We’ll be happy to see what you do and share it with everybody else.
Thank you for listening to the Photo Flunky Show. Again, show notes are available at williambeem.com/episode23 and of course we appreciate your comments there. You can find a free transcript of the show at the same link. And of course we’ve got links there to subscribe on iTunes, Google Play Music and Stitcher Radio.
You can also see us at photoflunky.com and all the other shows that we’ve got.
Thanks very much. We appreciate your time here and we’ll see you again next week.
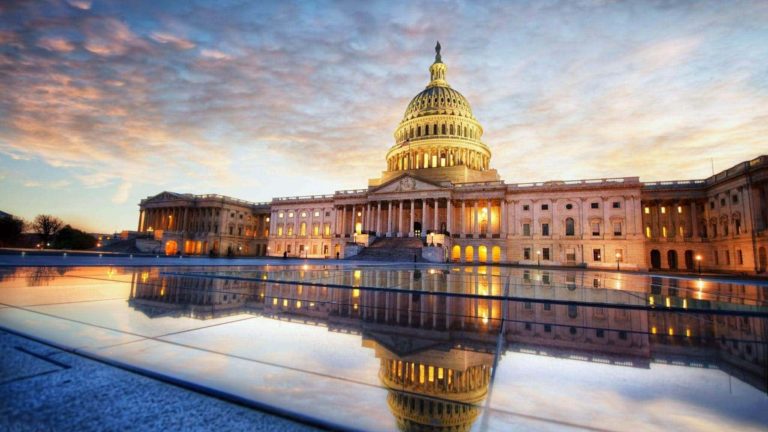
Want to learn more about Travel Photography? Click below to check out more Travel Photography articles.
Travel Photography Articles



A small flashlight with a red filter or red led is great for when it gets dark and you’re needing to figure out what camera settings are. The red light is easier on the eyes in the dark. Almost a necessity for Fireworks shots.