Affiliate Disclosure: We earn a commission if you purchase through one of our links at no additional cost to you.
Everyone wants to make their photos pop. You can find a ton of tutorials showing how to manipulate sliders in Lightroom or use plugins, but there is a simple tool that I don’t see mentioned very often.
To know how to improve color in Lightroom, you need to start with your Camera Calibration settings.
Camera Calibration Basics
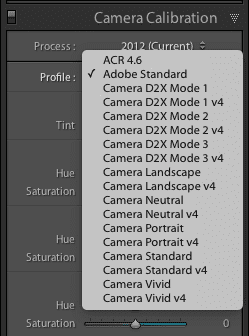
Camera Calibration is all the way at the bottom of the Develop module, but I think it should be your first stop when processing your photos in Lightroom. It sets the baseline for the color in your photos. Everything you do will build upon these settings.
Your menu will look different because it’s based upon the type of camera used for the selected photo. However, you should expect to see at least these few selections:
These selections are there to mimic the in-camera settings for JPEG photos. Have you ever wondered why the photos look so great on the back of your camera and then look rather flat when you load them in Lightroom? the difference is the Camera Profile.
You may have a Vivid setting on your camera. Those color corrections and sharpening get baked into the JPEG that you see on the camera’s LCD monitor. The RAW file you see in Lightroom typically uses Adobe Standard as a display profile. This is your starting point when you work in Lightroom, and you can change it to improve color in Lightroom.
Camera Calibration Profiles
It’s interesting to select a photo and change these profile settings. It completely messes with your perception of color accuracy. Here are a few examples from the same photo.
Adobe Standard
Camera Landscape
Camera Neutral
Camera Portrait
Camera Standard
Camera Vivid
In these examples, you can see changes to the man’s skin tone, his blue pants shift color, the brightness level changes and so does the contrast. All without touching any of the sliders in the Develop module.
If your photos never seem to pop as much as other photographers, maybe it’s because you aren’t starting from the same level field. The Camera Calibration settings can give your images a boost before you start making other adjustments.
How To Create Your Own Camera Calibration Options
Whether you want color accuracy or creativity, you need to have a standard place to start. When you look at your monitor, do you really know if red is truly red? Most of us have walked into an electronics store to find the same image on multiple screens, yet each one looked very different.
That’s because those monitors or televisions aren’t calibrated. They each think they’re right, but our eyes know better. If you want to know how to improve color in Lightroom, you have to calibrate your monitor.
Colorimeters vs Spectrophotometers
I know, they’re both a mouthful. There are two basic types of color calibration tools you’ll find when you want to calibrate your monitor. I’m not even going to pretend to be a color expert, so I’ll point you to this article on ColorWiki about Profiling Devices for Monitors.
There are some little gems in that article. Colorimeters work using filters to measure color. The good news is that they’re inexpensive. The bad news is that the filters may decay over time, which can affect the results of your color calibration. Also, they may not work with wide-gamut displays unless specifically developed for a brand of display.
Spectrophotometers do a better job of reading color and remain accurate because there are no filters to decay. On the other hand, they’re much more expensive and can have difficulty reading shadow information.
One other thing I like about my spectrophotometer is its ability to handle color profiles for printers, projectors and different types of displays.
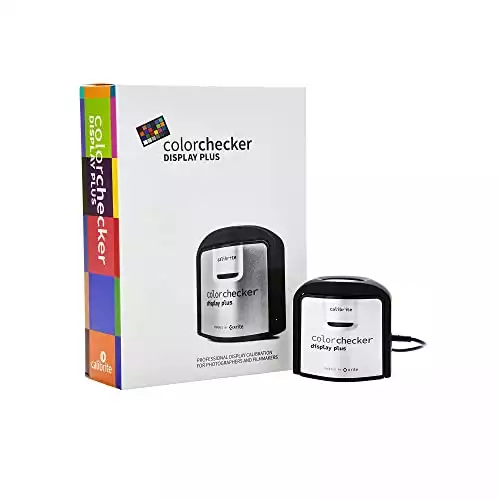
I used an inexpensive Huey colorimeter for a long time (though not as often as I should), but its accuracy has really declined. The difference is quite noticeable when comparing its results to the Calibite ColorChecker Display Plus I use. Now I can see the same color calibration on my iMac and my MacBook Pro, and I don’t have to worry about degradation.
Having an accurate display is critical. The Calibrite ColorChecker Display Plus is a direct replacement for the X-Rite i1Display Pro Plus, and offers technology for better blacks on OLED displays or any display that can achieve close to zero black point.
HDR-supported displays are also no problem, as this unit is designed to minimize clipping in dark areas while allowing you to achieve excellent blacks. It's USB-C compatible with the included USB-C to USB-A adapter, so you'll be able to use it with the latest computers and devices.
Creating Color Calibration Profiles
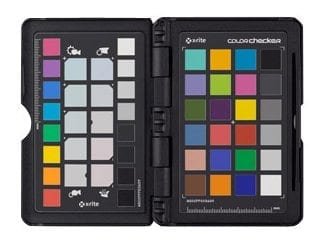
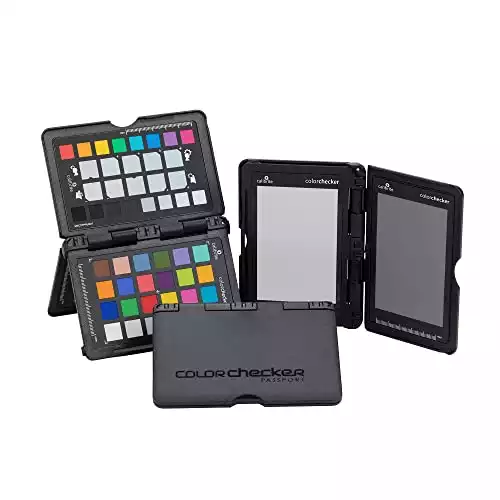
Calibrating your monitor and printer is the first step to ensuring color consistency on your devices. However, you can take it another step with the Calibrite Color Checker Passport.
By using a set of known colors, you can create custom camera calibration profiles in Lightroom with this handy device. Take a photo of your subject with this at the beginning of your shoot. Do that every time the light changes.
Once you get back into Lightroom, you can use a plugin that analyzes the colors on the Color Checker Passport to create a custom calibration profile. Variations in light can change how color appears.
The Calibrite ColorChecker Passport Photo 2 is the perfect tool for avoiding frustration with poor colors in your photos.
The Portable Protective Case accommodates multiple positions for easy use with four specialized targets. You can create custom camera profiles based on your individual camera/lens/lighting combinations for DNG and ICC workflows. You can also create a custom in-camera white balance for a consistent white point across a set of images without needing to correct each image later.
The enhancement patches allow you to check and evaluate shadow details and highlight clipping, and the lanyard ensures that your Passport is always where you need it.
This little tool gives you a way to measure and compensate for the subtle shifts in light. Use them for each of your light modifiers or out on a landscape shoot.
The reason for using this tool may be due to concerns about color accuracy. If you’re shooting a photo for a company with a specific color in its logo, your photos better come out with the right color of that logo.
On the other hand, you may like to tweak your colors for artistic reasons. That’s fine, but there’s still a good reason to use a common starting place. Frank Doorhof explains this well in his book “Mastering the Model Shoot: Everything a Photographer Needs to Know Before, During, and After the Shoot.”
One of the examples he gives is using a plugin or preset that makes specific changes to color settings to achieve a look. If you want those tools or presets to work consistently, particularly if you use different cameras or shoot in different lighting conditions, then you need a baseline for your color.
The X-Rite Color Checker Passport is how you get that consistency. It creates a profile that appears in Lightroom under the Camera Calibration settings. It’s simple and effective to get consistent color in your images.
How To Improve Color In Lightroom
Lightroom has great tools to enhance your colors. You can improve their reach by using the Camera Calibration settings to get a consistent color baseline. Of course, you want to be sure those colors are accurate. Find the color calibration tool that’s right for your display and printer.
You can move beyond a grey card for white balance. That isn’t setting the profile for you in Lightroom. Using a Calibrite Color Checker Passport lets you be sure of your color consistency from one shoot to the next, even if you change cameras or light sources.
Learn more about getting the best result with my article on Lightroom Classic Workflow.
Want to learn more about Photography software? Click below to check out articles about Adobe, ON1, Skylum, and more.
Photography Software Articles

