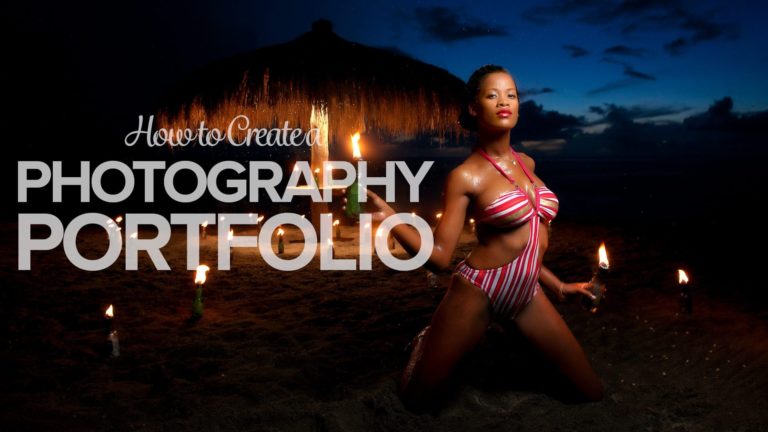
Affiliate Disclosure: We earn a commission if you purchase through one of our links at no additional cost to you.
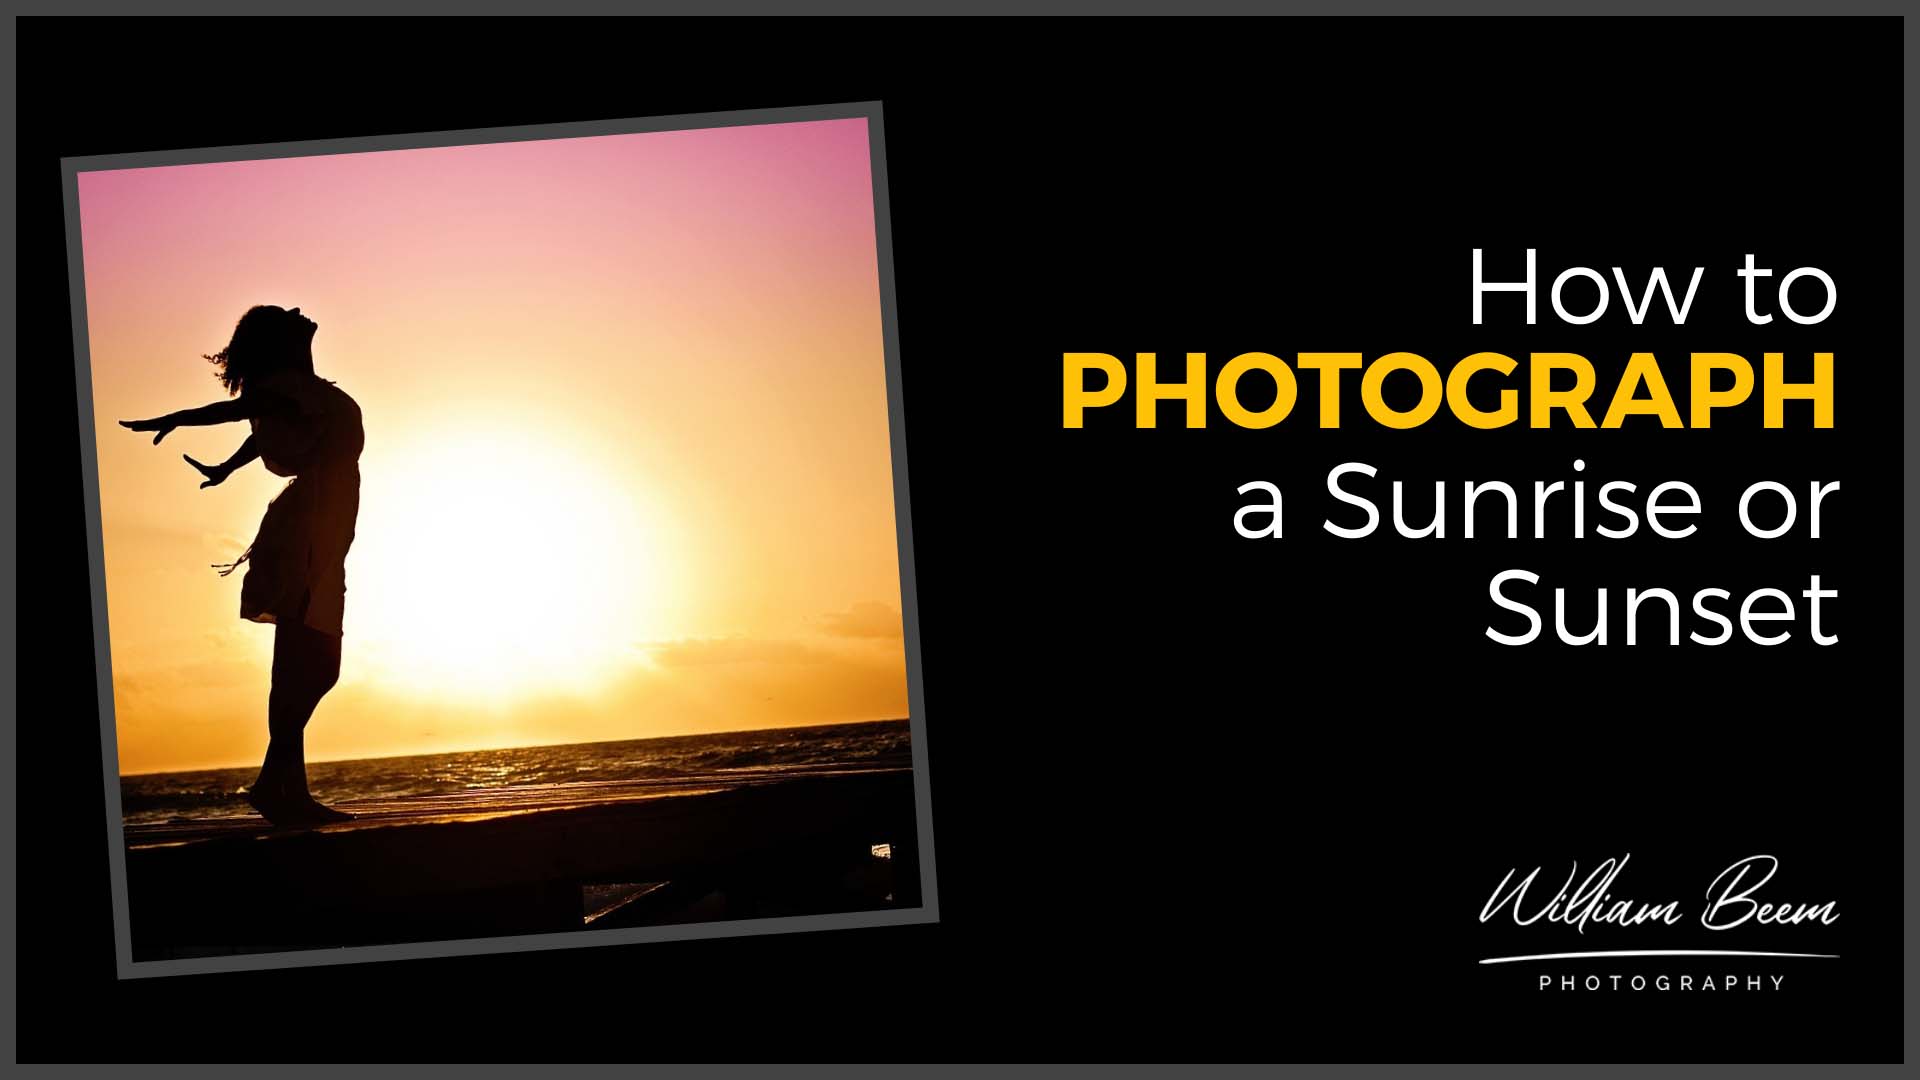
The world is a beautiful place, but we often don’t have the time to enjoy it. A sunrise or sunset may only last for a few hours, and there are so many other things going on in our lives that it’s hard to stop and take the time to appreciate them.
In this episode, we talk about the essential things you need to cover to photograph a sunrise or sunset.
Why Photograph a Sunrise or Sunset?
Sunrise and Sunset are often the most beautiful time of the day. We get soft, directional light and the colors from the sun hitting the atmosphere are different than any other time of the day.
However, keep one important thing in mind.
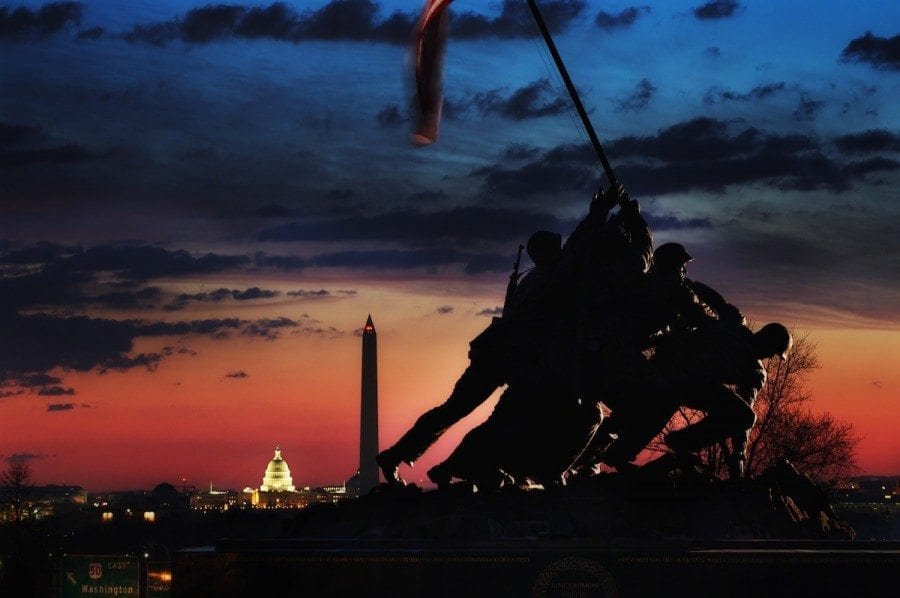
Don’t use the sunrise or sunset as your subject.
That doesn’t mean the sun can’t be in your photograph. It’s just not an interesting subject unto itself. Make sure you have a person, place, or thing as your subject. Let it bask in the beautiful color and light from the sunrise and sunset to ensure you have an interesting photograph.
1: Get a camera with manual settings
No rule says you can’t use an iPhone to get a snapshot of a sunrise or sunset. However, you will get your best results with manual settings to control your aperture, shutter speed, and ISO.
That lets you remain in charge of your depth of field with the aperture. You may want a long exposure with a slow shutter speed. Also, you don’t want auto-settings giving you a high ISO full of noise or grain.
Manual exposure is the best way to go.
2: Use a tripod to avoid camera shake and blurry photos
Since you’re bound to have low light when photographing a sunrise or sunset, you should expect a slow shutter speed during your time getting the shots. A tripod provides a stable platform to avoid blurry photos that may result from camera shake if you handhold your camera.
Another reason is that you’re going to take multiple photos and you may want to align them later in Photoshop or some other post-processing tool. That’s much easier to do on a tripod. You get a consistent composition from one shot to the next.
You may also want to bring a shutter cable to capture your photos without adding vibration when you touch the camera shutter.
3: Find an interesting subject in your photos, such as trees or a mountain range, or overwater
Remember when you photograph a sunrise or sunset that the sun isn’t your subject. You’re looking for the beauty of the color and light during those times of day to flatter your subject.
Use that light to highlight your subject, and that’s going to be a person, place or thing that your audience can find a reason to enjoy and feel something.
It may be a travel destination at the right time of day, or maybe you want to show the lines on a beautiful sports car. Make sure you have a subject for your photo.
4: Adjust the white balance on your camera so that it matches the color of available light
One of the creative things you can do is change the color of the sunrise or sunset using your white balance. You’ll need to ensure your white balance matches the light to capture the light as it is.
You can use a Daylight white balance or set a custom white balance using a grey card. Lee likes to just leave the camera on Auto white balance, which seems to work fine for her.
Remember that the color cast covers your entire photo if you opt to change your white balance to another setting for a creative result. You may need to use a flash with a gel to ensure your subject isn’t covered with that light.
5: Experiment with different shutter speeds
There are creative reasons to experiment with shutter speeds. If you want to convey a sense of movement in water or clouds, a slow shutter speed allows them to get blurry and smooth.
Likewise, you may want a fast shutter speed to capture a silhouette against the sunlight to show the form of a person or thing. With manual settings, you have more creative options.
6: Try using filters to match what you are trying to capture
Lens filters and help you change the nature of your photo. A neutral density filter lets you extend the shutter speed while avoiding a color cast on your photos. If you want a shallow depth of field, opening the aperture lets more light hit the sensor. That’s where the ND filter can help you out.
There are different landscape filters, like graduated ND filters or Sky filters that put more blue in the sky. These filters may help you enhance the colors and light available when photographing a sunrise or sunset.
Don’t Forget Your Post-Processing for Sunrise and Sunset Photos
No photograph is complete without post-processing. I recommend using Luminar Neo to get great results with minimal effort.
Luminar Neo is an AI-powered photo editor that turns any portrait into a stunning masterpiece. With FaceAI and SkinAI, you can easily retouch portraits, removing blemishes and highlighting facial features. And with the Portrait BokehAI tool, you can create a beautiful bokeh effect in any light. Plus, the Background Removal tool makes it easy to remove backgrounds without spending hours masking.
Skylum now offers Luminar Neo as either a stand-alone tool or part of a membership with extensions to offer more valuable tools like:
- HDR Merge
- Noiseless AI
- Upscale AI
- AI Background Removal
- GenErase
- GenExpand
- GenRemove
Additional extensions are coming.
Luminar Neo's exposure correction and color vibrancy features for all your travel memories will keep your photos looking natural and beautiful.
Finally, Luminar Neo's SkinAI and FaceAI provide the perfect finishing touches for your portraits, ensuring stunning results every time.
You can get everything with different pricing plans. Monthly, Annual or even Lifetime plans are available.
SAVE: You can save $10 using my coupon code - Beem10off
- Promo Code: Beem10off
- Easy to use
- Get great results fast
- Plenty of post-processing features
- Professional extensions are available
- May be slow on older computers
- File management is rudimentary
If you don’t have Luminar Neo yet, you can save $10 using my coupon code – BEEM, when you buy it.
Have fun and enjoy when you photograph a sunrise!
Time Stamps
I think almost every photographer wants to shoot a sunrise or sunset at some point, either when they're learning photography or maybe after a while they see a scene and they think this will look better at sunrise or sunset. And that's what we're going to talk about today on I Like Your Picture. I'm William Beem. Welcome to I Like Your Picture. The show that helps you improve your photography with visual storytelling.
What is visual storytelling? It's the method of approaching your photography with a knowledge of who you're trying to serve with your photos and what emotion you want to make them feel. We encourage you to concentrate on your subject, light and background to create a photo your audience loves. I'm glad you found us. Hi, my name is William Beem, and my name is Lee Beem.
And we want to talk about sunrise or sunset photos today. Basically what we'll want you to understand is, you know, what is the right gear that you want to bring along? What kind of camera settings or adjustments do you want to consider when you're going out for this kind of shot and how you may be able to get creative with your results. Lee gets the first question all the time.
Why do people like sunrise or sunset photos versus something at other parts of the day or night? I think it's something about the color and the light. Even people who don't think about or understand how light works are unable to deny that there is something pretty about the soft light and the colors that come through. It just, is this the most beautiful time of the day? For me,
it is. And I think that's a free personal thing. I always used to be more of a sunset person lately. I'm more of a sunrise person. That's simply because I get to see the sunrise most, every morning, which had didn't used to. I almost never get to see the sunset. And that's just because of our location. What happens is Lee gets up early in the morning before the sun comes up and she goes off and runs away from the house.
And as she's out running, the sun comes up and she'll come back, apparently because there's no place to go after she's done running and all her cool stuff is here. So she comes back and she tells me, oh, there was a beautiful sunrise this morning, the clouds were pink or the clouds were whatever they were. And she'll describe it to me.
And meanwhile, I was asleep. I missed the sunrise and I have been up to take sunrise photos before, but I got to tell you, I would much prefer to take sunset because it fits within my sleep cycle. Look, That's what I used to prefer as well. And I think it also depends where you are. I think some areas are,
they typically have better skies or better colors or better lights in the morning and other places are just better in the evening. And I think that it depends what you're looking for because the colors are different for sunrise and sunset. And they are different. They're similar, but there, there are differences. So why don't we go ahead and get into our main points?
So the first one is get a camera with manual settings. All right. So you've got your iPhone. You enjoy taking photos with that, but you've also got your DSLR with manual settings. Which one do you prefer for sunrise or sunset? If it's anything beyond a snapshot personal use, it's going to be the DSLR. And why is that? Because as you said,
I can control the settings. And I think this is, it's not that it's complicated, but it gives me the ability to play. You know, if something doesn't look right, I can adjust things and I have more options for adjustment and tweaking on the DSLR than I do on the phone, which is kind of limited because it's almost auto. It is auto on the phone.
And like you said, you can do a snapshot and you can say, wow, this was a beautiful sunrise or sunset. The nice part about using manual settings is you can control the shutter speed and the aperture and the ISO. So you may end up with something that needs a longer shutter speed to get the photo that you want. And that's really where we go to our next one,
get a tripod because you need something to hold that camera still. If you're going to go for a longer shutter speed. One of the examples that comes to mind is if you have something flowing, whether it be clouds or water, and you want to get that nice little smooth cotton candy kind of look, then you're going to need a longer shutter speed.
Can I throw in something else that you might want to consider, especially if it's flowing water or clouds or something? To get that shutter speed slow enough. Cause I prefer to underexpose sunrise and sunset photos and having a neutral density filter is actually very helpful. It really is. And we're going to talk about filters down further on, but one of the things that I like about having the tripod and having the manual settings,
I want to change my aperture up because I may not want everything in focus all throughout the image. When you're doing a shot with your iPhone or Android phone, in the past, it's been very difficult to get that shallow depth of field. Now they've got these little computational photography things, you know, where you can add in the bokeh later on. And if you use a program like Luminar AI,
it's got this new portrait Bokeh thing. So if there's a person there, you can add bokeh and later on, but there's something about getting the depth of field right in camera. I think it just makes it easier to post-process because sunrise and sunset photos, it doesn't matter how smart your camera is and how smart you are. You have to do post-processing otherwise it just never really catches that.
It's one of those things where when people haven't done post-processing or they haven't done enough of it, you'll always hear, well, I guess you had to be there. Yeah. And that's one of the things that really can be annoying. Now, number three, on our list is find an interesting subject in your photo. It could be trees, mountain range, over water could be,
people, could be a building, whatever it is. But the real thing here is the sunrise or sunset is not the subject. No, it's beautiful background. It's beautiful light. It's beautiful background. It's beautiful colors. But if you just go off and take a picture of the sun setting, chances are, it's not going to be that interesting. No. It's really not. Find a bird or something.
Yeah. You're getting this beautiful light. You're getting direction of light coming in sideways rather than, you know, from top-down. So you're getting interesting shadows. The light is soft, maybe. Those are all complementary things, but they're not your subject. So the decision of whether you get a sunrise or sunset may depend upon what your subject is and where it's located and maybe the sunrise or sunset depends on the time,
you know where you are. So for example, I live in Florida, we have an east coast and a west coast. Well, if I go do sunset photography over on the east coast, like Daytona Beach or Cocoa, I don't get beautiful light on the water side. That's all behind on the land. I've got to drive over to Tampa or Clearwater or someplace like that,
which is a much longer drive for us. And it's really one of those things like, all right, do I want to drive an hour before sunrise to go to the Atlantic coast? Or do I want to fight through traffic and drive two to three hours to go to the Gulf coast, which Is why we don't have any, right? This Is why we don't take pictures at the ocean for...
We love sunrise and sunset, but it depends on where's your subject. What is it facing and where's the direction of light that you want? So finding that interesting subject is also going to help you determine is this going to be a sunrise photo or a sunset photo? And maybe it's even something as simple as you want people in the photo, or you don't want people in the photo.
Sunrise. There's really not that many people around. Very true. That's why I like early mornings. And sunset. People are crawling all over the place. They're like ants. Photo bombers galore. All right. Number four, adjust the white balance on your camera so it matches the color of light you're shooting in. And that's either sunrise or sunset Lee, do you do much adjustment with your white balance.
The reason I bring this up is sometimes you can play tricks with flash and filters on your flash. So in other words, you can change the background of the sky to make it a deeper blue or deeper orange or golden, and then have your person or your subject look, normal skin tone by putting a gel on your flash to counterbalance what you've done with your white balance.
So it's a bit more of an advanced technique, but it can have some very interesting results. That's on the flash. It is, but it's still sunrise or sunset photos. Yeah, no, I'm just saying you were talking about making adjustments and your camera. The reason that I never touch like my white balance ever is because once I did that to get creative nightlights and everything,
it looked pretty cool with the bluish purple hue and the next day we'd paid for a hot air balloon ride. And I forgot that hadn't changed and I had tons of gorgeous photos, but there were totally wreck and I could not fix it because the other thing that I'd done was I bumped the thing from RAW to JPEG. And there was just nothing I could do. After that,
I decided auto works fine and I have never touched it since I think that was 2011. And that's what works for you. But I think, look, if you have time, like if you, if you're not got to make sure you get the shot, get the shot, but if you've got a place where you can go for sunrise or sunset and you can experiment along the way,
I would suggest play with the white balance, see what you get. That way you know, the next time that you want to go somewhere and do something, what your camera will do, if you've made those adjustments. There's nothing wrong with never adjusting your white balance to play with the color. But it is one of those kinds of creative things that you could try.
Right? Number five, we said experiment with different shutter speeds. You know, do you want a faster shutter for action shots, slower shutter speed for scenery shots. And I think this kind of goes back to what we were talking about. Whether you need a tripod or not? I would always bring a tripod on a sunrise or sunset because you're going to start off on a sunrise before the light comes up,
you're going to have a slower shutter speed. And as the sun goes down, you're going to be losing light. So you're going to need a tripod. And if your subject is something where you want to have the person or the subject where you can see what it is. In other words, not really a silhouette style. I think that's when a tripod is absolutely essential because you have to slow down your shutter speed to expose or partly expose whatever your subject is.
So if you're looking, going for the silhouette, look, he can get away with a faster shutter speed. That's probably your best option if you're doing handheld. And going back to using flash, I've got some shots of a local model around here. We did at sunset. I put flash on her and the background, the sunset was just like this real deep yellow.
If I put flash on her without a gel, I needed that flash to freeze her because I had her jumping. Not straight up like, like she was leaping across something and I needed to freeze the motion, but I also needed a slower shutter speed for the background. So there was times when maybe you want that slower shutter speed. You need the tripod for that.
But then if you have a person or subject that's moving and you need to freeze them, that's where you can put in some flash and maybe a gel if you need to counterbalance the light. So this is what I mean about experiment. You can do some weird and funky things if you just play around. But I would do these in stages. I would get comfortable just shooting the sunrise or sunset.
I would get comfortable with flash duration in case you need to freeze a subject and I would get comfortable with gels on a flash and then start merging them together to see what kind of results you can get. Yeah. Practice somewhere and don't plan on posting any of those photos. Just let yourself enjoy playing around for a bit. Cause it doesn't take that long to get a feel for things.
And if you're not under pressure, I think you just, you free yourself up to learn more and quicker with less frustration. There's one of the reasons we say that is because you think time moves slowly until you start trying to shoot a sunrise or sunset. Yeah. It's just a matter of that. Light is constantly changing. You're going to have to be re-evaluating your exposure and what you're doing.
And before you know, it, you're either out of light at a sunset or it's too bright at a sunrise. And you think, but wait, I didn't do everything I wanted to do. It's like, well, the sun doesn't care. Yep. That happened to me. It was a month, maybe two months ago I was out running and as the sun who I started,
I could see it was going to be one of those blood red, like stunning sunrises. I don't run with a phone on me, but I was close enough to the house. There was a lot of really just book it back. I can grab my phone and get a photo, then go and drop it back at home and carry on with my run.
Well, I did, the sunrise was just coming in to look gorgeous. When I grabbed the phone, I ran to the end of the street where I could see the sky and it had already changed. I mean, it was just that quick. And that's part of the experimentation is seeing how quickly the sunrise or sunset changes both with light and in color or the clouds that are going by.
You may only have a brief moment when you've got the optimal view of the clouds and the color. And then it's gone. That doesn't mean you can't still take more pictures. I would recommend that you keep taking pictures before the sun comes up through until it's bright or vice versa before it's really looking good on the sunset. You're going to have some ones that you don't like,
but you need to keep taking pictures, get your composition right. And that way, when the beautiful light or the best light is there, you've got it. Yep. Also I've found that the best colors are before the sun actually starts to hit the horizon, like before it comes over. And same thing with the sunset it's after the sun's gone down.
So I know that some people want a picture of the sun rising or setting, and that that's fine if that's the kind of butter you're going for. But if you specifically just want the colors and you have a subject and your photo and the sun itself, isn't that important to you? Your best colors are when it's hiding. The last item on our list was one that Lee kind of brought up before is try using filters to match what you're trying to capture.
So basically some people might like a graded filter. And what kind of filter were you talking about? Neutral. Like a neutral density. So you wanted to use neutral density to kind of slow down your shutter, slow Down the shutter speed. Because that's what I was saying. If you've got like, you know, if clouds are moving slowly so that you don't overexpose things,
there's only so much you can do to slow down your shutter speed. And sometimes you might want the help, if you want that really silky look. Yeah, that's true. It's like during mid day you probably need like a 10 stop, but for sunrise or sunset, I'm thinking two to three stops probably oughta be good to slow you down enough. There are also other kinds of filters.
If you want more blue in the sky, you can use a sky filter, which kind of gives you those blue tones. So take a look and see if there's some filters that you have, that'll help you create what you're looking for. But the whole idea really is to be creative and keep in mind that the sunrise or sunset is an enhancement to your subject. It's not the subject itself. Thank you so much for joining us on
I Like Your Picture. Show notes will be [email protected]/episode268. If you are looking to enhance your stuff in post-processing, you might want to consider checking out Luminar AI. I can give you a $10 coupon code. It is my last name BEEM. And, that'll save you $10. You have a good time. And also if you buy Luminar AI using my coupon code,
I'll give you my course Luminar AI Elements for free. So details are at Williambeem.com/courses. You'll see the course there and it'll give you all those instructions about how to send me your receipt. And I'll hope you enjoy it. We'll see you again in the next show.