Affiliate Disclosure: We earn a commission if you purchase through one of our links at no additional cost to you.
Learning how to process fireworks photos isn’t that difficult. You need to know the guidelines. This podcast episode discusses the issues you need to keep in mind (and they’re in the post below). Also, I provided a couple of videos below so you can see how the techniques work.
This post is about post-processing for your fireworks photos. If you need tips on preparing and capturing fireworks photos, I recommend you check out this post and podcast episode.
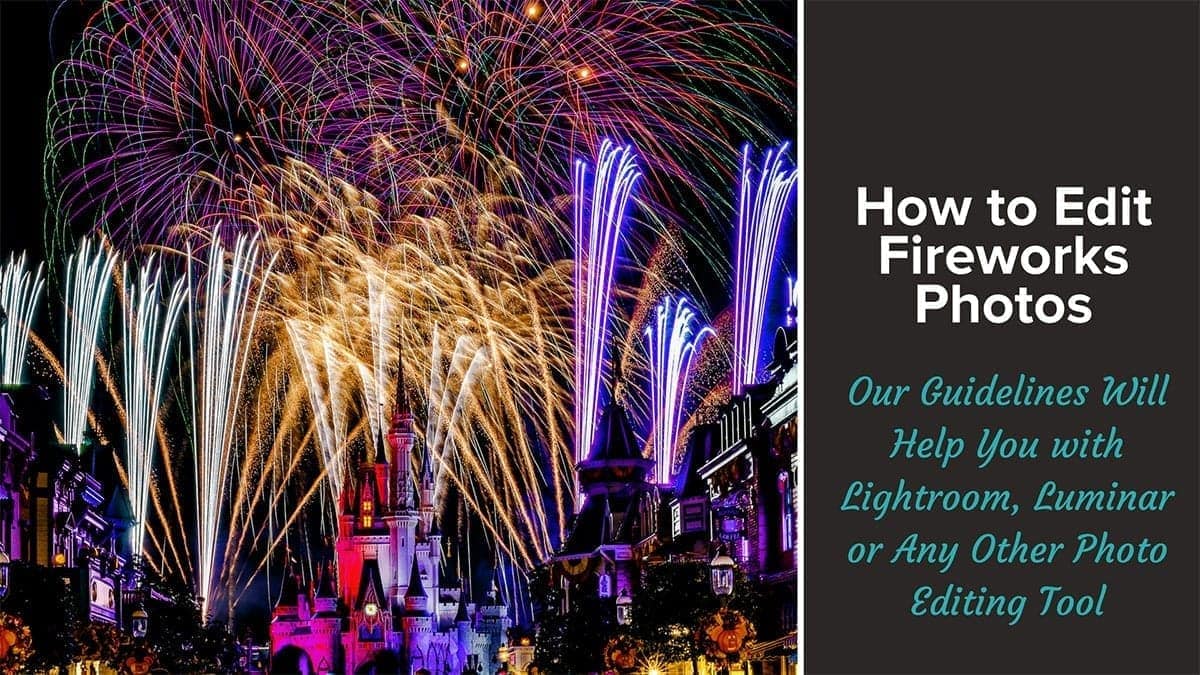
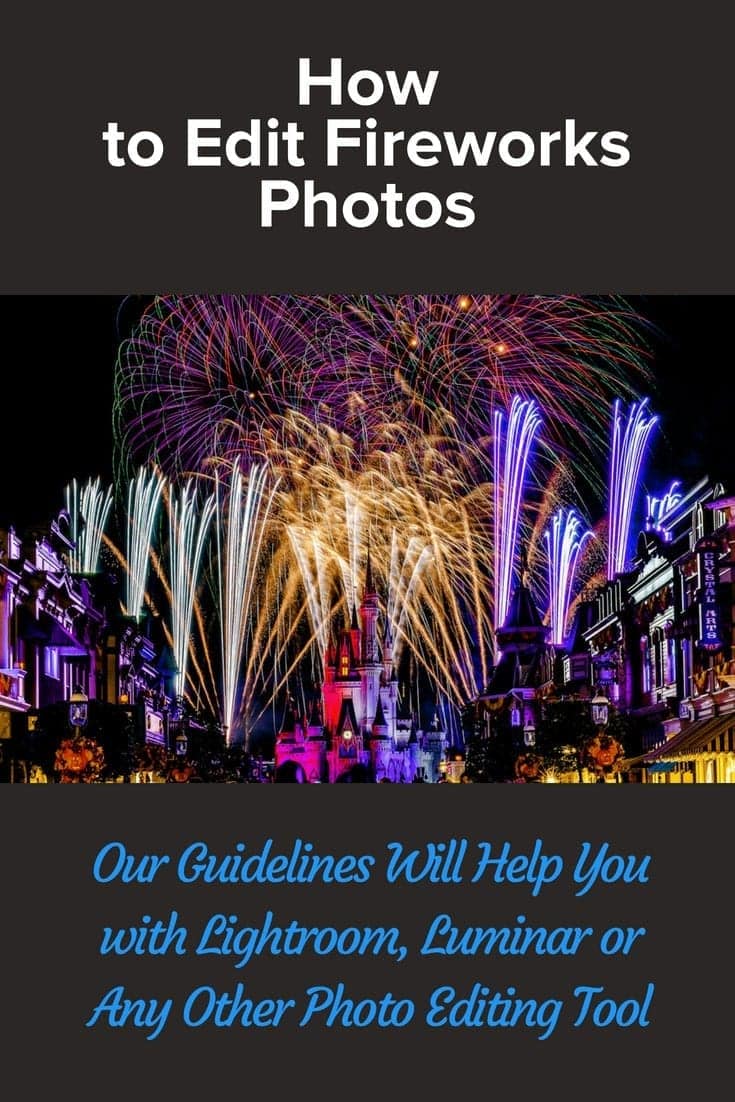
Guidelines to Process Fireworks Photos in Most Photo Editing Software
I absolutely love bold, colorful fireworks photos. The techniques I demonstrate in the videos below show how I get those colors. However, remember that everything is to your taste. You will definitely have different photos than I do, and you may have different preferences for the amount of color or detail you bring out in those photos.
Lee and I look for the same things in our photos. As you can hear on the podcast, we have different ways of getting those results.
First, let’s start with picking your winners.
1: Editing Fireworks Photos to Process
There’s a difference between editing and post-processing. Editing is a matter of reviewing your photos and selecting your favorite images, finding the ones that are worth attention and showing to others. Processing happens when you start making adjustments to your photo.
Shooting fireworks photos leaves a lot to chance. Not every photo will be a winner. If you took our advice on the previous episode, you have a few test shots before the fireworks went off. Those shots were to evaluate your exposure. Unless you really like those shots, you can delete them.
Sometimes the fireworks show has a bit of a lull and you may have a few frames without many bursts. I generally delete those, too.
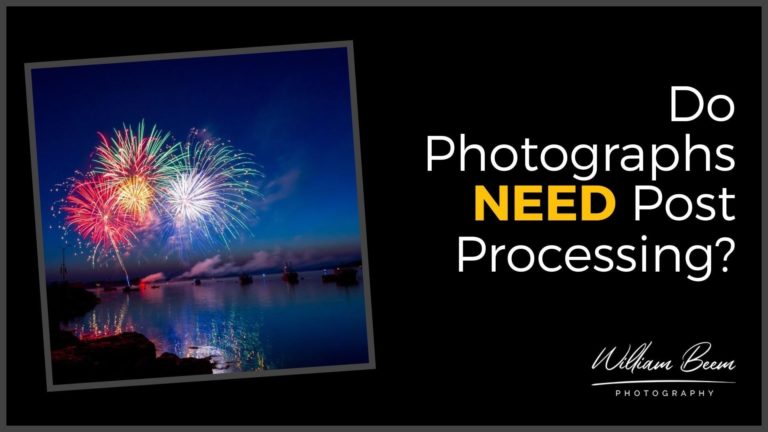
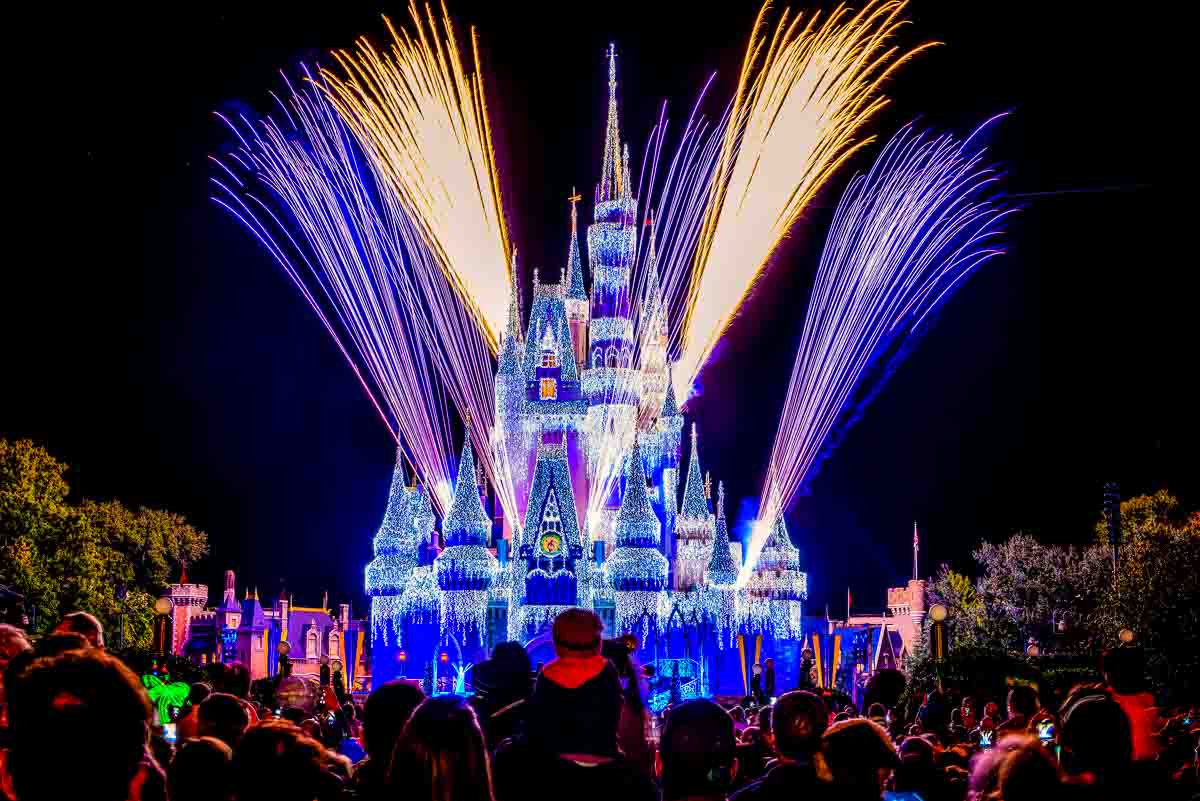
I’m looking for photos with an anchor as a subject. As you can see in our headline photo, the example is Cinderella Castle. That anchor subject should be sharp, clear and well exposed. You may need to do some exposure adjustments in post-processing, but that’s a key factor for your final photos.
If you want that anchor subject to be a silhouette, that’s fine. Just make sure that people know what it is. It’s part of your story and lends some depth to your photos.
When you evaluate the fireworks bursts, look for symmetry and balance in the photo. Also, I like to have color in my photos. Some fireworks bursts are white or yellow, which I don’t find quite as interesting.
Finally, be aware of any smoke or haze that obscures your image. Fireworks cause smoke, and sometimes you may find so much of it in the sky that you’re fireworks bursts lose some of their appeal. Again, this is something that goes with your own taste.
2: Correcting Your Fireworks Photos
I like to start off with any lens correction, cropping and rotation that’s needed in the photo before I get into the basic development. The reasons are simple:
- I don’t want to spend time editing part of a photo, only to later discover I have to crop it out.
- Some adjustments may affect the color or shape of the elements in the fireworks photos.
One thing I do with fireworks photos that I typically never do (and Lee doesn’t do this) is that I like to sharpen my photos in this stage. I sharpen here because that can affect the color and dimension of the fireworks bursts.
3: Basic Development for Your Fireworks Photos
Chances are that your photo won’t quite have the exposure that you want. That’s OK if you shot on RAW (you did, right?). You can recover some detail if areas are underexposed. I find overexposed images more of a challenge, which is why I work to get my exposure right on my anchor subject, and then recover in other areas selectively.
It’s tempting to want to open the shadows. Give it a try, but I find that it makes the sky look washed out.
My preference is for a very black sky, so I’ll typically bring my Blacks down enough to make sure we have a dark background.
Next, I evaluate my Whites and Highlights. When I use these sliders, my attention is on the fireworks streams. When you increase Whites and Highlights, they can make those streams look rather mushy with glow. I want definable and distinct streams of light. More often than not, that means reducing the Whites and Highlights slider.
Next, I amp up the Contrast. Not too much, but typically to about +20-+25 in Lightroom. Again, use your own taste as a guide. The Contrast often brings up the luminance I want in the fireworks streams.
Finally, I add a little bit of Vibrance to the photo.
That typically is about all I do for Global adjustments at this stage. Now it’s time to get specific.
4: Local Adjustments for Fireworks Bursts
For processing just the bursts, particularly the colorful ones, I get a brush and then visit a few sliders.
Hue/Saturation/Luminance (HSL) Slider
I like to select the Saturation and do the following:
How much is a bit? Whatever you want. This is where you season to taste.
An alternative method is to select the Luminance slider and reduce those same colors a bit.
Clarity
On the same adjustment brush, I add some Clarity. Don’t overdo it, as it may cause your fireworks streams to look a bit brittle. I think I increase my Clarity somewhere between +10 to +20 in most cases.
Just Brush the Fireworks Streams
Now start brushing your fireworks. Turn off auto mask if it’s enabled. Just brush over the various colors in the sky and you’ll see your results.
5: Evaluate Underexposed Areas and Correct
In the example in my photo above (and used in my videos), you can see that my view toward Cinderella Castle is very dark. Now it’s time to look for areas in your photo that need to come out of the darkness.
Get another adjustment brush and either open the shadows or increase the exposure. Bring out those details that let people know where you are or tell part of the story.
For example, you may have a crowd of people in your foreground that are enjoying the show. Pull them out of the darkness a bit. You don’t want to overexpose them and take away from your subject, but bring up their exposure to the level you remember seeing when you were at the show.
You can see my examples of this in the videos below.
6: More Global Adjustments
The photo is almost complete. You could probably ship it off right now, but I like to try just a couple more things.
The first thing is to use the Dehaze slider. A little bit goes a long way, but give it a try to see if you like the result. Sometimes it clears up a bit of the smoke from the fireworks, but it can also just brighten your image highlights a bit.
The second item I like to use is in Luminar, and that is the Remove Color Cast slider. It has two different auto settings, and the right one depends upon your photo. Try them both. You can see how much of an impact it had in the Luminar video below.
It’s possible to remove a color cast in Lightroom, but it isn’t nearly as easy as it is in Luminar and will add more time to your final photo. I’ll address that technique in a future video.
Finally, you may want to add a Lightroom Profile or a Luminar LUT to see how it impacts your photos. Lightroom now ships with some interesting profiles, and you can add more. The LUTS in Luminar are – in my opinion – not very good for fireworks photos.
The possible exception is the Grace LUT. Just be sure to adjust the sliders to your taste, or remove it completely if you don’t like it. I think it has a place on color grading, but it will definitely change the pop in your fireworks colors.
These Are Guidelines – Not Rules
Remember, there is always more than one way to achieve the same result when you process photos. Lee and I discuss that on the podcast episode and she gives her alternative methods.
However, we’re both after the same final objective. We want dark skies, sharp subjects and great color in our fireworks photos.
Use these tips are guidelines and then put your own special spin on them. Play with the sliders and see what works for your own artistic style and taste.
While I mentioned how much I love color, don’t be afraid to see how some of your fireworks photos look in black & white. You may have a subject that works very well in monochrome. No rule says you can’t eliminate the color and look at these images as an exercise in light and form.
Your creative imagination is the only limit, so play with the possibilities.
How to Process Fireworks Photos Demo
I decided to show how to process fireworks photos in Skylum Luminar 2018. The current version from Skylum is Luminar Neo.
The concepts are the same, but the tools give some slight differences. If you have another photo editing tool, you should be able to apply the concepts in other programs.
Skylum Coupon Code
I mentioned in the video that you can save 10% on Skylum software using my coupon code.
Luminar Neo is an AI-powered photo editor that turns any portrait into a stunning masterpiece. With FaceAI and SkinAI, you can easily retouch portraits, removing blemishes and highlighting facial features. And with the Portrait BokehAI tool, you can create a beautiful bokeh effect in any light. Plus, the Background Removal tool makes it easy to remove backgrounds without spending hours masking.
Skylum now offers Luminar Neo as either a stand-alone tool or part of a membership with extensions to offer more valuable tools like:
- HDR Merge
- Noiseless AI
- Upscale AI
- AI Background Removal
- GenErase
- GenExpand
- GenRemove
Additional extensions are coming.
Luminar Neo's exposure correction and color vibrancy features for all your travel memories will keep your photos looking natural and beautiful.
Finally, Luminar Neo's SkinAI and FaceAI provide the perfect finishing touches for your portraits, ensuring stunning results every time.
You can get everything with different pricing plans. Monthly, Annual or even Lifetime plans are available.
SAVE: You can save $10 using my coupon code - Beem10off
- Promo Code: Beem10off
- Easy to use
- Get great results fast
- Plenty of post-processing features
- Professional extensions are available
- May be slow on older computers
- File management is rudimentary
Just visit: https://williambeem.com/skylum
When you check out, use my Skylum coupon code: BEEM10OFF
Want to learn more about Photography software? Click below to check out articles about Adobe, ON1, Skylum, and more.
Photography Software Articles