Affiliate Disclosure: We earn a commission if you purchase through one of our links at no additional cost to you.
Traveling introduces an inherent amount of risk. We want to help you secure your camera and other photography gear to help reduce that risk so you can concentrate on enjoying the trip and capturing the photos you dreamt about before the trip.
You’ll learn how to secure your gear, deal with security inspections and dealing with limited carry-on space with planes and trains. Understanding some of the challenges you may experience during travel can not only help you secure your camera, but it also gives you some peace of mind because you’re prepared for potential changes in your plans.
How to Securely Pack Your Gear
Traveling on a photo trip is really about one thing. You want to get to and from your destination with all of your gear intact – safe and secure. While there’s really no such thing as complete safety, you can stack the odds in your favor. Here are some of our favorite tips.
1: Disassemble Your Gear
Packaging your camera with a lens attached to it in your bag is tempting. If you come across a fascinating subject, the idea is to whip out your camera to get the shot and stow it away again.
Don’t do that.
You need to separate the idea of your photography from convenience. Anything you need to whip out and quickly shoot, at least while traveling, is just a snapshot. Bring a point & shoot, or use your smartphone for snapshots.
The problem with attaching your lens to the camera body is that it makes the mount susceptible to damage. Things jostle around and bump while you’re traveling. The wrong bump, or even a dropped bag, may cause stress on the mounting point to break.
If that happens, say goodbye to your photo plans for the trip and hello to a costly repair bill. The idea is to secure you camera and other gear so that it’s in good working order when you arrive at your destination. Once you lose your camera, you’re no longer a photographer.
Now, this doesn’t mean you can’t put a camera body and lens together in your walk-about bag once you reach your destination. Just be careful about how you pack your gear in the bag that goes in an overhead bin where others are moving things about, or in the worst case, may have to go as checked luggage out of your site.
2: Put the Heaviest Items at the Bottom of Your Bag
What do all camera bags have in common? They’re all designed with a top and bottom. Whether you have a rolling bag or a backpack, they always work with the same orientation in mind while you’re moving.
You want to put your heaviest items at the bottom of the bag.
That creates the best weight distribution and helps you protect items that aren’t quite as sturdy. Heavy items have a stronger gravitational pull, so they naturally want to work their way down. If you have something lighter or more fragile underneath them, then they probably won’t fare so well under that weight.
Imagine your bag gets a jolt, like driving too fast over a speed bump. That’s going to drive your heaviest items downward with a bit more force than just your normal walking or rolling pace.
With some bags, it’s convenient to have the item you want the most accessible on the top. If you put your heavier items up there to easily access, you’re sacrificing the security of your gear for convenience.
Traveling to and from a destination with your photo gear ought to be about keeping things secure, not convenience for a whim.
It’s also one more layer of protection against theft or damage. Things at the top of your bag are more likely to fall out when you open it or are more accessible for a stranger’s hands to grab. Imagine how you’d feel when the security agent opens the bag, and your precious heavy gear tumbles out if you have an inspection.
Gravity doesn’t care about cost.
3: Choose the Right Bag for Your Trip
Depending upon where you’re going and how you get there, you may want to take more than one bag for your camera gear. Airports are great for rolling bags. My favorite rolling bag is the Think Tank Airport Takeoff. It’s sturdy and moves well on two wheels in the airport. Yet, I’m getting lazy in my old age.
Check Out More Think Tank Bags
Think Tank makes all kinds of excellent camera bags, and not just rollers. This article shows you everything – rollers, shoulder bags, sling bags, backpacks, and more.

The Think Tank Airport Takeoff V2.0 Rolling Backpack is the perfect travel companion for busy professionals. It features integrated backpack straps for easy conversion to a backpack and is sized to fit most domestic and international carry-on requirements. The large front pocket easily accommodates a 17" laptop and 10" tablet, while the main compartment holds up to a 400mm f/2.8 lens and two standard camera bodies. Padded shoulder straps and a padded back panel make it comfortable to carry, even when fully loaded.
Four-wheel spinner bags just glide through the airport with minimal effort. That’s why I have a ThinkTank Airport Advantage. It’s slightly smaller than the Airport Takeoff, but you don’t have to lug it like the Takeoff. It just glides through airports and hotel lobbies. It’s great for small, regional, domestic, or international travel requirements.

The Airport Advantage Rolling Carry-On Camera Bag is specially designed to meet the carry-on requirements of both U.S. and international airlines, so you can be confident that your gear will be safe and sound. With a dedicated laptop pocket that fits up to 15" laptops in a padded sleeve and plenty of room for 1 gripped DSLR with lens attached, 1 standard size DSLR with lens attached plus 3–4 additional lenses, this bag has everything you need to keep your camera gear organized and protected. The built-in roller system makes it easy to transport through even the busiest airports.
Yet, neither of those are bags you would take out on the street. They’re an excellent way to secure your camera gear during transit. Once you get to your destination (unless you’re going to a studio), you want to have a day bag to carry your gear.
Lately, I’ve been a fan of the Peak Design Everyday Backpack. It’s comfortable and well designed. You can access your camera gear from either side or the top of the bag. As with many camera bags, it has configurable dividers, so you can change the interior shape to fit whatever gear you decide to bring.
However, it’s not without some caution to ensure you choose the correct size. Peak Design advertises these bags as 20 liter and 30-liter sizes. That’s not entirely true.
These are expandable bags. That means the 20-liter bag is only 20 liters when you completely expand the top. With it’s not expanded, as in most times that you see it in ads or online, it’s only a 12-liter bag.
The Everyday Backpack has a clever magnetic latch system for the top section. It does an excellent job of keeping water out of your gear when it’s closed.
Yet when you expand it fully, gaps appear on the sides of the top cover, and then that water repellant doesn’t work – you know, because open gaps don’t do a great job of keeping out water.
It’s a good bag, but get the right size so you can keep it closed on top, for the most part. We bought both sizes and we’re happy with these backpacks.
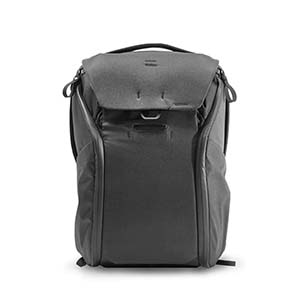
The Peak Design Everyday Backpack V2 is the perfect bag for everyday carry. Its versatile design and customizable internal dividers make it ideal for carrying your everyday essentials, camera gear, and laptop. Its side and top access make it easy to grab what you need without digging through your bag. And its protected laptop sleeve keeps your computer safe while allowing you to access it quickly and easily. This backpack is built to last with a lifetime guarantee.
How to Deal with Airport Security Inspections
Speaking of airport security, everything must go through an inspection. It’s far better to have that inspection before you go through the gate than to take it out of sight.
The first thing to remember is that everything gets scanned. If it looks odd, and chances are good that a bag full of camera gear looks strange, you’ll have to do a manual inspection.
Remember, you can’t interfere with the airport security inspection. However, you can and should advise them that the bag contains camera gear that is expensive and fragile. Let them know so they can appreciate the need to be more careful, and then stand back to allow them to do their job.
In my experience, airport security doesn’t want to cause any problems. They just want to ensure that your gear doesn’t pose any security threat and keep the line moving. If they have questions, they will ask you about an item.
Do not try to touch anything they’re inspecting or badger them. That will only delay your inspection and make you seem more suspicious about why they shouldn’t do their job.
Remember, these people have the right and responsibility to deny your luggage, or you, from getting on a plane. The best thing to do is be polite and professional. They will do the same in return.
Maybe you occasionally come across someone having a bad day or attitude. It’s rare, but it can happen. If you feel that your inspection isn’t going professionally, ask to speak to a supervisor. Stay polite, calm, and professional. The inspection isn’t personal. It’s their business.
I’m happy to say I’ve had good experiences with TSA inspecting my camera gear and never suffered any damaged items. If you’re friendly, they’re usually friendly in return.
How to Protect Film from X-Rays
If you’re a film photographer, you need to know those airport scanners using X-rays cause problems for film. It’s pretty easy to understand why. The film is sensitive to light, which is how we get our photos of them. However, what exactly is light?
Light is electromagnetic radiation within the visible spectrum.
It’s not the only kind of electromagnetic radiation. X-rays are another type, and we don’t see them. However, film does. It’s essentially possible to write to film with X-rays, meaning your photos on film get damaged as they pass through an X-ray scanner.
There are two ways to prevent damage to film in airport security.
The first way is to request a manual inspection. Security officers understand film sensitivity to the scanner and can inspect it without subjecting to the scanner.
The problem with that method is it takes more time, and may be problematic if you have a lot of film.
The second way to protect your film is to get some X-ray guards to hold your film. I know that Domke FilmGuard comes in three sizes and will protect your film canisters as they go through the scanner. That gives you peace of mind and avoids unpacking film for a manual inspection.

The Domke Medium Filmguard Bag is the safe way to protect your precious film from those pesky x-rays. With durable, triple-layer construction, this bag is built to last. The water-resistant ballistic nylon outer shell and lead-impregnated vinyl sheet keep your film safe from the elements. In contrast, the smooth, 420 Denier nylon packcloth interior protects it from scratches and dirt. All of your film will be well-protected with this large velcro closure bag.
Carry-on or Checked Luggage
If you have a choice, keep your gear with you and within sight as much as possible. You may not be able to carry on every piece of equipment you need, but using a carry-on for travel gives you some added protection in a few ways.
Let’s start with something that you hope doesn’t happen to any of your checked luggage, but it does happen. What do you do when your checked bag gets delayed or misrouted? There are plenty of examples where someone traveled to their destination, but their bag went on another plane to Pittsburgh.
No camera? You’re not a photographer.
The airlines will ultimately sort out misrouted luggage, but your plans to be a travel photographer get put on hold while the airlines work it out. The idea to secure your camera gear isn’t just about theft or bouncing around. That security is about knowing where your camera gear is all the time. Once it’s out of your sight, you don’t see what happens.
Have you ever boarded a plane on a window seat and watched luggage being loaded in the cargo area?
The folks doing this job have time commitments to keep everything on schedule. So while they aren’t tossing bags around like a gorilla in the old Tourister suitcase ad, they also aren’t babying your bags.
They just grab a bag and toss it on the ramp. One after another. Someone is inside the cargo area tossing those bags around, too. Someone else threw those bags before they got on a trailer to go out to the plane.
When you reach your destination, someone will toss those bags out of the cargo, onto the ramp, onto the cart, and then onto the luggage conveyer that ultimately spits your luggage out into the carousel.
Then you must worry about someone else mistaking your bag for theirs and walking off with your camera gear.
Between all that, there’s the inevitable security scan and real potential that someone will open your bag and manually inspect it, pulling each piece out and dropping it back into the bag.
While that’s good security for the airplane, it is NOT a secure way to transport your camera gear. Keep your expensive, delicate, and essential gear as a carry-on item.
What If There Isn’t Room for Your Carry-on Bag?
Sometimes, despite your preparation, there isn’t room to put your camera bag in an overhead compartment. Maybe you’re one of the last to board the plane, and the space is full. Another possibility is that you have to take part of your journey in a regional commuter aircraft, which doesn’t have room in the cabin for your gear.
This is when you need a Plan B.
If you secure your camera gear in a rolling bag, you may want to take another bag with you for these circumstances. Something large enough allows you to take the essential items from your camera bag and place them in a smaller bag that stays under the seat in front of you.
I usually travel with a messenger or backpack along with my rolling bag. However, for this circumstance, you could do something else like stuffing a small tote bag in your rolling camera bag. Take the critical items out, put them in the tote (preferably one with a zipper to keep things from rolling out), and then gate-check your rolling bag.
Try to research your travel itinerary as much as possible to determine which type of aircraft or other transportation you’ll encounter on your trip. Then you’ll be prepared in case you need to hand over some of your gear to get checked as luggage and keep the most critical items with you.
Be Aware of Battery Policies on Aircraft
Finally, we want to give a warning about batteries. Check with your airline about their policy. In general, expect to keep batteries with you in the cabin. As an example, here’s a link to the Battery Policy for Southwest Airlines.
Some batteries, particularly lithium-ion batteries, tend to explode or catch fire. You can find these batteries in portable chargers or your smart phone. My flash units also use lithium-ion batteries, so it’s a common item for many photographers.
In general, batteries should be inside of a device that uses them or carried in a manner that protects the exposed terminal of the battery.
Why do they want potentially exploding batteries in the cabin instead of the cargo hold?
Honestly, I didn’t know. Lee pointed out that the cabin is pressurized, whereas the cargo hold isn’t. Also, there’s no one in the cargo hold to prevent a fire from spreading if it starts. If something happens in the cabin, the flight crew can help put it out and also know to divert the plane to an emergency landing if needed.
That sounds much better than exploding mid-air because of an undetected fire in the cargo hold. Please check the policy of your airline. They limit the type of batteries you can transport and the quantity.
Subscribe to The Photo Flunky Show
Thank you for listening to The Photo Flunky Show. Make sure you get every episode by subscribing.
iTunes – https://williambeem.com/itunes
Stitcher – https://williambeem.com/stitcher
Google Play – https://williambeem.com/googleplay
Blubrry – https://williambeem.com/blubrry