Affiliate Disclosure: We earn a commission if you purchase through one of our links at no additional cost to you.
With all the discontent about the Adobe paradigm shift, I decided to take a first look at Pixelmator 2.2. So far, I like what I see.
I’m starting to see why so many people are making a fuss about Pixelmator. It isn’t Photoshop, but it has many of the features I use on a regular basis and a few more treats that Photoshop lacks.
My First Look at Pixelmator 2.2
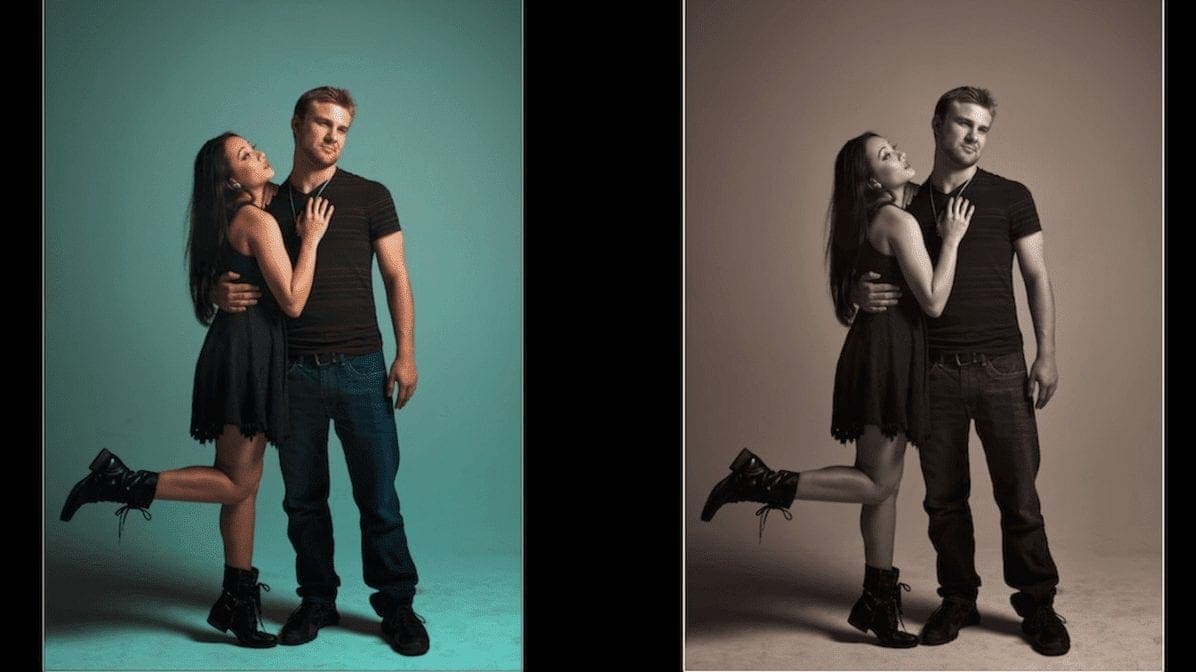
I just downloaded it an hour ago, so this is by no means an exhaustive review of Pixelmator. Instead, I gave it a short workout processing an HDR image to get a feel for what works and what may need improvement.
My standard technique for HDR is to process my brackets in Photomatix, blend in some of the original exposures, and then finish the image in Photoshop. Pixelmator filled the role for blending and finishing here.
The first thing I noticed is that I couldn’t just load Bridge, select my images and tell it to load in as Layers. There didn’t seem to be any option to load multiple files as layers, but I could load them all at once and each opened in its own document. From there, it was a matter of Selecting All, Copy and Paste into a document. That could get tedious and I hope Pixelmator will introduce some method to load multiple images as layers in the same document.
The next problem was Alignment. Though I spent time looking for some simple way to select layers and align them, I didn’t find it. Fortunately, my images aligned perfectly. That doesn’t always happen, particularly in HDR. The other route would be to change the Layer Blend Mode to Difference and nudge things around. You can move your images one pixel at a time or ten pixels at a time with different keystrokes.
Speaking of Layers, it covered most of the basics. I found all the same blend modes that I use in Photoshop. There are layer masks and opacity sliders. You can duplicate a layer or merge layers, but Pixelmator lacks the convenient shortcut to duplicate and merging requires selecting the layers first, then hitting Cmd-E. Also missing was that cumbersome shortcut in Photoshop to create a merged layer on top of your existing layers.
Brushing worked quite nicely with plenty of selections for brushes. You can change the opacity, but it lacks a feature to change the Flow of the brush. Not a deal breaker, but I do tend to like slowing down the Flow to 80 in most cases. The bracket keys work fine to adjust the brush size and it worked well with my Wacom Intuos 5 tablet. The D and X keys reset your brush color to Black/White and swap between them, just like Photoshop.
Pixelmator uses Effects rather than Filters in Photoshop. There were plenty to choose and this is where I started getting side tracked. Pixelmator has some interesting interface elements for all of its effects, ranging from Hue/Saturation wheel to some Instagrammy Light Leaks and Flare effects. I found some very interesting tools for creating blurs and glow effects, also.
The Healing Brush is just a tad slower than the one in Photoshop and I don’t see any content-aware labels, but it did a decent job removing elements as I played around – just trying to fool it. As in Photoshop, some things worked better than others.
When it came time to export my results, there are plenty of supported file formats. I opened one of my old PSD files, though I’d flattened it before saving it in Photoshop. It may be interesting to open something with more layers and specific features in Photoshop to see what happens in Pixelmator 2.2.
![]()
It’s nice to find a plethora of effects in Pixelmator, since it doesn’t integrate with other plugins like Nik, onOne Perfect Photo Suite or Topaz.
By default, Pixelmator saves files in its own .PXM format. You can save as a .PSD file if you like, but you’ll pay for it in size. The same image was 32 MB in .PXM and 75 MB in .PSD format. Since Pixelmator is a Mac only app, it can also add your photo to iPhoto or Aperture directly from the Share menu. You can also easily share images to Flickr, Facebook, Email, Airdrop, Messages and Twitter.
Summary
There are a number of things that I point out here to show how it doesn’t do what Photoshop does. Yet when I think about it, those things that it lacks didn’t stop me from completing an HDR photo using mostly the same techniques that I would use in Photoshop. In fact, there were some possibilities in Pixelmator that I wouldn’t have with Photoshop, Nik Color Efex, onOne Perfect Photo, etc. Basically, a photographer can get the job done with Pixelmator for $14.95. That’s something that Photoshop can’t touch – price!
If you own Photoshop already, you don’t need Pixelmator. It doesn’t cost much if you want to check it out and you may see some effects that you like. Also, it’s being updated regularly at no additional cost.
If you don’t own Photoshop and are wondering whether to join the Adobe Creative Cloud or get CS6, I’d say spend $15 and try Pixelmator, first. It’s a solid tool available for the cost of a cheap lunch.
Want to learn more about Photography software? Click below to check out articles about Adobe, ON1, Skylum, and more.
Photography Software Articles