Affiliate Disclosure: We earn a commission if you purchase through one of our links at no additional cost to you.
Are you looking at your photos and wishing they had a bit more life, or more pop to them? There are a few different ways to get that bright, colorful look. With my Luminar 2018 demo, I’m going to show you one of the easy ways to enhance your photos.
What Does Luminar 2018 Do for Photographers?
Luminar 2018 by Skylum, formerly Macphun, is a software program for both Mac and Windows platforms that makes it easy to enhance your photos. So what do I mean by “enhance?”
Let’s take a look at a Before and After photo.
Here’s the shot without any processing, other than sharpening when I exported the photo from Lightroom.
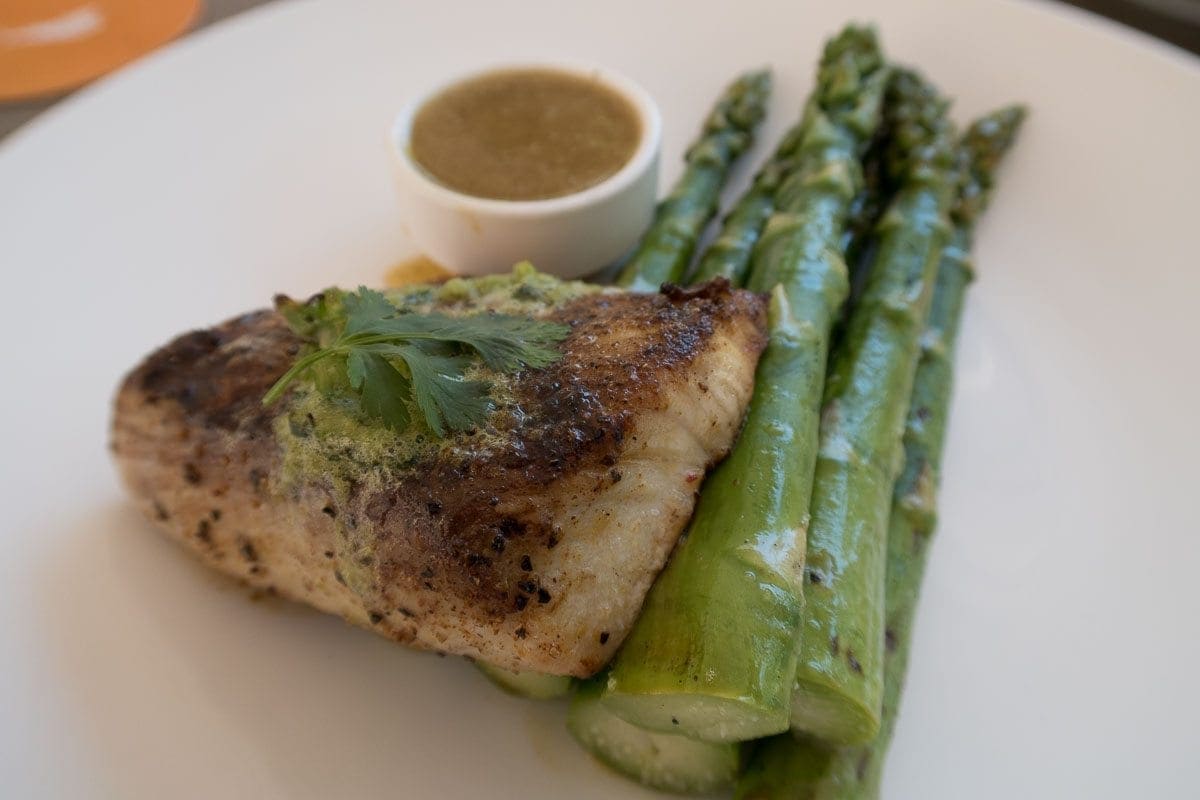
Now here’s the photo after I processed it in Luminar 2018.

Luminar 2018 Brings Out the Best in Your Photos
You’re probably wondering what I did in Luminar 2018 to get the result above. Lots of filters, manipulations and brushing?
Nope.
In fact, you’re probably going to be disappointed. I ticked off one checkbox and I moved one slider. That’s it, except for the sharpening when I exported the JPEG from Luminar 2018.
Mind you, I could do more with this photo inside of Luminar. The point is that I really didn’t have to, though. All I did was check the box to Autocorrect Lens Distortion and I moved the Accent – AI Filter slider form 0 to 100%. That’s it.
My post processing took just a few seconds and I was ready to export the results. That’s how well Luminar 2018 brings out the best in your photos.
Luminar 2018 Saves Time
As I said, this only took a few seconds. I spent more time scrolling down the list of filters than I did making an adjustment in the Access – AI Filter.
How long would it take you to do this in Lightroom or another RAW engine processor? It wouldn’t be terribly hard, but it also wouldn’t be as fast as moving one slider. You’d have to fiddle with Exposure, White & Black points, Contrast, Clarity and maybe a few more adjustments.
Luminar has some intelligence built into it based upon analyzing a ton of photos and how they were processed. That experience went into the Accent – AI filter so you can get a great starting – and perhaps final – point in post processing your photos.
Luminar 2018 is Easy to Use
Click a checkbox. Move a slider. Done.
It doesn’t get much easier than that. However, there’s more inside of Luminar 2018. Not only are there some additional filters to provide both correction and artistic enhancement to your photos, but there are a plethora of built-in presets if you prefer the one-click approach to your post processing.
Be sure to try out some of those presets to learn how they use the tools inside of Luminar 2018. You can find out just which filters and the adjustment came together to craft an interesting look and feel for your photos.
Luminar 2018 Saves You Money
Compared to some of its competitors, Luminar 2018 is more cost effective. In addition to that, I can offer you a discount if you decide to buy Luminar 2018 based upon my recommendation.
That’s because I’m an affiliate for Skylum, which means I earn a small commission if you buy from me. There’s no extra charge to you. In fact, you can use my coupon code to save $10 on Luminar 2018, or also on Aurora HDR if you choose.
The first step is to visit Skylum using my link: https://williambeem.com/skylum
Select Luminar 2018 and put it in your card. When you check out, use the coupon code BEEM and you’ll see your discount applied before you check out.
If you want, take advantage of the free trial before you buy. See if Luminar is right for you. Then you can be sure before you buy, and still save $10 using the coupon code BEEM.
Here’s something else you should keep in mind. Once you buy Luminar 2018, it’s yours. This isn’t a subscription product where you have to pay every month. You buy it, you own it.
Who Is Luminar 2018 For?
Obviously, Luminar 2018 is for photographers. Does it matter what kind of photographer you are? In most cases, I think Luminar will work fine for you if you’re enhancing photos in these genres:
- Travel
- Landscape
- Street
- Food
- Still Life
- Product
Essentially, Luminar 2018 is great for enhancing and correcting most photographs. If there’s a genre of photography where I think Luminar isn’t the tool I’d recommend, that would be portraits photography.
Why Not Use Luminar 2018 for Portraits?
For portrait photography, I like to create custom brushes to handle routine tasks. You can put a lot of power into a single brush stroke by combining adjustments like:
- Contrast
- Sharpening
- Color Correction
- Add Clarity
All of the wondrous stuff you can adjust in the RAW Develop filter can go on a brush. So can the effects from other filters. So why doesn’t this work for portrait retouching?
To be fair, it does. You can make the adjustments to retouch eye whites, enhance the iris for different colors of eyes, brighten teeth and even smooth skin.
The problem is that you cannot save a brush with those adjustments. That means you have to set those adjustments every time you want to use them.
You can create your own presets, but that isn’t the same as saving an adjustment brush. When you change from one preset to another, the current preset overwrites the settings you had on the first one.
I’m hoping that a future release of Luminar 2018 will provide the ability to save brushes. Until then, I don’t use Luminar 2018 for my portrait retouching.
Other Photographers Use Luminar 2018 for Portraits
You can find videos on YouTube by other photographers who claim to use Luminar 2018 to retouch portraits. I’ve watched a few of those videos, and I think they’re not truly retouching the portraits.
Yes, they’re enhancing the photos. Just as you would with any other genre of photography. However, they aren’t working on the eyes or teeth. They aren’t adding highlights to the hair. The manipulations I’ve seen used for Skin Smoothing seemed rather heavy-handed to me.
Now I think that Luminar is great for color grading your photos after you’ve done the retouching part. There are plenty of filters I can happily use on a portrait in Luminar 2018. It’s just that those tools come into play after retouching.
What if I Don’t Have Luminar 2018
Luminar 2018 is a faster, easier, and cheaper alternative to post processing your photos in Adobe Photoshop. Part of it is similar to the Develop module in Lightroom, but it does MUCH more than Lightroom by including a number of adjustment filters, different masking tools and allows you to use Layers for your adjustments.
What would you do if you had to rely upon Photoshop CC, or Lightroom Classic and Photoshop CC?
The first thing you’d realize is that it costs more. I think the Creative Cloud Photography Plan is an outstanding deal, but a year’s subscription costs you $120 and then you’re out, or you subscribe again.
Granted, there are a LOT of things that come with the Adobe Creative Cloud Photography Plan that you don’t get with Luminar 2018, but we’re talking about processing photos here.
So here’s how it would work out.
- You process your RAW photo in Lightroom Develop module or Adobe Camera RAW
- You open the photo in Photoshop
- You add layer after layer with different adjustments on each one
- You use some pretty arcane panels and tools
- You definitely spend more time on each photo to get a good result
- You pay every month whether you use Lightroom and Photoshop or not
Now, I don’t mean to belittle Lightroom and Photoshop. Both are wonderful tools and I use them regularly.
It’s because I use them regularly that I can tell you there is a time commitment involved in setting up, organizing and using each of these programs. There are thousands of tutorial videos, online classes, touring live classes and even conferences dedicated to learning how to use Lightroom and Photoshop.
That ought to tell you a couple of things
- Your investment in Lightroom and Photoshop doesn’t end when you subscribe
- You end up spending a lot of time and money learning how best to use these tools
- You spend more time inside these tools than you would in Luminar 2018.
There is a time and place for Lightroom and Photoshop. I happily recommend them both to photographers who need to use those tools. However, not every photographer needs Lightroom and Photoshop, and not every task requires the use of these tools.
If you already have them, Luminar 2018 works great as a plugin to both tools. If you don’t have the Adobe tools, then Luminar works fine as a stand-alone program. In a future release, Skylum plans to add a photo organizer tool in Luminar 2018 and then you can decide if it works well enough that you don’t need Lightroom – or not.
The Bottom Line for Luminar 2018
As someone who owns a plethora of post processing tools, I can tell you that I happily recommend Luminar for most people. Whether you want a simply program to avoid getting into Creative Cloud, or if you realize there are times when you can save some time by processing your photos in Luminar instead of the Creative Cloud tools, Luminar 2018 is a solid choice.
As I said, I’m an affiliate for Skylum, but I can promise you that I wouldn’t recommend something that I don’t use or believe would be good for you.
As an affiliate, I’m able to provide you with a discount code. So if you buy based upon my recommendation, you can save $10 using my coupon code and I will earn a small commission.
Click the link and don’t forget to use the coupon code when you check out.
Link: https://williambeem.com/skylum
Coupon Code: BEEM
Want to learn more about Photography software? Click below to check out articles about Adobe, ON1, Skylum, and more.
Photography Software Articles