Affiliate Disclosure: We earn a commission if you purchase through one of our links at no additional cost to you.
I created an overview of the Luminar 4 Essential tools you need to understand to enhance your photos. It’s part of the series I’m creating on YouTube to help people understand what Luminar 4 does (and sometimes doesn’t) in order to get the most out of their software.
If you haven’t purchased Luminar 4 yet, this series can help you understand it better and determine if it’s right for you or now. If it is, you can use my coupon code – BEEM – to save $10 when you buy Luminar 4. Just visit https://williambeem.com/luminar to get started or download a trial.
Luminar 4 Essentials
There are nine tools in the Luminar 4 Essentials panel and I cover each of them in this video.
- Light
- AI Enhance
- AI Structure
- Color
- B&W Conversion
- Details Enhancer
- Denoise
- Landscape Enhancer
- Vignette
For the life of me, I don’t know why Landscape Enhancer is in the Luminar 4 Essential tools, rather than in the Creative panel with the sky enhancer and sun ray tools. Then again, maybe that’s because I do more portraits than landscapes. I may have a different opinion of Essential if I were a landscape photographer.
That said, I’m really impressed with the ease of use for most of these tools, and the absolute power contained within that ease of use.
Get Started with Luminar 4
Here’s a link to my Luminar 4 tutorial series – Luminar: Start Here
Click the video below to learn about the Luminar 4 Essential tools.
Hi, in today's video, we're going to take a look at Luminar 4 Essential tools or put another way. The tools you're going to find in the Luminar 4 Essentially panel. So what makes these tools essential? These are the things that you're going to use to control your exposure, your contrast, and other elements of your photographs. So that's what we're going to talk about today.
Hi, my name is William Beem, I'm a portrait photographer in central Florida and also the cohost of the photography podcast, I Like Your Picture. If you're looking to improve your photographs, do more to help your visual storytelling. You're in the right place. That's what we cover on this channel. So if you would go ahead, get started by clicking the subscribe button and you'll see our tutorials every time they come out.
All right, let's go ahead and dive into the Essentials panel. If you can see it right over here on the side of this little first icon, you would highlight, it says essential as it looks kind of like a circle with a little bunch of light rays coming around, and we're going to start with the first tool called Light. If you're familiar with other tools that are like RAW conversion engines,
or even if you're working with JPEGs or standard shots, you'll find this. Some of the tools that you see here are only going to work if you're working on a raw file. So for example, this profile, you'll see, it says, Luminar default. If you pull that down and you're working on a raw file, such as this one, then you're going to see other profiles.
And as you hover over them, you'll see that it kind of changes the look. Basically, these are preprogrammed. looks. So for example, if we want to do something vivid, we can take care of that and you can choose these. You can go ahead and set select one and set it as a default for your camera. Right now, I'm going to stick with Luminar default.
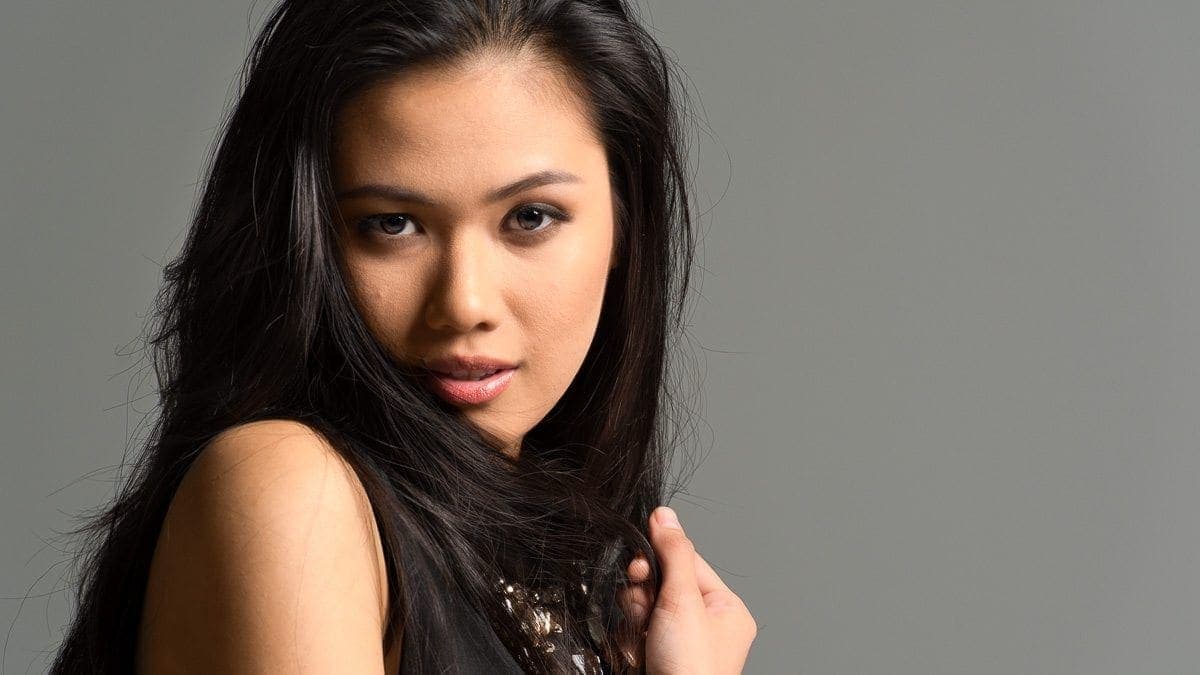
If you don't see this chances are, you're probably working on a JPEG. So I started with this one. Let's go with the white balance. You can see the little eyedropper over here, and this one is just a little bit off. So I've got her holding a gray card. We go ahead and select that and you can see automatically it kind of sets the white balance for you.
It brings some color back into our skin. We're not anywhere near done, but it's a good starting place to make sure you've got your white balance. If you don't have something with a gray card or a neutral, and you want to do another one, you've got these options for As Shot and then the usual ones that you might find a new camera.
These don't change as you hover down for them. You've got to go ahead and select one. So for example, if I select tungsten, we've just turned her into a Smurf. So let's go ahead and fix that up and just change her back. Another way you can handle this is if you don't have a option that you like over there, you can go ahead and manually dial in your tint and temperature and just kind of make things cooler or make things warmer.
And you can kind of do that to taste if you like. Same thing with the tint. So there's some creative options there. There's some corrective options there. The next thing down is your exposure. So this one I'm just kind of drag us down and make it a little bit darker and bring her, to my eye. That's kind of right where I want to be.
I'm trying to avoid too many bright spots on her. The next item on the list is a smart contrast. So you go ahead and move it over to the right and kind of add more contrast, bring it back to the left, subtract some contrast, but you're going to see that it's not really damaging your skin tone as we bring it all the way over is looking at some tonal adjustment,
but it's got enough awareness that it's paying attention to what the highlights and shadows are and what types of surfaces that it should or should not work with. Highlights and shadows are pretty straight forward. Like if you want to boost your highlights, bring them up to the right. If you want to pull them back, you can bring them over to the left and same thing with shadows.
You can go ahead and darken your shadows or lighten them up. I usually like to start kind of, if I look at my center line, I just pull the highlights up a bit and pull the shadows down. What do you need to do is going to vary from photograph to photograph. And it's just a, one of the options you can work with. Now,
advanced tools. You can do the same thing with your whites, the blacks. Do you want to boost your whites? And you can see like towards her skin over here on her, her left cheek, it's, there's a lot of rim by coming from this light behind her. So I may want to pull those highlights back. I may want to boost the whites up,
so it doesn't turn to a dingy gray, and I can pull the blacks down a little bit to kind of give some depth inside of things that should have a little bit of shadow to it. Below is, uh, your curves. So you've got your standard curves and then you've got your RGB. So you can go ahead and actually do a lot of detailed work on that.
We're not going to go over that so much today, but you can also slide this down kind of at the bottom to just automatically adjust the curve almost as if you're working with a levels control. Now there's one thing missing on the light panel for the base layer. In other words, when you just bring your photo in, that's going to be the base,
and then you can add other layers to it. We haven't really talked about layers yet, but let me show you why you may want to add a layer. If you look down here, even under the edit advanced settings, you don't see anything about masking. So in other words, if you want to apply these adjustments individually and just brush them in where you want to,
there's no masking tool here. Yet, as we go to other tools, you'll see there's an edit mask button and you can brush use a radio mask, gradiant, luminosity. So what happens if you really want to do that on the light level? Well, that's when you need to go to layers and add one more layer. So we're going to come up here to this top icon.
You see it says layers. And the idea is this is our base layer, and it's locked. You click on these three dots, you'll see duplicate layer. Now that you have a new layer, you see, we have edit mask. Those are the tools that you want. So you can go ahead and apply the mask and then come back to your essential tools and it'll apply the changes just where you want them to be.
So, for example, let's go over here and we're going to add this mask and let's go ahead and use the brush. Let's say that I'm going to do something on our hair. I'm just going to very roughly and loosely kind of do this change. When I come over here to the Essentials and let's just change the temperature, completely. Change the exposure.
And you can see we've made very ugly changes, but made them just the place, but we had the mask. So if you need to do a mask on your light tools, you first need to create a new layer and then you can mask that and then you can apply the other tool. Next tool we want to look at is AI Enhance. And this is one of the things that Luminar 4 is very popular for. It's very simple and easy to use.
I mean, you've got two sliders, so we can go ahead and let the, or select that AI Accent and just drag the slider all the way up to 100. You can see what a dramatic change has made. Let me show you a little before and after. One slider, that's just awesome. And then there's also the Sky Enhancer. So if you see that we've got a sky up here,
we can go ahead and slide this over. And it adds kind of like a, if you had a polarizing filter when you were taking the photograph. So the effect is very similar to that. It'll darken the sky and it's still preserving the highlights in the clouds as well though. So I don't necessarily want to dial these all the way up to 100,
but usually I'm kind of happy under 50. And even with the AI Accent Enhancer, I don't have to do that much, but I just want to bring it all the way up so you can see the dramatic difference. Again, let's take a look at a before and after, I mean, just two sliders and it made that much. The next tool we have is AI Structure.
And this one is aware of human skin. So if you've got a photo, let's say like this one, we've got a lot of detail on the feathers. I'd like to bring that out, but I don't want to destroy her skin in the process. So we can simply take this, AI Structure and move this up quite a bit. And you can see we've really brought the detail out in the mask and the feather.
So if we go ahead and look at it before and after matter of fact, I'm gonna hit the, uh, compare slider. So you can kind of see a little bit of before and after on either side. And you can drag this thing all the way up to 100, if that's how much detail you need. And if that's still not enough, you go ahead,
hit boost and drag that up. So as you look at this, you can see there's just a lot more detail in the mask and feathers, but we have not destroyed her skin. So it kind of enhanced the texture and her lips a little bit, but overall, she still looks like a person that we haven't really harmed the skin at all. I typically would not imagine dragging the AI Structure all the way up.
Now, another thing it starts off here at the halfway point, what happens if you bring it down and you can see it's just kind of smudged and blurred that out. This is not something I would probably do on a global level, but I find that if you have a need to put a mask on certain parts of it, it might be good for a softening,
something that's a distracting element and just kind of brush it in. Color tools are also very simple. You've got choices with your saturation and vibrance. So there may be times that you really want to bring some saturation up, pull it back down. Actually for a lot of portraits. I tend to pull saturation down, add a little bit of vibrance up.
And that kind of gives me, uh, a bit of a different look than what most portraits are going to look at. If you click on the advanced settings, you'll see that you have your Hue, Saturation, luminance, and also a hue shift. So for example, let's say if we select greens and we want to shift that color a little bit,
we can go ahead and do that. And you can see how it affects things on both sides of the, of the stack. So we've got a nice plant here with some purple in it. So we can go ahead and select the purple color and we could boost the saturation a bit. We can lower the Luminance, kind of darken that down and just give it a little bit more punch.
We've also worked with a Hue and kind of change that. Wouldn't change that back to a blue. If we'd brought it down and a deeper purple, if we were dragging it up. Black and White conversion is pretty straightforward as well. You can just go ahead and click this button. Convert to black and white, and you've got a nice black and white to begin with,
but what I really like is working with the color values in luminance and also on saturation and see how that changes. So for example, we know that she's a blonde with before, and you can see the yellow in her skin. We can drag this over and you'll see that it looks like selective color, and it's very targeted based upon the color of that tool.
We can do that with yellow and let's bring up red just a little bit, and we've already brought her skin tone and everything back because it's very yellow and red kind of photo. Working with the luminance values. You can kind of decide if we take these yellows, we can drag them down and dark them up, or you can bring them up and cause a lot of highlight with them.
So it's, it gives you a way to dial in the effects of your black and white conversion. The details enhancement is where you've got an option to add some contrast on your details based upon their size. So small details, medium and large. And also this is where you can enhance your sharpening the photo. So let's go ahead and take a look for large details,
drag that over. So you can see the stones in the cottage. That's really getting more from your large details. We go back to the medium details, bring up the medium ones and you can see in the trees over here that you're, you're getting something from those clumps of leaves. And it's also just kind of adding onto the edges. Let's go ahead and zoom in just a little bit more.
So there's still some detail that's happening on the cottage itself, but you can see how the leaves and the tree trunks are just getting a little bit more detail coming up. Now, when you finally get to your small details, that's when the leaves are really going to pop out. And it's not so much that you're seeing the same kind of change like on the tree trunk.
So I'm like, here are the tree trunks, very blurry, but all those little details on the bark of the tree are really coming out. Screen and take a look down here on the grass when we bring up the small details and then the medium details and then the large details. So you can see that we got definitely something with the grass when we did the small,
medium, not so much with the large. The large ones are going to affect things that really are going to be like the stones in the cottage is something that's a bit more substantive. Sharpening is just a slider going across over here. So as we drive it over, you can see how it's doing sharpening, but there are times when you may want to affect what's being sharpened and where. If you hit the advanced settings,
you'll see that you can choose a sharpening radius. And also sharpening mask. Basically that masking is going to try and keep things to the edge. So in my case, I tend to like to bring the sharpening masking up. So I'm not sharpening everything that's in the image. I'm just sharpening the edges or the details. All right, the next tool that we want to look at is Denoise.
You've got two choices here for luminosity and for color. I tend to look at luminosity first. Some people look at color first. Pick what you're poison is. And I'll just drag it up about halfway to see what it looks like. And as we can go with our before and after, you can see that it's done a very good job of just eliminating the noise that was in this photo.
If you see some little color specs in here, you may want to go ahead and bring up the color denoise. And I'm a little more conservative with doing that. But again, you can can just kind of take a look. It is doing a really good job of cutting the noise out of this photograph. The landscape tool is the only tool in the Luminar 4 Essentials panel.
That confuses me as to why it's, I'm not sure why this is essential. If you take a look over here in the creative panel, you'll see that there's augmented sky, there's a sky replacement. There's sunrays I kind of get the impression that to me landscape should probably be more over here on the creative side, but it's not. It's here in the Luminar 4 essentials panel.
And so let's take a look at it. First off, this photo has just a little bit of a haze over here. So let's go ahead and pull this up and see if we can clear that up just a little bit. And you can see that often the distance maybe is still there, but up close in the foreground, it's really done a nice job of pulling that haze out out of the way.
So here's what it looked like before and after. You can see it even cleared up the sky a little bit. You've also got a couple of other things over here. Use these carefully in combination because you can get some really strange results. And just to show that I'm going to go ahead and move them all the way up to 100. So the golden hour is kind of like to enhance that feeling you get when the sun's going down and things get golden.
So there's golden hour at 100. Foliage Enhancer is supposed to bring out the greens. If we go ahead and bring this all the way over to 100, that is just electric green. That's not quite what we want to do. I'm going to pull both those backwards and going to go ahead and hit everything on the... Click on the title and reset everything to zero.
How would like to say work with foliage enhancer first and work with it gently. By the time I get up to 50, I'm already starting to get more green than I want to see in here. So to me, it's something that I would recommend using under a halfway mark of 50. And I'm just going to stay here at 35. And I think that's done a nice job of kind of bringing the color out.
And then I would go ahead and apply a golden hour, probably at 25. If I bring this all the way up, it's really electrifying the green as well. So this is one of those tools that I think can work in combination, but the effects of one tool may just kind of hurt you on the effects of the other. It looks like I accidentally turned that off.
Somebody go ahead and click that back on. And I'm just going to bring the golden hour back down to about 25 and I'm gonna bring the Dehaze backup and shut that down. And we started off here and we brought it here. I think the landscape enhancer works very well, but you can really take it too far. Under the enhanced settings. You've got a foliage enhancer,
excuse me, the foliage hue. So let's go ahead and bring the foliage enhancement up to about halfway. And I just want to show you what happens as you move this slider around when changed. So if I bring it over to the right, you can see the grass is just getting really electric and it's dominating everything or bringing all the way over to the left.
It's de saturating the color just a little bit, and it looks a bit more natural, but kind of dull. So it's not necessarily going to change Autumn leaves out of green leaves. You're not going to go ahead and get those reds and yellow leaves that you might expect. But if you want to do some tweaking on the color of the grass and foilage that you have,
that's just one extra option. The last item that we want to look at in the Luminar 4 essential tools is the vignette feature. Let's go ahead and click on that and you can choose your subject. In other words, you can say where's the center point of the vignette going to be? So in this case, it's going to be right here on my subject.
Now let me go ahead. And I'm going to drag the amount way up. If you move all the way over to the right, you're going to get a white vignette. So that's kind of like your very seventies and eighties glamour shots. Look, if you want that, most people that I know probably wouldn't want that I'm going to make a very dark vignette.
So you can see that it is centered around where my subject is. There are actually times I want to go this dark, but I might want to change things a little bit. As far as the size of the vignette, you can see, you can make it larger by pulling the right or smaller point to the left. And also, this is something you might want to do to set your vignette
before you go ahead and fix your vignette, I'm going to change the feather and pull up all the way down. You see that we get a very hard edge. So that kind of proves to me that I got what I was looking for out of centering the vignette. So, and also you can change the roundness. You can make it like an old,
uh, sixties television set, or you can make it perfectly round. I'm kind of happy with that oval look in the middle. So I'm gonna go ahead and bring my feather up again, because it's just a bit too much. Now this little inner light thing is just a wonderful thing. It just adds a little bit of brightness or exposure to your centerpiece.
Now, typically I am not going to have an amount of a vignette that much, but if I bring it off like this. The whole idea of a vignette is to kind of dark and the edges, draw the eye to the center. This inner light helps boost that. So this is without the inner light. This is what the inner light of a hundred is.
Obviously the exposure goes too much, but I found that if you put it back between 20 and 25, it's a very subtle effect, but also very effective. So let's go ahead and take a look at before and after. So there's before and there's, after you can see that we've really concentrated the subject as the focal point, the object of interest,
and we're drawing the eye. So if we can look again before you, it's kind of bright everywhere, your eye can wander all over the place. So all we're really doing is telling the eye, Hey, look here. This is what's important. All right, that's my overview of the Luminar 4 Essential tools. You can find those in the Essentials tab.
I hope this was helpful to you. If you was, please go ahead, consider Like the video, subscribe to the channel and ring the little notification bell. So you'll notice get notified the next time I send something out. This is part of a series I'm working on for Luminar 4 to kind of give an overview of all the tools and how to work with it.
I'll be doing other videos after I've completed this series. So if you're into Luminar 4, please go ahead and subscribe and we'll see you again next time.
Affiliate Links
Luminar Neo is an AI-powered photo editor that turns any portrait into a stunning masterpiece. With FaceAI and SkinAI, you can easily retouch portraits, removing blemishes and highlighting facial features. And with the Portrait BokehAI tool, you can create a beautiful bokeh effect in any light. Plus, the Background Removal tool makes it easy to remove backgrounds without spending hours masking.
Skylum now offers Luminar Neo as either a stand-alone tool or part of a membership with extensions to offer more valuable tools like:
- HDR Merge
- Noiseless AI
- Upscale AI
- AI Background Removal
- GenErase
- GenExpand
- GenRemove
Additional extensions are coming.
Luminar Neo's exposure correction and color vibrancy features for all your travel memories will keep your photos looking natural and beautiful.
Finally, Luminar Neo's SkinAI and FaceAI provide the perfect finishing touches for your portraits, ensuring stunning results every time.
You can get everything with different pricing plans. Monthly, Annual or even Lifetime plans are available.
SAVE: You can save $10 using my coupon code - Beem10off
- Promo Code: Beem10off
- Easy to use
- Get great results fast
- Plenty of post-processing features
- Professional extensions are available
- May be slow on older computers
- File management is rudimentary
If you enjoy the free training, buy me a burger! : https://www.paypal.me/williambeem
Here are some of the gear and resources I use for my photography and tutorial videos.
Software:
Skylum Luminar (Coupon Code BEEM to save $10) – https://williambeem.com/luminar
Skylum Aurora HDR (Coupon Code BEEM to save $10) – https://williambeem.com/aurorahdr
Topaz Studio (Coupon Code WBEEMPHOTO to save 15%) – https://williambeem.com/TopazStudio
Topaz Mask AI (Coupon Code WBEEMPHOTO to save 15%) – https://williambeem.com/TopazMaskAI
Topaz Adust AI (Coupon Code WBEEMPHOTO to save 15%) – https://williambeem.com/TopazAdjustAI
Topaz Sharpen AI (Coupon Code WBEEMPHOTO to save 15%) – https://williambeem.com/TopazSharpenAI
Topaz DeNoise AI 2 (Coupon Code WBEEMPHOTO to save 15%) – https://williambeem.com/TopazNoizeAI2
Imagenomic Portraiture – https://williambeem.com/portraiture-ps
Adobe Create Cloud – https://williambeem.com/cc
The following links are Amazon affiliate links
Hardware:
Nikon Z50 DX-format Mirrorless Camera Body w/ NIKKOR Z DX 16-50mm f/3.5-6.3 VR (video tutorials) – https://amzn.to/30Txt5W
Shure SM58 Microphone – https://amzn.to/3fVO5hM
Yamaha MG12XU Mixer – https://amzn.to/33Vrpf1
dbx 286s Mic Preamp/Processor – https://amzn.to/31RGVpx
Zoom H4n Handy Recorder – https://amzn.to/2E3XxCA
Neewer 2 Packs Professional Metal Bi-Color Dimmable 660 LED Video Light – https://amzn.to/2XY1Cze
Neewer Collapsible Softbox Diffuser – https://amzn.to/2PTIGNm
GVM RGB LED Video Light – https://amzn.to/3iyWZTS
Want to learn more about Photography software? Click below to check out articles about Adobe, ON1, Skylum, and more.
Photography Software Articles

