Affiliate Disclosure: We earn a commission if you purchase through one of our links at no additional cost to you.
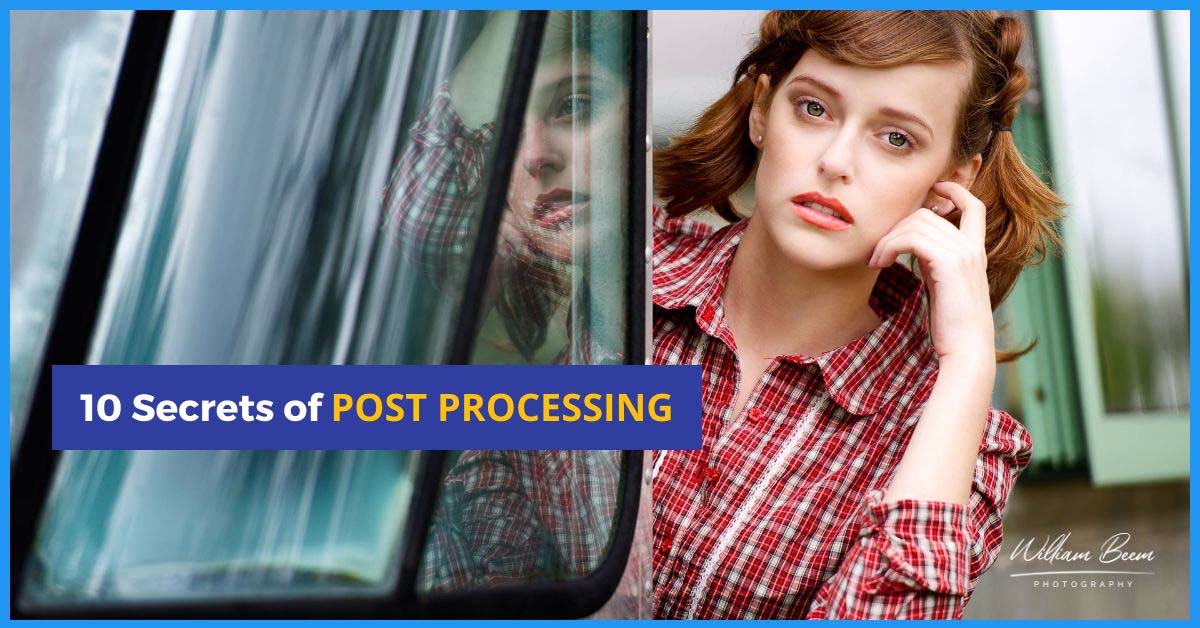
The secrets about post-processing aren’t really about techniques. In fact, a lot of the arcane post-processing techniques that I’ve used for the past couple of decades are outdated with new AI-powered tools.
The issues we want to discuss in this episode are about saving time, saving money, and creating the result that you really want for your photos.
This episode came from a previous article on 101 simple photography secrets.
The Secrets About Post Processing Aren’t About Techniques
The first three things you need to know about the secrets of post-processing are pretty easy to understand but often overlooked.
Everyone starts with over-processing. It’s an easy mistake to make. You’re staring into a monitor as you make adjustments and perhaps you don’t realize that you moved a slider too far or brightened something too much. Perhaps you have more structure or contrast than you need, making your photo look crunchy.
It’s OK. We all do it. Walk away for a day and come back to look at your photo. You’ll immediately see if you over-processed the photo.
Speaking of coming back to photos, don’t think that you can’t re-process old photos. I’m not sure why this issue exists, but some people think that their first attempt to process a photo is the only one they’re allowed.
That’s nonsense. As you get more experience with post-processing, you make decisions you didn’t know to make earlier in your work. So why not use that new experience to get a better result on some of your previous photos
There are a lot of post-processing tools on the market. I know, as I’ve bought many of them. Truth be told, I don’t need all of them. Some of my purchases were redundant, meaning that some of those products did exactly what the other products did. It’s easy to spend too much money on tools chasing the perfect result.
Let’s talk about that.
1: You Need Photoshop And Lightroom Classic
For $10 USD per month, you can get two of the most useful and powerful tools on the market. Adobe Photoshop and Lightroom Classic are available in a Photography Bundle in the Adobe Creative Cloud. It’s the best value for photographers and contains two of the industry-standard tools for organizing, post-processing, and printing your photos.
If you're a photographer, there's no doubt that you've heard of Adobe Creative Cloud. And if you haven't, well, let us introduce you! Adobe Creative Cloud is a subscription service that gives you access to two industry-leading products for photographers: Photoshop and Lightroom Classic. With Creative Cloud, you can edit and organize your photos and bring your creative vision to life.
Are they perfect? Nothing is, but they have more advantages than disadvantages. Even if you never intend to use Photoshop, it’s still worth the price just to get Lightroom Classic to manage your photos.
On top of the utility of these programs, there’s an entire industry surrounding them to extend, enhance and educate you on how to use them. There are communities & conferences dedicated to these products (Like KelbyOne and Photoshop World).
KelbyOne is the perfect resource for anyone looking to improve their photography skills.
Whether you're a beginner or a seasoned pro, there's something for everyone at KelbyOne. They offer courses on all aspects of photography, emphasizing Photoshop and Lightroom for post-processing.
Professional photographers, led by Scott Kelby, offer a new course every week, so you can always keep your skills fresh. And best of all, membership gives you access to everything they offer so that you can learn at your own pace and improve your photography game.
KelbyOne offers Monthly and Annual pricing plans, so the plan that works best for you.
Get 10% Off the Pro Annual Subscription with Code WBEEM10, Only at KelbyOne!
Coupon Code: WBEEM10
Get 10% Off the Pro Monthly Subscription with Code WBEEM10M, Only at KelbyOne!
Coupon Code: WBEEM10M
- Excellent training for photography and photo editing
- Wide range of topics covered
- Multiple instructors
- Discounts and Perks for KelbyOne Pro members
- Free plan available
- You can purchase a course without a membership
- A few instructors are better at doing than teaching
- With years of developing courses, some are out of date.
2: Plugins Can Save You Time
If Photoshop and Lightroom Classic can do everything you need, why do you want to buy plugins?
In a word, convenience. They can save you time by performing tasks that are more time-consuming in Photoshop or they can go beyond the capabilities available in Lightroom. When you’re done using those tools, they return the resulting photo back into Photoshop or Lightroom.
Let me give you an example.
I know how to use Photoshop to smooth the skin on portrait subjects. It involves some layers, blend modes, and brushing on the right area of the photo. If that sounds time-consuming, it is. However, I can get some great results. To speed up the process, I can automate actions within Photoshop to perform the repetitive steps. However, I still have to do some manual work to apply the effect on a selection.
On the other hand, I can use Portraiture, a plugin that enhances skin, to do the same job in seconds. If time is money, convenience is an investment.
3: When You Think You’ve Processed Your Image Enough, You’ve Over Processed It
The big secret about post-processing is that you always want to dial it back a bit. This is especially true while you’re getting started or learning new techniques. Over-processed photos detract from your skill as a photographer.
It’s easy to ruin colors, add too much contrast or spoil the exposure of a photo. You can spend time trying to enhance a selective part of your photo without realizing that you’re making it seem out of place with the rest of your photos.
When I started my own portrait retouching, I had a tendency to brighten teeth and the whites of an eye too much. They looked like evil flashlights coming out of someone’s face. The simple truth is that teeth and eye whites aren’t actually white. Teeth have a bit of yellow in them. Eyes have some red from the veins running through them.
Another secret about post-processing relates to enhancing skies. You rarely have purple skies or black clouds. It’s easy to get caught up in the possibilities of enhancing a photo and lose sight of the end result.
Whatever you do, walk away for a while and then review your photo before you publish it. This is something taught to other artists, and I wish more photography training picked up on this simple tip. Walk away and come back with a fresh perspective. You’ll likely want to reduce the intensity of some changes you made.
When you get too invested in staring at a monitor, you can get so isolated in the photo that you don’t see your own mistakes.
4: Everybody Should Have A Grey Card
One of the secrets about post-processing is that there are things you can do while capturing your photos that make things immensely easier when you get to the post-processing stage. One of those secrets is about making sure you can get a clean white balance in your file.
Taking a photo of a gray card while doing your photography gives you a neutral object that you can select with a white-balance eyedropper tool in post-processing. Using the information in the photo, your post-processing software can correct the white balance with a simple click.
I like using a Manfrotto EZYBalance Collapsible Balance Card. First, it’s durable. You can get a gray piece of cardboard, but that will get frayed and wear out in time. Second, focusing on a perfectly grey card is hard because there’s no contrast.
You can focus manually, or you can use the target printed in the EZYBalance grey card to make auto-focus quick and convenient. Finally, the EZYBalance gray card folds into itself to make it small and easy to stuff in your camera bag. Cardboard isn’t as forgiving.
Take a photo of the gray card in the same lighting conditions as your subject so you can easily remove a color cast or correct your white balance in post-processing later.

Is your camera giving you weird, inaccurate colors in your photos? Avoid that issue entirely by using the Lastolite 12-Inch Ezybalance Card.
This helpful tool lets you set your camera's white balance perfectly, so you'll never have to worry about poor coloration again. Not only that, but the Ezybalance Card is also great for exposure control and creating accurate color rendition. It's collapsible and durable, so you can take it wherever you go, and it's easily cleanable too. Plus, it's double-sided with grey and white tones to suit your needs.
5: If You Think You Can Save A Photo In Post, Delete It
I’m amused when I hear photographers discuss saving a photo. If the photo sucks in-camera, then post-processing is just applying lipstick on a pig.
It’s important to understand what makes a good photo. Post-processing won’t fix blurry photos, poorly composed photos, or uninteresting subjects.
Concert photographers occasionally get a great pose from a musician on stage and later see that a green stage light ruined their skin tone. OK, convert it to black & white to eliminate the color, and perhaps you have a good shot. You still need sharpness, exposure, and an interesting subject in the frame.
The problem with many photographers is that they become emotionally attached to their photos. They can’t evaluate their work objectively and want to save their photos.
Trust me, kill your darlings. (That’s #46 on the list of 101 Secrets)
Delete photos fast, so they don’t weigh on your mind. Either that or keep them as personal mementos. Don’t show bad photos as examples of your work if you value your reputation as a photographer.
6: Keywords Are Better Than Collections To Organize Your Photos
The organization of your photos may not be something you think of as post-processing, but it’s still a critical element of your post-processing work. You have to put those photos somewhere and, ideally, have a system to find them.
Many people rely upon Lightroom Collections to organize their photos. Those collections are the digital equivalent of stuffing your photos in a shoebox. It completely ignores the capability of your computer to sort and identify your photos based upon metadata – information that describes your photographs.
Keywords allow you to add descriptive words and phrases as metadata for your photos. You don’t need to add information stored in your photo, like the time and date. Some people create cumbersome folders and collections based upon date, and that’s such a waste of time. Your camera has a clock, and it puts the time & date in every photo file. Lightroom reads that data, so why would you duplicate it?
There’s this argument I heard against using keywords that I find laughable. The argument is that people get stifled and stuck, not knowing what keywords to add. So they get advised to put the photos in collections.
Well, every collection needs a name. If you can think of a name for your Collection, why can’t that name be a keyword?
What kind of photos do you take?
Every one of those items is a potential keyword. List the location where you took the photo. Was it day or night, sunset or sunrise? What kinds of things come to mind when searching for your photos? Those are perfect things to use as a Keyword.
Now here’s the fun part. You can build Smart Collections, which are nothing more than saved queries of your Keywords and other metadata. As you add keywords to new photos, they automatically go into those Smart Collections.
There’s more potential to organize and find your photos, and I cover them all in my course – Where’s My Photo? Click to check it out.
7: Watermarking Is For The Criminally Insecure
If you think adding a watermark to your photo will prevent theft, you’re wrong. People worry about someone stealing their photo and using it unlicensed. Yes, it happens. It’s happened to me. However, that theft earned me thousands of dollars because I had a valid registration with the US Copyright Office. That is how you protect your photos, not with some ugly little watermark.
Watermarks detract from your photo and do nothing to protect it. Someone can crop the photo to eliminate your watermark or use content-aware technology to replace it. Those watermarks are little bright spots that draw the eye, interrupting your photograph’s enjoyment.
You don’t need them. When you publish your photo, it’s next to your name and contact information. Doesn’t matter if this is on your blog, SmugMug, Flickr, or Instagram. Those places don’t need a watermark because your name is right there, and so is a way to contact you.
The big fear is that someone will swipe a photo from the Internet. Well, people swipe Tic-Tacs from 7-11, too. It’s obnoxious but not a big deal. Legitimate businesses who want to use your photo will contact you for a license. I’ve had many inquiries like that, and none of those inquiries came from a photo with a watermark.
8: There Is No “One Size Fits All” Final Export For Your Photos
In the digital age, we never get to publish a photo in one aspect ratio and call it a day. That’s especially true if you’re taking photographs for clients or trading services with a stylist, florist, caterer, or another service provider.
Everyone needs photos in different sizes and aspect ratios for social media, their own website, flyers, and marketing materials. You may need those different aspect ratios just for your own needs.
If you want to create a photography website, consider what aspect ratio you need for your featured image for each post. Try to keep it consistent. You can vary the aspect ratio for your photos inside the articles.
Anticipate this need when you’re creating the photos. Get multiple shots of the same subject or scene in camera. It will save you time later when you need to crop the photos in multiple ways.
Don’t just hand out your photos and let others crop them. You lose control of the presentation, and anything they screw up gets attributed to you. So plan ahead for your different output, and then create the alternative aspect ratios in post-processing.
That’s another secret about post-processing. Do all the work as you want it done, or suffer the ignominy of how someone else wrecks your photos and tells everyone that you took the shots.
9: You Will Eventually Develop Your Own Style Of Post Processing
When you start, it may not seem like it, but you will eventually develop your post-processing style. That style, combined with your composition, develops a recognizable look.
People know a Picasso when they see one or a Dali. The same is true with photography. Your subject selection, composition, use of color, and more will define the look that identifies you as the creator.
Don’t rush into trying to create a style immediately. You’ll probably screw up some photos and then change your mind. Style evolves. You’ll learn different applications and techniques as you develop your photos in post-processing. It’s OK to experiment to see what you like but only publish your best work. The rest is for you.
10: Save Time Post Processing By Getting The Shot Right In-Camera
I don’t like to spend much time post-processing to finish a photo. In my mind, finishing is the purpose of post-processing. Most of the real work of photography comes when it’s time to create the photo.
That means working the scene, eliminating distractions, and getting everything right in camera to the greatest extent possible. If something is distracting in your scene, get up and move it. You can put it back later if necessary. Why fight to remove an object in post-processing when you can pick it up before you click the shutter?
You may need to wait for the right time of day to get the light you want or for a group of people to move away. Patience is more rewarding than a difficult post-processing session that may screw up your envisioned result.
Take your time and get the right result at the moment of capture.
Time Stamps
Transcript
We've gone through a lot of episodes about secrets for taking photos. At the end, eventually, you have to do some post-processing. If nothing else just cropping them, getting a little bit of exposure adjustment. In this episode, we're going to talk about 10 secrets of post-processing. I'm William Beem. Welcome to I Like Your Picture. The show that helps you improve your photography with visual storytelling.
What is visual storytelling? It's the method of approaching your photography with a knowledge of who you're trying to serve with your photos and what emotion you want to make them feel. We encourage you to concentrate on your subject, light, and background to create a photo your audience loves. I'm glad you found us. Hi, my name is William Beem, and we're going to talk about post-processing.
This is not going to be one of Lee's favorites because she does not do a lot of post-processing, but she does do some. And we're going to talk about not just post-processing. We're not really talking about techniques. We're going to be talking about, are you going too far or are you going far enough? How do you know that your post-processing is really doing what you want to do?
So there's three things. We want you to be able to take away. Number one, everyone starts with over-processing. When you look at people who begin doing post-processing in their photos, you don't have a feel for it yet. And almost everyone that I've ever seen, just moves the sliders too far. They're too crunchy with too much contrast. The saturation is too much and it takes a little while to kind of get a feel for how to do post-processing and that's okay.
So if you're starting off and it looks over-processed, or someone's giving you a critique about that, don't feel bad. Everyone does this. And I think as part of the learning curve to get to the photos processed in kind of a believable state, or if you're doing something that's for effect to get to that state. You'll find your style, but everyone starts off moving those sliders
I think, just a little bit too much. Yeah. I agree. Number two. It's okay. To go back to reprocess old photos. I look at some of the ones I did in the past, and they were guilty of number one with over-processing I think, oh man, what was I thinking? I've got some horrible HDR photos in the world.
And I think I do, you know what I can do better. This photo is not a bad photo. It's just got bad post-processing on it. So it's okay. You can go back. And number three, I hate to say this because I'm an affiliate for a lot of post-processing tools, but it's easy to buy more post-processing tools than you really need.
Yeah. There are a few things that you really need. Everything else is nice to have. And I'm not going to tell you that you shouldn't buy those tools. And particularly if you buy them using my affiliate link, I'll be very happy and grateful to you. But the idea is don't go off buying a lot of things until you've mastered what you have and you've determined a need for another tool.
Yeah. That's just something to keep in mind as we talk about our main points. So my first point is you need Photoshop and Lightroom. It's that simple. 10 bucks a month. It is a very powerful combination and you may not necessarily need both. Maybe Lightroom does just what you need. Lee doesn't use Photoshop, but the bundle that you buy for $10 a month from Adobe Creative Cloud is Photoshop and Lightroom. Lee,
you don't touch Photoshop. You just use Lightroom. The only time Photoshop was ever opened was like, if I bumped it by accident, I was like, oh no, what is this? And then closer to open. Like, you know, sometimes you just do something. Now, the way that it's set up, you don't really do that anymore. But yeah,
I've been using right off the bat when they came out with this little bundle, combination, which was when 2013, it's been a while. I got it right then at the beginning, I've had it since and I've, I have never, ever opened Photoshop deliberately. And it's because you don't need it. You take a lot of time. You carefully set up your scenes and she's doing food
photography, tabletop photography, things of that nature. And she's got her lighting adjusted. She's got her scene adjusted. So it's pretty good out of camera and what she's doing in Lightroom besides, you know, storing her photos are just some minor adjustments and that's all you need. I have a bit of a take on it and you know, it's neither here nor there.
You may disagree with it. But I actually believe that very few people and that includes myself are at the level where they good at both setting up and actually taking the photo. In other words, they really great photographers. And they're really great at post-processing. That is a journey and you get, I think you need to be open, get yourself to that point.
But I think most people are either really great and/or passionate about creating wonderful photos and the post-processing is just a necessary evil. So they just want to get in and get out. Now that I kind of fall more into that category, cause I've got a passion for taking photos and getting them right. But post-processing isn't really my thing. You also get people who are maybe more technically minded,
less creative, not always, who just like they take the photo cause they just need to get the ingredients together, but they really know how to work their magic in the post-processing. I don't think many people have an absolute passion for both. I think we'll all sway one side or another. There are some people who just do retouching. If I come up with an example of someone who does both,
I think of Lindsay Adler and she recently did a YouTube video that was a deconstruction of a black and white high-key portrait that she did. And it was interesting to see how she photographed the subject and then did the post-processing. One of the things that caught my attention was she did some liquify on the subjects, shoulder and neckline. She wanted to show a very,
you know, not overly so, but she wanted to show a long graceful neck and the pose looked like the shoulder, it kind of a little bit hunched. And she used Liquify to kind of push that down, to get more emphasis on the neck. And that's a case where you're really looking at the final result more than just documenting a subject. And it worked. Now would other people do that?
Some people won't do that with Liquify or other tools because they say, well, that's not what was there. And I thought, well, that's depends on your intention. Her intention was the end result of the photo. And she came out with a marvelous photo. I think Lindsay Adler does a great job with lighting, a great job with composition and styling and all the things in the photography.
And then she takes that same vision into post-processing and she creates what she wants there. So there is a true blend, you know, at the same person doing both things. But I agree with Lee that most people kind of tend to be on one side or the other. Are you strong in your photography or stronger in your post-processing? Oh, post-processing definitely isn't mine.
Cause, when you said, Liquify, I thought that was another word for happy hour That's Photoshop, Photoshop talk there. Okay. All right. Number two. Plugins can save you time. Let me give you an example of this. Let's say again, I'm going back to a portrait thing and it's kind of typical that you do skin smoothing on female subjects. You can go through Photoshop and I know the process where I can create these different layers and different blend modes and then brush over the skin and get a really nice look.
Or I can just use my plugin Portraiture. And within a few seconds, I've got pretty much the same result. You're paying for convenience. And that's the idea with, with a plugin. It's not that you cannot do something in Photoshop. It's just that it saves you so much time if you just move a slider or press a button in a plugin and then transfer that back to Photoshop.
So that's the whole idea. And there are tools that can do like one thing at a time, like a lot of the Topaz tools, you know, there's Topaz, sharpen AI. Well, what does it do? It sharpens your photos. And it does a really good job. They've got a DeNoise AI that also does the same thing. It will remove noise.
It's not there to do a whole bunch of other things. Then you'll have tools like either ON1 Photo RAW or Luminar AI and coming up, Luminar Neo that do many different things and they don't do all the things that Photoshop does, but they can save you a lot of time doing that post-processing and then also work in Lightroom as well. So you don't necessarily have to go to Photoshop to use those as plugins,
but that is the whole idea of a plugin is not that you cannot do something and maybe some people haven't learned how to do it manually, but they save you time and convenience. And that's why you use a plugin. All right. This one, I want to see if Lee agrees with me or not. Number three, when you think you've processed your image enough you've over-processed it. Actually I do. For the most part,
I think it's true. And some people I guess, are just really tuned in. They tend to stop a little early, but that's probably because they know that when you think it's enough, it's overprocessed. Like when you're eating, if you just keep plowing through your food, when you're starving, by the time you realize you're full, you're kind of uncomfortable.
Well, here's my idea. And this came from personal experience and I've also, and I've also observed it in others as well. You get tied into the monitor. You're looking at, maybe you're trying to whiten teeth, whiten the whites of someone's eyes and you get there and you think that could be just a little bit brighter and then you walk away and you come back the next day and you look at it in the teeth and the eye whites are like flashlights burning through your soul.
Whatever you've done back it off a little bit. And that's what I mean by over-processing. It's not necessarily that you've have too much saturation, you know, maybe you do, but whatever you've done, you've probably done it a bit more when you're staring at the monitor. Don't be afraid to walk away for a while, come back and look at it and evaluate it on a second
look. I was going to say before I export my photos, like when I've saved them I, usually if it's on an SD card, I normally just learn to keep stuff. Once I've got what I wanted to have got it. And I, I tend to leave it, go and make coffee or do something and then I'll come back and I'll actually look through all the photos.
And yeah, sometimes you do end up back off. Sometimes you need to add a little more of something because you were overly conservative, but it does help with any kind of art. I mean, even if you're a painting, you will be told from time to time, step away, leave the room and walk back in so that you can see it as you're approaching it.
It does make a difference. All right, number four, everybody should have a gray card. And if you don't know what I'm talking about, there are these little things when you're taking photos and it doesn't have to be a portrait, it could be any photograph. It is just a gray card. And there's like an Ezy Balance gray card that just like a collapsible thing pops up.
You take a picture of that in the lighting conditions where your subject is, when you get back to post-processing, you can click on this to make sure your white balance is correct. You don't have a color cast that you didn't intend. And it's just that simple. You take one shot in the light where you're taking your photographs. It doesn't matter if it's with flash or if it's in sunlight,
because you can have the wrong white balance set on your camera. You can have a color cast from the day. And if you want to be able to correct that in post-processing having one photo in that area where you can just click on it and get the correct white balance can completely change how you perceive that photo. And that's not to say that you won't put a different color cast on it.
You've chosen later on, but it's really nice to have the ability to look at it in just kind of a flat light with the correct color. It gives you a clean starting block. That's exactly right. It's just a clean start. And if you have a gray card, it's not a big deal to pull it out, take a photo and then go on and do what you're going to do because you know that if you're shooting with that gray card in the same light,
when you get back to Lightroom or whatever post-processing tool you have, you can get a clean start just with an eyedropper with that tool. Number five, this is one of my favorites. And I see this online all the time. If you think you can save a photo in post-processing, delete it. A bad photo is a bad photo. I mean, don't think you can save it. Don't
think you can do anything that's going to fix it or help it or whatever. You took a bad photo. Just admit it, accept it, delete it. And I know that maybe it's something that's like, but it means so much to me. It would be just so perfect if only. Yeah, it's the, if only, that makes it a bad photo.
Well, if it means so much, then that's those, the ones that you keep for yourself. So maybe don't delete it, but those are the ones you don't show. I will accept that as an answer. And you know what? The photo that we talked about of you and I as my social media photo, horrible background, but I love the way we look together in that photo.
So it's not something that I put out there as a work of art or something I would ever hand to a client because the background is just really atrocious. But for a social media profile photo, I love it. I'm not trying to save it. I just liked the fact that the two of us are together having a really nice day. And that's what I want people to take
when they look at my social media profile, here's a guy who loves his wife and hopefully she loves him too. And then that's who they are. That's all I want out of it. But if you're out there taking something that you think that this is going to be so great, and then you get back and you think, well, that could be great if only I could.
And as soon as you hear yourself saying that, that's not a photo you share for a work of art, a client, or anything like that. If you think you can save a photo and post-processing, you're probably going to make it worse. Sometimes it's not that there's anything technically wrong with a photo. It's just not an interesting subject. Sometimes. Maybe you've got a little bit of blur someplace,
or maybe you think you can sharpen this enough. It doesn't work. It never works. I've seen tons of people who come up and say, they've got a new software tool. And they say, Hey, it saved this photo. But, no it didn't, the photo was bad. So the post-processing was just lipstick on a pig. That's number five. Delete it. Yeah.
All right. Number six. Not everybody agrees with me on this, but we're talking about Lightroom or organizational tools. So number, six keywords are better than collections to organize your photos. And here's why I say that keywords are things that you can use to build smart collections. And as you add a keyword to something, it automatically goes in the right collection.
And if you remove the keyword, it automatically comes out. Collections are more like dumping everything in a shoebox. They may have been relevant at one time. Maybe they're not. Or also you end up with a long list of collections that you never go back and look at. I like smart collections because when I'm in the mood to find something, those keywords are something I can use for a search.
And that's really what I do. I don't keep buckets and buckets and buckets of collections around and then wonder which photo in which. I use keywords because I can search on keywords. And then the results that I want show up in that space. I don't do things by date because every photo has a date on it. You know, even if you forget to change the daylight savings time on your camera,
it should still have the right date on the photo. If you're worried that that's not working, well, check the date and time on your camera. All of that is in the metadata of the photo. I don't need a collection to say June 2020. I can do a quick search faster that I can make a collection and put all those photos on there. Keywords are really great at helping you organize.
If you're horrible at organization, I have a course that is rather inexpensive. It's called Where's My Photo. And if you go to WilliamBeem.com/courses, you'll see it there. It's inexpensive. It's $27, but I guarantee you, you will have your act together. As far as organizing, finding, and exporting your photos. Trust me, if you're bad at organization,
this will help you. And it doesn't cost very much. So that's the little plug for this episode. Number seven watermarking is for the criminally insecure. Lee, do you know what I mean by watermarking? Yeah. And it's just, it's so frustrating. I get, when you get like a sample thing, if it's a sample, that's your proof of whatever, you know,
you let somebody check they're happy before they they're going to buy it anyway or whatever the story is. But people who put their photos up with these huge signatures all over is like, really? Do you really think that anyone's that interested in stealing your art? Like if somebody wants the photo, they're going to find a way to get rid of the watermark.
Oh, you can crop that watermark right out of there. Or these days with content-aware editing, you can just make it like that watermark was never there. It detracts from the image. It is usually bright enough in his little spot that it draws your eye down there. And the people who are going to steal your photo were never going to pay you.
Now, what is a better idea is to register your photos with the US Copyright office. That way, if somebody steals your photo and they put it up for sale someplace, you can file a lawsuit. If you filed your registration in advance and you could make thousands of dollars. Usually, in a settlement, you usually won't have to go to trial. I've done this.
It is an extremely frustrating experience. I don't advise anybody to file lawsuits because even if you find an attorney who does it on a contingency basis, which means they keep half the money and you don't pay them anything upfront, you still end up paying court fees. And that could be six, $700, you know, for whatever the filing fees are. And in the end,
you're going to get some money back. If they've done this for a business venture, but that watermark isn't stopping anybody. If anything, it's just making your photo look bad. Do you differentiate between like a big watermark. Cause some people are pretty bold with that. And somebody who's just cooked their automatic, a little signature, you know, William Beem. Let's just say you had a signature on your photos.
That was the bottom right-hand corner every time, because I knew that some people do that, like the portrait, maybe a portrait photographer, this is what they do. I'm not sure that I actually have a problem with that. You know, I take children's portraits and you have the little signature kind of like somebody signs their art. I think f it's not all over the place.
Let me answer your question. This is pretty simple for me. I still think it's obtrusive and none is unnecessary. I know what you're talking about. You're talking about putting a signature and it's kind of like there was a portrait photography place called Olan Mills, and maybe they're still in business. Maybe they're not at the bottom of everybody's portrait, it said Olan Mills.
It doesn't matter if it was my mother, your mother or somebody else. They all said Olan Mills. And then in the future, sometime people are gonna find these photos. And they said, Hey, this woman's name was Olan Mills. It's all about context. If your photos are online and you post them, well, your name is probably pretty close to it.
If you're doing this on your business website, your business name or your name is going to be there, you're going to have something where people can reach out and contact you. If somebody sees this on Flickr or 500 PX, whatever it's gonna be, you're gonna put it out under your name again. There's going to be a way for people to know this photo is yours.
The only thing the watermark was for was in case of photos somehow gets out without being associated with a place that you published it. Which at that point, do you think so, do you think someone's going to see that watermark and say, I need to find this person so they can take my portrait? It's no, it's not going to happen. I've had people that have contacted me for photo sales and none of them were photos that had a watermark on it.
I have gone through a phase where I put watermarks on photos, no one ever contacted me about any of those photos. It is a useless waste of time. It takes away from the image. And it's just a distraction that serves no valid person. And it's like I said, it's for the criminally insecure. You think someone's going to steal my photos.
You know, at 7-11 people still Tic Tacs, too, and 7-11, doesn't put a little sticker that says stolen from 7-11 on each one of these things. You don't need to worry about it. It's not helping you. It's hurting you. Any place where people see your photos where you've posted them will have your name nearby and a way to contact you.
So that's, that's my thought on watermarking. It's now you did mention something different, which is like, if you're giving somebody a draft photo. I sold a photo to somebody who wanted to put an on the roof or excuse me, not the roof, the ceiling of their conference room. It was a picture of the interior ceiling of the Library of Congress.
And I said, I don't have a format that is large enough that you can transfer to paint on the ceiling size that you're talking about. I said, now, if you want, I can give you a draft. And then you can see if you can find somebody. And this was all before the sale happened that you can see, can you enlarge this photo?
Because I don't have, you know, what it takes to do that. Or at least I didn't at the time. So I gave it to him and it had a big watermark that said drafts. So that way they didn't just go ahead and use it. And he comes back and he says, yeah, I've got it all good. So then we go through,
I make the sale. Then he comes back to me and says, it's not large enough. I said, that's why I gave you the draft before I sold you anything. He says, well, I guess I just spent a lot of money for nothing. I thought, well, I'm sorry that you feel that way, but you had the draft to find out if this worked beforehand.
So a watermark in that kind of case makes perfect sense because you haven't made a sale yet. And the person who wants the photo just needs to check. Yeah. Does it fit? You know, one of their criteria, if you're not smart enough to use a draft and to see if it really works, then, and then you pay for it.
I can't help you. All right. Number eight, there is no one size fits all final export for your photos. We mentioned this on the previous episode, but some people are going to want different aspect ratios and you may need it for Pinterest. You may need it for 16 by nine, a four by three, all sorts of different crop ratios.
So don't think that one size is going to do everything. You may need to take multiple photos. You may need to export those photos in different aspect, radio, different aspect ratios for people that you're sharing your photos with. So keep that in mind that maybe one photo isn't enough and you're not going to export it the same way correctly in just one aspect ratio that you shot it. Number nine,
you will eventually develop your own style of post-processing And your own system as well. So in other words, you get efficient. Well, Lee, your style is, is very simple, but it is your style. I have a specific order that I do. Now, what I will say is that I'm typically using, I'm taking the same types of photos.
If I went outside and started taking photos of our dogs playing in the yard and the sunlight, I might actually have to review the order in which I do some of the things, but I've found a system that works because I guess that's what happens when you do something a lot, you become more skilled at it. You get to practice it a lot.
And that's really what it, what it comes down to it. But you do certainly develop your own style and workflow. And I think you get more efficient. You get quicker with it. I may have more than one style as Lee said, depending on what you're shooting. Some people really like black and white, they only do black and white. Some people really like very colorful,
bright imagery. I'm kind of getting to the point now where, what I like is a bit de-saturated and I'm still playing with this. Maybe my subject isn't quite as de-saturated, but things in the background are, and I don't mean a really noticeable desaturation between the two, because I think that doesn't really look right. It's almost like selective color, but a very subtle desaturation of everything.
But my subject kind of helps that subject stand out a bit more. And that may work for some people. It may not work for others, but that kind of goes back to when you think you've processed your image enough. You've overprocessed it. If I did too much, then it would really look garish in contrast with something that wasn't de-saturated. If you look at the work by Joel Grimes,
he's mentioned that I think he's a little bit colorblind, or maybe he's a lot color blind. I don't know. But he de-saturates his photos quite a lot because he's worried about over-saturating things, but he's got to look that is just his, and I think that's part of how he did it. It came across it. I don't want to call it insecurity,
but an awareness of his concept of how color works. Yeah. So I think that's good. And I like his photos. I liked that desaturation. I think it works very well. He combines that desaturation with a bit of a pump in contrast. And I think it works very well. Well, it's funny because I, you know, as we said,
I do a lot of food photography and with food photography, one of the standard things that do, I think it's the second step I make. Once I've got that photo is I drop the saturation by anything between two and five points before I start doing anything else. So I, and it's not because mine is de-saturated, but I find that it works better with other sliders instead of hitting on saturation the whole time,
Number 10, save time in post-processing by getting the shot right in-camera. And this kind of goes back like, you know, if you think you can save a photo, you can't. Spend some time when you're taking the photo. It will save you so much time in post-processing. Scott Kelby had a story he shared on one of his workshops where they were had a group of people,
they were taking a shot at. I don't even remember what the location was. And he got up, he went over and picked up like some leaf or a feather or something like something that was in the way of the shot. And somebody in his group called out. It's like, well, we can take care of that in post-processing. He said,
if you take care of it and preprocessing, you don't have to. Yeah. And I think that was just a very simple, elegant answer to not being lazy, get the shot right in-camera. It will save you so much time and trouble later on in post-processing. I agree. I mean, I'll spend an hour getting the photo the way I want it so that I don't have to spend more than two minutes in post-processing.
And I'm literally saying two minutes, It's kind of like the old saying that's attributed to Abraham Lincoln. If I'm given six hours to cut down a tree, I'll spend the first four hours sharpening the ax. And that's what you're doing when you're getting it right in camera. You're spending your time doing it right in-camera. Post-processing should be simple, easy.
And I think rather quick, unless you're doing something dramatic with compositing and all sorts of stuff where that is a work of art unto itself, but for most photographers, I would say, post-processing, shouldn't take you much time. All right. And that is the end of our 10 points. And I've mentioned before that we were going to end the show.
This is the last episode of I Like Your Picture. We have had some really wonderful time sharing this with you. We've gotten some great feedback. I want to say thank you to everyone who's listened, everyone who's shared some feedback with us. I appreciate it really very much. Yep. Thank you for being part of the family. It's been good.
And then this is the last time you're going to hear this music on our show. I said, thank you once, but what the hell? Thank you again. We really appreciate you listening to I Like Your Picture. Show notes for this episode will be at WilliamBeem.com/episode278. And of course, we'll put in some links there to some of the products that we mentioned,
and I hope that helps you out. Those will be affiliate links. They certainly helped me out if you purchase using those links. And again, thank you for being a fan and part of the community and listeners of I Like Your Picture.