Affiliate Disclosure: We earn a commission if you purchase through one of our links at no additional cost to you.
It’s always a good time to begin photography. It’s fun, it’s exciting, and yet also a bit confusing. There are a lot of possibilities and questions. You also have a lot of potential pitfalls and mistakes to make – some of them costly – before you really find your own style and technique.
The idea for this post and podcast is to give you five things I wish I knew when I started photography. With any luck, these tips will help you achieve your goal a bit faster and without as much as expense as I went through.
So let’s get started.
Buying More Gear Doesn’t Make You a Better Photographer
It’s tempting to want to buy more gear. There’s even a phrase for it among photographers – Gear Acquisition Syndrome, or GAS. You’re going to have a temptation to buy new lenses and other tools. Each one with the promise of improving your photography. I spent a lot of money on these temptations. Then I learned one simple truth.
While it’s true that you need gear to take photos, you don’t need all the gear. This is particularly true if you don’t know what problems the new gear will solve. Hint: the problem gear solves is NOT how to take better photos.
Some lenses are sharper than others. Some cameras have better sensitivity to light. There are a lot of problems that gear can solve. However, you don’t know what problems you have while you’re trying to begin photography.
The very best thing you can do when you start learning how to take photographs is to work with the gear you have.
You need to get over this idea that you take a photograph. If all you wanted to do was press a button and allow the camera to make all of the decisions, you’re better off just using an iPhone. The purpose of being a photographer is to install your own creativity into the photographs that you make.
In order to make photographs, you need to understand how to control your camera.
Begin Photography by Learning to Use the Exposure Triangle
Every photograph you create uses something called the Exposure Triangle. At it’s core, the exposure triangle is a calculation of light that hits the camera sensor (or film plane) to create a photograph. There are three variables in the Exposure Triangle:
Whether you control these manually or the camera controls all of the variables on Auto mode, the Exposure Triangle is part of every photograph on every camera.
So if the camera can control these variables automatically, why do you need to know how to use them?
That’s because understanding how to change the Exposure Triangle variables gives you more creative control of your photograph. Understanding Shutter Speed is the difference between having a long exposure, freezing motion, or getting a blurry shot.
Knowing how to select an Aperture is the difference between keeping everything in focus or isolating your subject with beautiful bokeh in the background.
The ISO setting is like a water faucet. Use it to control how sensitive the camera is to light. At a low ISO, you get your best quality. A higher ISO that’s more sensitive to light allows you to capture images in low light, but the trade-off is more digital noise.
You’re going to learn that everything in photography is a compromise and there are alternative methods to do everything you want to do.
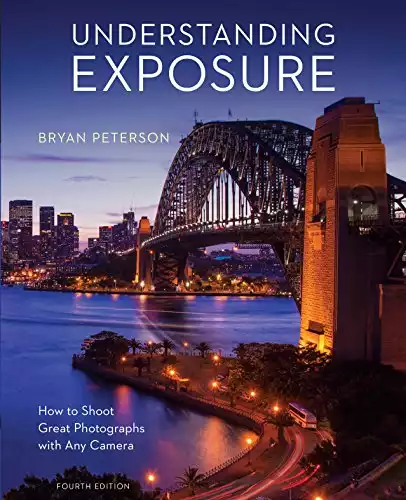
The best recommendation I can make to help you understand the Exposure Triangle is a book called Understanding Exposure by Bryan Peterson. This book sets the standard for learning how to creatively choose the exposure you want.
Understanding Exposure is the book I recommend to every new photographer.
Understanding Exposure has been helping photographers of all levels for years, teaching them how to get the desired results out of their shots. In this newly updated edition, Bryan Peterson covers all the basics of exposure, from light and aperture to shutter speed and beyond.
With an emphasis on getting the perfect exposure no matter the situation, this book is a must-have for anyone looking to improve their photography skills. You'll learn how to control sharpness and contrast, freeze action, and take great meter readings, plus get tips on using filters, flash, and available light.
Understand the Basics of Composition
When you understand the Exposure Triangle, you get the mechanics of taking a photo and some potentially creative ways to do it. However that’s not enough to make a great photo. You need find an interesting subject and frame it in an interesting way.
Understanding composition will help you show your subject in a flattering and interesting way so it catches the viewer’s eye and keeps it there. One of the most important things to do is to train yourself to see like a photographer.
It’s easy to go out and find a pretty scene or subject. The trick is to remember that your viewer isn’t there with you. Somehow, you have to condense everything you’re seeing into a frame that you’re going to present, and that’s what they get to see.
None of their other senses come into play. They don’t hear the ocean at the beach. Your viewer won’t smell the flowers or touch anything in the photo. You have to think of the best way to see the subject and place it inside the frame. That’s composition.
To get you started, here are a few basic tips to use.
1: Visualize the Photo Before You Take It
Do you know the difference between a random snapshot and a nice photo? A snapshot doesn’t put much thought into how the viewer perceives the photo. It’s documenting something, which isn’t entirely useless. You can get a lot of history and storytelling with a snapshot.
However, snapshots are generally interesting to a limited audience. If you want to create something a bit more artistic, think about how the viewer will interact with the photo. What makes the photo interesting, and what keeps them looking at it?
The first thing to consider is that light draws the human eye more than anything else. We’re naturally more interested in the brightest part of a photograph. If your subject is dark and some other area is bright, we’re going to miss the whole point of the photo.
After brightness, the next thing that draws the human eye is sharpness. If your subject is out of focus and something else is sharp, it’s another way of telling the viewer to avoid looking at it.
Basically, you want to have draw the eye to your subject by using light and sharpness to make it the most interesting and appealing thing in the frame.
If everything is equally bright and sharp, then nothing directs the eye to a specific focal point. The entire point of visualizing the photo before you make it is to think about how you’re going to get someone to look at the subject in your photo.
Something must be your subject. A pretty scene without a subject is just a boring photo.
2: The Rule of Thirds
It’s tempting and natural to put your subject right smack in the center of the frame. That gives a lot of weight and importance to your subject, and sometimes it’s the right choice.
Usually, it’s the wrong choice.
We tend to find photos more interesting if the subject is a bit offset from the center. That’s where the Rule of Thirds comes into play. You want to imagine a grid on your camera sense that looks like a Tic-Tac-Toe board. Two vertical lines divide your view into thirds, and two horizontal lines do the same thing.
Some cameras may have a setting that shows you the Rule of Thirds in the viewfinder.
Align your subject along one of those lines, or perhaps at the intersection of a horizontal and vertical line. If I’m taking a portrait, I’ll try to align the subject’s eyes along the upper horizontal line, particularly with one of the eyes intersecting also along the vertical line.
If I’m working on a travel photo, I may put the horizon line along the lower or upper horizontal line, depending upon whether I have more interest in the area above or below the horizon. What you’re trying to do is to tell the viewer that this area is more interesting than that one. Putting the horizon line dead in the middle doesn’t add that information.
So make a choice. Is it the sky that looks great or whatever is below the horizon line?
The four points of intersection of horizontal and vertical lines are your greatest points of interest. It places your subject inside the frame so the viewer’s eye gets drawn into the photo.
3: Create a Sense of Depth
A photograph is a flat, two dimensional view of a person, place or thing. Doesn’t sound very interesting, does it?
You can change that perception by creating a sense of depth. The way to do that is to have something in the foreground, middle and background of your subject. Let your viewer imagine the depth because some things are in front of or behind other elements of your photo.
That doesn’t mean your subject always has to be in the middle. It could be in the foreground or the background, too. The idea of depth is to help your viewer feel more connected to what’s going on in the photograph, because that simulates how we perceive the world around us.
4: Eliminate Distractions
Nothing ruins a nice photograph faster than something that takes your eye away from the subject. You don’t want to see a telephone pole coming out of a subject’s head, or a pile of trash in the foreground.
Take some time looking at your composition to keep it as clean as possible. Distill your photo down to only the essential elements it needs and eliminate everything else. Simplicity is your friend here
You can do this by changing your angle of view. Sometimes that means moving or it could mean using a different focal length. If you can move your subject to a more appealing location, then ask them to change position.
You want to look along the border of your frame for unwelcome elements sticking in from the sides, above or below. If there’s something in the foreground and you can pick it up, then clear it out of the way.
Move your camera, move your subject, or move the distraction. No matter what, get that stuff out of your frame if it will take someone’s attention in the wrong direction.
5: Leading Lines and Natural Frames
Your environment may have some elements that direct the viewer’s eye. That can work for you or against you.
We have a tendency to look for leading lines and follow them to their conclusion. That’s why so many photographers like railroad tracks. If you want leading lines to work for you, have them lead into your subject. If you want to see how leading lines can work against you, just watch them lead the viewer’s eye right to the edge of the frame and off into…well, something other than your photograph.
Natural frames are anything that creates a framework for your subject. It doesn’t have to be something like a natural arch. It’s just something you find in your environment. Doors and windows can frame your subject and they make common natural frames. Those borders around your subject act to keep the viewer’s eye right where you want it.
6: Use Balance…or Not
If you follow the Rule of Thirds, you place your subject to one side or the other of the frame. What happens on the other side? If it’s empty space, your lacks visual weight. Some people will argue that this causes a lack of harmony in your composition.
It does, but is that a bad thing?
There may be times when you want to create a photo with empty space on one side because you plan to put some text elements there later in a tool like Photoshop. The text on one side and the photo on the other side creates balance. Take a look at the header graphic of this article as an example. There’s text on the left and a graphic illustration on the right.
Make sure you understand Art and Design Elements of Composition.
On the other hand, I’m not afraid of a little visual discomfort for the viewer. Sometimes that makes your subject that much more important to view. There are no distractions on the other side of the frame, so your eye goes where there’s information.
When you’re thinking about balance, give one side a bit more emphasis or importance than than the other. You can do that by giving it more light, making it larger, or sharper than the other object on the opposite side.
Learn How to See and Use Light
You may think that photography is about your subjects, but it isn’t. It’s about light, and the lack of it. Let me explain.
If you evenly light your subject, chances are that it’s going to be a pretty boring photo. Our eyes like a bit of hide and seek. Remember that I told you that our eye goes to the brightest thing first? It can’t do that if everything is equally bright.
Something emerging from the shadows is far more interesting than something plainly lit up for all to see
Shadows are your friend. They define our subjects and give them shape. Shadows make things interesting. There’s a sense of something being revealed when it has shadows, which is far more provocative than a well lit subject.
1: Use the Direction of Light to Create Shadows
Light has to come from somewhere. That’s what makes it interesting. If light comes from everywhere, there’s no sense of mystery.
You can use the direction of light to create interest in your subject. Backlight creates silhouettes. Sidelight creates interesting edge lighting. Lighting from an angle means that shadows fall on the opposite side.
Perhaps the least interesting photographs you make are when you put a flash on top of your camera and blast it from the front. It’s like a light grenade that makes everything flat and lifeless. Yet take that same flash and move it a few feet to either side, above or even behind your subject – now you’ve generated some interest.
If you can’t move the light, then you move the camera around the subject to capture different angles compared to the light. Mobility is one of your greatest assets as a photographer playing with light.
2: How Much Light Do You Need?
Light has quantity. You see this pretty much every day. Dawn starts with a small amount of light creeping over the horizon and it keeps amplifying until midday. There’s a lot more light in the middle of the day than at dawn. Then the process reverses until sunset and after. The light starts to diminish.
Now I ask you, which time of day has the most interesting light? In my opinion, it’s the dawn and sunset periods when there’s less light. However, the answer of “best light” depends upon what you’re shooting.
If I had to shoot some street basketball, I’d want to get some in the hard light of day because that’s when a lot of people play. Yet I’d also work for some silhouette shots at sunset or after. It tells the story of how things wind down at the end of the day.
If you want to freeze action, you either need a lot of light to get a short shutter speed, or you need a flash with a short duration.
3: What Color is Your Light?
At dawn and sunset, the color is much different than midday. Rather than going on a scientific explanation of why changes color in the atmosphere, let’s just accept it and know that we can get some beautiful blue light or orange/red light at these times.
You aren’t limited to sunlight for color. There are plenty of opportunities for colorful lights all over the place, from neon signs to colorful gels to put on your flash. Experiment with color. It adds interest to your photos.
Spend some time watching movies to see how they use color in lighting. Some films have masterful use of lighting to sell their story. You can learn a lot from how they light a scene.
Begin Photography by Knowing What Kind of Photographer Do You Want to Be
When you begin photography, it seems like any subject is fair game. I tried a lot of different genres.
Eventually, I settled primarily on portraits and also travel as the genres that interest me the most. I did better work in those genres. Also, I got tired of going to events for sports or concert opportunities. Those places are crowded and I get uncomfortable around places with thousands of people.
Parking is also a pain, too.
Portraits and travel allow me to enjoy photography without being surrounded by too many people. With less stress, I take better photos. That’s what worked for me.
I’m not saying that you shouldn’t experiment with different types of photography. In fact, I’d encourage it. Just don’t go spend a lot of money on gear used for a specific type until you’re sure you want to continue that genre of photography.
Take sports photography as an example. You often need a long focal length, and those lenses are truly expensive. If you want to try it, rent some gear for your first few sessions. Big telephoto lenses also come into play for wildlife photography. Not only because you don’t want to disturb the animal in its natural environment, but also because some animals may eat you if you disturb them.
Extreme telephoto lenses cost thousands of dollars. It’s wonderful to have if you’re going to use it over and over again, but not so much if it just sits in your closet because you decided that sports or wildlife photography just isn’t your thing.
Gear is a tool to solve problems. Long lenses solve a problem of staying out of harms way (for football or bear photos). Lighting gear is great for photographs, but you probably don’t need a dozen Profoto strobes to take photos of a bear.
Automotive photography can be fun, but can you find the cars you want to photograph? The genre you choose takes some effort to get your subjects. Make sure you’re willing to invest in that effort before you invest in more gear.
Begin Photography the Smart Way
Photography can be expensive and time consuming. It’s a wonderful creative endeavor and I love it. Photography still frustrates me and makes me cuss like a sailor, but I keep coming back to it.
The best way to avoid wasting time and money in photography is to work on your skills first, and then build your kit later to solve specific problems. Remember, you can’t buy your way into creating a great photo.
It comes from you and your artistic vision.




I like it. Very helpful.
This blog was very helpful, considering the fact that i’m taking a class for photography… it showed me what things i needed to focus on and what things i need to watch out for in the future.