Affiliate Disclosure: We earn a commission if you purchase through one of our links at no additional cost to you.
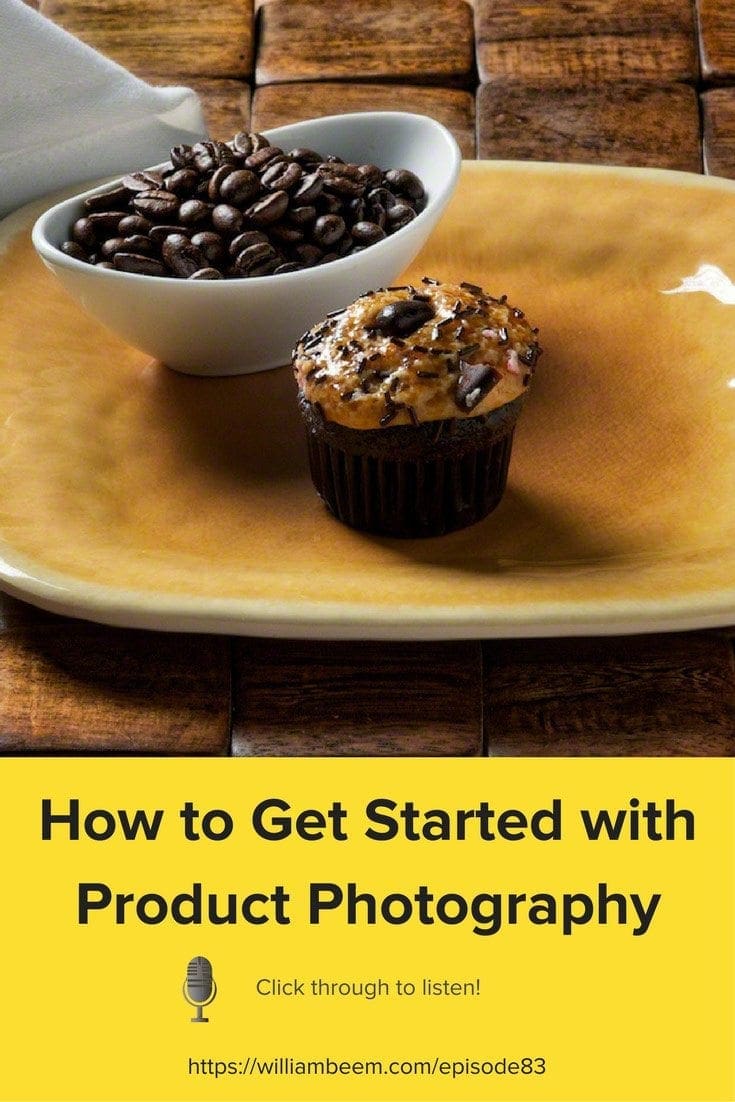
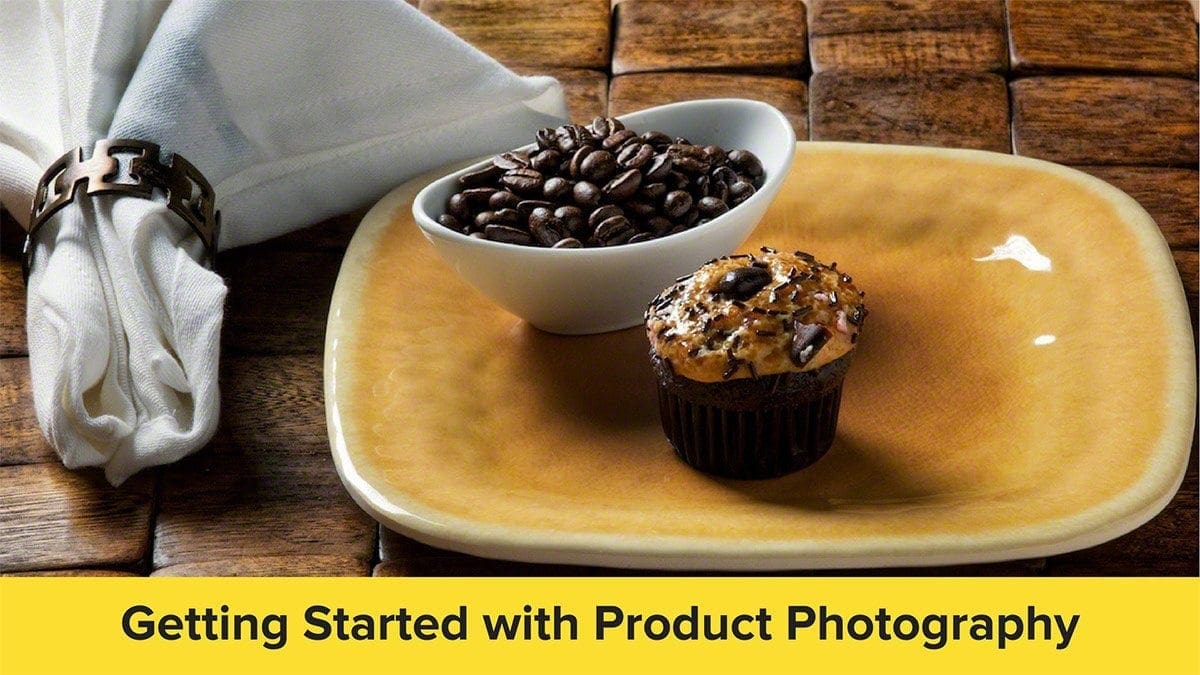
Product Photography Tips to Get You Started Making Better Photos
Getting started in product photography can seem daunting. If you’ve never tried it before, some of your initial research can lead you down the wrong path. It’s actually very simple from a technical point of view. The place were people get lost is understanding their purpose.
We call it product photography, but it’s essentially the same as still life photography or food photography. In each case, you set the scene and have control over all of the variables. It’s up to you to be the art director, stylist and photographer. There’s one other thing that you need to have before you get started, though.
You need to have a story.
You’re not a photographer. You’re a storyteller. That’s the difference between a snapshot and a photograph. Make sure that your photos communicate some kind of message.
Lee’s Product Photography for Running and Nutrition
Lee has a passion for endurance running. Six days a week, she wakes up at “Oh Dark Thirty” and runs for miles. When she gets home, she takes a photo of herself with some message for her social media accounts. That little habit, along with her cheery personality and experience, builds up a community of people who enjoy endurance running.
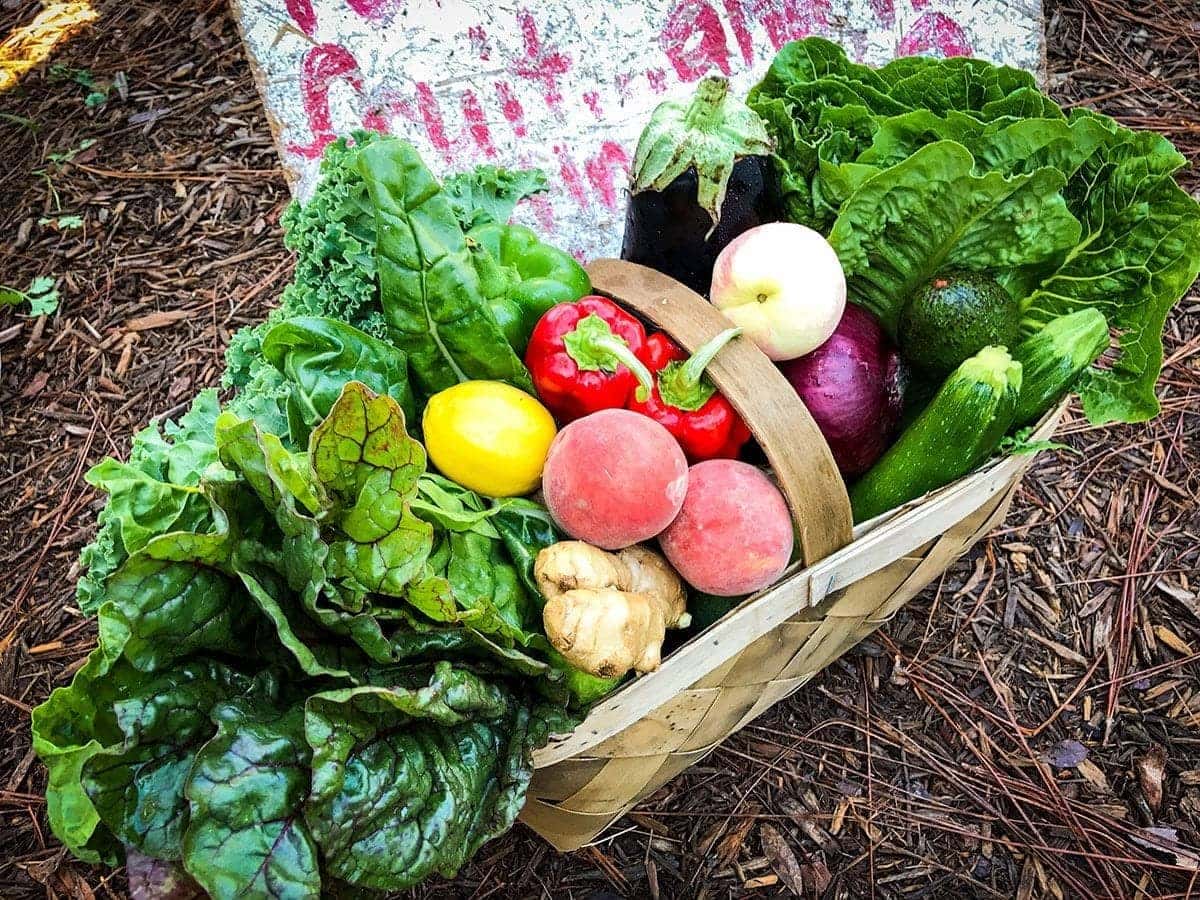
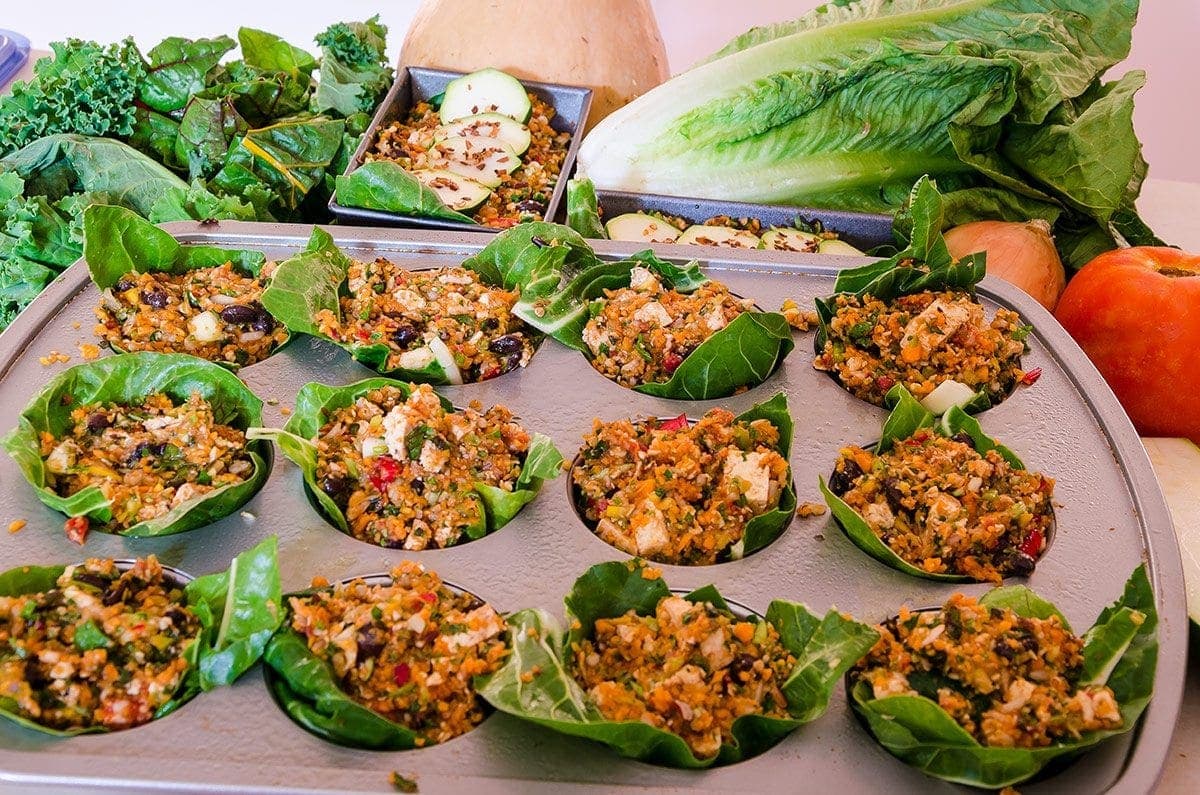
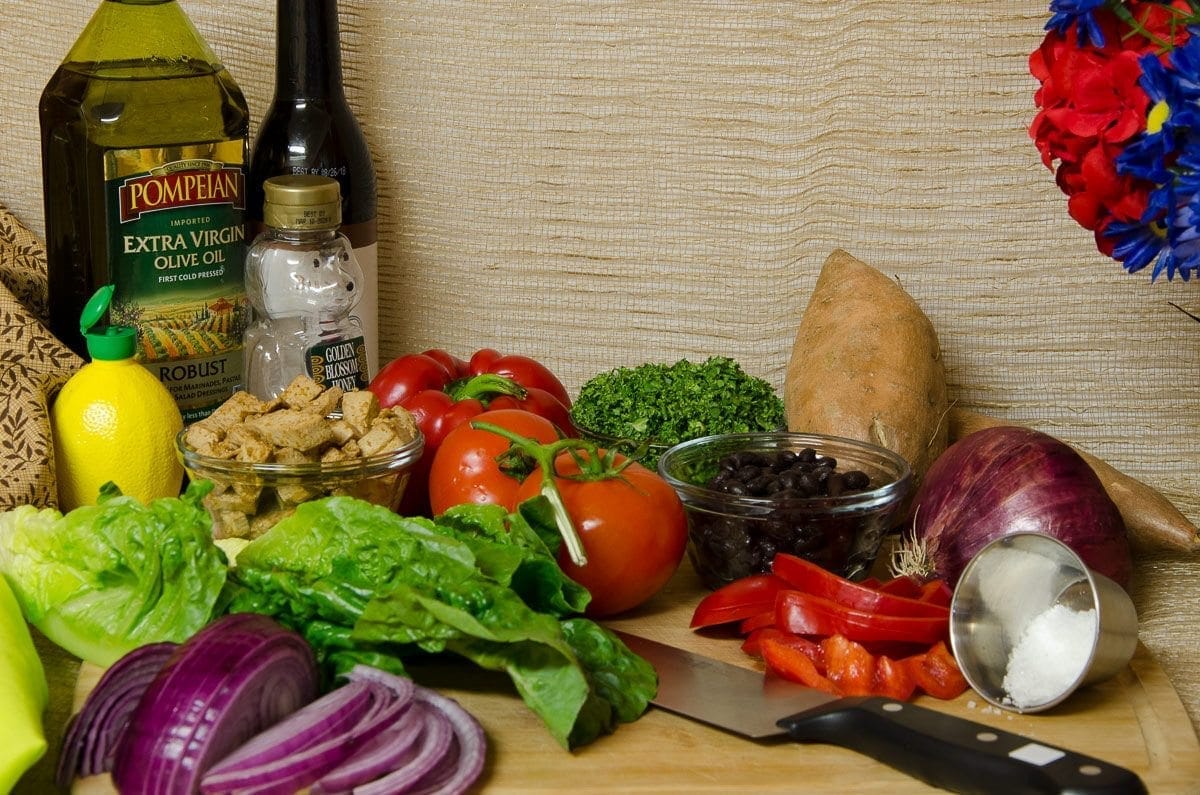
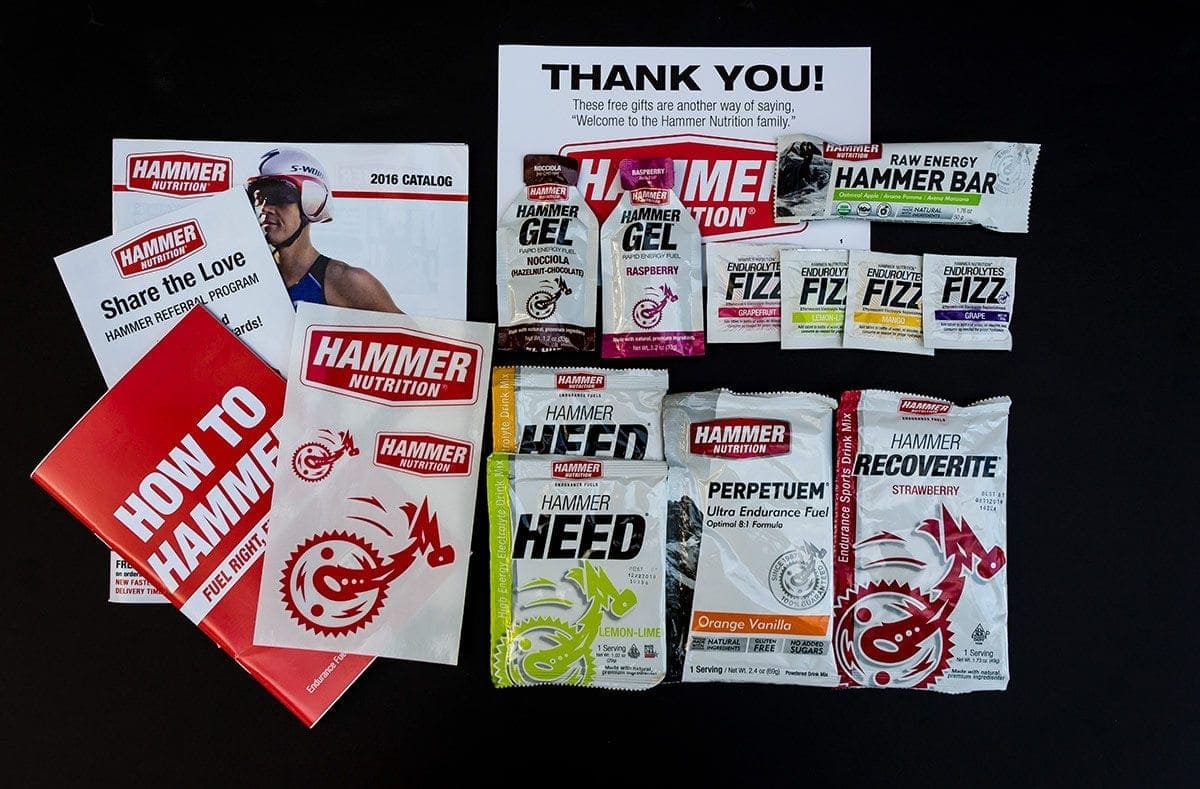
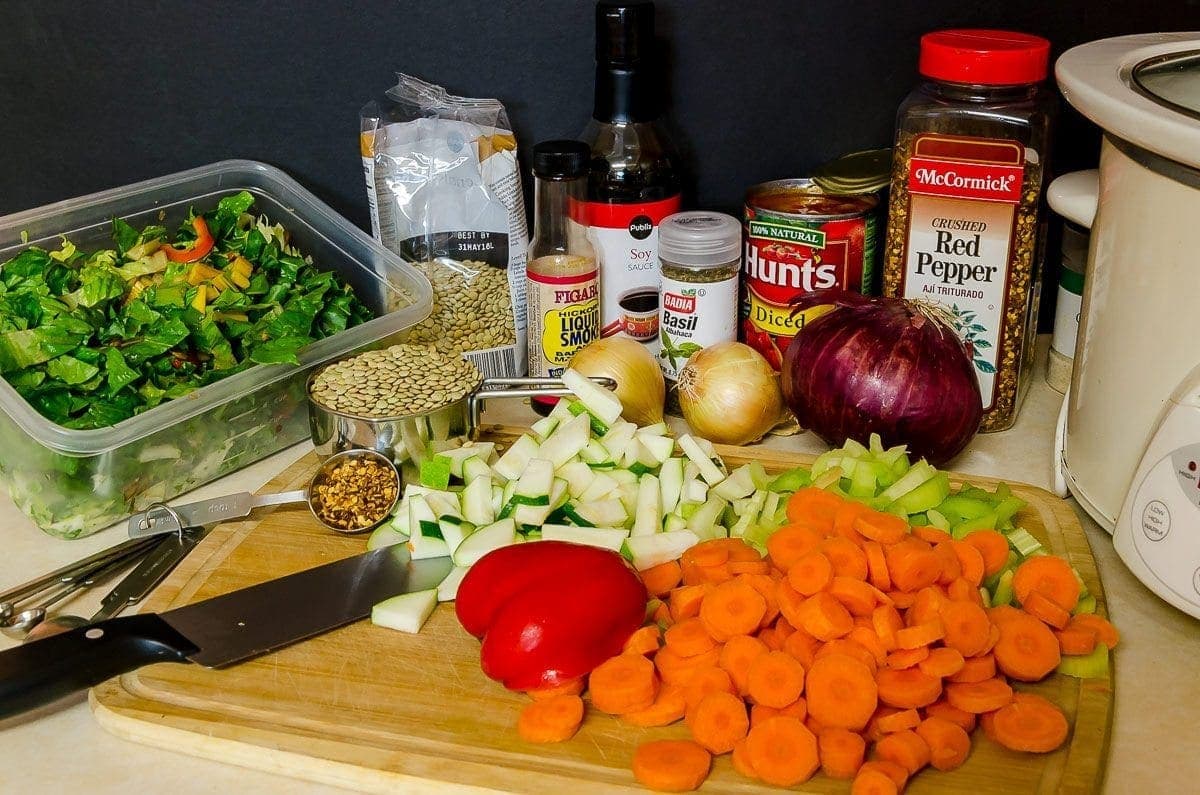
She does more than selfies, though. She’s sharing images with products she uses. Lately, she started a nutritional series showing her food prep from market to oven. As a result, she’s earning ambassadorships with various vendors in the endurance running industry. She also landed a job with a company dedicated to helping others plan, train and recover from endurance races. Her blog is just starting, complete with her photography to help tell the story for each post.
Product photography is essential to telling her story. It’s also helping her build momentum, grow her audience and earn money. That’s why telling a story is imperative for product photography. The photo must serve a purpose.
Here are a few examples from her recent photos:
What Are Some Technical Product Photography Tips?
Planning your story is the first step, since it guides everything you do in the photography phase. Here are a few tips to keep your message on target.
1: Keep Your Set Simple
There are a lot of photography tools that you could use in your product photography, but there are very few tools that you must use. The photos above were taken with a camera, a tripod and available light.
If you’re comfortable with flash photography and setups, you can get creative with your lighting to isolate or highlight a subject. However, don’t think that you need to use external lighting for these photos.
2: Protect Your Colors
If you’re shooting a product with a specific color, like Coca-Cola’s iconic red label, you better make sure that the Red in your photos is Coca-Cola Red. The best way to do that is to use a ColorChecker Passport Photo to create a known color calibration profile.

The Calibrite ColorChecker Passport Photo 2 is the perfect tool for avoiding frustration with poor colors in your photos.
The Portable Protective Case accommodates multiple positions for easy use with four specialized targets. You can create custom camera profiles based on your individual camera/lens/lighting combinations for DNG and ICC workflows. You can also create a custom in-camera white balance for a consistent white point across a set of images without needing to correct each image later.
The enhancement patches allow you to check and evaluate shadow details and highlight clipping, and the lanyard ensures that your Passport is always where you need it.
At the very least, shoot with a grey card for your White Balance settings. Don’t let the color of your light change the colors of your products.

Is your camera giving you weird, inaccurate colors in your photos? Avoid that issue entirely by using the Lastolite 12-Inch Ezybalance Card.
This helpful tool lets you set your camera's white balance perfectly, so you'll never have to worry about poor coloration again. Not only that, but the Ezybalance Card is also great for exposure control and creating accurate color rendition. It's collapsible and durable, so you can take it wherever you go, and it's easily cleanable too. Plus, it's double-sided with grey and white tones to suit your needs.
3: Show Your Subject in Context
One of the products that Lee features in her photos above are little jewelry tags with quotes. They can go on your running shoe laces, on a wristband, or even a water bottle. It’s fine to show these items together. However, they don’t really have a place with her nutrition photos.
Food goes with other food, knives, pots & pans.
It’s also fine to isolate your products on a neutral background that doesn’t compete for attention. Remember, the objective is to highlight the product for a specific purpose or use. Don’t confuse your story or message by placing your product with something irrelevant.
4: Embrace Color Contrast
To help your products stand out, show them with some color contrast. Notice that Lee uses a lot of neutral backgrounds, but often places her subjects beside different colors that contrast with each other. That color contrast helps both items stand out in its own way.
You May Also Like…
If you’re into creating your photos at home, check out this article on creating a Home Studio for Portraits.
FREE Lightroom Presets from ON1
I mentioned on the show that ON1 created some FREE presets for Lightroom. Here’s the link to download the presets
FREE LIGHTROOM PRESETS FROM ON1.
Transcript
THE PHOTO FLUNKY SHOW: Episode 83
William: Hi there. Welcome to the Photo Flunky Show, Episode 83.
Today we are going to be talking about pretty much all about getting started with product photography.
Hi, my name is William Beem.
Lee: Hi! My name is Lee Beem.
William: And just so you know, I’m going to put all the pressure on Lee Beem today because this is pretty much her thing and we have been looking forward to talking about this because it’s not just product photography. This kind of thing is going to go for still life or food photography. I guess I want to go over what you’ve learned since you started and how you’ve kind of developed the rhythm that you’ve gotten into.
You’re not the only one I know that is interested in doing this and I’ve seen people on a Facebook community for business folks that are trying to do their own photography and they are having all sorts of problems with it. So I’m hoping we can make this a bit of a resource. Like how do you get started doing it?
But before we get started talking about that, there is going to be a transcript of the show for free williambeem.com/episode83 and you can find links to subscribe to the show there. Also you can go to photoflunky.com We’ve got a player there. So you can listen to this episode and all the others that we’ve done. And of course we have some links there as well.
And also I want to let you know that On1 has some free Lightroom presets. These are actually pretty cool. There’s a number of them out there and I’ve got a shortcut from my blog to get there. Just go to williambeem.com/on1lrpresents. I’ll have a link to that on the show notes page, but it is williambeem.com/on1lrpresents. They are very free.
Lee: Absolutely free.
William: Yeah they are very free. They are absolutely free. If you’ve got Lightroom and you want to check out some of the presents from On1 we really encourage you to go try them out. Download them and see what you think and enjoy. If you’ve got any questions, just let me know.
OK, let’s get started with why product photography … Lee, you’ve been doing this for your social media and for the blog that you’re starting up. What is it exactly that you are trying to do and why did you need to go ahead and take your own photos and share them rather than using some of the product photos from not just companies that you are sharing; you’ve got an ambassadorship for some of them, but you are also doing other things and you kind of need to show your own setup. Is that what it is?
Lee: I am. And you know this is not … I never ever thought about doing product photography. I think it’s one of those genres, certainly at a professional level, I never wanted to do it and still at this point I don’t; but it is something that evolved and I kind of stumbled into it through necessity and desire to do things very specifically.
It’s really turned out to be showing my own style. I’ve got a very specific way of photographing things and I think people are starting to recognize it. If you’ve been listening to the show for a while, you’ll know that I’ve got my scrapbook background so there is a bit of an orderly haphazard method in my setup.
William: Well, it’s not just the scrapbook background. Even before that you had an art background. And you’ve got your own vision of how things should look and how you should arrange them.
Lee: I really do and it’s something that I cannot really explain, because I don’t think about it as much as I see it and I feel it and it either balances right in my creative mind or it doesn’t. Sometimes it’s just a case of shuffling and moving things around until you’re happy. You’re not exactly sure what you need to do, but you know when it’s not right and it kind of resonates when it is.
William: You made a choice that you didn’t need stock photography. You needed something that was specifically from you and for you.
Lee: It is and that is something that I stand for. I think what I am doing and the essence I’m capturing in the message I’m putting across is that I am real. I have good days and I have bad days. The things that I share are things that are my own. If I ever share something of somebody else, it will be linked and stated so. I don’t want to borrow things from somebody or something else and then put them out as my own.
It’s not always that extreme. There are times when that works very well. There are products and services out there that can give people a kick start. But I am actually willing to have something that maybe looks a little less polished and be real about it than to put out some kind of showpiece. I want some heart and some real life in it.
William: Your audience is reacting very well to this. In fact you’ve got people asking where you’re getting your photos. And then you tell them, “Oh, I took that.”
Lee: Then they are even more intrigued when I tell them that some of them were done with my iPhone.
William: That’s because your audience is based upon endurance running so they are not photographers.
Lee: They are not photographers; no.
William: And the idea that you are doing it I think is kind of surprising to some of them.
Lee: That is true, but then again, I have ambassadorships and there are also companies that I want to work with and who have got to know me who have asked about my photos and being on the marketing side, they are familiar with their brand.
I’ll give you an example and this was a very naughty thing to do, but I have an ambassadorship for one of the products and they sent out this stock photo for us to share to get a special discount code for a limited period. I looked at the photo and thought, that is just terrible!
So I took my own product photo and redid the whole thing and made my own and shared it. Nobody ever came back. In fact they liked the photo when I shared it so I’m assuming they are OK with it.
William: Well, one of the nice things about doing your own photography is that you are unique and it’s actually resonating with your audience on social media.
That’s something I’ve read from other people who are allegedly social media experts. They say don’t use stock photography. Use your own photos if you can, because like I said, it’s unique; it’s you. You’re not sharing the same photo that everybody else is sharing.
People in a given audience are probably following a number of others that may be with the same program for an ambassadorship or an affiliate marketing or whatever the relationship is. If they see the same image everywhere….
Lee: I think that’s another thing to consider. This does happen, especially when you are affiliated with some kind of company. They will send out their stock photo for whatever the promotion is or the contest. It could be anything. And everyone who is part of this little group is going to be posting and sharing the same photo.
The problem is that we become immune to that, so as soon as we see something that’s showing up all over the place, mentally I think we are so programmed to learn how to dismiss ads and commercials and aggressive selling that we don’t look at it. And I know for myself that is true. I see the same thing coming up and I kind of disregard it and scroll through it because I know that it’s some kind of commercial or ad. If you put something different in, people are more likely to stop and at least wonder what it’s about.
William: Let’s talk about this. You’ve got a couple of different styles that I know of. Some you get through with your run and you put up …. You take a photograph after every run. And you put up a social media message for that.
You’ve also got your food prep and you do your food photography photos. What am I missing?
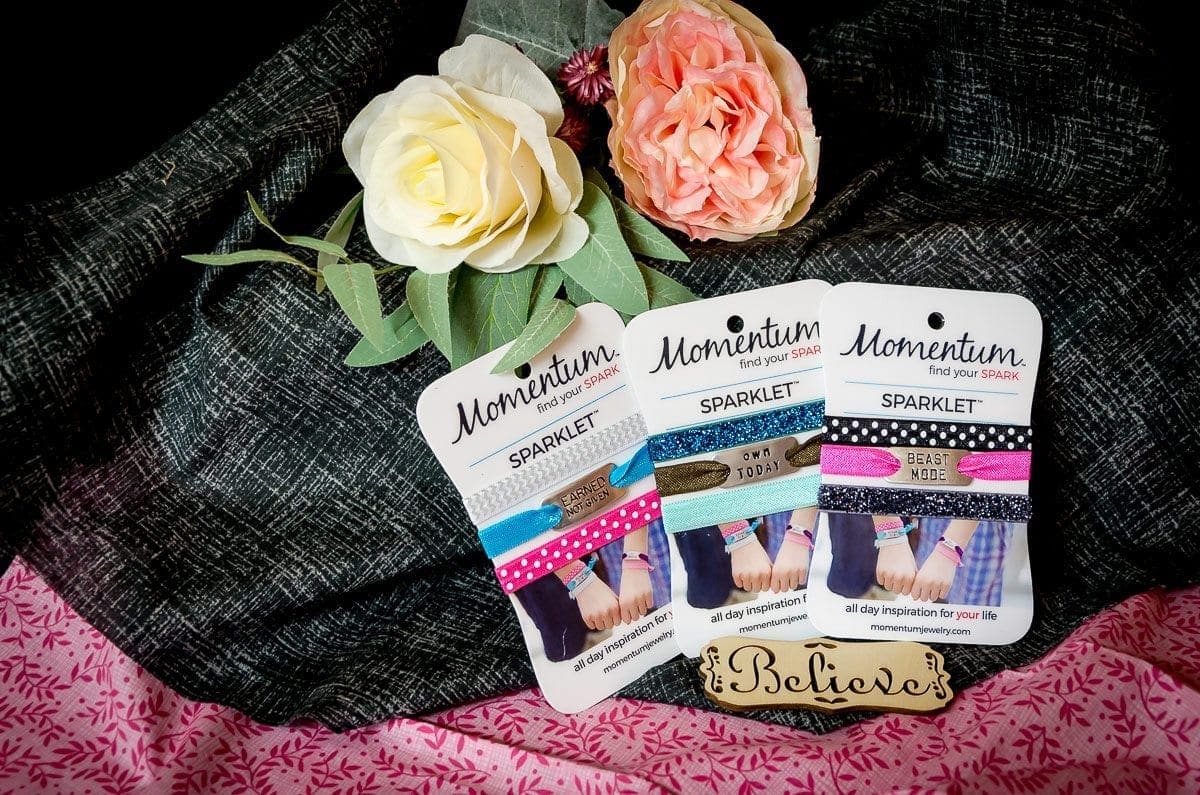
Lee: I’ve also got some other products that I really like. I have no affiliation with these companies; I really love their products and they become an integral part of what I do for various reasons. For example there is Momentum Jewelry and they make little sparklets and shoe tags and these are all done in metal and they have a little message written or a motivational saying. Or some kind of statement on them. I really love these things and I love to take photos of these things and tag them in it. I love the company. I’m not trying to get anything out of it; I’m just trying to say I really like what you do.
So those are part of it. I do have some ambassadorship programs and there are photos. One is a race; an actual race ambassador so that represents the event and that is almost seasonal from sign up time until post race when everything dies down so I’d say about seven or eight months of the year there are going to be things that go up there. That is going to be race specific or something specific to their event in the run-up to the event. And then afterwards there will be something else that will come up.
William: Well there are certain things that endurance runners comment on. Obviously the shoes. You have featured your various shoes.
Lee: Shoes all over the place.
William: The gels that you take when you are running, and your food prep – we mentioned that before. So there are products that kind of go along with this community that they recognize and you feature those in your photographs and your social media and for your website.
Lee: Yes.
William: In order to do that you’ve got to set up and do your own photography. What is it that you wish you’d known when you started?
Lee: You know I just went through all kinds of things and it sounds silly, but initially I figured if I used the big camera that I would get better photos and while the photos are better quality, they didn’t always capture exactly what I wanted the way I wanted and for a long time the easy solution was to take my iPhone and get a piece of foam board in the color that I wanted, arrange my stuff outside on the lawn on that foam board with daylight coming down and taking the photo with the phone.
I struggled. We don’t have a lot of outside light filtering into the home and if you switch on a light you’re going to get different temperatures and you start fighting with your colors. So with product photography the color that you represent needs to be as true as possible, if not bang on to the product that you are representing.
I’ve kind of had to work around these little things. I use Lightroom and I am able to do my white balance corrections which is always my first stop in Lightroom and I figured that this actually takes care of a certain amount of that. You do your best to get it right in camera, but that really helps. I do wish that I worried less about that and that I had just taken a tripod and mounted the camera on the tripod. Because I was really trying to work this hand-held.
William: For a long time you were. You were using both your iPhone and your DSLR on different types of shoots.
Lee: Yes.
William: So I think the ones where you’re coming back from a run and you’re all sweaty you don’t necessarily set up the DSLR.
Lee: That DSLR is weather proof; it’s not waterproof. After a run? I need housing for it!
William: Well, let’s face it, it’s more of a hassle to set that up than to set up the iPhone and that’s like your daily message. An iPhone works perfectly for that.
Lee: It does. This is not a photography contest. This is a message; it’s a communication.
William: Since you have a better iPhone than I do you get a better picture out of it.
Lee: I don’t know about the front camera, but…
Actually I tried using the rear camera with the iPhone 7 Plus. I had this thing set up and I figured, OK I’ll position myself and use the selfie camera and then all I did was I marked the spot where I was, turned the camera around and went back to it and somehow I just wasn’t properly composed in there. So the quality was better with the one, but the composition was better with the lesser quality.
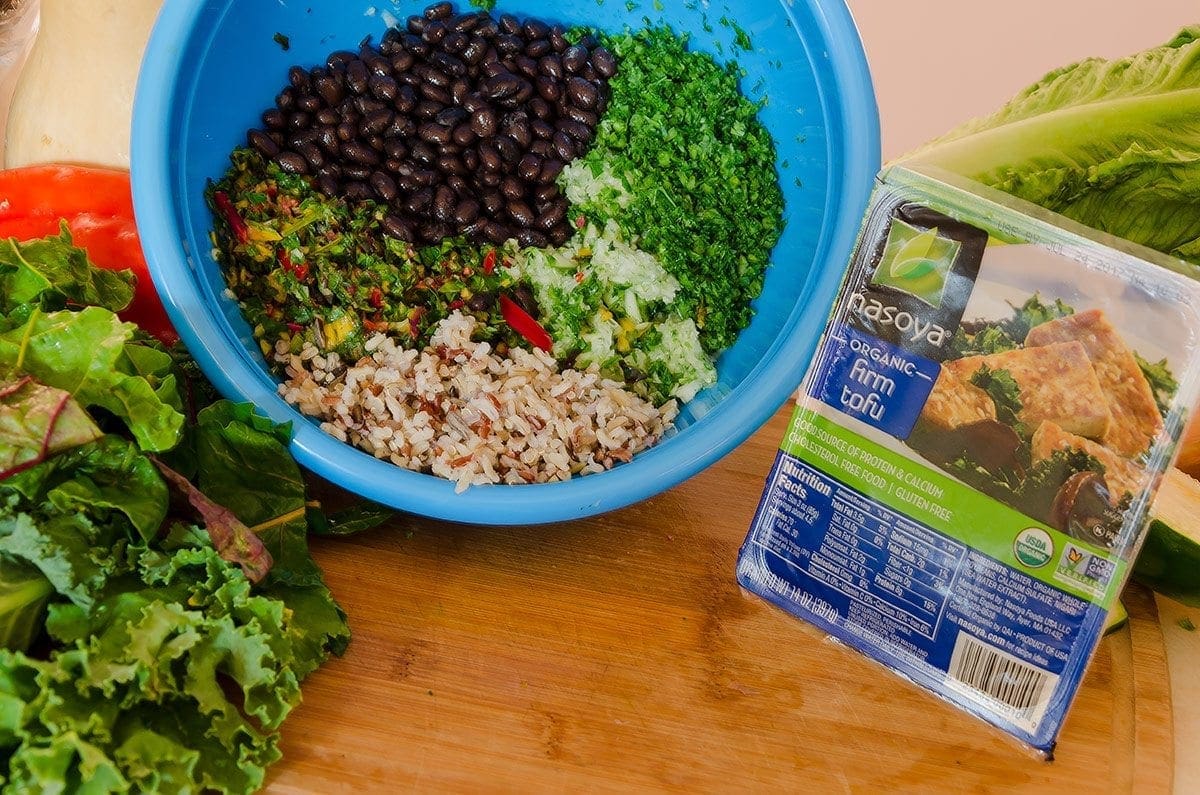
William: I guess those are not so much going to be on product photography. You do a weekly food prep. We did everything from when we went to a product market and we were taking photos there for the basket and you were getting things. You do your food photography, you do your setup of your food prep and then you’re doing more than that. Even just setting up your cutting board; here are all the ingredients going into this.
Lee: Yeah, for example there are little things I never used to think about. I used to prep my stuff, chop it on the board and show the work in progress taking the photo. That was fine. Somehow as I’ve been doing this more and more I’ve realized let me use the very old weathered faithful plastic chopping board, cut up the stuff and make a mess on there. I’m actually taking a spatula and sliding the stuff onto a clean, nice wooden chopping board for the presentation photo. And these are silly little things that I wouldn’t have thought about.
If you are taking your cinnamon out of the cabinet to display it as part of your image, make sure the bottle is clean. We cook and our hands are sticky or greasy or somebody has grabbed it. You want to get all your things nice and clean and ready to present. Pretend that each item that you are setting out as part of your display is a model. They need to go through a quick check and a dress.
William: Well this is something I’ve known about food photography for quite some time. The foods you eat are not necessarily the food that you photograph. But also your presentation is everything. You are not so much selling the food that you’re eating. You are selling the idea.
Lee: That’s exactly it. Nobody seems to like the food that I eat.
William: Well I don’t. But for example you made your lentil soup and you set up the board. You’d done all your chopping on the old plastic one, but then you took out the nice wood block and you set up the colors a certain way. You arranged things around. So it wasn’t just a matter of your food prep but it was also displaying the colors and the arrangement and composition in such a way that people look at it. Even I looked at it and said, “Wow, that looks really good!” and I wouldn’t eat that with a twelve foot spoon!
Lee: No, you wouldn’t. I thought he was laughing at me when he said it looked good. Then I realized it was the photo not the food.
William: It really did look good. And it was the kind of thing that makes you think, I want to try that. And despite the fact that there wasn’t a single ingredient there that I eat, it really did look that good. I think that was one of the things that maybe you didn’t have when you started. You just showed I’m cutting on this board. Here is the shot of what I did. Which was step by step. Then suddenly you graduated from not so much food prep, but to presentation of what you had prepped.
Lee: Yes. I’m very involved in something that is going on with social media right now and it’s a live challenge which is actually part of a paid training series that I’m doing. This is kind of a part of it so I want to give a nice representation; not for myself as much as to kind of encourage people where it looks overwhelming. In spite of the photo it was so simple. This was a one pot meal and that was the message I was trying to put across to draw people in. I think you need to have something that draws them in with color, with sharpness and clarity.
William: There was all of that, but you just mentioned what I think was really what you wish you’d known when you started and now that you’ve got it: you have a message. Basically these food photos are telling a story.
Lee: Yes. All my photos are telling a story.
William: That’s what’s making them successful I think, is the fact that you have a message that goes with them. It’s not just a matter of: here I am chopping vegetables. Here is what I’m trying to get to, here are the ingredients and you’re telling a story board almost, from this point. Maybe then you’ve got the other shot where you had the muffin pan with some of the ingredients inside before you baked them and after you baked them. You were telling a story from beginning to middle to end.
Lee: Yes, I actually had a collage with the 1, 2, 3 coming down horizontal photos. It was the preparation stage, in the pots and then the finished product.
William: So it wasn’t even about showing the food you’re eating; it’s teaching someone here is how you can do this too.
Lee: Yes.
William That was actually pretty cool. Now you’ve gotten into a bit of a groove with this. You know what you need to do now and you took the big white v flat that we’ve got to use for background fill. So what have you done to set yourself up? You’re not necessarily doing a bird’s eye view looking down. You’re kind of looking at an angle instead.
Lee: I am, because I think most of us don’t use a bird’s eye view when we’re cooking. Ii know that your board is above you, but I almost want to give the view that you have when you’re eating something, which is not straight down. You don’t hover over your table to eat your food. And that – I’m almost going for that angle. So what I will do is prop things up so that they lean forward to face the camera. For example, I had an open can of chili or something or hot pepper seeds and to get the color in there I needed to put the lid of it under the back end to tilt it so that it was facing the camera, but I really didn’t want to do the bird’s eye view thing. Because there is nothing wrong with it, but that’s not the look I’m going for.
William touched on something very important. A lot of food product photography they’ve done things to the food to make it work very well in photographs, but that renders it inedible, if it ever was edible in the first place. The food that I put in my photos is food that I have chopped or done something with it and I actually eat everything and anything that is on that board. So I am not putting display food out there. I am trying to make a display of what I am actually doing. And I think that comes down to defining your purpose. What is the message that you want to send across? And doing it with integrity.
William: Integrity is very important to you. We’ve talked about this on a number of occasions. You are showing: this is who I am, what I do and how I do it, but it’s real. And that’s the integrity part for you. Not only do you have a story with it but this isn’t fake food. These are things that “This is my lunch and dinner.”
Lee: Yes. That’s really the story. This is my daily life. This is the good, the bad and the ugly of it. But then when it comes to the backgrounds I think this is something else where I struggled. William mentioned the V flats. That was a great idea so we have a kitchen island and we don’t have a lot of outdoor light coming in through the kitchen. I was trying to avoid having to switch on the light – the fluorescent lights – I used the tripod to slow the shutter speed which I think was sitting at about three and a half seconds if that gives you an idea! In the middle of the day, what kind of light I was dealing with.
Eventually I just flicked on a light and life just got so much easier. There was a little bit of white balance correction that was necessary, but there are also other little things that you need to look at.
For example I had the V flat, there’s some gaffer tape in the middle and that was fine, but they were a little tall for the ceiling in the kitchen so they were slightly leaning. This wasn’t a problem. I wanted a clean white background or any black, white or something. I don’t composite images so it really was just going to be a background that I could blur somehow that wasn’t going to interfere with my subjects.
But the little strips of tape had to be cleaned up in Lightroom and then there was a seam down the middle and these were all things I had to learn every time I did it better.
What I did the last time is because my still lifes are relatively contained in a small area, I just took a piece of foam board and I had a very classy setup because I think I picked up some spice bottles and the ketchup bottle and used it behind the board to lean it against it. I stood that on the kitchen counter and just made sure that I had some crop and wiggle room when I composed. But that was my background and it was a quick pick up, set it up and put it away set-up. It just simplified things. It made things so much easier. I think sometimes we can complicate things when we see things that look really fancy and good. But a lot of the time the things that you need, especially for something like this where you’re focusing on a small area, are so simple.
William: And that’s one of the points I wanted to get across with this. I mentioned I was on Facebook with some business groups and there were a number of people doing their own product photography and they are having all sorts of problems. People are buying these little light boxes and trying to put something in and then one, they don’t get a good view of it, two – the lighting they are using is probably from desktop lamps so there is a color issue that is going on there. It’s a pain to work with.
What you are working with is very open and you are using whiteboards for reflection. You are not even using flash. I mean I recommended it to you and you said. “I’m in the middle of it right now; I don’t want to deal with that.”
Because it’s not something that you’re comfortable using on a regular basis.
Lee: I don’t and it’s not to say I won’t or I don’t like it. It’s just at the time I needed to get the job done and I didn’t want to learn something new in that moment.
William: Although that’s a case where I probably would have used it to bounce off the whiteboard. What I want to bring out is the fact that you got excellent shots without having to complicate your photos with something. You didn’t need to use flash. You just put up a tripod and let the exposure go.
Lee: And a cabled shutter release. That was it.
William: Your colors were fine, they were vibrant, people love the colors that you got and what I wanted to recommend is you do not need to over complicate this in order to get excellent results.
Lee: You really don’t. I mean, for example William has got a nice big seamless paper rolls. You’ve got a few different colors: the neutral gray, the white and I think you’ve got a black one as well. These are available for me to use. I am lazy. I do not want to have to set things up. But I also realize it goes beyond that. I don’t need to set these things up and I have other responsibilities in the day as well as taking photos all day so for me, time is important. I am willing to spend the time to get the right shot, but there is a limit as to how much time I can invest in just taking one photo that is only going to serve me so much. The simpler for me, the better.
William: And that’s really what I want to point out. What works for you and what I think will work for a lot of people is you do not need a complicated big setup in order to take good product photos. You were working with our kitchen with a couple of pieces of foam board and a tripod, your camera and a cable release and you got great photos.
Lee: I also want to say for the product photos, some of the things have very vibrant colors in their branding and two black foam boards worked perfectly. All I did was laid them out at 90 degree angles so I had the base and literally leaned it against something – it didn’t have to be a perfect 90 degrees. You’ve got your base and you’ve got your background. I set the things up, took the photo and just blurred the background a little bit in Lightroom with a brush going over the seams and that was it.
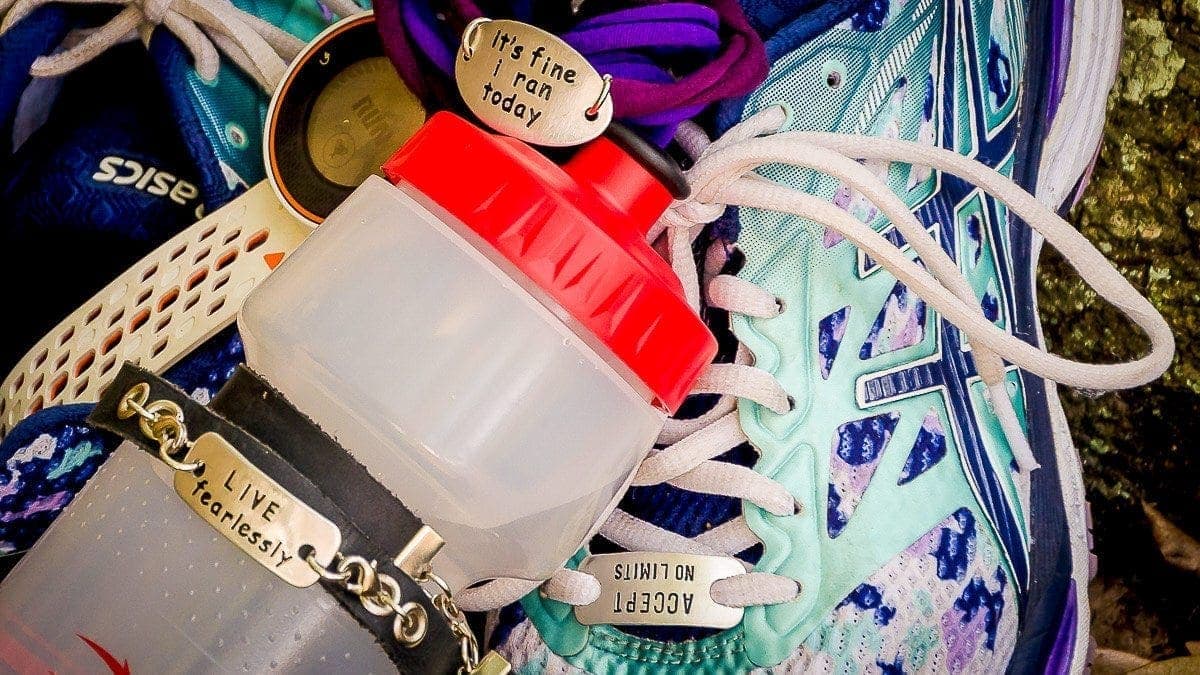
William: And every once in a while there are some things that you’ll just take outside and shoot in sunlight and maybe you will do a bird’s eye view. For example, the photograph that you’ve got on the header of carefreerunner.com is a bird’s eye view of your shoes and a few of your accessories, including jewelry you were talking about.
Lee: Yes. That’s all on there. And there are times I’ve done a layout of my clothes the night before. This is a running community thing so I won’t go into it, but that was also a bird’s eye view. In that case purely because of the colors I had for the clothes I was going to wear, I chose a white board for it. But yes, standing outside when I can is optimal. Food prep is a little bit more complicated outside, especially in Florida in the summer. I don’t need to say any more about that.
William: No, but I will say that I am really proud of you for going outside and taking those photos because the place that you do it is on the side of our house where there is a little concrete thing and there’s a snake that lives under there that every once in a while comes up and gets mad at you.
Lee: I know, the snake! There is our resident snake and family, I believe. Yeah, I don’t usually get bothered with the camera. I think that’s my weapon of defense. If I go out with a camera I have never been bugged.
William: Mind you if you are doing your product photography outdoors in Florida, beware of the snakes.
Lee: I’m a tough girl.
William: Thank you very much for joining us on the Photo Flunky Show. Show notes are going to be available at williambeem.com/episode83 We will have a couple of Lee’s photos out there for example and of course you can find a transcript of the show there for free.
We do not have any photographs of the snake because he’s a slippery little sucker.
Lee: You won’t get photos from me of the snake. I’m gone!
William: Thank you so much everybody. We’ll see you again next week.