Affiliate Disclosure: We earn a commission if you purchase through one of our links at no additional cost to you.
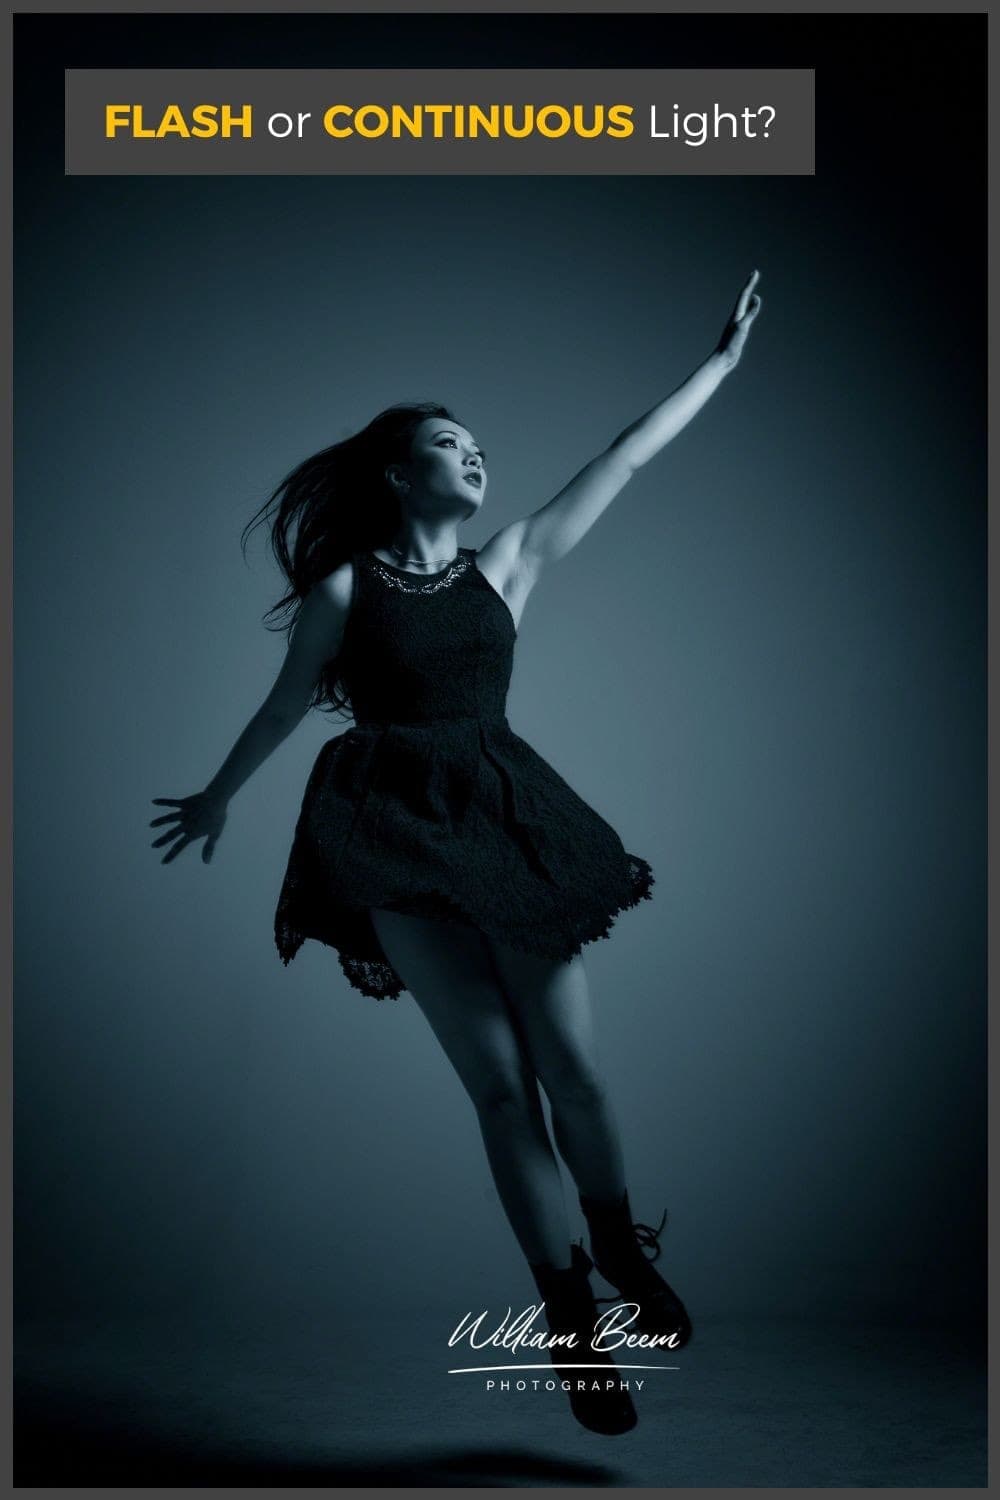
Should photographers use flash photography or continuous light? If there’s a contentious issue discussed among photographers, this is it.
You’ll find “natural light” vs “artificial light” debates raging all the time, but I think there’s more to the issue than often gets discussed.
Video: Flash or Continuous Light?
What’s the Difference Between Flash or Continuous Light?
A flash creates a short burst of light. You can’t see the result with the naked eye because the duration is too fast for us to perceive.
Continuous light is always on, making it very easy to see how it affects your subject. What you see is what you get.
There are ways to modify the light from flash or continuous light, and we can change our exposure to craft the final result of our photographs.
1: Flash Lighting for Photographers
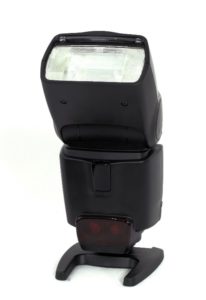
Flash comes in a few different forms. There are speed lights, like the image to the right. These are small flashes that typically fit the hot-shoe on top of your camera.
However, there are different sizes of flashes. Some people refer to larger flashes as strobes, but they all do the same thing, as I mentioned above.
Flashes and strobes put out a short burst of white light when triggered by a signal of some sort. That signal may come from the hot shoe, a cable connected to the hot shoe, a radio signal or in response to another flash that fires.
For the purpose of this article, we’re not going to talk about strobes or speed lights. Let’s just call them all flashes, because that’s what they do.
Here’s a quick summary of what you can expect from a flash.
2: Continuous Lighting for Photographers
Photographers discussing continuous light is usually about an electronic device with some kind of light modifier in front.
Of course, that leaves out a lot of other useful forms of continuous light. Any ambient light you see is continuous light that you can use.
Here’s a summary of what you can expect from continuous light:
Exposure Variables for Flash or Continuous Light
Variables are parts of an equation that can have different values. In photography, we deal with variables on the camera to determine the exposure result that we want.
The most fundamental variables are within the Exposure Triangle, but as we’ll learn, using flash adds more variables that we can use to our advantage.
1: The Exposure Triangle
Most photographers learn about the three variables of exposure:
We can come up with a correct exposure with a meter, whether inside the camera or an external light meter.
How do we know which setting to choose for each variable? That depends upon your creative needs or available light. To figure that out, we use the Exposure Triangle.
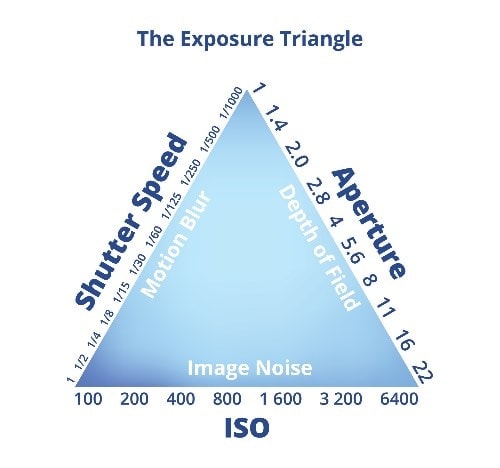
Do you want to add motion blur or freeze motion? The triangle lets you know that a faster shutter speed helps to freeze motion and a slow shutter speed allows motion blur.
Do you want lovely bokeh or should everything be in focus? Your aperture is the key to answering that question.
Is the noise in your image a problem or are you willing to accept it? Your ISO has a lot to do with that result.
Most photography is like other aspects of life. Everything is a compromise. When you deal with continuous light, you have to work with the Exposure Triangle to determine which criteria matter most to you.
In cases with electrical lights, you may be able to turn up the power to compensate for the ISO. However, you may also have a bright light that your subjects squint and have horrible expressions. If you’re dealing with still-life subjects, that’s not much of a problem.
2: Two Extra Variables for Flash Photography
When you use flash, you can still use the Exposure Triangle. That allows you to get an exposure for everything in your scene at a consistent level or the correct exposure for your needs.
When you combine flash with ambient, or continuous light, you introduce two more variables to your exposure.
The advantage of using flash with ambient light is that you can separate your subject from the background by using different exposure values.
With your traditional Exposure Triangle settings, you can slightly underexpose your background scene, and then add a bit more light to your subject with flash.
Why would you want to do that?
The human eye gets drawn to the brightest thing, sort of like a moth to a flame. Make it brighter if you want your subject to stand out from the background. Flash can easily do that in your photos.
Flash Power
Almost every flash has a range of power. Some flashes have more power than others, so we don’t truly have a universal metric to quantify flash power. Guide numbers are approximated, but the jury’s out on their usefulness.
When you fire your flash at full power, that’s a 1:1 ratio. The next step down is 1:2, a 50% reduction. It continues down at a reduction of 50%, such as a 1:4 ratio.
Your camera’s light meter works in a similar fashion. A 50% reduction on your meter is called a Stop of Light, or an F-Stop.
Let’s say that your camera exposure is correct with an Aperture of f/5.6. If you increase your flash power until you get to f/8, that’s a 50% increase in the amount of light from your flash.
If you move from f/5.6 to f/4, then you diminished your light power by 50%. If you go down two stops to f/2.8, you have a 75% power reduction. That’s because the 50% reduction from f/4 to f/2.8 is only 25% of the power compared to your original f/5.6 aperture.
Flash to Subject Distance
So where do you measure the power of the flash?
Since light is just electromagnetic energy, it decays as it travels. So that closer your subject is to the light, the more power from the light source hits your subject.
Move your flash away from the subject, and it doesn’t get as much power from the light. That’s why handheld light meters measure the output of a light from the subject’s position. The only measurement that matters is what hits your subject.
There’s another useful fact related to Flash to Subject Distance. This one relates to something called the Inverse Square Law. Photographers get hung up on this and often make confusing statements, but let’s keep it simple.
In other words, move your light closer to your subject for soft light. Pull it away if you want harsh light.
Note that the key here is “relevant to your subject.” A 24″ softbox 6″ away from your subject is more relevant to the subject than a 53″ softbox 6 yards away.
Essentials of Continuous Light
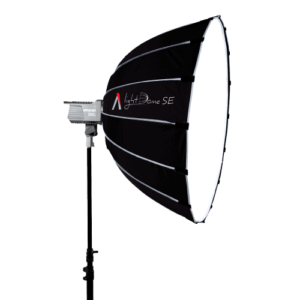
I mentioned that many photographers think of continuous light as something like this image – an electric light specifically designed to provide color-balanced light, directed and diffused through a softbox.
These continuous light sources create gorgeous light when you get them dialed in with the right amount of power for your photography needs.
In my experience, they work best for video. I use a pair of LED light panels for continuous light to create my videos. Each of those panels has a softbox to diffuse and direct the light where I want it to go.
For still photography, continuous light can work very well for most things. The problems arise when you need to freeze or prevent motion blur. We’ll discuss that a bit later in the article.
1: Sources of Continuous Light
The nice thing about continuous light is that it’s mostly free or easily available. There are some specific cases where it’s a pain to lug around, but let’s first take a look at some examples of continuous light you can use for your photos.
Using Sun Light for Photography

Sunlight is the most obvious example of continuous light. It’s free and it comes around every day.
That said, working with sunlight isn’t without its rewards and challenges.
My wife loves using sunlight for her photos. She used to take photos outside, but a breezy day blowing leaves tends to ruin her set.
Now she uses our dining room table with window light. The problem is that there’s a specific time of day when the light is just right for her photos. Too soon or too late and she doesn’t get the kind of light that she wants.
Although the light comes through the window, she modifies it by blocking light in some parts of her set. If she needs the light to come on the other side of the set, she just turns the table to get the direction of light she needs.
Best of all, there’s no setup or tear down of light equipment for her sessions.
Using Reflectors for Photography
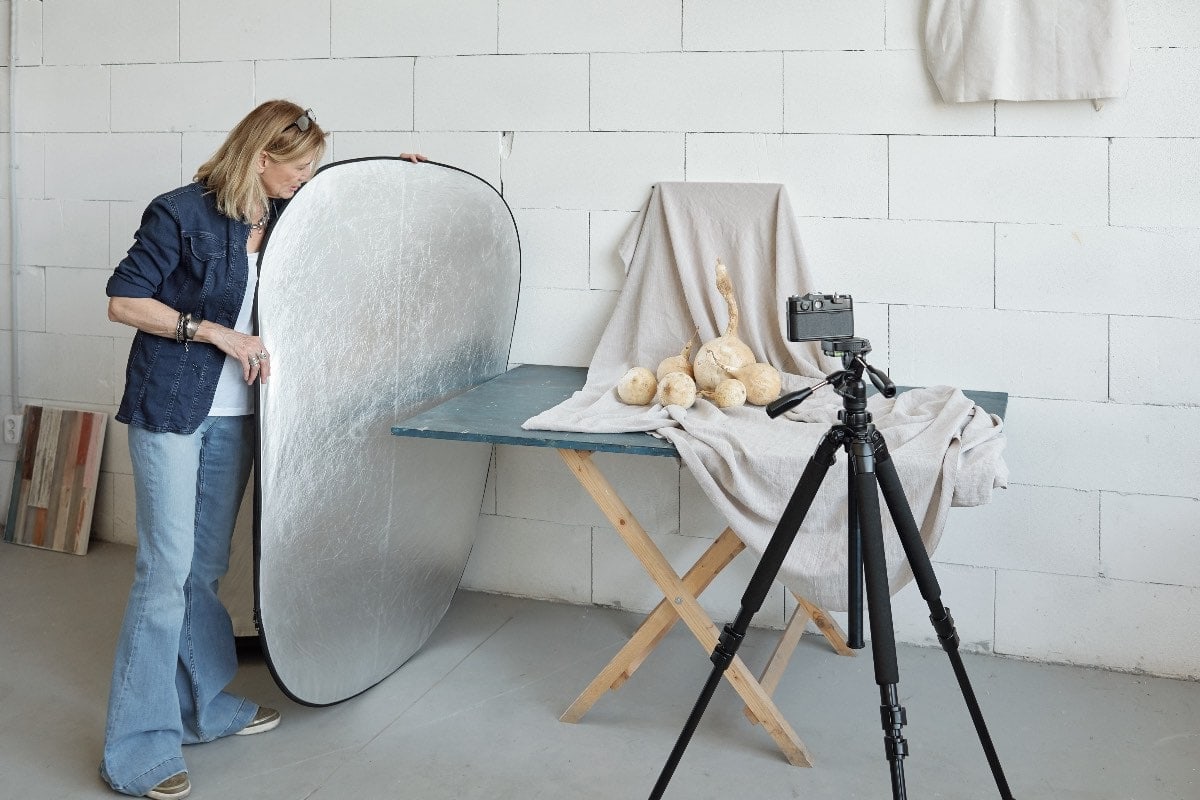
Remember, a light source is anything that points light at your subject. You can use a reflector to add light to your subject from the other side of your continuous light source.
That’s great for adding fill light, rim lighting or bouncing a different color of light on your subject. Many swimsuit and lifestyle photographers may use a gold reflector to bounce sunlight on their subjects and give them a warm glow.
Using Electrical Lights for Photography
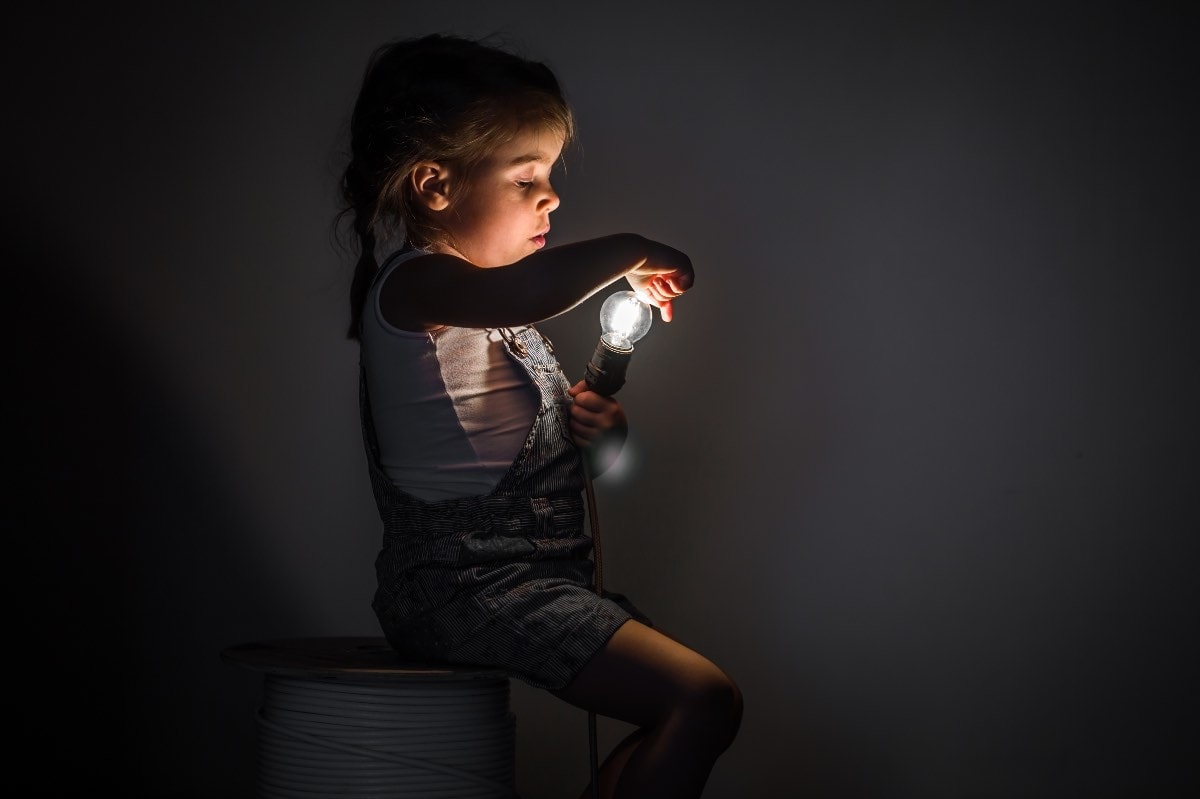
There are plenty of electric lights that you can use as a continuous source. This little girl has a light bulb, which means you can use lights bought at Target. They may not have much power or the color you want, but it’s a start.
I mentioned that I use LED panels for my continuous light sources. You can get larger and more powerful continuous light sources, or you can go downtown and use some colorful neon lights from a store window.
There are many creative ways to find and use continuous light sources for your photos.
2: Advantages of using Continuous Light
You’re a photographer if you have light and a camera. Lose either of those, and you’re not a photographer.
Continuous light has some excellent advantages for you to use.
Here’s an example of how easy it can be to manipulate continuous light.
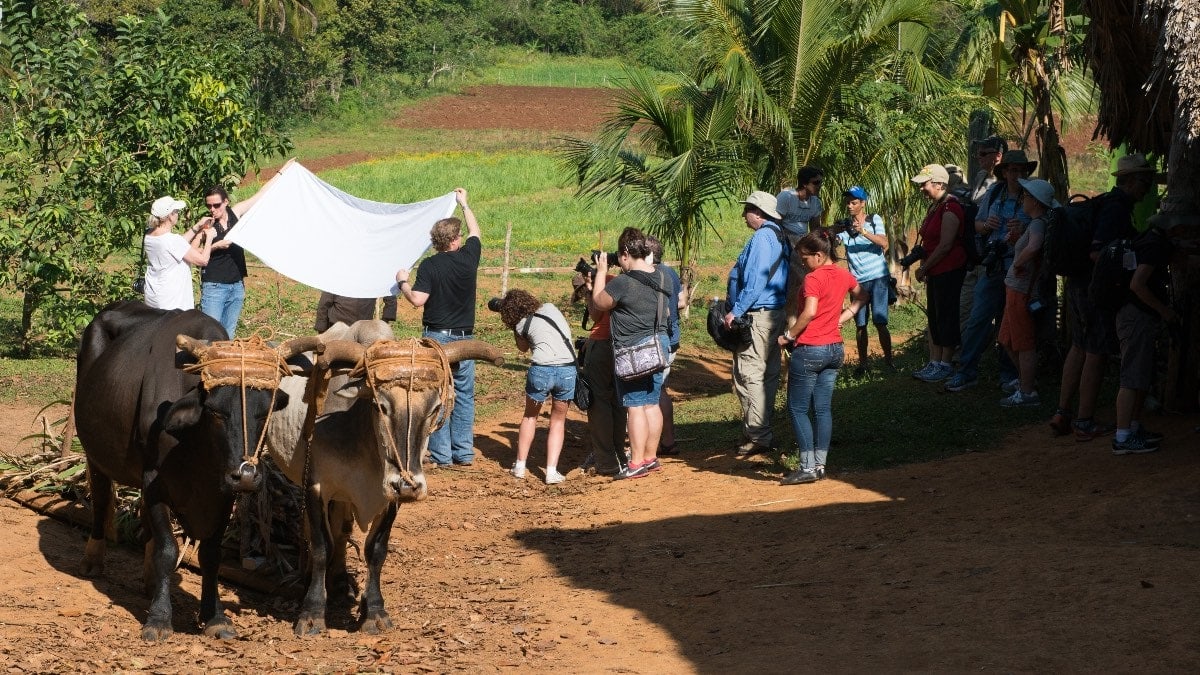
This is a behind-the-scenes photo of an impromptu portrait demonstration. I was on a photo trip to Cuba with Santa Fe Workshops and Joe McNally. He used the bed sheet from a little girl’s home just out of shot to demonstrate how to diffuse the light in the harsh, midday sun.
Here’s an example of the result.
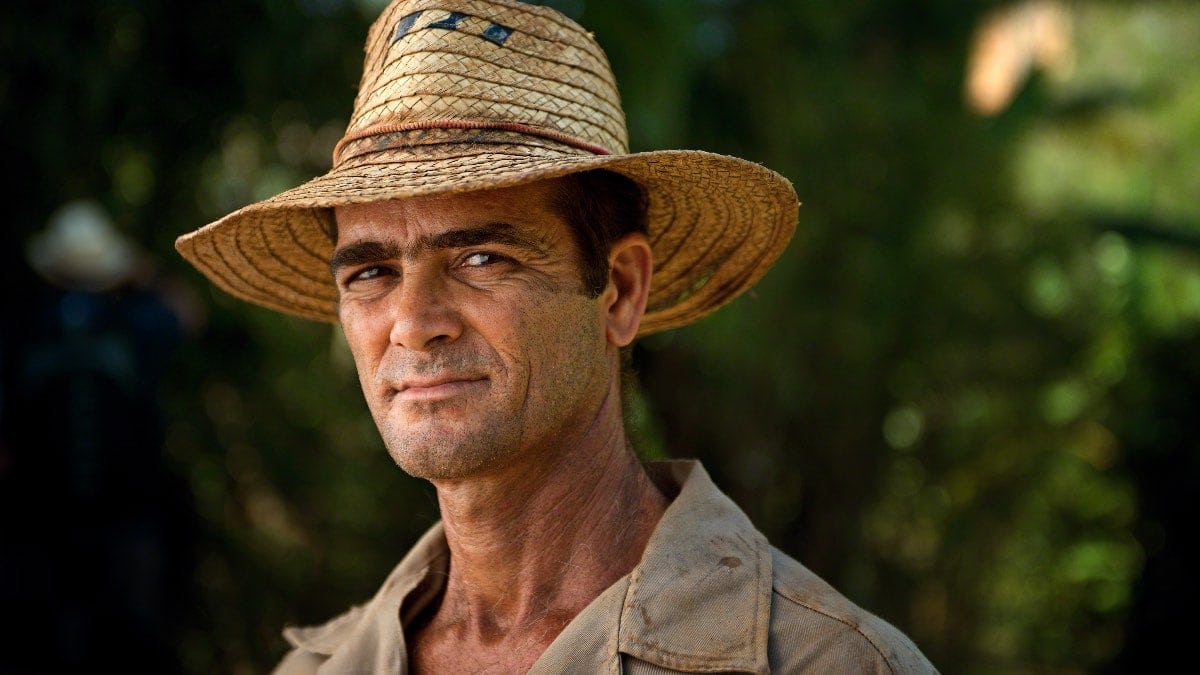
This is Jesus, one of the farmer on this Cuban tobacco farm. He’s on the other side of that bed sheet. The closer Joe brought the sheet to his face, the better the quality of light on his face. It practically glowed on his skin as the sheet came closer.
The idea of a light modifier is to put something between the subject and the light to change the light’s nature. There’s more than one way to accomplish light modification.
This is Sirous, one of the photographers who joined the trip. He’s sitting on the bed where we got the sheet used above. I’m photographing him through an open window.
Using window light is a great way to modify sunlight into useful continuous portrait light. It’s soft and directional.
3: Issues with using Continuous Light
Nothing is perfect for everything, and continuous light is no exception to that rule.
The biggest problem is the quantity of light you get from your continuous light source. When using products designed for photographers, like the Westcott TD-5 Spiderlights, I found that they just don’t work very well.
These lights didn’t put enough light to use at a low ISO. As a result, I had to raise my ISO to 1600 for some portraits, and I wasn’t pleased with the results.

This photo is much grittier than I’d like. That’s mostly due to the noise generated with my camera at ISO 1600 to try and get a shutter speed fast enough for me to hand hold for this portrait.
Granted, this is a few years old, and that technology just wasn’t good. FJ Westcott now sells a flexible LED panel system that works very well, like this Westcott Flex Cine 1×2′ Daylight Mat.

Westcott's Flex Cine Bi-Color Mat is a powerful and versatile lighting solution for filmmakers or photographers. Its unique flexible, pliable design allows for dynamic light spread up to 360 degrees, making it ideal for use in tight spaces. The mat is also color accurate up to 97 CRI (98 TLCI), making it perfect for any lighting situation. Additionally, the mat is equipped with powerful magnets and grommets in the corners for easy mounting and positioning.
Jerry Ghionis used a few of these to take my portrait at WPPI a couple of years ago, and they worked very well. I was almost blind after standing in front of them for a while, but it’s a good product for portrait photographers who need to spend time engaging with their subject rather than their lights.
Don’t go cheap if you decide to use continuous lights for portraits. You need sufficient power to take your portraits at a fast enough shutter speed because people move.
With continuous lighting, you may need to rely upon a tripod for stability rather than going handheld, which limits your mobility.
I prefer flash for portraits because it’s easier on my subjects.
Essentials of Using Flash
When using flash photography, there are a few essentials that you need to keep in mind to get the best results.
First, make sure that the flash is positioned correctly. The further away the flash is from the subject, the harder the light will be.
Second, pay attention to the background. A busy background can distract from the photo’s subject, so it’s often best to choose a plain wall or backdrop.
Finally, experiment with different settings until you find the perfect balance of light and shadows. With a bit of practice, you’ll be able to take stunning photos illuminated by a beautiful soft light.
1: Advantages of Using Flash
We discussed some great reasons to use continuous light, but there are also plenty of reasons to use flash to light your photos.
Remember when I said my wife could only take photos by the dining room window at an optimum time of day? Flash works when you have charged batteries, day or night.
If you like control, flash is your friend. You tell it how much power to use. The direction of light is within your control. So is the quality and color of light.
I have several different flashes for different purposes, and I can use them separately or together. Check out my Resources page to see my lighting gear.
I use and recommend Godox flashes and strobes. Godox has a range of flashes and strobes at reasonable prices. They’re well known and supported in the photography community.
We use and recommend Godox flashes and strobes. Visit the Godox Store on Amazon to find the latest products and best prices (with FREE delivery for Prime members).
2: Flash Duration
Flash duration is one of those topics that photographers have turned into a gnarly issue with some cumbersome terms. Fortunately, it’s not that hard to figure out.
There are two terms involved, and I’ll show you why there’s only one you need to worry about.
Your T.1 time is how long it takes your flash, at a specific power output setting, to deliver 90% of its power. The fastest T.1 time will be at your flash’s lowest power setting. As you raise the power on your flash, the T.1 time increases.
Why is that important?
T.1 time is essential when you want to freeze motion. The faster your t.1 time, the less time you have light on your subject. Therefore, your subject appears to freeze because it doesn’t have light for long while moving.
Your camera’s shutter speed doesn’t have to be fast to freeze motion, since the sensor isn’t recording light while the shutter is open, at least not the light from your flash.
Let me show you an example.
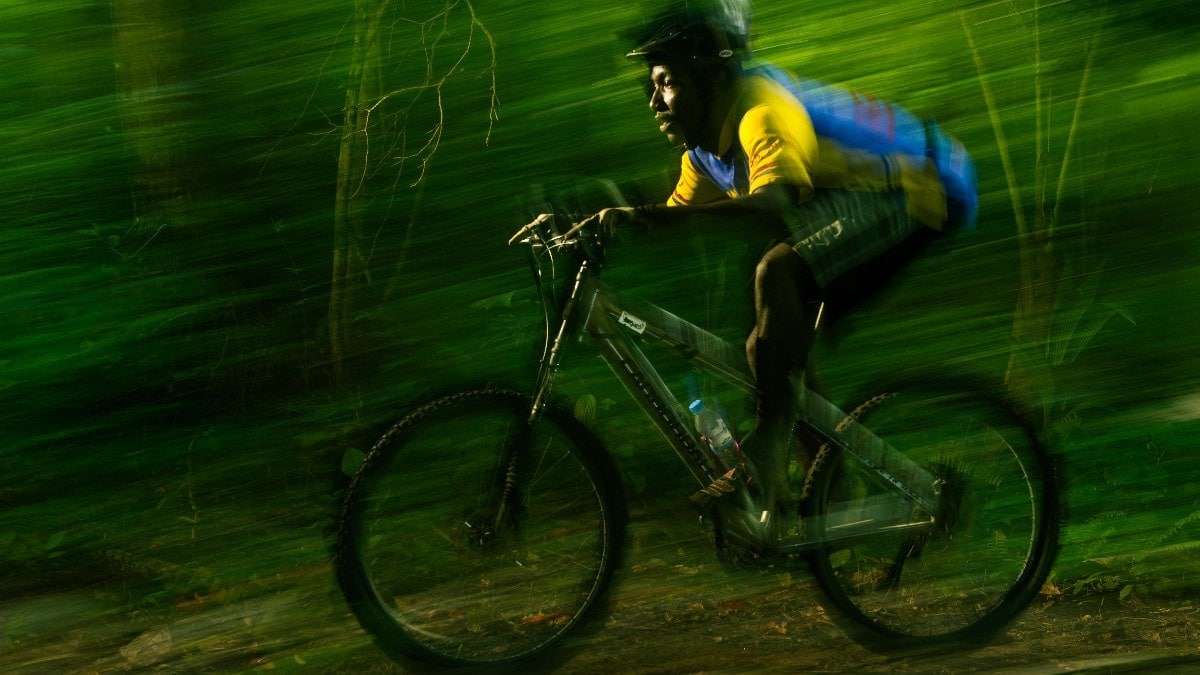
This photo is used a slow shutter speed as I panned the camera with the mountain biker moving past me. You can see the obvious motion blur, except on his face.
That’s because two flashes with short duration illuminated is face for a fraction of time and kept it sharp, essentially freezing that part of the subject.
Why two flashes? Remember, you get a shorter flash duration at lower power. So if you need more power over the flash duration, add another flash to double the output while retaining a shorter T.1 flash duration.
As for the T.5 time, who cares? T.1 is 90% done, which means there’s only 10% of time left and that’s unlikely to affect your output. With T.5, you still have the same duration to go, effectively doubling the time measured at T.5.
3: Flash Example Photos
One of the things I like about flash photography is the flexibility that comes with it. If I want the light to be crisp, soft, or colorful, it’s easy to create a look. That adds powerful storytelling benefits to your photos.

This is a beauty shot of my friend Sam. Everything you see here, I lit with flash.
On the front side, I used clamshell lighting. That included a Beauty Dish above her and a short strip box below her. You can see the catchlights in her eyes reflecting both sources.

The Godox BDR-W55 White Pro Beauty Dish is a great light shaping tool for portrait, cosmetic, and fashion photographers. It creates a beautiful, wrapped, contrasted look that accentuates facial features and textures while creating stunning shadows and catch lights. The interior of the beauty dish comes in two coatings: silver and white.
Behind her is a 53″ softbox from Elinchrom. I could have used white seamless paper, but then I’d have to light it from both sides. This is a nice shortcut to get a white background with minimal fuss or expense.

If you're looking for a softbox that will give you beautiful, round catch lights, then the Elinchrom Rotalux Octabox 135cm is a perfect choice. This innovative softbox features a lightweight dedicated speed ring, which makes it quick and easy to set up. The 53" (135 cm) Octa shape provides a large surface area, making it ideal for close-up portraiture or fashion photography.
Note: For Godox strobes, use the Bowens mount speedring from Elinchrom
Note:
You don’t have to use light modifiers from the same vendor as your flash. I have Elinchrom modifiers because I used to use Elinchrom lights. The speed ring is the only thing I had to change to use these modifiers with my Godox lights.
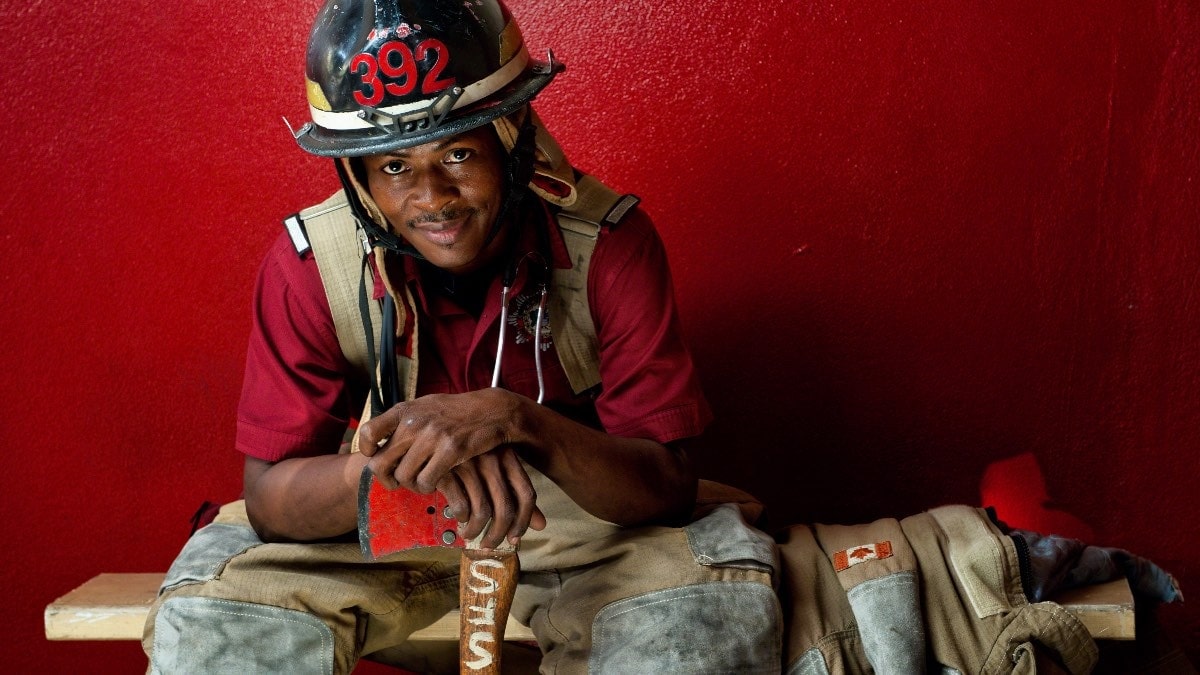
This is a two light flash portrait. The key light was to his right side, but his helmet blocked the light from getting to his eyes. To correct that issue, we put a reflector on the floor in front of him and fired a small flash straight down. The light bounced up to fill in his face with soft light.
This is my friend, Shelly. I used a key light on her left at a 45-degree angle. Notice the light on her shoulders?
To add that rim lighting, there are two more lights, each within a strip box modifier.
Using flash allows you to create separation from subject and background. You can also do this with continuous lights if you have the sources available. It’s commonly done on video sets.
However, it’s often more expensive and cumbersome to do this with continuous lights than using flash.
4: Eliminating Continuous Light from Flash Photography
You may run into a situation when the ambient or continuous light is undesirable. That usually happens when the stuff getting lit is unattractive or boring. Let me show you an example.
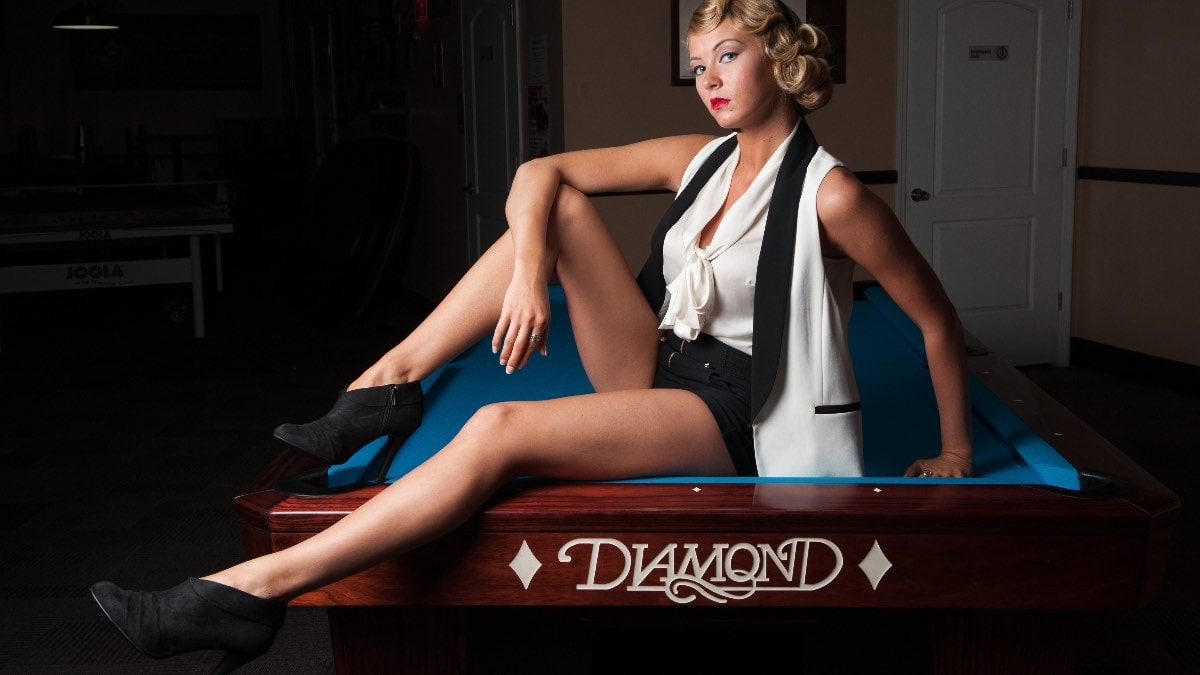
Here’s a portrait example where I’m using flash to light the model. The light on her looks great, but the background just isn’t complimentary at all. It’s ugly, boring, and pedantic.
So what if I changed my Exposure Triangle to eliminate the continuous light in the background?
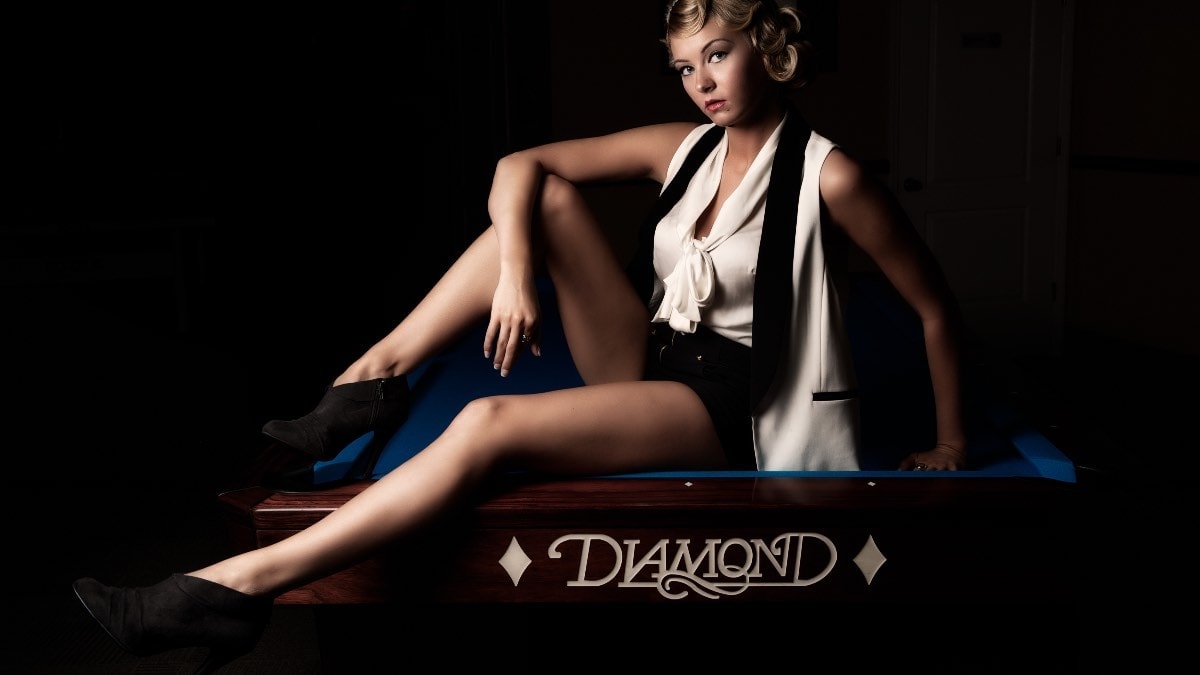
We end up with a very different result. It’s a bit moodier, but I prefer that story to the one where she’s in some cheap pool hall.
All I had to do was change the exposure settings on my camera to get a different result.
Blending Flash and Continuous Light
When people start using flash, they often ask how to blend it with the ambient light at a location. There are two significant steps.
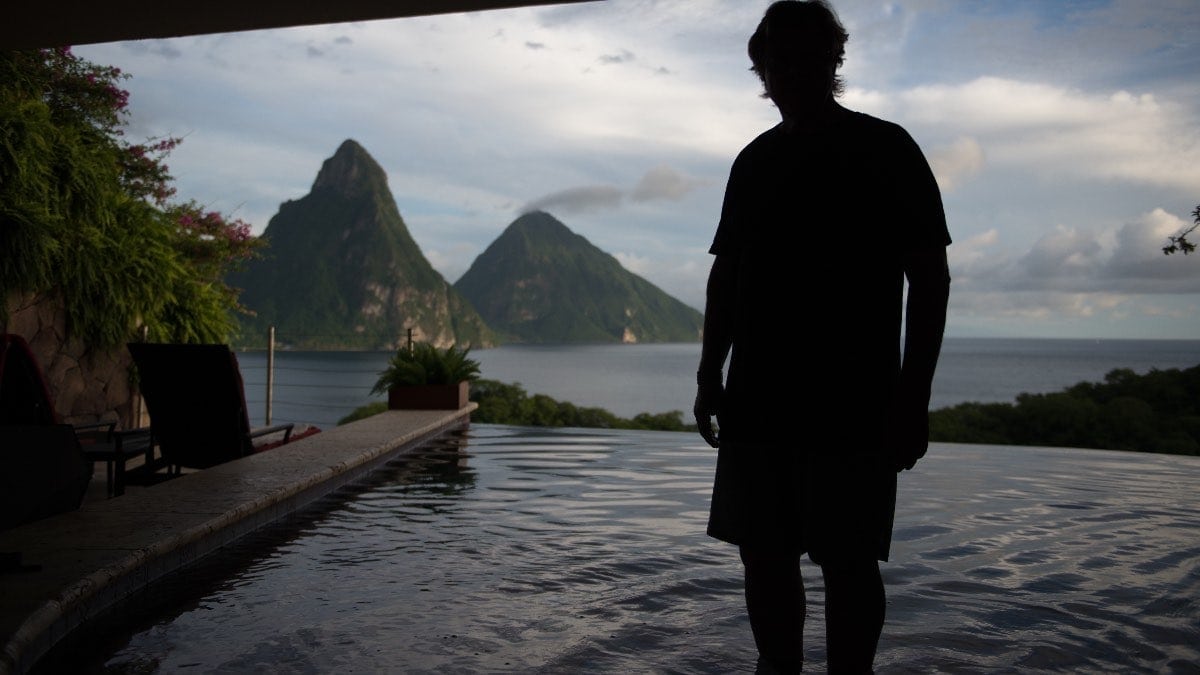
The first thing to do is to establish your continuous light exposure. You can see that we can get a good exposure in the background, but there’s no light on our stand-in subject.
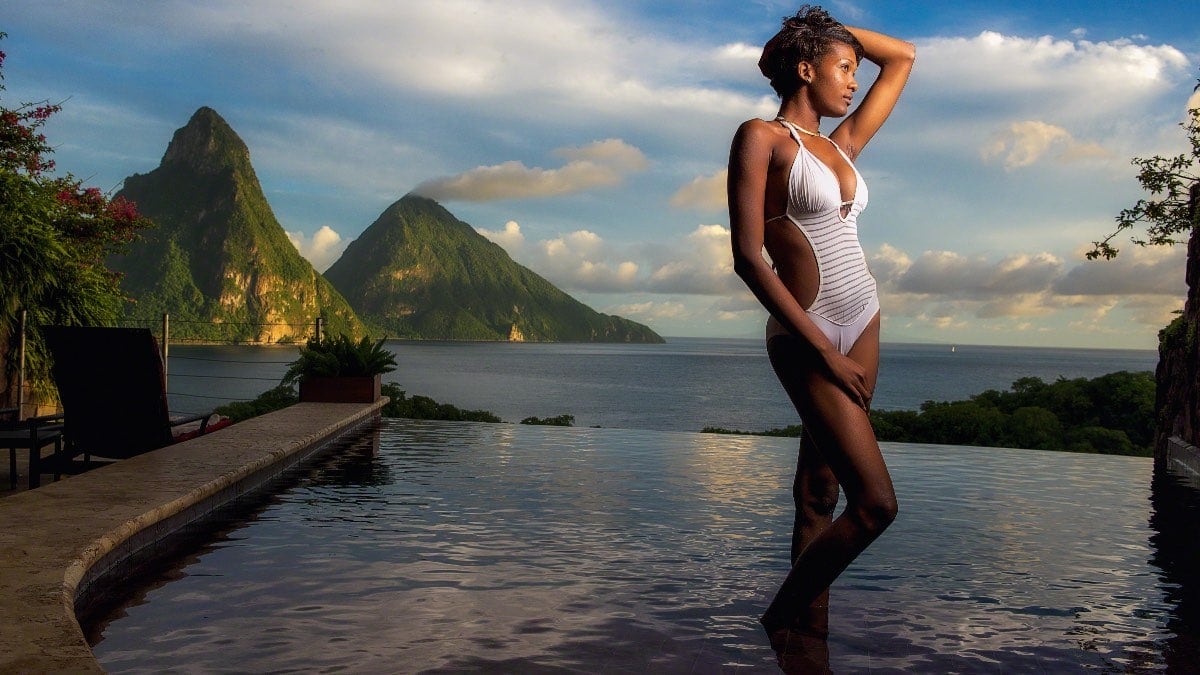
Next, we light our subject, so she has the right amount of light coming from the flash. As you can see from the background photo, a person would just be a silhouette if we didn’t have a flash.
You may also need to use a correction gel to match the color of light to the ambient light. Sometimes a 1/4 CTO gel will do the trick to give some warmth to the light coming from the flash.
Is Flash or Continuous Light Better?
I hope you’ve reached the same conclusion as I have with this article. There’s no need for war discussions about light. Use flash or continuous light as you see fit for your photos.
Each has its strengths and drawbacks, but each also provides great resources to illuminate your subjects. You just go about creating your photos in a slightly different manner depending upon the result you need.
Light is a multifaceted tool. Choose the tool you need for the result you want.
All Light is Natural Light
One final piece of information I want to share is that all light is natural.
Some people believe that natural light is superior to artificial light, but that premise has a flaw. Light is light.
It’s all – every bit – nothing more than electromagnetic energy within the visual spectrum. It doesn’t matter if you get light from the sun or the light next to your couch. Those photons are all the same thing.
Artificial means “not from nature.” Well, electromagnetic energy, or light, is entirely natural. Just because the ignition of the light came from a device made by man doesn’t mean the light itself is artificial.
A cigarette lighter would create artificial fire and light if that were true. That’s not how it works.