Affiliate Disclosure: We earn a commission if you purchase through one of our links at no additional cost to you.
Scott Kelby is on tour with his Light It, Shoot It, Retouch It seminar. I was able to attend a hands-on workshop, and then hit the seminar the following Friday when it came to Orlando. He mentioned to me before the seminar that it was going to be a lot of deja vu for me, and he was right.
However, it was still very informative to see it the second time around because my head was in a bit of a different place for a seminar vs. a hands-on workshop.
Have you ever gone through some training and got home, only to discover there was something you didn’t quite catch? It happens to me all the time, so my second visit cleared up some of those issues for me.
I had a front-row seat at both events. On the second time around, I brought my Nikon Coolpix P7000 and took some snapshots of the lighting setups. It’s enough to give you an idea but be prepared for some grainy snapshots from a point & shoot camera. This isn’t fine art, it’s education – expect less.
Lighting Setups on The Stage
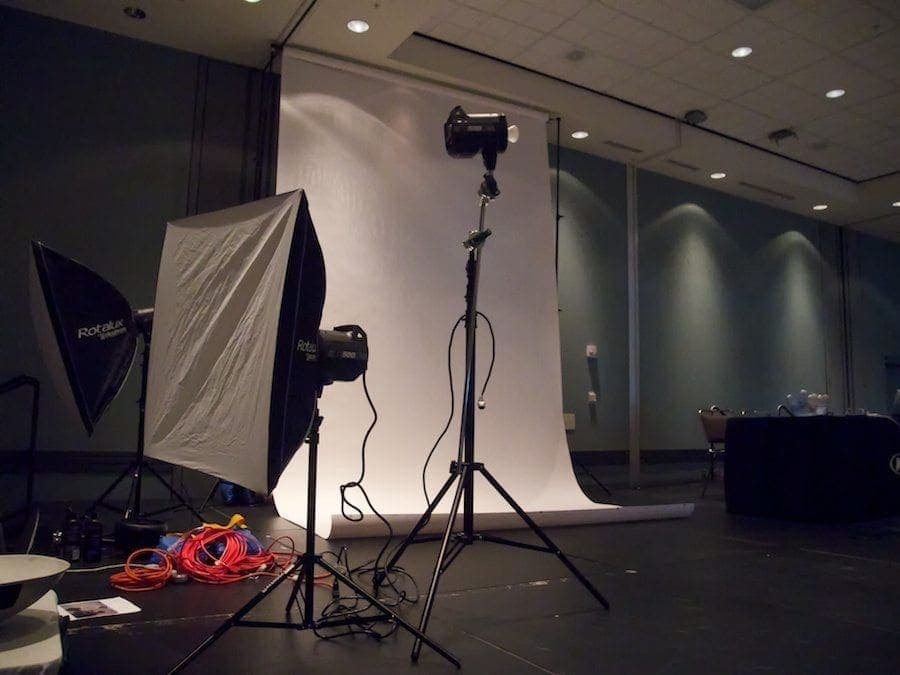
One aspect of this tour is that you see how the lights build up. The benefit of that is to get an understanding of why you place those lights, rather than just go home and mimic the setup because that’s what Scott said. Here’s what you see before the seminar starts.
Before he gets into the setup, he talks a bit about his lighting gear.
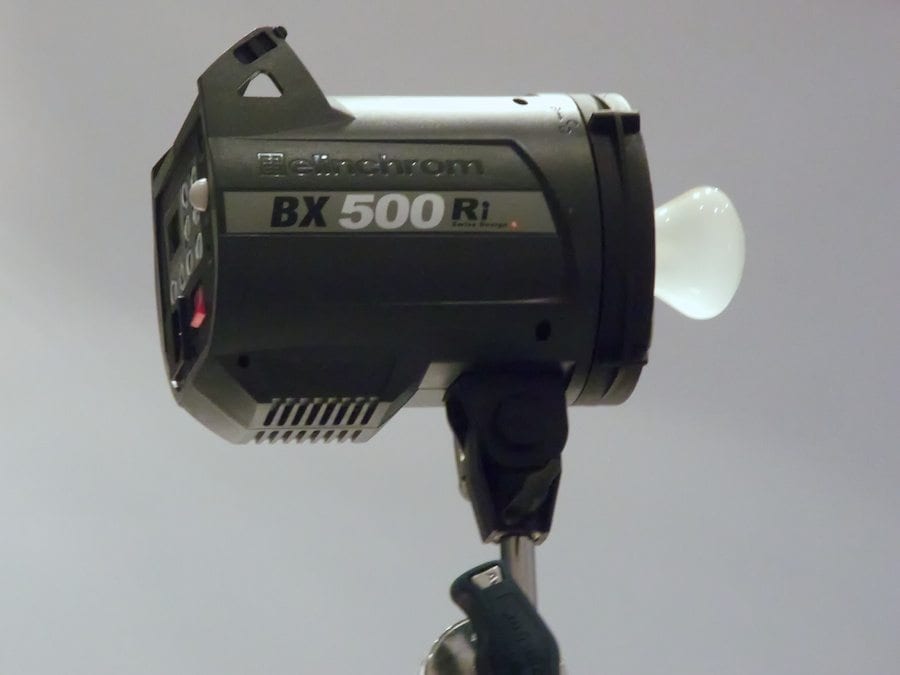
It’s the Elinchrom BXRi 500 lights. They have built-in Skyport wireless receivers, a handle on top, and they make a bright flash of light. Part of the spiel goes over how he’s owned all sorts of lights in the past – Profoto, White Lighting, AB’s, etc.
At the end of the day, they all make a bright flash of light. The thing that’s more important to the quality of your photo is what you put in front of that bright flash – your light modifier. The other important thing is the SkyPort.
Unlike many other wireless triggering systems, SkyPort allows you to adjust the power of your lights in 1/10th stop increments. That means you can adjust your lighting while still in a position to shoot your subject. You don’t have to go back around to the light to move the power up or down, and that’s convenient. Imagine if your light is up high.
Do you get on a ladder to make an adjustment, or worse – do you lower your light and hope you put it back in the same position? With SkyPorts, you just push a button on your transmitter to make those adjustments. I have a pair of these and I expect to get another pair. It’s a very convenient way of adjusting your lighting power.
Speaking of power, most of the shots during his seminar were taken with the lowest power setting, which is about 33 watts. These lights go up to 500 watts, which really blow out your exposure. You don’t need a lot of power for this kind of studio lighting.
At times, he raised the power of some accent lights – ranging from half a stop to 1.5 stops at most.
Beauty Lighting
With that in mind, he starts his beauty lighting with a beauty dish.

One light, up above the model and angled down about 45 degrees. If you notice, that position gets repeated throughout his seminar. So what result do you get from just this one light with a beauty dish?
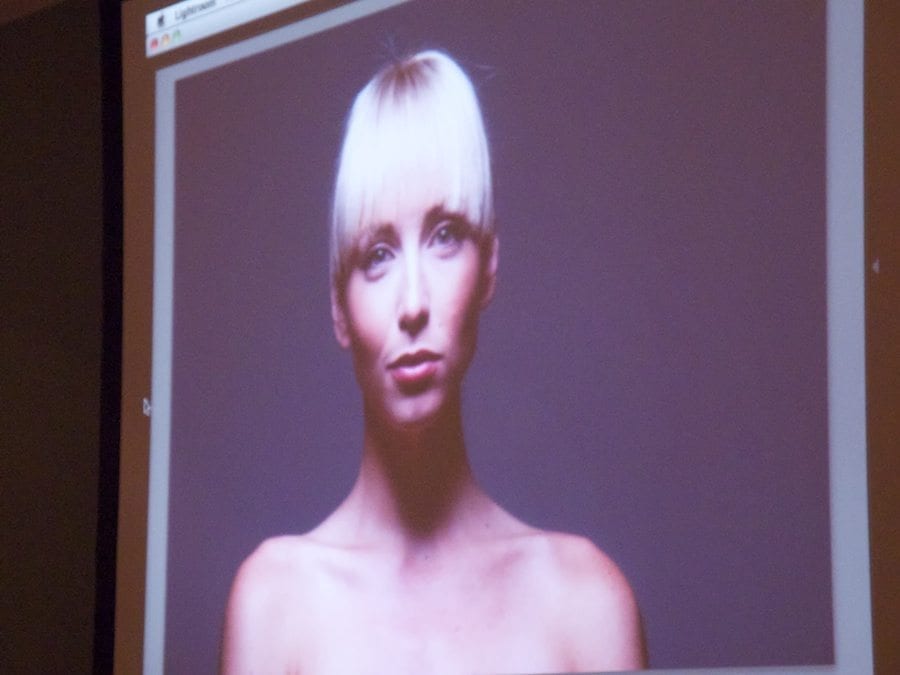
Take a good look at those shadows. It accentuates the line under her eyes, wraps the side of her face and casts deeply down her throat. By itself, that’s not a flattering look for a female subject. Scott adds two more lights, one at a time, to create his final setup for beauty lighting. I’ll skip to the end to show the final setup.

You can see there are three lights, though you can do it with two. The key light is the beauty dish with a diffuser sock on it above, angled down at 45 degrees. In front of her is a softbox angled up at 45 degrees. That creates a clamshell lighting effect.
If you only have two lights, then you could substitute a reflector for the bottom light in the front. Topping it off is a larger softbox behind her, again angled up at 45 degrees to provide the pure white background.
Here’s a sample of how this lighting setup looked from my own shot at his hands-on workshop.

Dramatic Lighting for a Female Subject
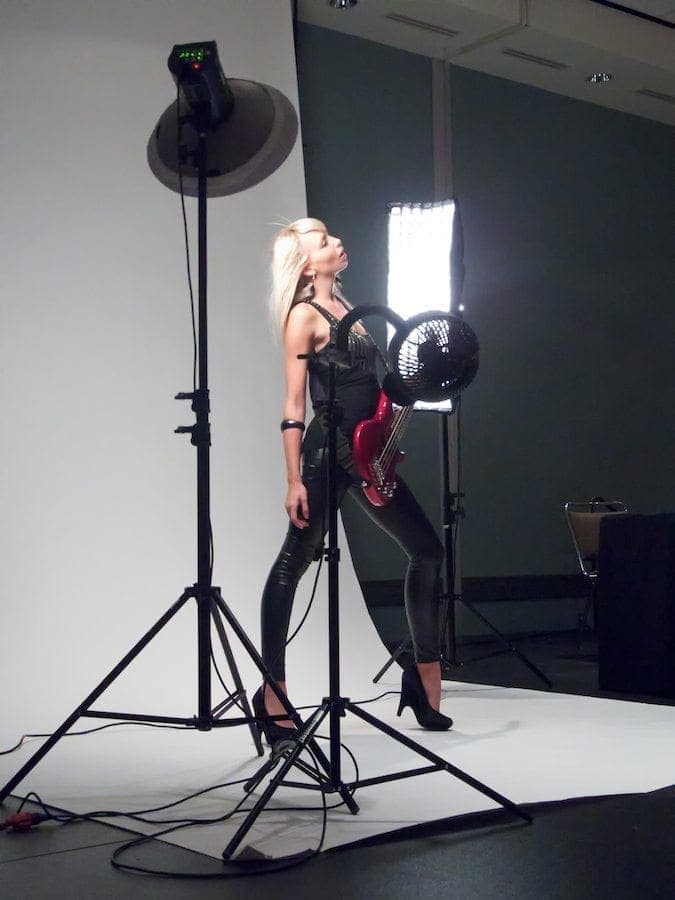
The next setup was quite opposite the first. Rather than having a bright overall look, the dramatic lighting setup for a female subject created a darker overall tone. The idea was to make the subject more interesting through the use of shadows. Here’s the lighting setup.

In this case, we see the Deep Octa softbox in front and a strip bank with a grid behind her. Again, note that the softbox in front is above her and angled down at 45 degrees. Also, note her position to the light.
I know my snapshot here is rough, but you can see the shadow on the left side of her face. She’s bathed in beautiful light on her right side, but it falls off quickly into darkness on her left. The strip bank behind her keeps her from drifting completely into darkness and gives an outline to her shape.
Edgy Light
This setup is better suited to a male subject, where you want to bring out contrast rather than soften it.

I did a poor job of capturing the lighting setup here for two reasons. One is because this guy (Andrew) was ripped and I wanted to show how the shadows were falling on his body.
The other reason is that the woman sitting next to me kept grabbing me and seemed to want to pole vault onto the stage to touch Andrew. With that in mind, I’ll describe the setup.
This is a three-light shot. You can see that I’m shooting straight into a light behind him. On either side behind him, there are lights with reflectors using a 40-degree grid, aimed at the side of his head. The key light is a beauty dish right in front of him, angled down at 45 degrees.
Unlike the setup with female subjects, Scott recommends taking off the diffusion sock for a male subject to get more contrast. If you’d like to how it looks, click here to see Scott’s final image of Andrew.
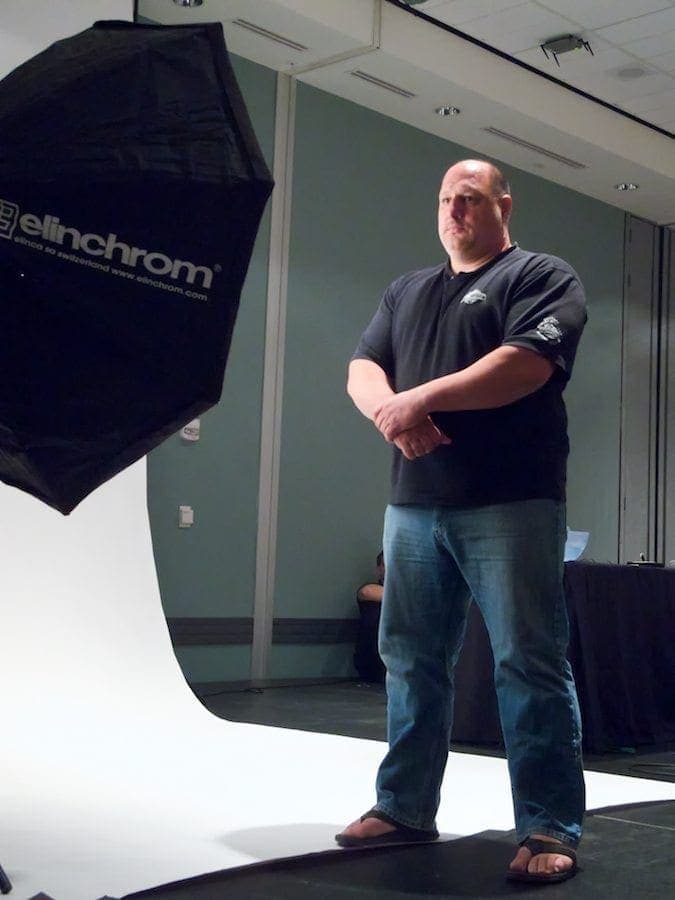
Fashion/Glamour Lighting
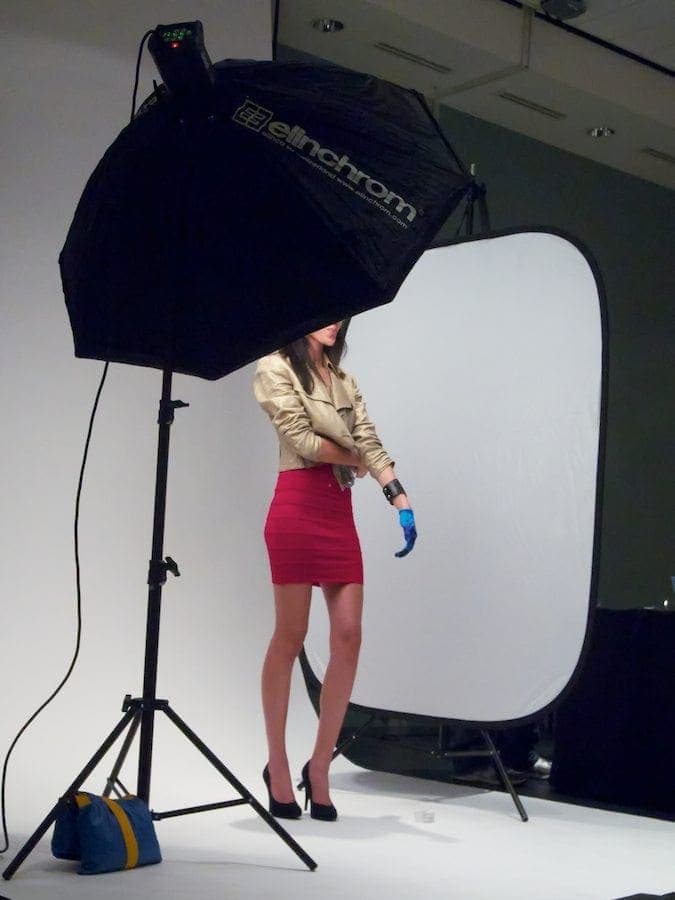
As you can see, it’s a one-light setup with a large white reflector on the opposite side. Once again, it’s raised above and angled down by 45 degrees. It provides great lighting that fades slowly down, giving gentle shadows on the subject.
During this session, Scott told a story about a photography competition, and the winning photo uses this modifier. The other photographers groused and said, “Of, sure. You can make anyone look good with a 53″ Octa.” Well, then why wouldn’t you want to use it to make your subjects look good?
Personally, I’ve been waiting for a new modifier from Elinchrom that I saw at Photoshop World last time in Orlando. It’s a combination of three modifiers. This 53″ Octa, the Deep Octa, and the 74″ Octa.
The new modifier is 53″s, like this one, it’s deeper, like the Deep Octa, and the head mounts inside the modifier facing the back of it to force the light to spread out on the edges, like the 74″ unit. Still haven’t seen it on the market and I got tired of waiting for it, so I ordered the 53″ Midi Octa this weekend and will have it in a couple of days.
Who wants to look good in front of my camera?
Lighting for Compositing
The idea here is to provide a lighting setup that works to help extract your subject from the background and create a composite photo on another background scene. In this case, the white backdrop is key to help the selection in Photoshop for extracting the subject.
Without lighting the background, you get a light grey backdrop, which we’re told is ideal for making those selections. You want to show the contrast between your subject and the background in order to make those selections. If you use a green or blue chroma backdrop, you’re likely to get a color cast on your subject.
The cross-lighting setup puts a beauty dish on one side and a strip bank on the other. It seems to work surprisingly well for most background scenes, giving you the means to integrate your subject with the lighting sources that may be in the background, but also rely on the fact that most people will accept front lighting from an off-camera source.
Granted, you still need to do much more in Photoshop to blend the color of the scene on your subject, but that’s beyond the scope of the lighting setup.
Bonus Lighting Setups
I’d like to say something that I never expected, but here it is. Thank you, Canadians. You see, some of you wrote down feedback at Scott’s tour up north that you wanted to see product lighting setups. Scott read that feedback and incorporated it into the seminar.
So although you didn’t get to see what you wanted, I did. Here it is.
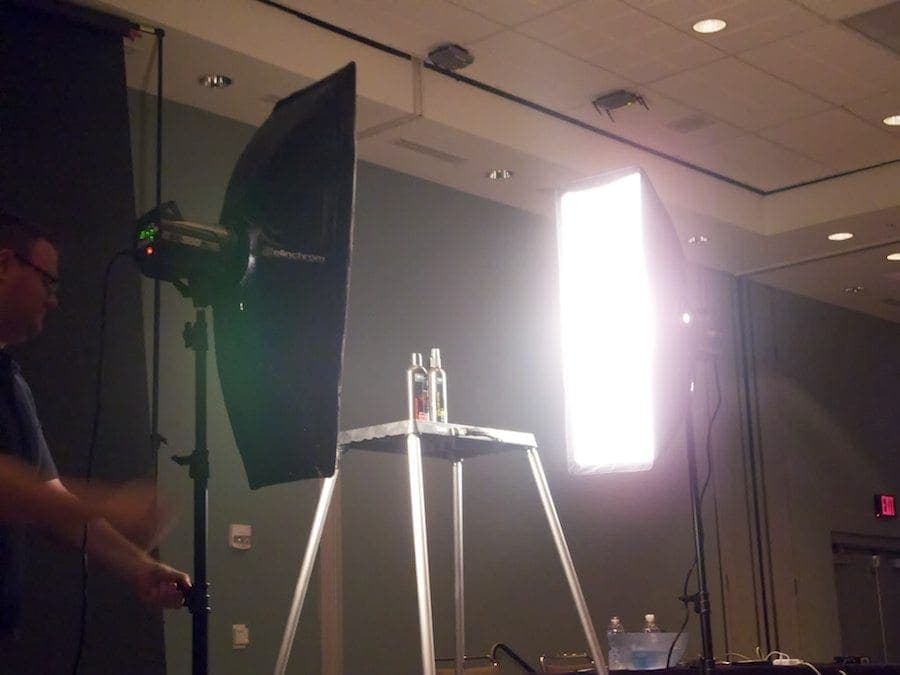
There you go, Canada. The solution is to put your bottles of car wax or shampoo on a utility table sandwiched between two strip banks. It gives you that nice sheen of light on the sides of the bottles and the light wraps around to give a nice view.
As a bonus, you can see that Scott’s assistant, Brad Moore, is quick like Ninja.
Vanelli Lighting
But wait, there’s still more! In fact, that’s what I wrote in the comments of my workshop feedback form – More Vanelli!
In this case, Vanelli was the subject to demonstrate some silhouette lighting. You can see a bit of separation on his face from the modeling light to show his position relative to the 53″ Midi Octa. As a result, you see a photo with just a slight bit of lighting to create an image with his outline.
It creates a dramatic look, much like that signature look of Alfred Hitchcock from years ago. Scott showed a few examples of how you can vary this look by the photographer moving around, so experiment.
A Parting Thought
I came home from the workshop and seminar with a lot of information, but one of the most useful things may have been that simple issue of raising the light above the subject, angling it down at 45 degrees, and providing some fill if necessary.
The day after this tour hit Orlando, I took those lessons to our local Model Mayhem Meet & Greet. Using a single flash in a small softbox, plus an occasional reflector for fill, I got some wonderful lighting that people seem to enjoy.
People naturally expect the light to come from above, so why are so many photographers shooting their subjects straight-on at eye level with flash? Something to think about next time you’re out with a subject.