Affiliate Disclosure: We earn a commission if you purchase through one of our links at no additional cost to you.
If you don’t have a photo backup plan, I can promise you will eventually lose your photos. That’s because all data repositories die. Some are faster than others. With a good photo backup plan, you can ensure your photos live even if your repository dies.
All Things Must Pass
This is a simple truth of life. All things must pass. Every sunrise gives way to sunset. Seasons change. Icecaps melt. Data storage devices stop working.
It’s happened to me before and will happen again. The first time one of my RAID systems died, it wasn’t due to a drive failure. The RAID enclosure used a chip to store the software that controlled the array, and that chip failed.
I was lucky. The vendor was able to send me another enclosure but also warned me that those chips were no longer manufactured. My data used a proprietary format that was no longer being produced. It was a matter of time until I could no longer recover my primary data repository.
Sometimes I think mankind is moving backward in this field. We have cave paintings that have lasted for roughly 40,000 years. Yet the DVDs that I burned failed after 3-5 years.
What is My Photo Backup Plan?
Fortunately, I had a workflow to protect my photos. It saved me from losing everything.
Other people who use this kind of plan have given it the silly name of a 3-2-1 Backup. Why does everything need a childish name?
The concept behind this plan is rather simple. You need three copies of every file you want to save. Two are local copies, meaning they are stored in your location but on different devices. One is for your working files. The other is a backup on another disk system.
If something gets damaged or deleted in your primary working space, you have a convenient backup to restore the files.
One copy gets stored offsite. If you suffer a fire, flood, or another catastrophe at your primary site, you can still recover the files from the offsite backup. That’s presuming you didn’t die in the catastrophe.
The concepts of this approach are simple. How you implement the concepts can vary quite a bit.
1: Setting Up Your Working Space
There are two important considerations for your working space. You want to have sufficient performance and capacity. Some of your performance depends upon your capacity. Full drives perform slower than half-full drives. Buy more capacity than you need for storage.
There is a misconception that internal drives are always faster or better than external drives, so it’s better to put your working space on an internal drive. That’s nonsense.
First, there is no guarantee your internal drive will be faster. Second, your drive head can only read one sector at a time. Separating your working space from your operating system can yield superior performance.
In my case, I have a 1 TB SSD drive inside my iMac. It’s enough to hold the operating system and application files. I don’t want any data on that drive. All it does is read programs.
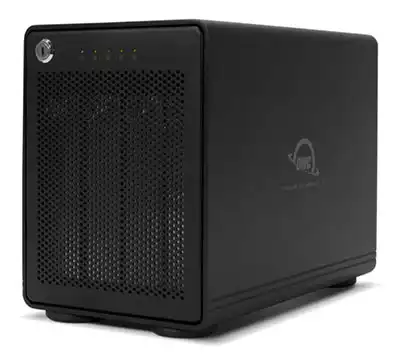
My primary working space is on an OWC Thunderbay 4 RAID array. I run SoftRAID on my Mac to control this system. It can hold up to 40 TB of storage. A newer version is slightly faster but uses a built-in RAID control chip. I prefer avoiding proprietary chips these days.
The OWC Thunderbay 4 is the market's most popular multi-bay RAID storage solution. Two Thunderbolt ports give you the muscle to move all your content at up to 1527MB/s real-world throughput speed.
The Thunderbay 4 is also highly configurable to perfectly match your storage needs. You can use each drive independently or in the SoftRAID XT configuration of your choice for the optimal balance of performance and data redundancy.
It’s fast and has plenty of space. I’m using about half of its capacity right now. I’m extremely pleased with my choice.
2: Your Onsite Backup Can Serve More Than One Purpose
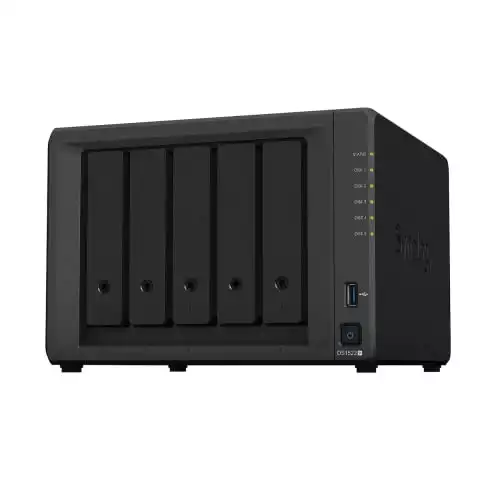
I chose a Synology NAS for my backup server. It has some pros and cons. One of the reasons I purchased it is because I can do more than one thing with it. For example, it can provide security camera service, access to files when I’m away from home, and more.
The Synology DS1522+ is a versatile and expandable 5-bay NAS solution that is easy to scale as your needs change. It offers optional support for up to 15 drives, fast networking, and NVMe SSD caching for quick and efficient file operations.
Powered by Synology DiskStation Manager (DSM), it provides a flexible all-in-one solution for data sharing, synchronization, backup, and surveillance. With built-in file and photo management, data protection, virtualization, and surveillance solutions, the DS1522+ is a powerful solution for small businesses and home users.
On the other hand, it is much slower than my Thunderbay system. I was willing to sacrifice some performance for other features and benefits in this case.
I use the Mac’s Time Machine backup on the Synology drive to perform my onsite backups. It’s a convenient tool that creates hourly backups. It keeps generations of backups so I can recover from different points in time. Time Machine is also very easy to use for recovery.
This isn’t my only onsite photo backup, though. I have another drive to keep copies of my RAW files. When I import photos to Lightroom, a copy also goes to another Thunderbolt drive. Nothing else goes there. Just photos.
At this point, I have three copies of my photos. That’s good, but the offsite backup issue is still to consider.
3: Offsite Backup by Rotation or Network Storage
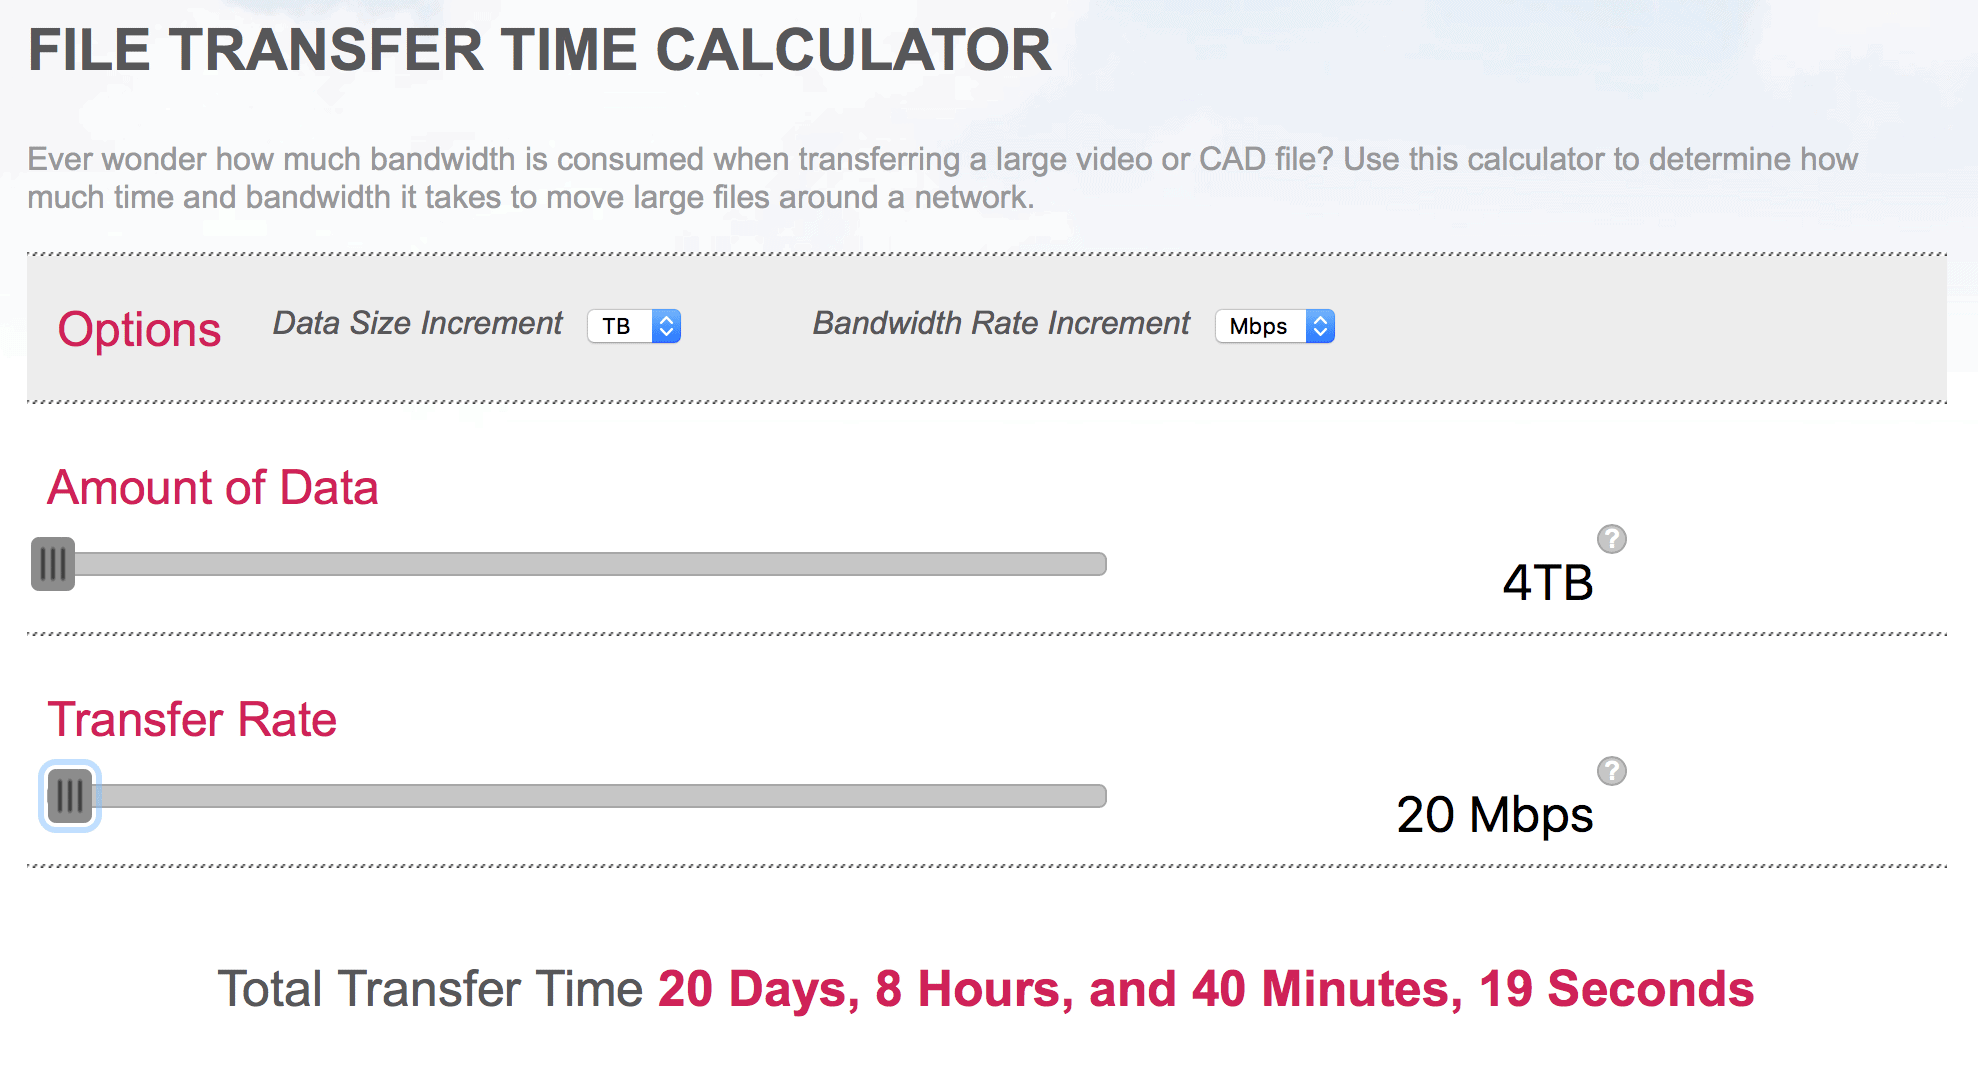
Not everyone has the capacity for Internet Storage of every photo. My current photo library has just under four terabytes of data. That’s quite a bit of data to upload.
While Internet speeds are getting fast, most of those improvements are for downloads. Uploading is much slower on asynchronous services like cable modems.
My current service offers 150 MBps download but only 20 MBps of upload capacity. Even then, those speeds are for optimal conditions. Remember that cable modems are shared networks. If your neighbor is also using a lot of capacity, it impacts your performance.
So how long would it take me to upload my photos under optimal conditions?
About three weeks of uninterrupted transfer. That means I’m not using my Internet service for much of anything else.
I would even bet that a cable provider would see this kind of behavior as a threat to their business and throttle my connection so it doesn’t impact their network, so your time to upload could increase exponentially. I’m using an AT&T 1 Gig fiber connection these days.
While online plans sound good and may be useful if you don’t keep many photos, it isn’t practical for my needs.
That’s why I opted for rotation. It isn’t as timely as other backups. It’s only as timely as you make it. If you don’t make a backup and take it somewhere in a month or two, those new photos are at risk should you have a catastrophe.
That’s a risk assessment you have to make, compared to the inconvenience of manually rotating drives of your precious photos.
Lightroom Doesn’t Backup Your Photos
I’m amazed that Adobe has done nothing to assist photographers with a tool to back up their photos. It’s something that I truly miss about Aperture.
I previously used LaCie Rugged 2 TB drives to keep backups of my Aperture libraries, but I switched to SanDisk 2TB Extreme Portable SSD drives.
They’re smaller, lighter, and faster than the LaCie mechanical drives. They’re also tougher, so you won’t get such a fright if you drop one. They’re much easier to take on the road than the larger LaCie drives.
This SanDisk 2TB Extreme Portable SSD is the perfect way to get NVMe solid-state performance with up to 1050MB/s read and up to 1000MB/s write speeds. This high-capacity drive is perfect for creating amazing content or capturing incredible footage. It comes with a handy carabiner loop so you can secure it to your belt loop or backpack. It's also resistant to water and dust, making it tough enough to take with you anywhere.
When you see Lightroom prompting you for a backup, that only makes a copy of your Lightroom Catalog.
Yes, you want to back up the catalog. It should be in your onsite and offsite backups. That catalog contains your adjustments, metadata, and file locations. It’s important. However, it doesn’t contain a single photo.
You can recreate a Lightroom catalog. The effort to recreate a photo is far more substantial. Do not trust Lightroom to backup your photos. That is not one of Adobe’s features or benefits to its customers.
Files to Backup
You want to backup your RAW files, but that’s not all. Make sure you backup your Lightroom catalog. Include any PSD files you created in Photoshop. Don’t forget any JPEGS you exported for use in documents or websites.
Consider your entire workflow and backup the data files that you use.
I would not recommend backing up program files. You may want to be sure you have copies of the installation files or can easily download them. It’s usually better to reinstall a program with the current version than to restore a backup.
Most programs have files and integrations with the OS that you may not see. Restoring a program can lead to more wasted time than just reinstalling it.
Don’t Trust Free Online Storage
Some sites tell you that you can upload all your photos for free. Maybe, but I wouldn’t trust them. Google will let you upload photos but at a limited resolution. The file you upload may not be the file you get back.
If you want to use online storage, I recommend you choose a Data Storage service, not a photo-sharing service designed for consumers.
Something like Dropbox is great when you’re traveling. You can upload a small set of photos and know they will be safe until you get home and put them on your main system.
Dropbox makes it easy to store your files, save your photos, and organize your passwords. Using my referral link, you also get an extra 500 MB of storage capacity.
If you want to look at online backup solutions, I recommend something like Crashplan instead of Google or Flickr. You can get a Free Trial for CrashPlan for Small Business to try the service.
When it comes to data protection, Crashplan is the gold standard. Crashplan is cloud-based for rapid deployment, unlike other backup solutions, with no file size restrictions. This makes it the perfect solution for businesses of all sizes.
With automatic continuous backup and self-serve restore, you can rest assured that your data is always safe and accessible. The free trial gives you complete access to all of Crashplan's features for one month - so you can see just how easy and reliable it is.
On August 22, 2017, Crashplan sent out a letter to customers announcing it was exiting the Consumer market with unlimited backups. Existing users have time to find an alternate solution. Migration to Crashplan for Small Business worked for me, and they transitioned my old files to the Small Business Plan.
Remember, it isn’t enough to be able to upload your photos. You have to be able to get them back.
Sometimes photo-sharing services will compress and distort your photos. They may not accept RAW files. Their servers aren’t optimized for data backup and retrieval services. Worst case – they may change the rules or decide they don’t want to provide a service anymore (as Google often does).
Your Photo Backup Plan Can Save Your Ass or Chew It Up
I know the feeling of dread when you walk into your office, ready to do some work, and discover that the data storage system isn’t working. That’s why your photo backup plan is so important. It’s much better to deal with a lost day of work than to lose years of your work.
Maybe the tools I outlined here are not within your budget. That’s OK. Something is better than nothing. You can change, adapt and grow along the way. Just don’t do without a backup.
That’s when the gremlins bite the hardest.

