Affiliate Disclosure: We earn a commission if you purchase through one of our links at no additional cost to you.
I thought I’d show the evolution of an image today. Everything from the initial capture to my post-processing workflow to complete it. The image itself is just a snapshot, but it was a good subject for this kind of discussion.
That’s because we see things differently than our cameras. Those devices simply cannot compete with the ability of our eyes to measure light and colors. There’s more to it than overcoming technical issues. Sometimes the desired result amplifies reality. Then other times it crosses the line. It’s tricky, because there are no valid rules for determining where the line was drawn.
Evolution of an Image: Initial Capture
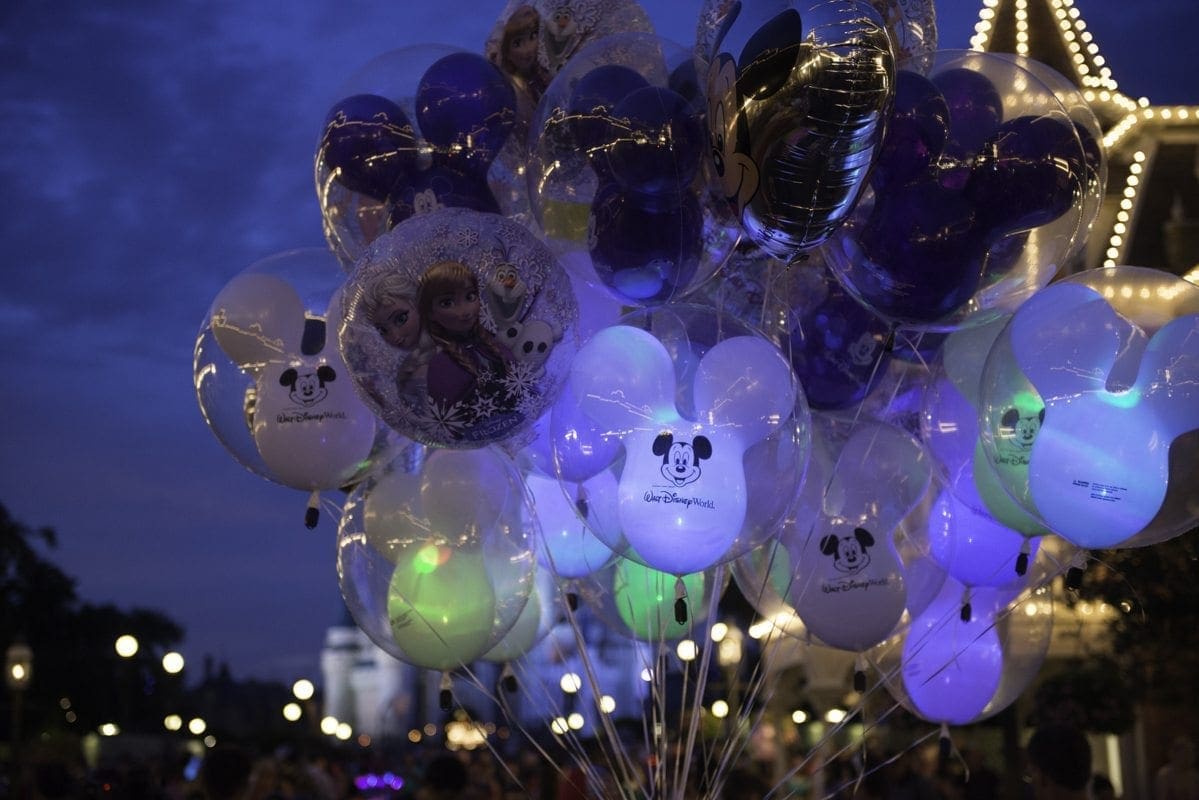 Here’s the original capture out of camera. Like most RAW captures, it lacks vibrancy and punch. That’s OK, thought. JPEG photos come with predetermined algorithms for color and sharpening. Shooting RAW, we want to decide later how best to represent the image for viewing.
A few of our choices at the moment of capture can have significant impact. It’s not just the composition, but how we use depth of field and exposure. Another factor is the White Balance setting. Left to its default setting, the results can end up unimpressive. That’s part of what happened here. The scene has a very cool, very blue color cast. Fortunately, that’s rather easy to correct.
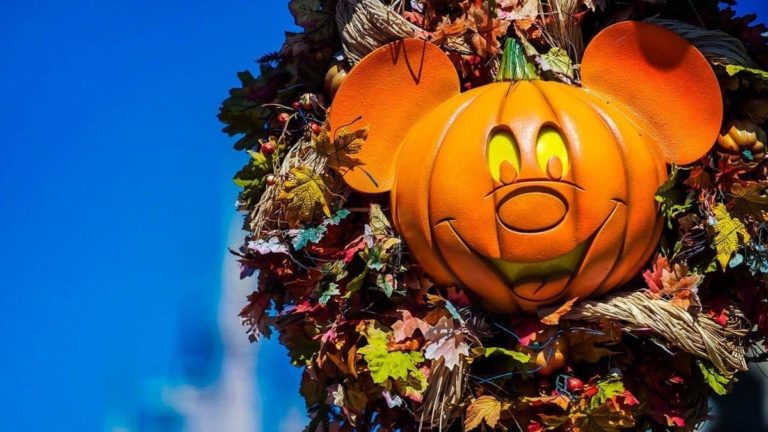
Another problem is the nature of exposure. The idea for this photo is the clump of balloons at Walt Disney World’s Magic Kingdom, but the specific subject is the center balloon with an illuminated Mickey Mouse head. I want to keep that subject, but not at the risk of ignoring its surroundings.
Evolution of an Image: Initial Post-Processing in Lightroom
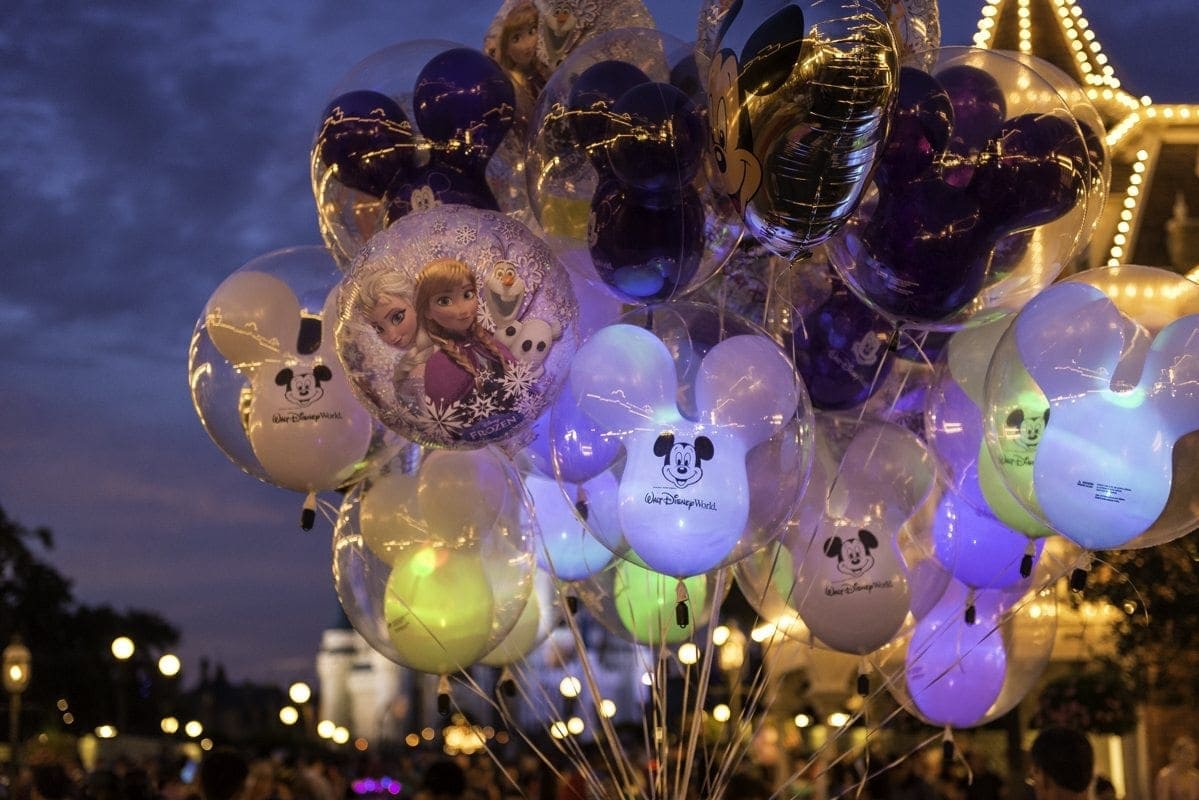
The first notable change here is due to the White Balance. I shot this using an Auto White Balance, which tends to default to a cool result on my Nikon D800. That didn’t suit the nature of this scene. The evening lights on Main Street at Walt Disney World’s Magic Kingdom are very warm. Switching to a Daylight White Balance brought out the warms of the scene, and also helped correct the color o the clouds during sunset that night.
Once I was happy with the White Balance, the next steps were rather automatic. I corrected the Blacks and Whites in the Basic panel. There’s a simple technique to get in the right ballpark for these settings. Hold down the Shift key and double-click the name of the setting. For this image, it changed the Blacks to -12, but didn’t change the Whites. You can do the same technique for other settings in the Basic panel. Those changes may not be your end if your taste differs from the results, but it’s a quick way to get a starting position and balance the exposure.
After that, I adjusted Clarity and Vibrance to my own taste. Still, it was a bit off.
When you compare this image to the initial shot out of camera, you can see more exposure on the balloons. I decided to selectively increase the exposure on some of the balloons to bring them out of the shadows.
After that, I applied some general sharpening to the entire image and a slight amount of noise reduction. The image didn’t really need the latter, but I like moving sliders.
This is the version of the image that I posted to social media on Sunday night. It’s representative of what I saw that evening. You could very well leave it alone and walk away at this point. Of course, I didn’t.
Evolution of an Image: Selective Edits in Photoshop

Who says a photo has to be an example of realism? That works for journalism when conveying information is paramount. However, you’re free to tweak your personal work to the extent that your viewer will except. This is less about informing and more about influencing. The rules are different.
The changes were simple to make and mostly due to MacPhun Software’s Intensify Pro. My first change was to use the Tack Sharp preset selectively. I duplicated the layer, applied the preset, and then added a black layer mask in Photoshop. Then I selectively permitted the effect to show up where I wanted it. On the strings tied to the balloons, on the images in the balloons, and on the wrinkles of the mylar Mickey head balloon near the top.
Next, I decided to boost the color a bit more. The Vibrance adjustment in Lightroom does a very nice job. This setting has a different impact on color, though. It’s more than Vibrance, but not quite as harsh as a Saturation increase. The initial setting was too much at 100%, but I opted for a 20% opacity for the color boost.
Finally, I finished off the image with a slight glow. Rather than using a plugin, I just added a Gaussian Blur of 40pixels to blue the snot out of the image and then changed the layer style to Soft Light and pulled the layer Opacity down to 20%.
My preference is usually to sharpen after adding the glow from the Guassian Blur. The glow was an afterthought for this image, but I was satisfied that I didn’t go back to add more selective sharpening.
My Post Processing Theory
There are no big surprises here. I want to do as little as possible with each image that I decide to process. Part of that is starting out with my initial capture. Since I knew I wanted to make the balloons my subject, I shot wide-open at f/2.8 with my Nikon 24-70mm lens to give a soft, defocused look to the background. This was a spur of the moment shot, but spending some time working the White Balance would have helped. I didn’t worry about it much because I was shooting in RAW and knew that I could just as easily change that setting in Lightroom.
The bulk of my work happened in Lightroom with some simple slider adjustment. I say “bulk” because that’s what had the greatest impact to the photo, but it wasn’t the most time consuming part. In fact, those initial adjustments were over in less than a minute. The next stage of processing in Lightroom was just making some changes to Exposure with the Adjustment Brush. I brought out some of the balloons that were hiding in the shadows. Then I topped it off with some sharpening.
That was it. Done, posted, over. At least until I decided to push the envelope in Photoshop. Even those changes were rather simple. Could I have used Intensify Pro from Lightroom? Yes, but I wanted to use Photoshop Layers and Masks with their results, and I also preferred to use my own glow effect with Gaussian Blur in Photoshop.
The image took less time to tweak in post production than it took to write this post to explain it. You don’t have to spend a lot of time on your images if you know the tools at your disposal.