Affiliate Disclosure: We earn a commission if you purchase through one of our links at no additional cost to you.
Preparing your photos for the web is a key part of running a photography blog. It almost makes you want to cry when you craft the perfect image, only to find it looking horrible for your web visitors.
Key Concepts For Displaying Your Photos Online
Before you start publishing your photos online, start thinking about the kind of result that you want to achieve. The only wrong answer is the one that doesn’t achieve your desired result.
- You want to sell the images
- You want to earn new clients for your business
- You want to sell the products depicted in your photos
- You want to share photos with family, friends, or people with a similar interest
It may sound silly to bring up something so basic, but that’s where it all starts. You have a photo and you want to share it. Why?
The answer will help determine the answers to some of the decisions you must make when preparing your photos for the web.
- What will you name it?
- What size will it be?
- How will you sharpen it?
- How will you help your audience find the photo?
Let’s start with some of the basic concepts you need to understand when you share your photos online.
Which File Type Should You Use?
There are three basic types of files you find on the web.
Each has its advantages and drawbacks.
GIF files have lower quality than the others. They’re best used for simple colors, which excludes most photographs. The GIF format also supports animation, which is about the only time I’d ever consider using it. For the most part, I recommend avoiding GIF files for your photography.
JPEG files are the standard for photographs. It has the best color capacity, but it’s a lossy format. You can significantly degrade the quality of your photos with compression. Just take a look at the photos on Facebook for an example of extreme compression and the effects it has on photos (banding, artifacts, etc.)
PNG files are a lossless file format. If you want your photos to look great on Facebook, upload them as a PNG. Facebook’s compression won’t work. On the other hand, PNG files are much larger than JPEG. If you export photos as JPEG and PNG with the same file size, the JPEG will look much better. The PNG file will have to be much larger to display the same level of quality as a JPEG.
I recommend you stick with JPEG for the photos you post on Wordpress.
Names, Spaces, Size and Sharpness
If you want to optimize your photos for the web, you need to know how the web deals with some of the choices you make. In short, you have to make the right decisions before you export your photo.
1: Choosing a File Name
If you want someone to find your photo through a search engine, there are a couple of things you can do to make it easy on them. The first and most basic thing you can do is to choose a name that describes your subject.
Here are a couple of examples:
Search engines are like people. They understand words. If you use plain English words (or whatever language works for your visitors), you can greatly improve your odds of having your photo discovered by someone who is interested in the subject.
Your site probably has visitors that discovered you based upon their search engine queries. Take a look at your analytics or your Google Search Console to see what words and phrases people are using to find your site.
You can take this one more step to help the search engines by putting relevant text in the Alt field associated with your photo. Again, use plain English text to describe the subject.
A lot of photographers allow their artistic freedom to come up with creative names for their work. Unfortunately, these titles do nothing to help people who are searching for a subject.
It may be interesting that you have a title like “The Creamy Castle of Liberty”, but it does nothing for someone searching for “US Capitol at sunset.”
Use names that help people find the photos they want.
2: Color Space
When you’re processing your photos, it’s generally recommended to use the largest color space available to you. For me that means using ProPhoto RGB.
When exporting your photo, you can choose a different color space for the final result. The color space you choose depends on where you’re going to send the photo.
The web uses the sRGB color space. It’s limited in range compared to ProPhoto RGB or Adobe RGB. That means you’re going to lose some color information.
The important matter is who gets to make that decision – you or your viewers? If you make the decision using your post processing software, the resulting file will choose replacement colors that best match your original image. If you post something to the web with the wrong color space, it could look very different on the display of everyone who views your photo.
Think of it this way. Imagine a color space is like a grid. sRGB has only so many slots for colors. If you convert your photo from ProPhoto RGB to sRGB, you can see the result and know that will display the same way for devices that work with the sRGB color space – which includes most of the devices who will visit your site.
If you give those visitors an image with a larger color space, it’s up to their system to decide which colors to keep in those slots and which ones to discard. The system that makes that decision will vary from one machine to another, and probably won’t do as well as your post processing software.
In the end, you may have a model with green skin or a landscape with purple skies. Failing to export in the right color space will influence how your visitors judge you as a photographer.
Here are some examples of the same photo exported with different color spaces.
sRGB

Adobe RGB

ProPhoto RGB

When I look at this page on my 5K iMac, all the photo look alike. When I view it on my iPhone, there are dramatic differences in the colors of each version of the photo.
Even with the same color space, your images may vary from screen to screen. I just compared my Home page on three different devices – my Macbook Pro, my wife’s Windows laptop and my iPhone 6s Plus.
The colors on my iMac are warm and vibrant. A bit less so on my iPhone. However everything looked brighter and desaturated on my wife’s laptop.
Different devices will have different results. It’s just something you cannot control.
3: Choosing A Photo Size For The Web
I don’t think anything makes more impact upon a viewer than a large photo. That said, nothing slows down your site like a large photo.
You have to strike the balance between size and performance. That causes a few other issues, too.
There are a couple of standard widths for your posts and pages in a WordPress environment. A standard post is 600 pixels wide. A full-width post is 1152 pixels wide.
By default, your media settings for WordPress will allow three sizes.
You can change these defaults, but be careful before you start playing with numbers.
One of the biggest problems you can have with your photos on the web comes from resizing images. You can define image size by pixels or percentages. In some cases, you may not get the results you anticipated.
Resizing an image can impact you in a few ways. Let’s say that a post gives you 600 pixels to display your image, but you upload a larger photo.
First, there is a waste of extra pixels. It takes more space than if you had uploaded the size of the image to be displayed. Second, it takes longer to download than a smaller photo at the display size. Then there is the time it takes to calculate the change and resize the image prior to display. Finally, you may lose detail.
Any time you resize an image, you lose detail. That often means sharpness gets lost as the resizing algorithm discards data.
What happens when you want to display the image at a larger size in a lightbox? The best practice is to export two images. One at the display width for the post, and another for the display width of the lightbox.
The reason you may want to use this technique is to have control over the quality of your image. Remember, resizing a large image to a smaller one discards data. Resizing a small image to a larger one creates jagged edges or a pixelated appearance.
Export two different sizes and sharpen each one for its display size.
When you add a photo using Wordpress media, there is an option to link it to a media URL. That’s the URL that gets displayed in a lightbox. You could upload the larger image, have the blog post display it in a smaller size by resizing it (in which case that image loses detail) and then displays the correctly prepared image only in the lightbox.
A better option is to use the Custom URL option in the media browser. Then you can link a properly prepared blog post image to a properly prepared larger image to display in the lightbox. Your visitor won’t know or care that you’ve used two different images, but your result will be a better experience for the viewer.
What happens if you want to use this image in a full-width post? I have the same advice. Prepare another version of the image for full-width display, sharpen it for that size, and use it where needed on full width posts or pages.
Speaking of size, the question of compression comes to mind.
You can use a plugin like WP Smush to reduce the file size of your photos by 10-20%. It works fairly well without losing much quality. On the other hand, you can get a much better result using Photoshop or Lightroom to export your photos at the quality you desire.
I’ve tried WP Smush. It saves space and does a better job than Facebook. However, you can get far superior results by choosing a lower quality setting with your post processing tools. It’s best to optimize your photos before you upload them to Wordpress, not after.
Content Delivery Network Issues
I mentioned Content Delivery Networks (CDN) in a previous post about selecting a web host. It can be a blessing for performance, but some issues must be considered.
First, a CDN may need some configuration to work with your lightbox. By distributing your photo as static objects, you get a different URL path for each server on the CDN distribution chain.
When someone clicks an image to view it in a lightbox, they may just see a large image on their browser rather than one contained in your lightbox.
That gives a poor presentation to your visitor. Fortunately, this was an easy fix with WP Engine. I just contacted support to describe the issue. They quickly created re-directs for each CDN server and provided my viewers with the lightbox experience I expected.
Your original image is always available on the URL you created, but keep in mind that your visitors may see the photo on a different URL. That may have SEO consequences if they create links to a CDN instead of your home site.
How Should You Display Your Photos?
Wordpress gives you a number of options to display your photos.
1: Inside Posts and Pages
Any WordPress theme will allow you to insert a photo into a Post or Page. Just push a button to Add Media, upload a photo or select on in the library, and then insert it.
Why would you want to do this?
The most obvious case is because it’s related to the topic of the Post or Page. You just photographed a wedding, and you’d like to display images of the happy couple. You’re selling a motorcycle and need to let prospective buyers take a look. You created a beautiful piece of art and you want to sell it. You captured a newsworthy event and need to show people what happened.
Some themes will allow you create galleries inside of a post. If your theme doesn’t allow it, you can find a Wordpress plugin to create a gallery inside the post. That could work with any of the examples listed above.
Imagine that you’re trying to sell a photo as a print. A lot of people post their photo on a site like SmugMug and then hope someone will come around to buy it. SmugMug has built-in tools to handle the transaction, but it does absolutely nothing to drive business specifically to your photos.
SmugMug is a photographic version of StumbleUpon, where people click from one photo to the next. It could work in your favor or you could just as easily lose a visitor to the next image.
A better practice is creating a page specifically for the photo you want to sell. Optimize your photo to look its best. Optimize the text on your page to provide details about the photo. Search engines need relevant text to help them understand how to serve your photo in search results.
Having a page dedicated to your photo also allows you to promote it easily. You can share that page on social media or with potentially interested buyers. Unlike SmugMug, sending visitors to your site allows you to control the links that they can click, so your visitors don’t have any incentive to leave your page and see what someone else is offering.
2: As a Featured Image for a Post
You aren’t required to have a Featured Image, but I think it’s a good idea. You can have only one Featured Image per post. Basically, this is the headline image for your post. It tells people what the article is about. It’s a visual clue to grab their attention when scrolling through a list of articles on your site.
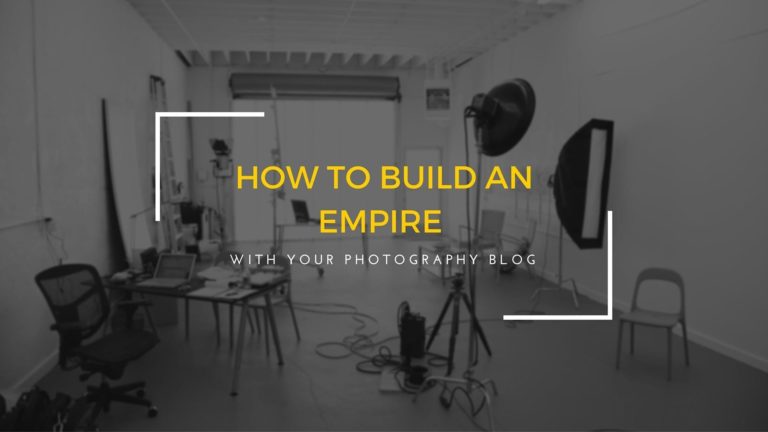
For this post, I’m using a graphic image with a title “How to Build an Empire with Your Photography.” I use this image on a number of posts because they’re related and part of a theme. All of these posts build-up into a larger body of work that shows how to start and enhance your Wordpress website for business.
You can show the Featured Image inside your post, but it doesn’t have to be there. The purpose of a Featured Image is to use as a header or logo for your post.
3: Galleries and Portfolios
What’s the difference between a gallery and a portfolio? Some people use the words interchangeably, but they aren’t really meant to achieve the same result.
A gallery is a collection of related photos. Let’s go back to the wedding photography example. You may create a gallery of images for each of your clients. One gallery has images from the Frankenstein wedding and another has images from the Dracula wedding. You can display galleries inside of a Post.
Your portfolio is a gallery of your best work. It’s typically built upon a WordPress Page outside the blog’s normal flow.
The purpose of a portfolio is to show your style and capabilities. Whether you accept clients or not (and I don’t), it can still be useful for people who are evaluating you as a photographer. This is your statement to the world.
It’s also a very useful tool for evaluating yourself. When you gather the images for your portfolio, it gives you a new insight to your own photography. Instead of looking at individual photos or even related photos from an event, you start to think about your body of work.
It’s an interesting sensation to choose the images for your portfolio. You start to evaluate your style and discover things about your photography that you may have never previously considered.
Keep in mind that you aren’t limited to one portfolio. I prefer portraits and travel, so I created a portfolio for each category.
Now that I look at my images as part of a portfolio, I see things I like and changes in style that I’d like to make on future shoots. In short, creating a portfolio gives you a never-ending opportunity for self-evaluation and growth as a photographer.
Prepare Your Photos For The Web
No matter what stage you are with your photography, you want to show your photos at their best. I’ve learned from trial and error how to make the best presentation. To be honest, it takes a bit more work than just tossing your images out there.
When you know the factors that can cause problems with your photos on the web, then you can take steps to mitigate those issues.
Unfortunately, nothing is perfect and you can’t control every device that displays your photos. You can optimize your photos to prepare them for most circumstances that a potential viewer will encounter.