Affiliate Disclosure: We earn a commission if you purchase through one of our links at no additional cost to you.
We have travel photography tips to help you prepare and pack your gear, determine what photos you want to capture and deal with some unexpected situations on the go. Some places, and people, may place limits on where you can take photos. We have some tips that may help you get around those issues.
How to Research the Must-Have Photo Opportunities
Which kind of photographer are you?
The kind who plans and knows what photos to take before you go, or the kind who just shows up and discovers the location as you travel through it?
I like to do a bit of both, so my trip starts with research. Not only does that tell me what are the great travel photo scenes at my destination, but it also tells me what kind of gear I need to take with me.
A few years ago, I got a private tour of the United States Capitol building and also the Library of Congress. During that visit, I took only my Nikon body and my Nikon 14-24mm lens. It was perfect.
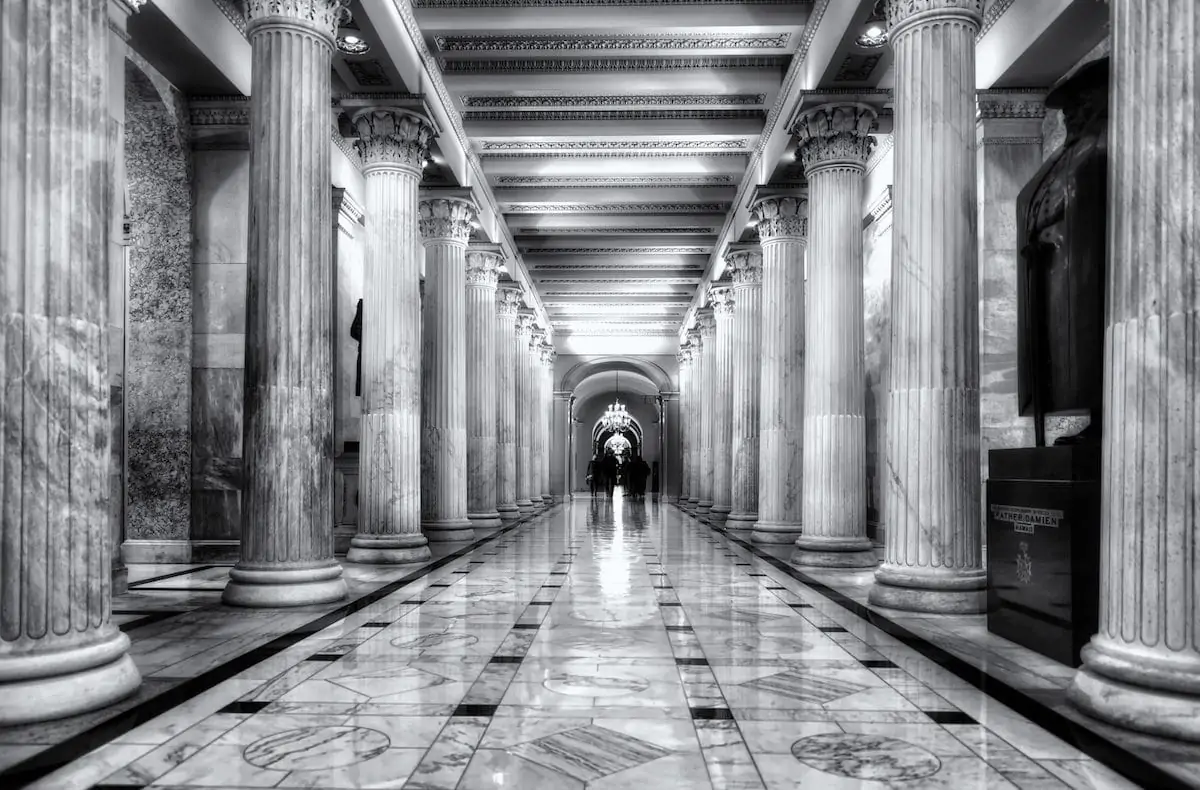
I had to deal with the existing interior light for my shots, and a short focal length made it much easier to hand-hold without going to extreme high ISO to get a fast enough shutter speed that eliminates hand-shake blur.
The U.S. Capitol is a grand statement of architecture and artwork. A wide-angle lens was the perfect way to tour and know I’d get shots I could use.
On another part of that trip, I stopped at the Wormsloe Estate outside of Savanah, GA. The estate has this classic dirt road lined by trees. This is a horrible place for a wide-angle lens, as I discovered.
I got in my car and started to leave when I realized the answer – I needed a telephoto lens to bring the trees closer together.
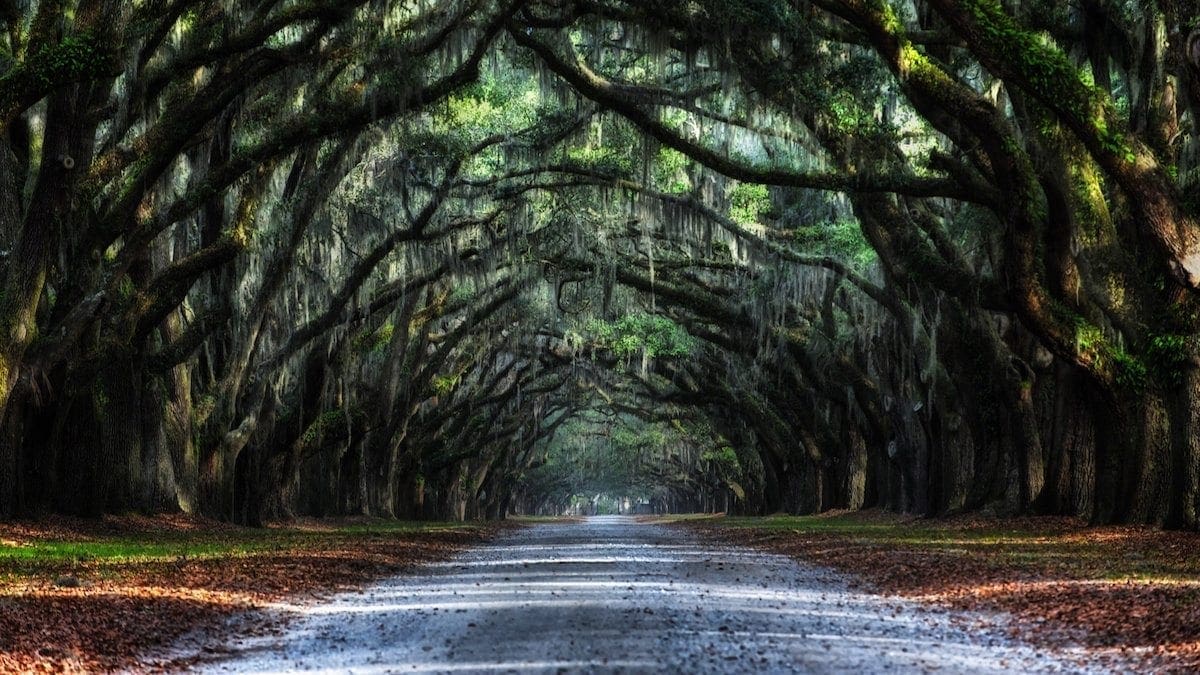
Standing there, the trees seem spaced quite far apart. Those gaps just didn’t make for an interesting photograph, like those I’d researched before my trip.
With a longer focal length, the gap between the trees seems almost non-existent and changes the photo’s atmosphere.
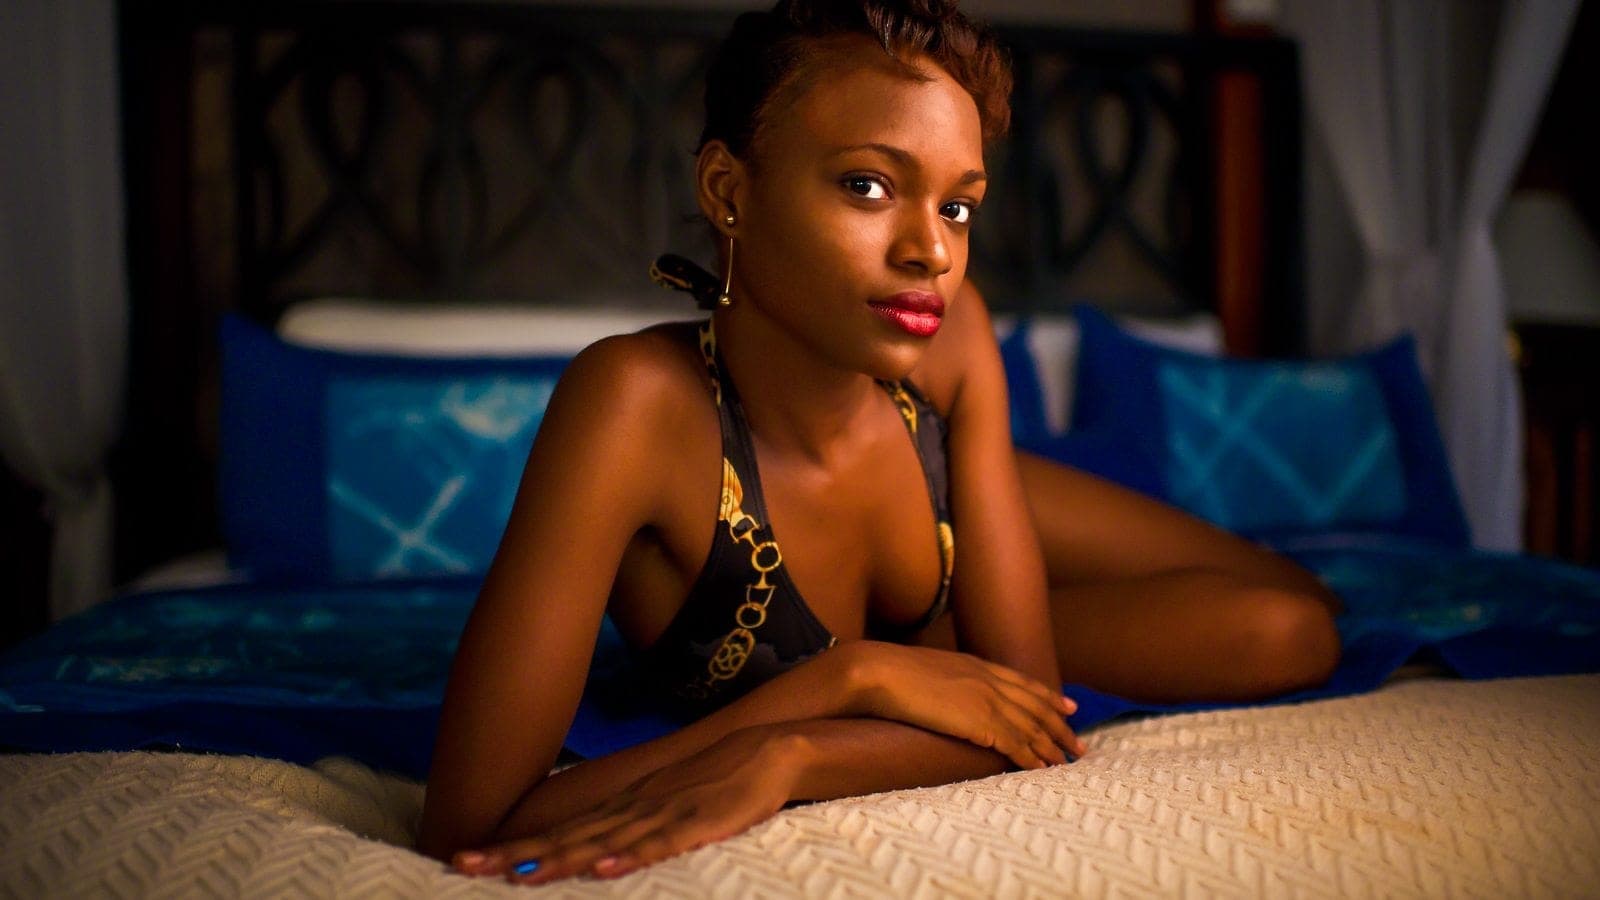
Some travel trips are as much about the people as the place. If you’re looking for portraits, then take your flash, a portrait lens, and something to use as a light modifier.
Knowing what kind of photos you want is the first step to researching your destination, but what if you genuinely don’t know what to expect?
Google Images and Flickr are my two most trusted resources for researching a travel destination. Combine that with the genre of photography you have in mind. Architecture, food, portraits, landscape? Add those terms into your search query.
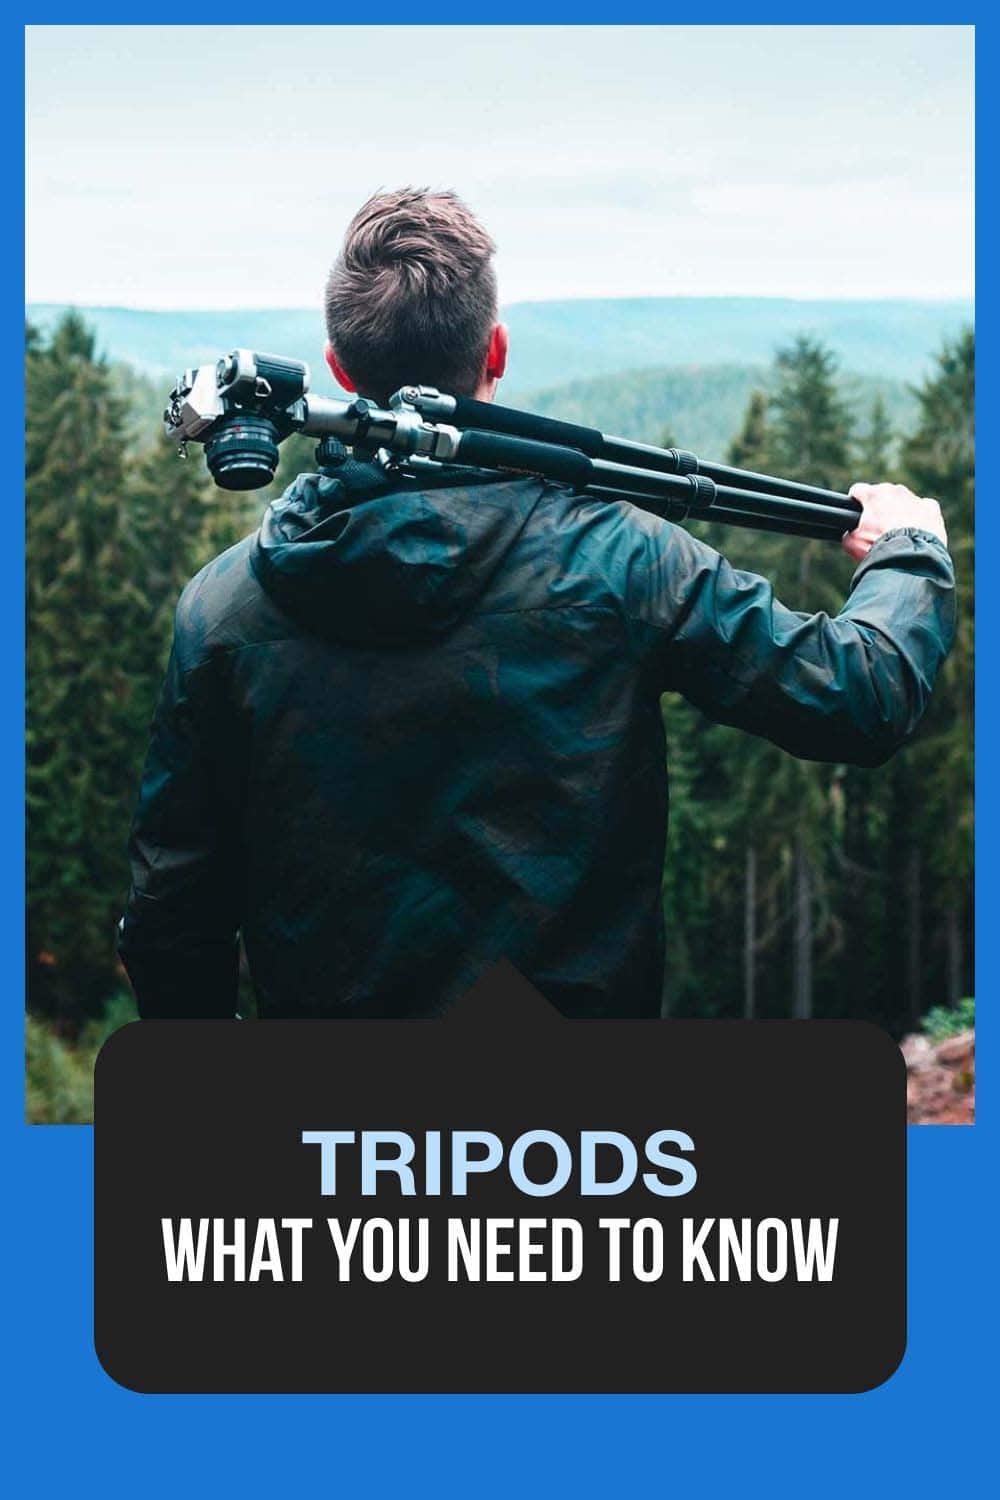
Keep in mind whether you need a tripod, or if you can get by with something like a Platypod or a Manfrotto Magic Arm and Superclamp combo. (links below)

The Platypod Max is the perfect solution for photographers and videographers who want to travel light. This ultra-light, flat tripod weighs only 13 oz and easily fits into any camera bag.
Despite its small size, the Platypod Max is incredibly sturdy and can support heavy DSLR cameras and long telephoto lenses. The Platypod Max is a perfect choice if you want a powerful tool that won't weigh you down. To top it all off, they offer a 5-year warranty.

Tired of lugging a tripod around?
The Platypod Ultra is a compact and versatile tripod designed for smaller equipment like mirrorless and compact cameras. It features four heavy-duty spike feet for grip in unusual places, a 20-inch cinch strap for strapping to poles, beams, trees, and other freestanding objects, and a carabiner for easy transport. With its compact size and versatile design, the Platypod Ultra is perfect for capturing those hard-to-get shots in any situation.

The Manfrotto 244RC Variable Friction Magic Arm is essential equipment for any photographer or videographer. This articulated arm allows you to mount your camera at any angle, making it easy to capture the perfect shot. The large locking knob makes it easy to adjust the friction and lock the arm, while the quick-release camera plate ensures your camera is secure. With a load capacity of 8.82 lbs., this durable and lightweight aluminum arm is a must-have tool.

The Manfrotto Super Clamp is the original clamp that has thousands of uses. No camera bag should be without one. The Super Clamp can hold just about everything, including cameras, lights, umbrellas, hooks, shelves, and plate glass.
The wide jaws of the Super Clamp make it easy to attach to poles, posts, tripod legs, pipes, doors, stands, and beams. If you can fit the Super Clamp around it, it will hold! This makes it an incredibly versatile and valuable tool for anyone who needs a little extra help getting their gear where they need it.
Determine What Gear You Need and How to Protect It
Part of the fun of travel photography is deciding what gear to take. That’s why I like to do some research before I go. Different cameras and lenses are tools for different jobs. Do I need a flash or other accessories?
[Silly question: I always take a flash]

The AD200 from Godox is a game-changing flash that offers powerful, battery-operated performance in a compact, portable package. This versatile light can be used on or off-camera to provide stunning results in any situation. With its 200Ws of power, the AD200 is perfect for everything from location shoots to portrait sessions.
The AD200's lithium-ion battery provides up to 500 full power flashes, making it ideal for extended use. And with its built-in 2.4GHz radio receiver, the AD200 can be triggered wirelessly from up to 100 meters away.
Note: I own two of these.
- Quick recycle time
- More than one type of flash head
- More powerful than on-camera flash
- Great battery life
- Easy to use
- Only works off-camera
- Rapid-fire HSS causes overheating
Think about some of the items you need to pack for a travel photography trip.
That list may vary in size depending upon what you want to do. Some folks can get away with a single body and lens. Others go out with a rolling bag full of gear and more items in the checked luggage.
Yes, I’ve done that.
We’ll talk more later if you’re one of those folks who carries so much gear that it just can’t fit as a carry-on.
1: Why You Want to Carry on Your Camera Gear
I don’t like to pick on airline employees, because they have a tough job. That said, the folks who handle your checked luggage are also handling tons of other bags in any given day. They toss these things from a cart to a ramp. Sometimes a stack of bags falls over. So they pick them up and toss them back where they belong.
Quite simply, they aren’t in the business of moving bags gently around. They don’t have the time for that treatment. It’s not that they’re purposely banging them around, but you should expect checked bags to get a few bumps and bruises during a trip.
Only once have I ever put something in a checked bag, locked it up, and found it missing when I got to my destination. Theft isn’t rampant in my experience, but it’s possible. I have no idea who got into my bag when I checked it and pulled it off the luggage ramp, but someone clearly did.
My cameras, lenses and flashes go with me on the plane. Every single time.
I’ll put tripods or light stands in a checked bag. They won’t get hurt and likely won’t get stolen. The precious and expensive items stay right by my side.
Something else to consider. Bags occasionally don’t make it to their destination and the airline works to reunite you with your luggage. You won’t have much of a photography trip if your gear gets sent elsewhere while you’re in your destination.
2: Choose Your Bags Wisely
I don’t like to be overloaded when I’m traveling. Let’s face it; camera gear can get very heavy after lugging it around for a few hours. I recommend traveling as light as you can, but not so light that you miss opportunities.
Sometimes I travel with a rolling bag – like my Think Tank Airport Takeoff. I’ve used this bag for years. It’s sturdy, has excellent roller-skate wheels to glide through the airport, and fits in overhead compartments.
The Airport Takeoff is what I use when I need to carry multiple bodies and lenses, plus other accessories. It keeps everything with me while traveling.

The Think Tank Airport Takeoff V2.0 Rolling Backpack is the perfect travel companion for busy professionals. It features integrated backpack straps for easy conversion to a backpack and is sized to fit most domestic and international carry-on requirements. The large front pocket easily accommodates a 17" laptop and 10" tablet, while the main compartment holds up to a 400mm f/2.8 lens and two standard camera bodies. Padded shoulder straps and a padded back panel make it comfortable to carry, even when fully loaded.
However, it isn’t meant for your everyday carry bag. Yes, it has backpack straps in a compartment, but a fully loaded rolling camera bag is pretty heavy to carry around.
When I take this bag, I’ll bring another bag inside my checked luggage, or perhaps as a personal item on the flight, to use for my everyday carry bag at my destination.
Think Tank Has Many Different Types of Bags
There’s more to Think Tank than roller bags. Check out the variety on this article.
If you can plan your trip with just the gear that fits in a backpack or shoulder bag, then do so. Sometimes I can enjoy walking around with a single body and my Nikon 24-70mm lens to get every shot I need on a trip. Maybe a Nikon 35mm prime lens for a few low-light situations.
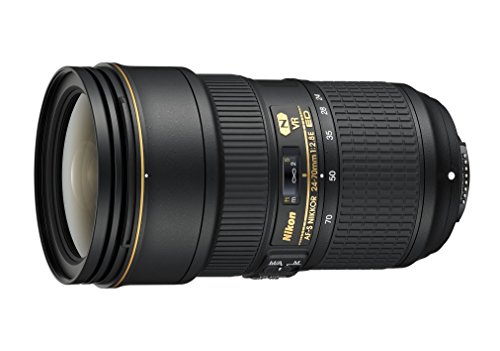
No matter what your photography style, the Nikon AF-S FX NIKKOR 24-70mm f/2.8E is a versatile and powerful lens that will help you capture stunning images. With a 24-70mm zoom range, this lens is perfect for anything from landscapes to studio work, and with a fast f/2.8 aperture, you'll be able to freeze fast action or create a beautiful bokeh blur. Plus, the Nikon fluorine coat on both the front and rear glass protects your images from any unwanted glare or reflections.
- Weather-sealed
- Constant aperture
- Fast auto-focus
- 77mm thread for filters
- Not inexpensive
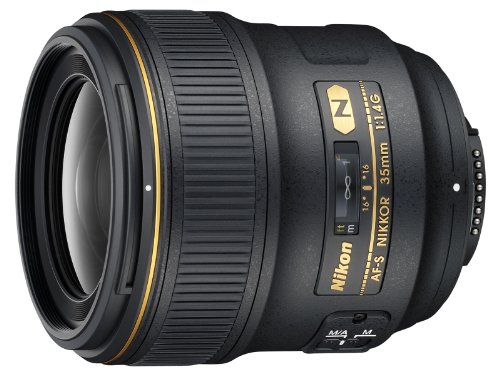
Nikon AF FX NIKKOR 35mm f/1.4G is a fast, classic wide-angle lens perfect for capturing stunning images with edge-to-edge sharpness. This lens is part of the Nikon Holy Trinity of Prime Lenses, and its nano crystal coating ensures optimum image quality. Great for landscapes, travel, and food photography. We find it works well on FX & DX Nikon cameras.
Keep in mind that some bags have brands that just scream out EXPENSIVE CAMERA GEAR INSIDE. Depending upon your location, you may want to see about using some other bags that are less dedicated to the photography industry. We’ll talk more about how to do that below.
3: Going Through Transportation Security Checkpoints
Someone will inspect your camera bag unless you’re driving to your destination. It may be a simple ride on a conveyor belt through a scanner or a manual inspection.
If you have film, the scanners may damage it. So you do one of two things.
- Request a manual film inspection rather than go through the scanner.
- Get an X-Ray film bag to protect your film. This is one of those things you plan, which is what we’re talking about here. Know before you go.
What Are the Laws or Restrictions on Your Photography?
Remember when I mentioned the Platypod and the Manfrotto Magic Arm & Superclamp combo as potential replacements for a tripod? That’s because some people and places just hate tripods. I mean really, really hate them.
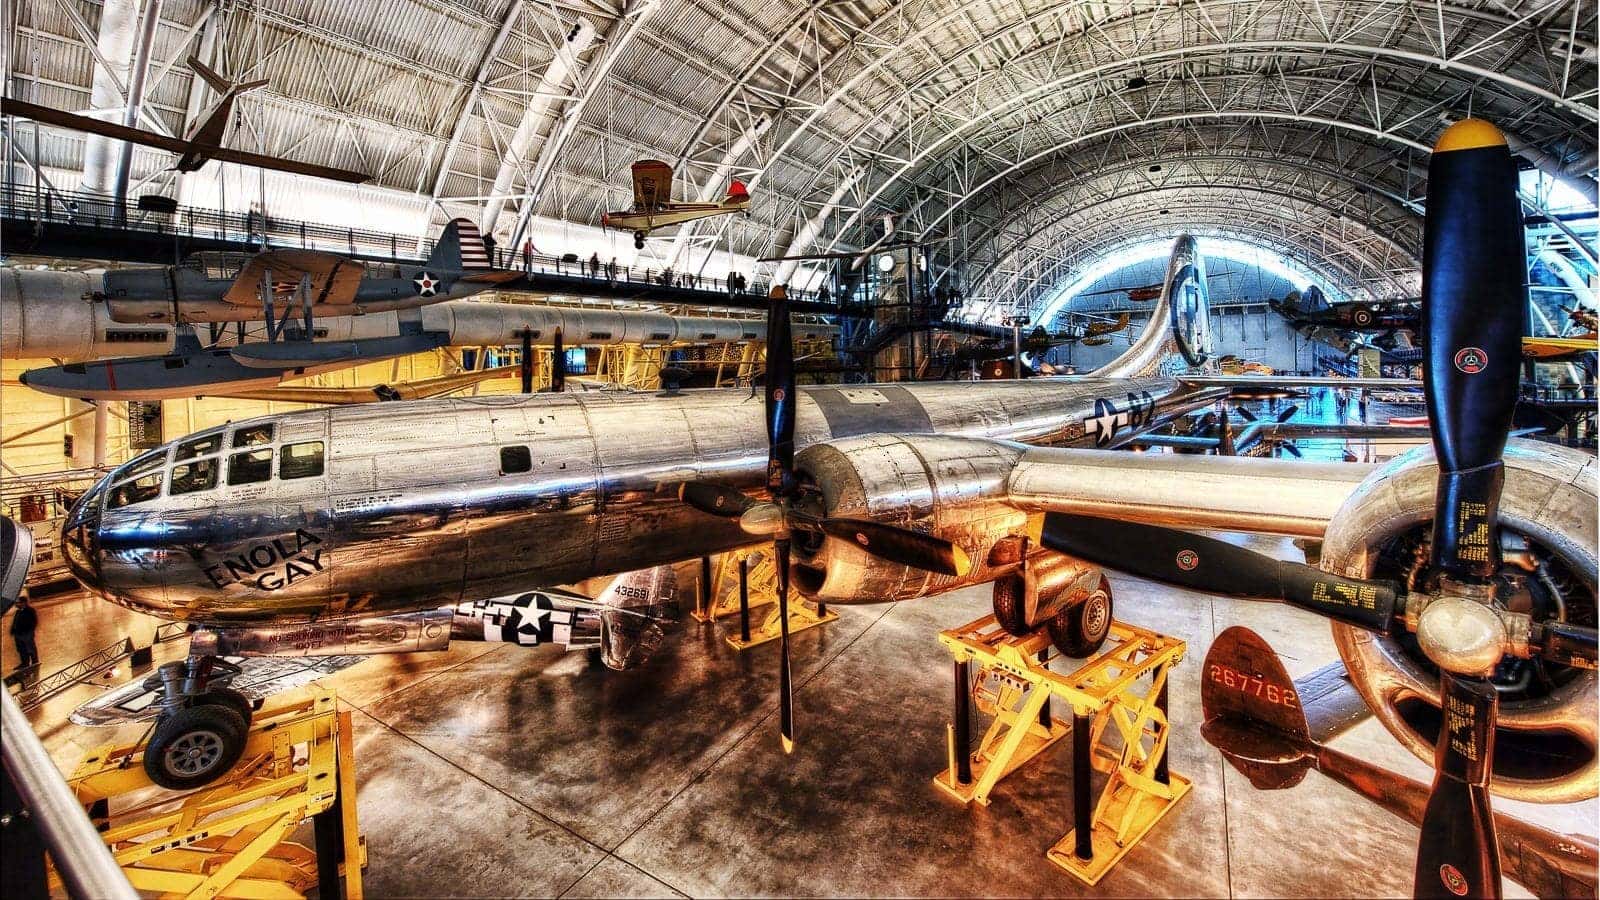
I wanted to take photos in the Smithsonian Air & Space Museum. Due to my research, I knew they didn’t allow tripods. However, I noticed a railing around almost every exhibit. It seemed like a perfect place to use my Manfrotto Magic Arm and Superclamp.
It wasn’t long before my first photo when a security guard came out to confront me about it. He was pleasant but didn’t know what I was doing. I explained that I knew tripods weren’t allowed, but this would give me a stable platform for my photos. He checked with his boss and they agreed. It wasn’t a violation of their rules, so I got my shots.
I had a similar issue on the Stratosphere in Las Vegas. No tripods allowed.
A guy was in front of me going through the security checkpoint before entering the elevator. He had a small, hand-sized tripod with him. The security guard screamed at him – NO TRIPODS! I felt bad for the poor guy.
Good thing for me that I wasn’t carrying one.
My turn came up, and I opened my bag. She saw the Magic Arm and yelled NO TRIPODS! I politely told it it wasn’t a tripod, as it only had one leg. She looked puzzled and said, “Oh.” Then I got my shot from way up high over Las Vegas.
Sometimes you just need a tripod. However, tripods are bulky and almost universally hated. If you can get away with a smaller, lighter non-tripod tool that lets you have a stable platform for your shot, then do it.
Another thing to consider is if there are rules or laws against photography. For example, you DO NOT take photos of police or military people in Cuba. It just isn’t done unless you want their immediate attention and possibly some small, confined place to stay for a while.
Businesses have the right to deny photography. In fact, I have a photo collection of signs that say “No Photography.” Generally speaking, I don’t abuse their rules. They can have me exit the property and even ban me from returning.
Casinos used to have strict no photography rules. The proliferation of mobile phones seems to have made it nearly impossible to prevent all photography, but I wouldn’t recommend going in there with a big DSLR and a 70-200mm lens. The same is true for concerts, other performance venues, movie theaters, etc.
Just know that some places are off limits to photos.
Are You Staying in the Right Place?
Why stay anywhere else if you know where you want to take photos?
This seems pretty obvious in most cases. Stay close to the action. You don’t want to waste your precious travel photography time traveling. You want to spend your time taking photos of your destination.
Why stay 45 minutes or an hour from where you want to take your photos?
If you need to get a sunrise photo, you must be at your location before dawn arrives. If you have to travel an hour away and still have time to scout the right spot and set up your gear, you’re getting up right in the best part of a night’s sleep.
Let’s say you want to take photos of the beautiful Moraine Lake in Banff National Park. Beautiful glacial waters, epic mountains, and forests all around. It’s a great trophy photo taken by thousands of people before you. The closest airport is in Calgary.
Don’t stay in Calgary.
Moraine Lake is quite a bit deeper into the Banff National Park. It’s about a 2-hour & 20-minute drive from the Calgary airport. Find a hotel close to your destination so you can spend your time taking photos rather than driving somewhere to take your photos.
Contact a Fixer
This is a tip I learned from Scott Kelby. He sometimes uses local photography guides – a fixer – to help him get some great photos of a destination. Serge Ramelli showed him Paris. Mimo Meidany showed him how to get the most out of Venice and Rome.
Finding a local guide with knowledge of the destination and photography can be a great benefit to capturing photos you didn’t even know were possible. Sometimes they can take you places that the tourists never see. Other times they can get you access to a location that would never admit you.
Local guides with local connections are the key to getting some photos that others will never have the opportunity to try.
If a fixer isn’t in your budget, try going with a photography workshop. I’ve done this a few times and it’s always been a great benefit. Not only do you learn something, but you still get access to people and places that would otherwise be unknown to you.
My favorite outfit for these workshops is Santa Fe Photography Workshops. They were particularly helpful and knowledgeable on my trip to Cuba.
You may also find some individual photography workshops, but make sure you trust the provider. Some are great, and some are just a bust. Use your judgment and don’t just accept things at face value. I can recommend workshops with Scott Kelby and Joe McNally. No doubt there are other reputable workshop providers out there. Just know that a big name in photography isn’t always a guarantee of a good workshop.
Some folks are better at doing than teaching.
What Accessories Do You Need?
Earlier in the post, I mentioned that film photographers may want to get some X-Ray protection bags for their film. X-Rays can do some damage to your precious film?
Why is that?
At a basic level, light is just electromagnetic radiation within the visible spectrum. There are plenty other wavelengths of electromagnetic radiation, including X-rays. Light and X-Rays are essentially the same thing. It’s just that you can see light and you can’t see X-rays.
However, your film will react to X-rays, so protect it.
Another recommendation is if you don’t want to use a camera bag. Thieves know the popular brands of camera bags, so it may be wise to get something not associated with photography. The problem that brings up is other bags don’t have the useful compartments to keep your gear from banging around.
Look for something called Lens Wraps. These are made of soft foam material and they come in different sizes. You can find them for your camera body and various lens sizes. That takes the bite out of clanking gear in your non-camera bag.
Take a power strip when traveling to places with a less than stable electrical grid. That saves you money so you don’t have to buy a power adapter for every device. It also provides you with surge protection.
You never know if the person next door will do something that causes a surge which may fry your equipment. Always be carrying a surge protection power strip.
Are You Carrying Excess Baggage?
What happens if you’re going on a fantastic trip that requires much more camera gear than you can carry on with you? A lot of checked luggage can quickly get expensive.
First, check with your airline to see if they have media rates. That provides a discounted luggage rate for traveling members of the media, which could help you a bit.
Think you’re not in the media?
Maybe so, maybe no. Perhaps you can pitch an idea to a media organization, magazine, etc. Take some photos and write a story to go with them in exchange for an assignment letter to quality as media.
Do you have a travel or photography blog? That may work with some airlines. It can’t hurt to call them and ask.
Another option is to split your camera load with a travel companion. If they’re willing to take some of your gear as carry-on, it could save you on luggage fees.
If you do have to check your camera gear as luggage, make friends with the Skycap and tip well. Some photographers know and do business with the same skycap year after year to ensure their gear gets on the right plane.
Sometimes the size of your camera gear just won’t fit inside a plane. If you have a lot of C-stands or other large pieces of gear, plan on getting it checked. Use something like the ThinkTank Logistics manager to keep it safe. I don’t have one of these (yet), so I can’t give a specific recommendation for it. However, I do trust ThinkTank as a brand.
Finally, think about cases where you need to make a connection on a regional flight or a smaller plane. That rolling bag that fit so comfortable in the overhead on your main flight may not fit in the cabin of a small aircraft.
You may have the same issue on trains or buses, too. Make sure you have a Plan B or Plan C for these circumstances to protect your kit’s most important pieces of gear.
Other Travel Photography Tips?
Do you have some travel photography tips to recommend? Please leave them in the comments for other readers to know!
Subscribe to The Photo Flunky Show
Thank you for listening to The Photo Flunky Show. Make sure you get every episode by subscribing.
iTunes – https://williambeem.com/itunes
Stitcher – https://williambeem.com/stitcher
Google Play – https://williambeem.com/googleplay
Blubrry – https://williambeem.com/blubrry
Want to learn more about Travel Photography? Click below to check out more Travel Photography articles.
Travel Photography Articles