Affiliate Disclosure: We earn a commission if you purchase through one of our links at no additional cost to you.
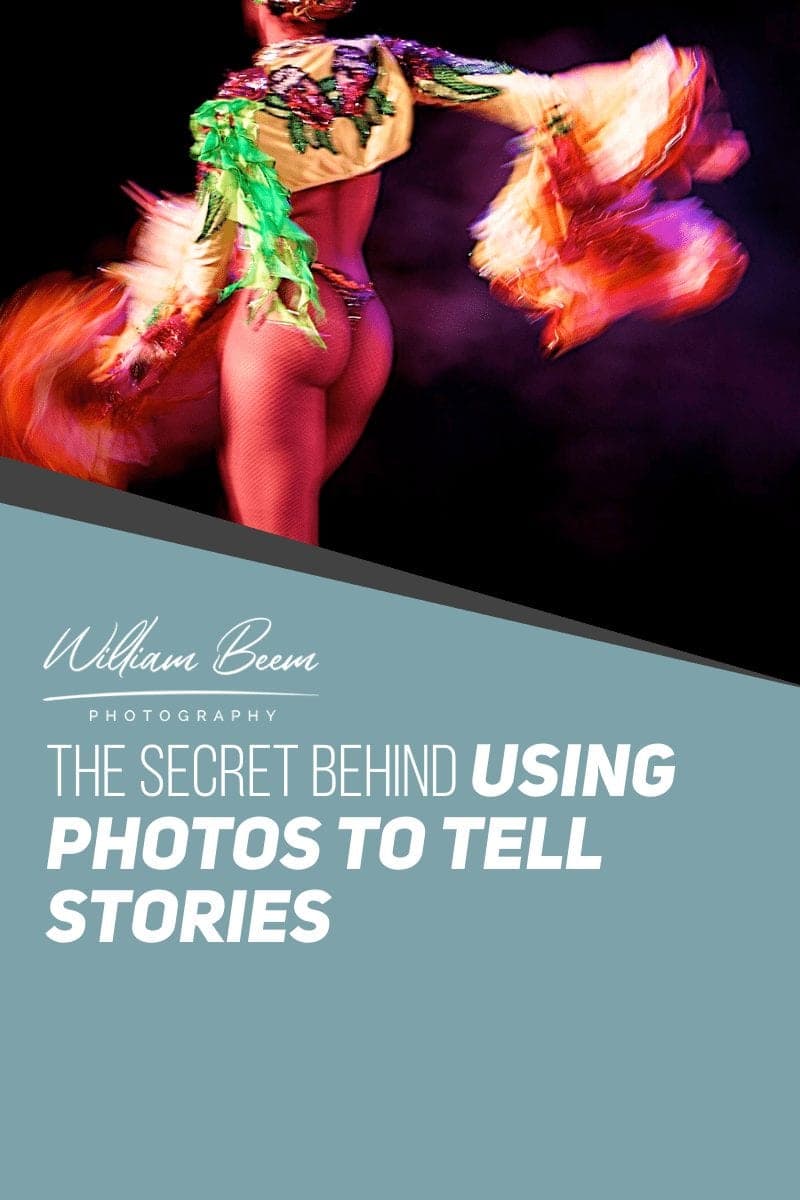
Light is how photographers communicate. We start with a canvas of shadow and light is our brush. You have incredible power to convey how your photograph tells your story through the use of creative lighting.
Whether you want your story to be dark, dramatic or ebullient & joyful. The way you use light is the primary way of communicating with your viewer and evoking an emotional response.
You can use light with color, direction, intensity or quality to make your viewer feel something about your photo. Hollywood movies are wonderful examples of storytelling through creative lighting. That’s because light has a language of its own, and it’s up to you to use it in the right way for your subject.
About The Language of Light
The phrase “The Language of Light” is one I picked up from Joe McNally. He has two great courses with this title, and it’s something I can easily recommend. I’m not an affiliate for Joe or these courses. I’m just a happy owner of the products passing along a recommendation to a friend.
You can find Joe’s video “The Language of Light” and other products here.
In the course, Joe discusses the qualities of light and provides demonstrations of how to shape light to enhance his portraits – essentially telling stories with light.
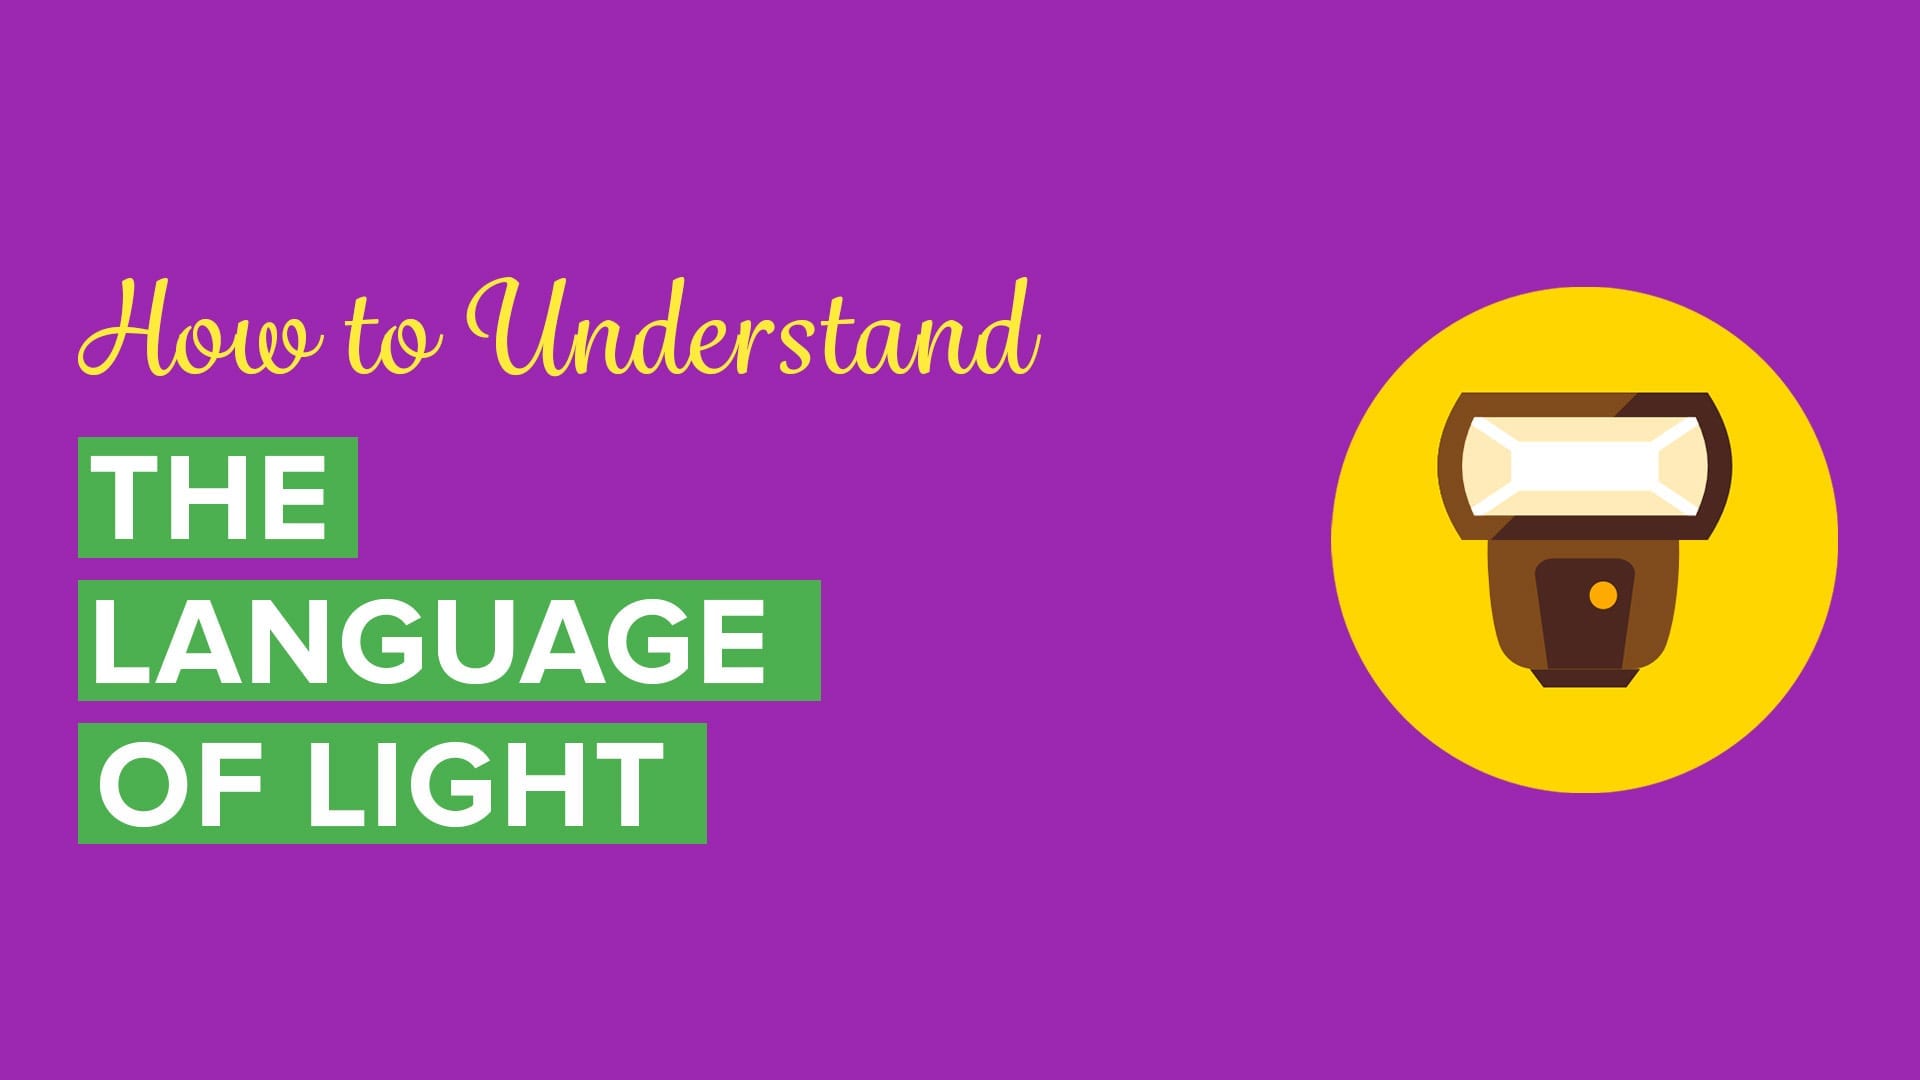
How to Bend Light to Your Will
We’re going to discuss four elements of light, at least as they relate to photography. I’ll share some examples to help illustrate what we’re talking about.
The Direction of Light
Let’s start with the obvious. Light has to come from somewhere, and we usually think it comes from above. Most commercial buildings and plenty of homes install lighting in the ceiling. We expect most of our sunlight to come from above. It’s normal.
Of course, normal isn’t always the most interesting.
Light also comes from the side. We often think of dawn or sunset light as the most beautiful light of the day.
One of the things we usually don’t find is light coming from under our face. There are exceptions. Campfires, scary Hollywood gore lighting, or maybe even your favorite bartender – they always seem to have light coming up from the bar in those dark rooms. It’s not a flattering look, though.
So when and why would you want to change the direction of your light source?
For one thing, you can make things interesting by changing where the shadows fall on your subject. Let’s say that you’re photographing an elderly person. Lighting them from above likely places shadows in their wrinkles and the bags under their eyes. It’s really not something that your subject may want.
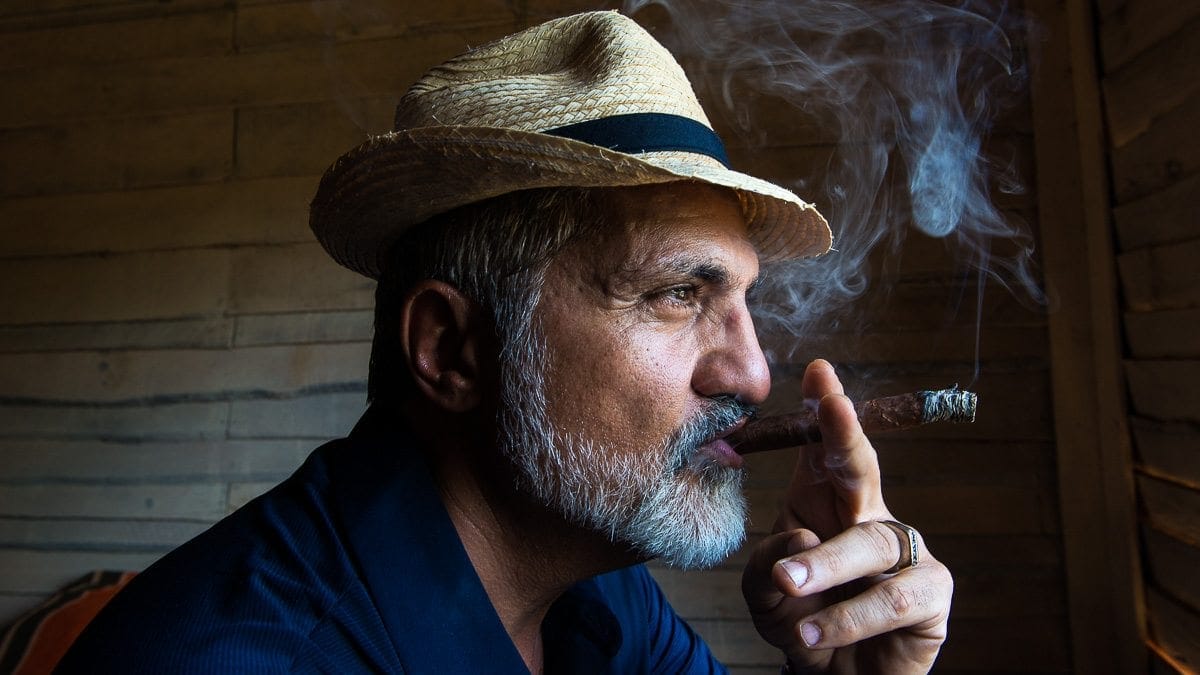
In this example, the light comes in from the side. However, our subject also faces the direction of light. the result does a couple of things for him.
First, you see the light is brighter on the front of his face and slowly changes to shadow by the time it gets to the back of his head. That concentrates your view right where you want it – on his face.
Second, you don’t see problems with wrinkles or bags by shadows, since he’s getting pretty much flat lighting from the open window providing his light.
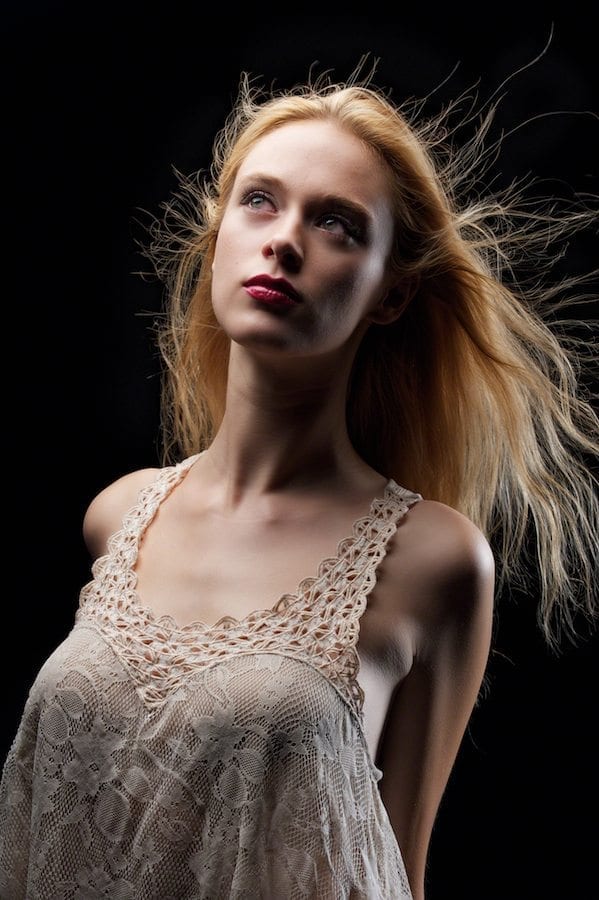
More often than not, shadows are your friend. This young model doesn’t have to worry about wrinkles. She’s being hit with two light sources here, so the direction of light is actually a cross-light scenario.
Imagine that she’s standing in the center of a clock. My camera is at 6:00 o’clock. The key light source is about 7 or 8 o’clock. It’s also angled down at roughly 45 degrees. That position creates two effects here.
Creating Lighting Styles with Direction of Light
The first is something called Short Lighting, because the side of her face closest to the camera is in shadow. The second effect is Rembrandt lighting. You see the tell-tale triangle of light under her left eye. It’s not a perfect example of Rembrandt lighting, since the shadow from her nose should extend across her cheek. It’s more of a hybrid of Loop Light and Rembrandt light. Sometimes that happens when models move about.
Opposite the key light is a strip light to provide some rim lighting on her arm. It provides an edge so she doesn’t fade away into the background. It’s also acting as a bit of a hair light, so her hair stands out as it’s blown by a fan.
I’ve learned over the years that I appreciate shadows more than just blasting someone with light. There are always exceptions, but I find that creative use of the direction of light yields more interesting photos than just having light all over the place.
The Color of Light
A big trend these days is to use color grading to process photos. It’s not a bad idea, since color creates emotions and stirs the senses. Blues feel cold. Warm colors…well, they feel warm. Green can look inviting in foliage and sickly on someone’s face.
You have to know what you expect from your colors. If you can think about that before you take your photos, then why not add those colors in your light?

At the right time of day, nature will add color to sunlight for you. You may not have control over what you get, but it’s usually better than the blast of light at high noon.
In the example above, you can tell the natural blue hour light creates a receding color, which is perfect for the Red gate to become a dominant color.
If you’re using off-camera flash, you can experiment using color gels to create different colors on your background or even on your subject. The trick is to keep one light from bleeding into the other, or you may get some undesirable results.
I mentioned a really cool example of color in lighting in a movie called John Wick, starring Keanu Reeves. It’s an exciting movie, but I was actually far more interested in how they used light and color to set the mood of each scene. It was brilliant.
Before you go watch that movie (or John Wick 2), I’ll post a warning that it’s a pretty violent movie. We’re talking about an ex-assassin on the rage shooting people in the face. It’s not as gory as it could be, but definitely not something for the kids or anyone opposed to watching that sort of thing.
The Quality of Light
There’s no such thing as bad light.
Many photographers tell you not to go out to shoot at high noon because the light is bad. Honestly, it’s all relative. Bad light for one subject may be perfect light for another. Here’s one of my favorite examples.
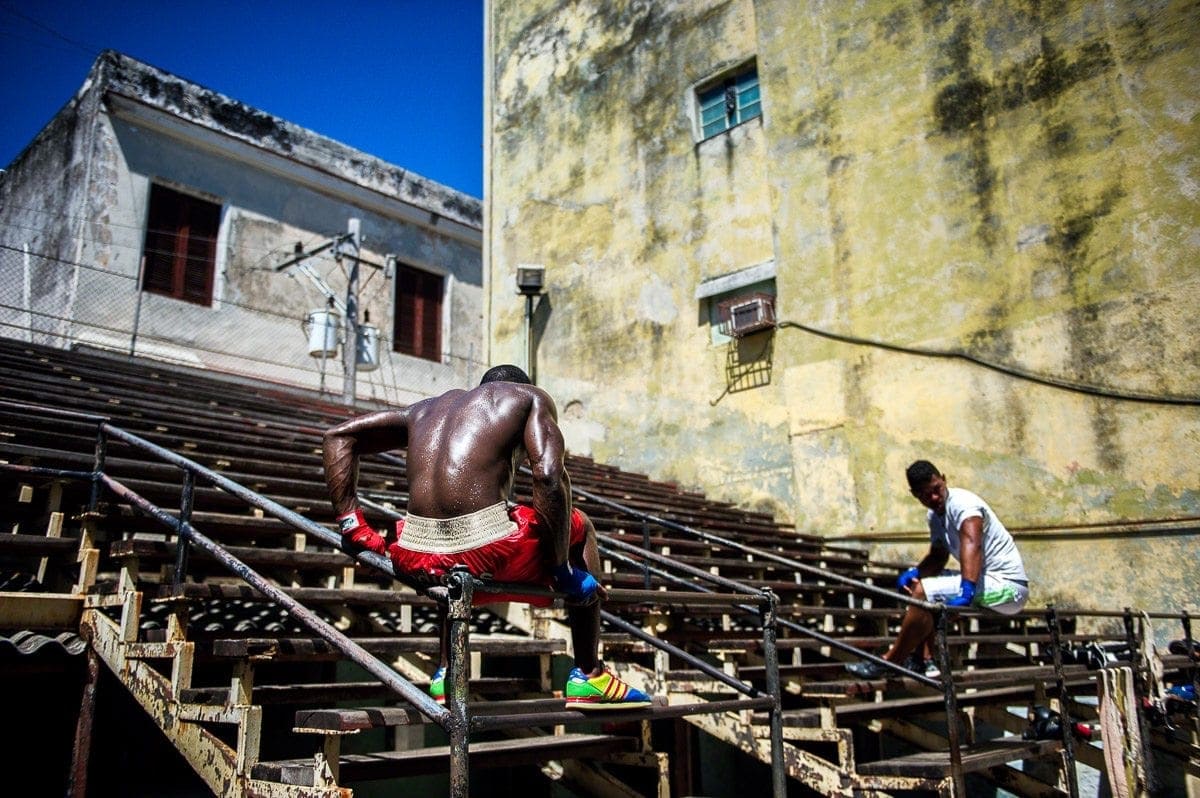
Now that is hard light. Midday sun, no clouds in the sky. It’s brutal, and that was a good thing. For this photo, you want to show just how hard these guys workout, and the toll shows in this photo during one of their few breaks.
At the same time of day, I took this photo.
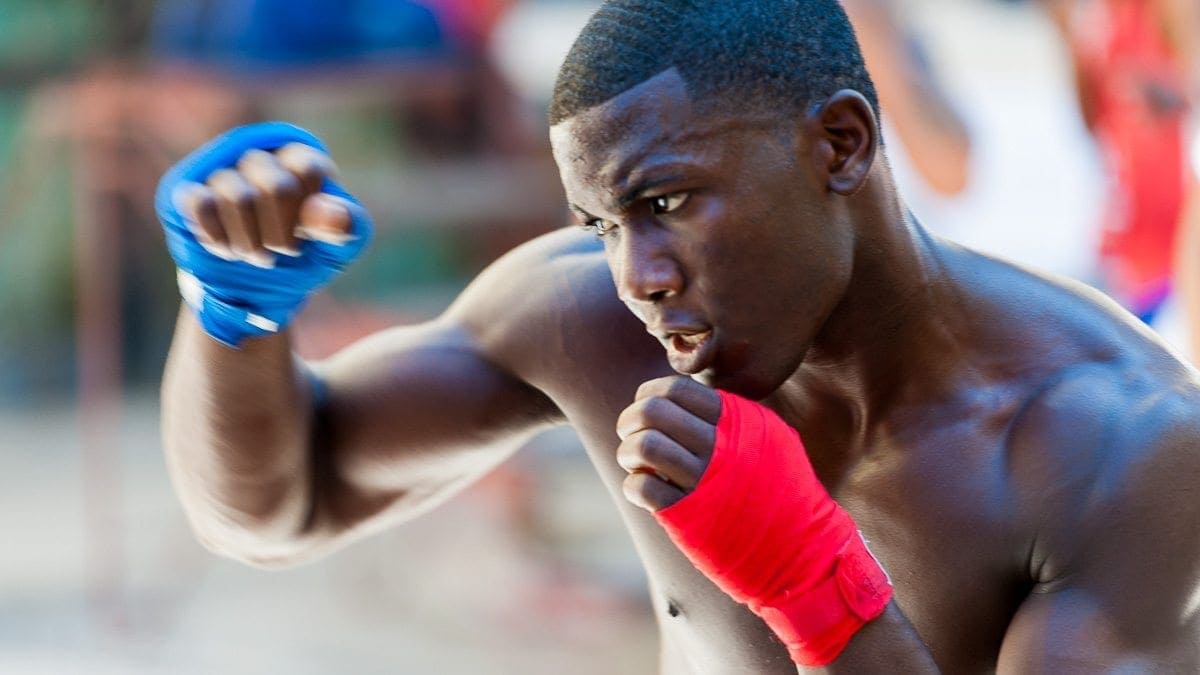
The boxer is doing a shadow-boxing drill. The sunlight is the same, but notice how much softer it appears on the short light, or side closest to the camera. The harsh sunlight makes a great rim light. He’s being partially blocked by a metal roof over the boxing ring behind me.
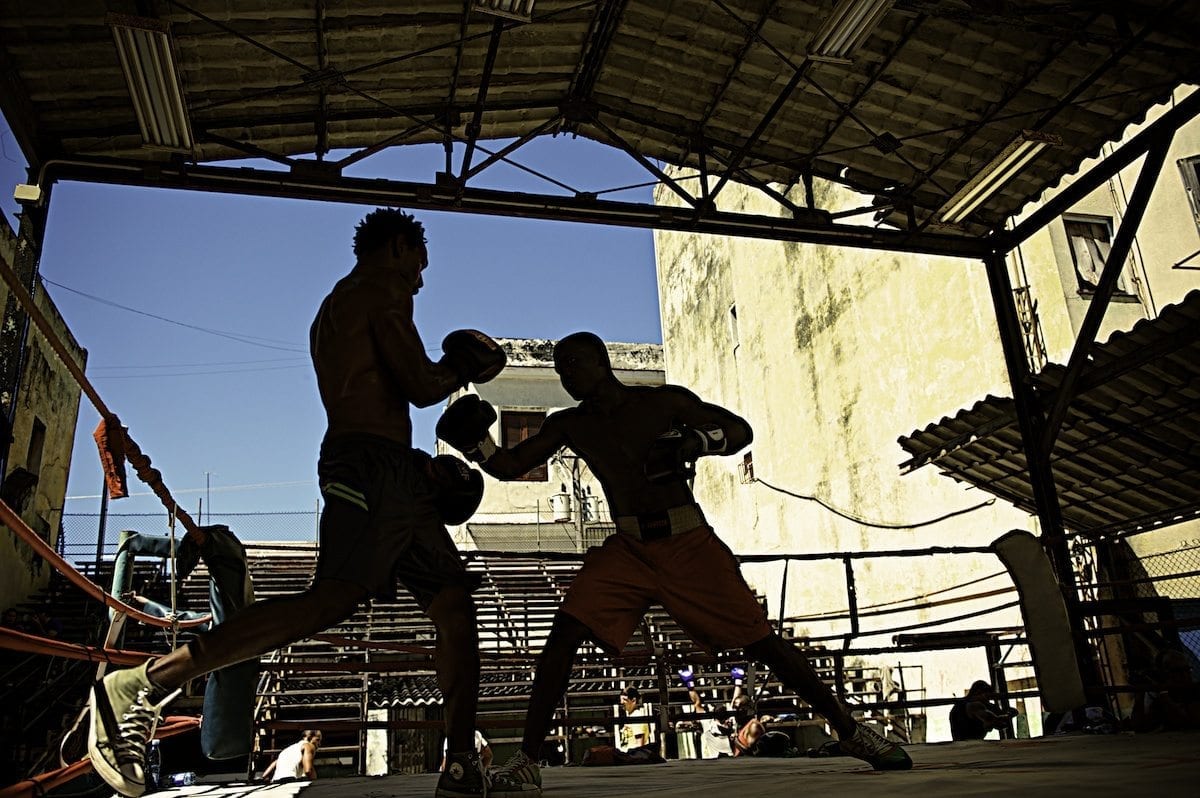
Again, here we have the same light at midday. You can see how hard it is in the lower left corner where the metal roof isn’t blocking the light. Yet both of the fighters are silhouettes in this example.
You can allow the light to come as it does, or you can find ways to shape or block the light to suit your purpose. Scrims, diffusers and reflectors are inexpensive ways to shape available light.
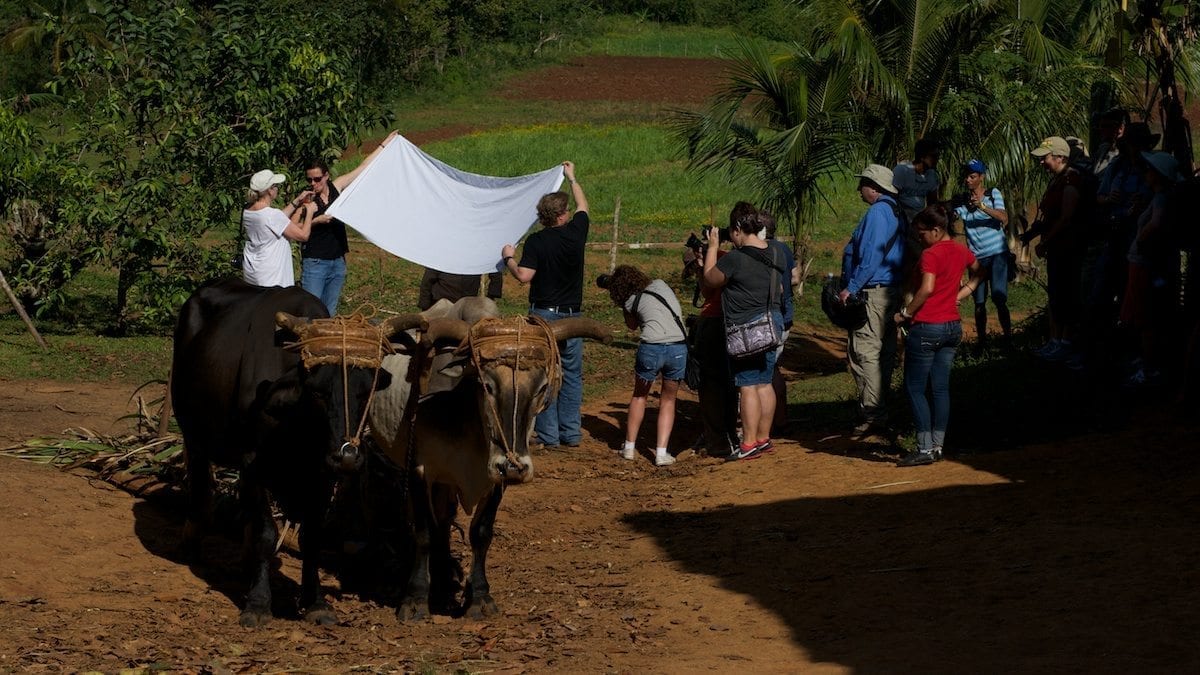
Here’s an example of just how easily you can shape hard sunlight. That’s Joe McNally and an assistant holding a girl’s bedsheet in Western Cuba as members of the tour photograph a cowboy. Look at the hard shadows all around. This is what people call bad light.
Yet this is my photo of the cowboy.
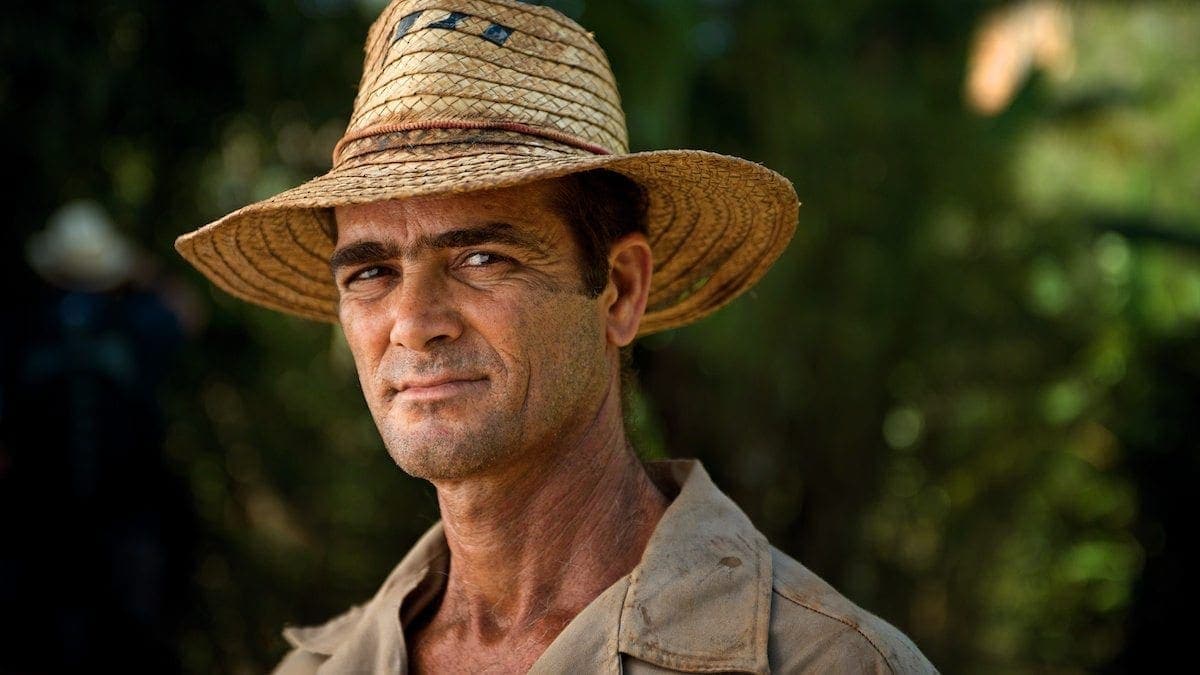
I love buying lighting gear and big soft boxes, but you don’t always need that stuff. This is beautiful light from a bedsheet between the man and available sunlight.
The Quantity or Intensity of Light
I already mentioned that you can have too much light if you just blast away and don’t have any shadows. The amount of light in your photo is another part of your story.
Maybe you want something bright and cheery. Perhaps it’s dark or romantic lighting you need. Some scenes just work better with a different quantity of light.
It’s up to you to choose the right quantity of light for your subject. It’s only bad light if the subject and light don’t match.
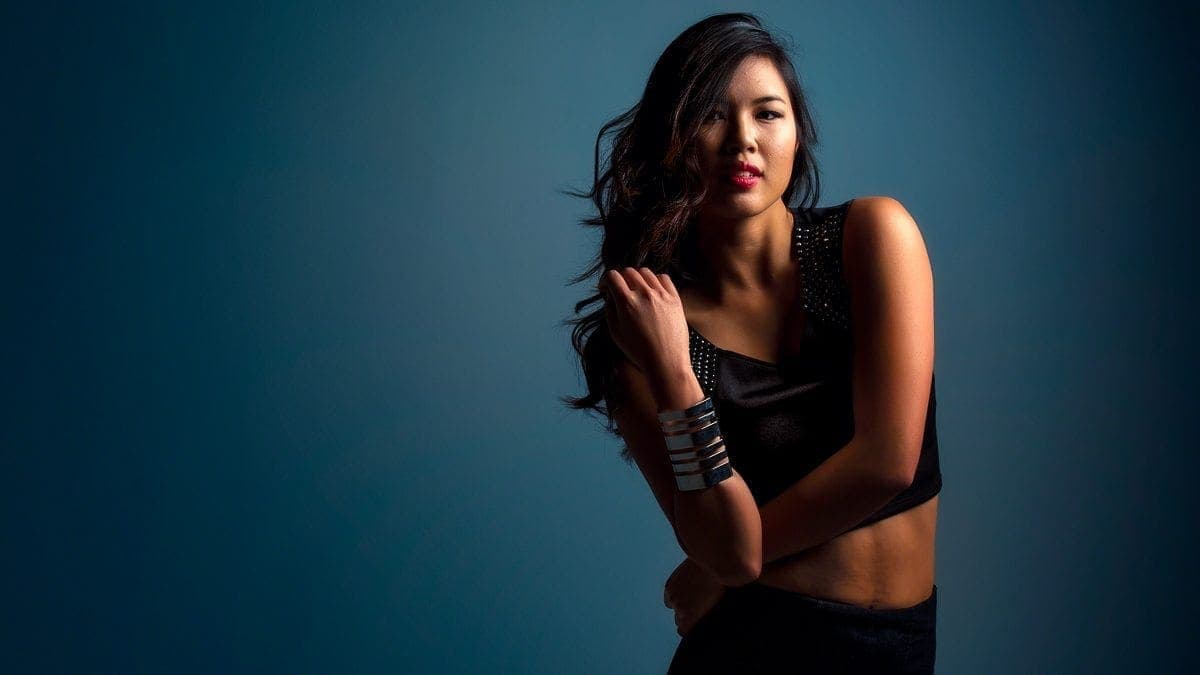
We specifically went for a low light shot on this portrait.
This is an example of combining a few of the elements we discussed already. She’s standing against a white wall in a studio, but the studio has a blue shade and she looks warm.
This is an easy trick to pull off. I changed the White Balance on my camera to a cool temperature and then used a CTO gell on the flash to give her a warm look and shot it through a 24×24 soft box just outside of camera right.
In one click, we combined direction of light, color of light, quality of light and quantity of light for this photo (and many others).
It’s not hard to do. You just need to consider what you want.
In this case, I wish I had a cross-light setup to add some light on her hair, but one flash is all I had at this moment. One light is often enough. Some folks use 10, 20 or 37 flashes for a single shot.
Your mileage may vary.
Your Light Tells a Story
We’ve seen examples of using available sunlight to using off-camera flash to create different looks. Never feel as you should be limited to the light around you. If you give it some thought, and don’t mind borrowing a little girl’s bedsheet, you can bend the light to your will.
Remember, the light and your subject are relative to your camera position. Nobody says you can’t move. If there’s a path to move around your subject, do it. Sometimes you may find that the light looks better from one side or another. You don’t have to just accept what exists.
In the words of Jay Maisel, “Move your ass.”
Your mobility is one of your greatest assets. It’s one of the ways that you can shape the light to tell your story. The Direction of light is relative to your camera, not to the subject.
Subscribe to The Photo Flunky Show
Thank you for listening to The Photo Flunky Show. Make sure you get every episode by subscribing.
iTunes – https://williambeem.com/itunes