Affiliate Disclosure: We earn a commission if you purchase through one of our links at no additional cost to you.
I’ve been using this technique quite a bit since I watched Julianne Kost demonstrate how to create a 32-bit TIFF with HDR Pro at Photoshop World in Las Vegas.
I see a lot of people on the Internet commenting about “How HDR ought to be done.” This always amuses me somewhat, as I never knew of a Council of Nicea convention to regulate the standards of High Dynamic Range photography. As far as I’m concerned, you can do it any way you want. People will either like your photos or they won’t, and those reactions will vary from one person to another.
That said, there are plenty of folks who dislike HDR as an effect, but like it as a method of approximating the same perception of light that the human eye can achieve. For those people, the ability to create a 32-bit TIFF with HDR Pro seems to be a great tool for creating a “realistic” HDR photo. It’s also pretty easy to do.
How to Create a 32-Bit TIFF with HDR Pro
I’m using Photoshop CS6 in these instructions. You need Camera RAW 7.2 to make this work. Lightroom users may need to update for Camera RAW 7.2 compatibility.
Note to Windows Users: When I type ?, you can substitute the Control key.
1: Load Your RAW Files into HDR Pro
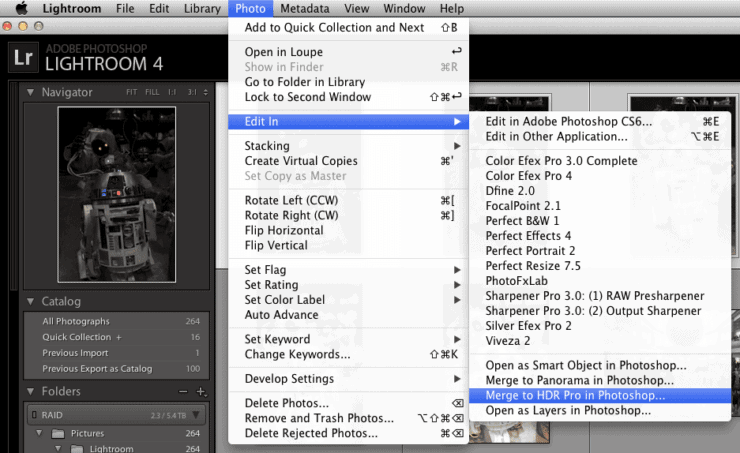
If you’re a Lightroom user, you can select your bracketed photos and launch HDR Pro from the menu by selecting Photo | Edit In | Merge to HDR Pro in Photoshop…
If you don’t use Lightroom, don’t worry. I primarily use Aperture for my photo management and it doesn’t have this same kind of integration with Photoshop. Instead, you just need to use Bridge. In Aperture, I select my brackets and hit ?-Shift-S to export copies of my RAW files to a folder. Then I use Bridge to select my photos and launch Photoshop with Tools | Photoshop | Merge to HDR Pro…
2: Set Mode to 32 Bit in HDR Pro
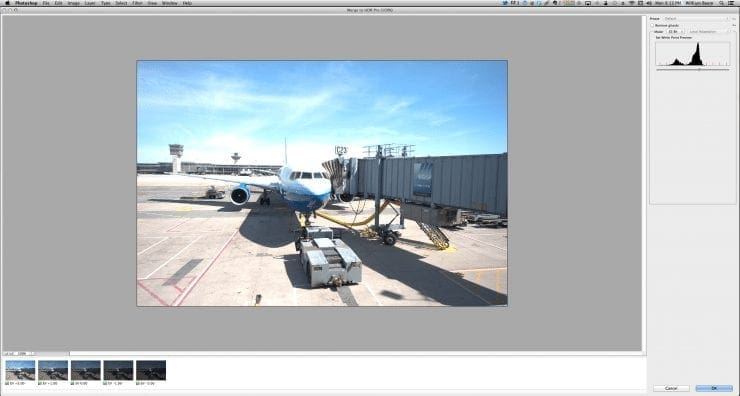
Once you launch Photoshop with the Merge to HDR Pro command, it will take a moment to load all the photos in Photoshop, then launch into HDR Pro. Then you’ll see a screen like the one below.
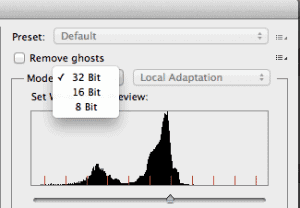
There are two things to pay attention to in this screen.
Set the Mode to 32 bit
- Check the box to Remove Ghosts if you have movement in your original bracketed exposures
Photoshop CS6 does a very good job of removing ghosts. Of course, that’s dependent upon your images. If you have brackets with a bunch of long exposures and something is blurry in all of the frames, then Remove Ghosts isn’t going to work magic to make those photos sharp.
There’s still a lot of power behind that checkbox. Once you check it, you can select the original exposure in the filmstrip at the bottom of the screen to determine which image Photoshop will use to eliminate ghosts, but it does a good job on its own.
Other than those two settings, ignore everything else. You can play with the slider, but it doesn’t matter. Just hit the OK button at the bottom of the screen to let HDR Pro do its thing.
3: Save As a TIFF
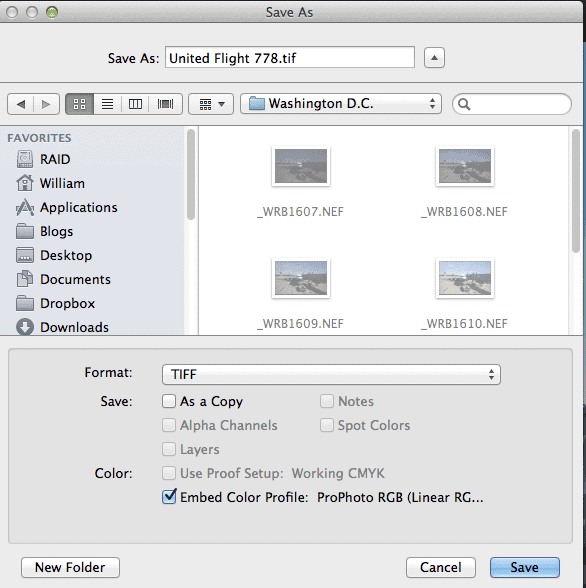
After HDR Pro crunches the brackets into one image, it will spit things back into Photoshop. Resist the temptation to do anything here, except saving the photo as a TIFF file.
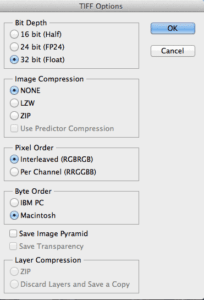
All you need to do is select a folder, give it a name, and change the Format to TIFF. There’s one more dialog after you click Save. The only thing I’ve changed on this dialog was to switch the Byte Order from IBM PC to Macintosh. If the settings look good to you, click OK to complete your Save operation.
4: Load the 32-bit TIFF into Camera RAW/Lightroom
Camera RAW and Lightroom use the same processing engine, so use whichever one is best for your workflow. As I mentioned in the beginning, you need to be using version 7.2 or higher.
Bridge users can select the 32-bit TIFF and launch it into Camera RAW by typing ?-R.
5: Make Your Adjustments in Camera RAW/Lightroom
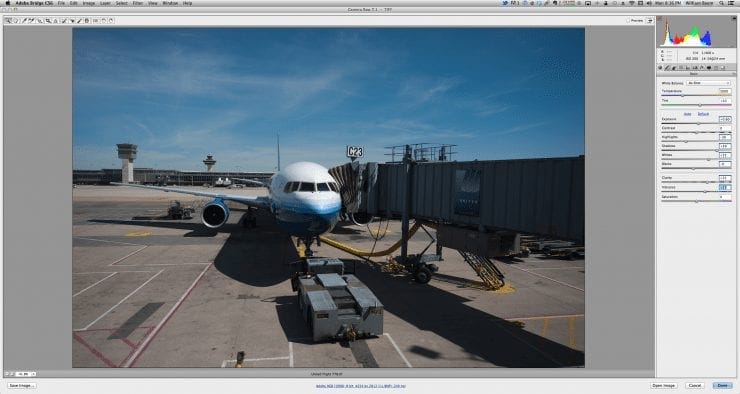
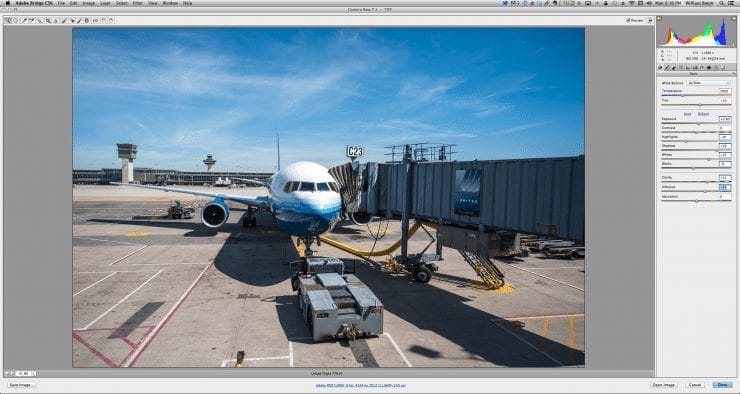
Here’s where the cool stuff happens. All of that dynamic range from your bracketed photos now exists in one image. When you start moving the Shadows and Highlights sliders, you’ll see some fantastic results to adjust your image. Unlike doing the same thing with a single RAW file, you don’t end up generating noise or artifacts when you go to extremes with the sliders.
Here’s are some screenshots of my edits, first with the Preview turned off so you can see the original TIFF.
Now here’s the view with the Preview turned on to see the edits in the image.
Bonus: Develop As You Like!
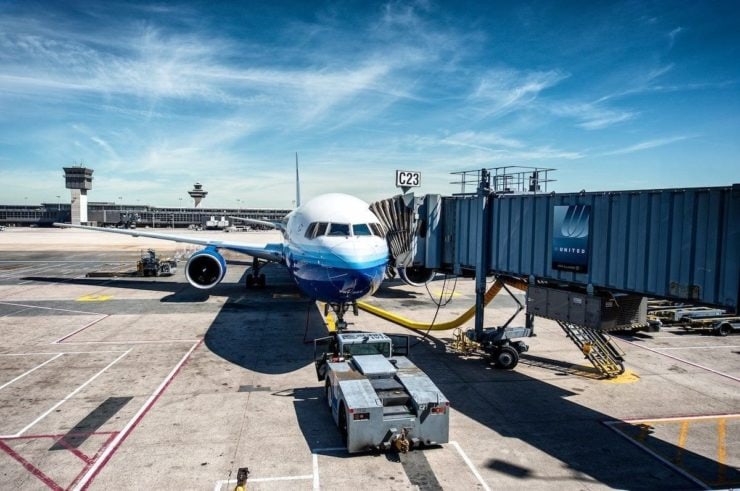
You can do all of your editing in Camera RAW/Lightroom if you prefer. There are some great presets available to come up with some interesting results. Since I’m not bound to realism, I decided to add some filters with Nik Software Color Efex Pro 4 using these three filters.
- Pro Contrast
- Bleach Bypass (reduced to 20% opacity)
- Darken/Lighten Center
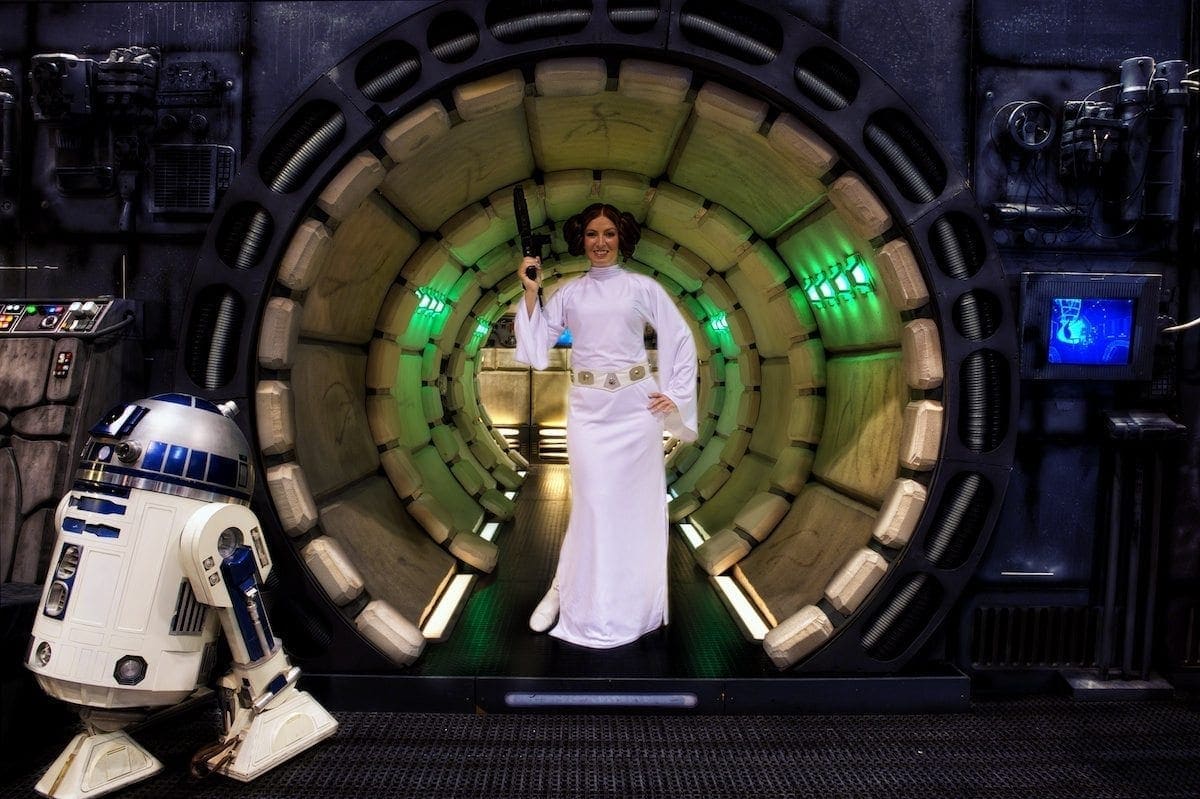
Here’s my result.
I hope you enjoyed learning how to create a 32-bit TIFF with HDR Pro. It’s a fast and easy way to create a single image with a large amount of data to enhance the dynamic range in your photos. Even if you never leave Camera RAW/Lightroom, you can still selectively edit your images with the Adjustment Brush to bring out details or make other enhancements. You also avoid some of the traditional HDR effects that require correction later, such as halos, electric colors and dirty clouds.
HDR Pro wasn’t one of my favorite tools for creating images in the past, but this technique is becoming one of my favorite methods.

