Affiliate Disclosure: We earn a commission if you purchase through one of our links at no additional cost to you.
Photography isn’t cheap. That’s why I appreciate some of the inexpensive photography accessories when I find them. You know, those little things that usually do one job. Yet that one job comes in handy when you need it.
We have a list of inexpensive photography accessories that we think will serve you for a long time. They don’t take up much space, and a few of them help keep things clean for you. It’s amazing how important cleanliness is to photography.
What Are the Best Inexpensive Photography Accessories?
1: White Balance / Color Correction Tools
Good color creates unity in your photo.
This one is something you can use on every photograph. It can be incredibly cheap and then escalate into more expensive items. What we’re talking about here is a grey card target to help set your white balance in post-production.
At it’s simplest, you can get this in an art supply store. A light grey piece of foam core will do. Simple take a photo of this grey card in the same lighting conditions as you find for your photography.
Later in post-production, you can use the eyedropper tool in a program like Adobe Lightroom Classic CC to set your white balance. That comes in VERY handy if you screwed up your white balance while shooting.
Some cameras will let you set a custom white balance when you take a photo of the grey card. I do that with my Nikon cameras so I know I have the right white balance at the point of capture.
Remember that you have to shoot another photo of the grey card if your lighting changes. Bright sunshine and cloud daylight are different.
There’s one basic problem with a flat grey card. While cheap, it doesn’t give your camera enough contrast to focus on the card.
Is your camera giving you weird, inaccurate colors in your photos? Avoid that issue entirely by using the Lastolite 12-Inch Ezybalance Card.
This helpful tool lets you set your camera's white balance perfectly, so you'll never have to worry about poor coloration again. Not only that, but the Ezybalance Card is also great for exposure control and creating accurate color rendition. It's collapsible and durable, so you can take it wherever you go, and it's easily cleanable too. Plus, it's double-sided with grey and white tones to suit your needs.
That’s why I bought this little bad boy. It has a little target in the center to make it easy for your camera to focus. Grab your shot, and then put it back in your bag until you need it again.
Although it costs more than a piece of foam core, it lasts longer. It’s a fabric center within a flexible frame that folds like many collapsible reflectors or backdrops.
It pops up perfectly every time I need it.
2: Decent Camera Strap
There are a lot of camera straps on the market. Some are popular. Some are crap. Then there are some that are both popular and crap.
I tried out a number of straps, including one from BlackRapid that supports the camera from the tripod mount. People seem to love straps and holsters that use the tripod mount.
However, I won’t use anything like that since I learned an important truth. Those tripod mounts can crack and your precious camera falls to whatever surface is under your feet. You see, the tripod mount was never intended to support the full weight of your camera and lens hanging upside-down.
Those little eyelets on your camera body are what you should use.
Don’t get me wrong. I’m all for cross-body straps if that’s what you want. I just don’t trust anything to hold my camera from the tripod mount.
For many years now, I have recommended the UPstrap – check out my UPstrap Review for details. Lee and I both use this strap, and it’s never let us down. The problem is that the vendor is going out of business.
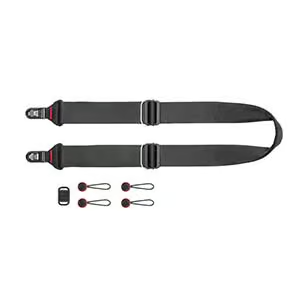
However, I’m testing out something different. It works with kind of the same principle as the UPstrap. By that, I mean there are anchors that you attach to your eyelets, and then you can quickly attach or detach those with your strap.
In many ways, it’s like the UPstrap. It uses anchor points, but these aren’t quite as bulky as the clips on the UPstrap. The Slide is quite comfortable and stays on your shoulder when you move around.
It has a quick release to expand or contract the strap, making it easy to put it across your body and tighten it up. Just reverse to take it off. Now that’s something the UPstrap doesn’t have.
If you want to hold your camera without the strap banging around, both products allow you to disconnect quickly and then put the strap back on again.
Looking for more camera strap choices? Check out this article”
13 Best 3-Point Slinger for Camera
3: Lens Cloth / Cleaning Wipes
A little microfiber cloth is one of those essential accessories that are cheap and ubiquitous. It’s handy for cleaning your lenses and, if you’re like me, eyeglasses. You can find these things in any photo or eyeglass store. They’re often given away for free by photo vendors if you go to a conference. I have some stuffed in every camera bag, my eyeglass case, and my pocket.
You never know when you may need to wipe off a smudge or go for a deeper cleaning with some lens fluid.
By the way, don’t get too hung up on cleaning fluid. The guys at Nikon Professional Services use Windex. It does a good job and it’s easy to find. Rumors are going around that you have to use specific lens fluid because anything else is too harsh or that the fluid was designed to protect the coating on the lenses.
Those coatings are on the inside. You aren’t going to hurt them with Windex or another glass cleaner.
Zeiss Pre-Moistened Lens Cleaning Wipes are an effective and gentle way to clean your glasses or lenses. These wipes are safe to use on lenses with anti-reflective coating or prescription, and they're guaranteed not to scratch your glasses or lenses. Plus, they're effective at cleaning without leaving streaks or residue.
Of course, there’s another alternative that I’ve used for the past few years. are pre-moistened towelettes you can use to clean your lenses (or eyeglasses) and dispose of them when you’re done. There are two advantages with these things.
1: You don’t need to carry a bottle of glass cleaner or lens fluid to squirt something wet on your lenses.
2: They’re clean. You don’t have to worry about any residue left on your microfiber cloth transferring to the lens that you want to clean.
Mostly, they’re very convenient. I know that I’m getting a quick, clean wipe for my glass. Just rip the edge of the packet and pull out a 6″x5″ towelette to clean, and then toss it in the trash. Use them right away, because they’ll dry up after a couple of minutes. These things aren’t reusable, which is part of the reason you get them.
4: Memory Card Reader
Some computers come with a built-in SD card reader. What happens if you have a different kind of card, like my CF Cards or an XQD card? Well, you get to buy yet another accessory. There are tons of these on the market, and which one you get depends upon the type of cards you need to read.
The important thing to consider is how fast the reader can transfer data from the card to your computer. Every little bit of time saved can help.
The SmartQ C368 USB 3.0 Card Reader is a handy and reliable device that allows you to quickly transfer data between your computer and various types of memory cards. It has a four-in-one design that supports Micro SD/SD/MS/CF cards, can read data independently, and has a high data transfer speed of up to 5GB per second.
It is compatible with Windows/Mac OS/Linux and other systems and requires no driver for installation.
I recommend looking for a card reader that works with USB 3.0 or USB C to get the best possible transfer rate, depending on which port you have on your computer. Even if you have an older computer that runs USB 2.0 ports, I’d recommend the USB 3.0 card reader. One day you’ll upgrade that computer to something with a faster port.
You don’t have to spend much money on your card reader to get a good one.
Remember, look for both speed and compatibility with your cards. My first memory card reader worked on FireWire, because that was the fastest transfer bus. You may eventually need to upgrade as technology improves, but those changes of often years apart. I’ve used the same card reader for several years, and it keeps working.
5: Small Flashlight
Have you ever noticed that the interior of most camera bags are dark? I have one that’s bright yellow, but most are grey, dark grey or black. It makes for a difficult time to find that tiny thing you need, particularly when you’re outdoors at night. A little flashlight is just a time saver. Put it in the same pocket every time so you know where to find it.
If you only need to use it to check inside your bag, don’t spend a lot of money. You can find very cheap LED flashlights that work on a AA battery or even some that recharge on USB.
Of course, there are other times when a flashlight comes in handy. Light painting, lighting up your subject so your camera can focus, and making sure you can see where you’re going while walking in the dark. You may need something bigger and more powerful for those needs. I have two lights that I use and recommend (though I’m a bit of a flashlight geek).
The Anker Rechargeable LED Flashlight is powerful and reliable. The 900-lumen LED produces a bright light that can reach up to 1000 ft, making it useful for emergencies or when you need to light up a large area.
The flashlight also features five adaptable settings to choose the right light level for your needs. The long-lasting 3350mAh battery provides up to 6 hours of light on the medium-beam setting and can be recharged in just 6 hours with the included Micro USB cable. The tough and durable aluminum body makes the flashlight resistant to water and shocks, while the anti-slip finish ensures a firm grip.
It’s a 900-lumen light with a rechargeable battery. You plug a USB cable into the back to recharge from your computer or anything else with USB power.
It has adjustable power settings from High, Medium and Low. There’s also a Strobe and SOS signal with this light. It’s rather rugged and water resistant, and not very expensive for what you get. It’s about $28 at the time I’m writing. The low setting is great for checking out gear in your bag without lighting up everything else. Sometimes you need to be discreet.
If you’re into light painting, the medium or high settings give you some options based upon how much light you need – or how large of a subject you have. You can light paint a tall oak tree with this thing. 900 lumens is plenty of light. The battery lasts about six hours of use, too.
My favorite flashlight (this is where I mentioned being a flashlight geek) is the Fenix PD35.
The Fenix PD35 v3.0 is a powerful tactical flashlight with a very bright beam. This flashlight can reach up to 1700 lumens and has a throw of up to 390 yards. The PD35 v3.0 is USB rechargeable, so you can easily plug it in to recharge the battery.
An indicator beneath the side switch lets you know how much power remains. This flashlight is also easy to use, with a two-stage tail switch to power on/off and a metal side switch to adjust the mode and brightness. Plus, it has a steel pocket clip that can be attached to backpacks, belts, and MOLLE systems for easy access. For everyday carry, the PD35 v3.0 also includes a holster and lanyard.
It’s a bit more powerful at 1700 lumens and has five different power settings and a strobe. It’s even more rugged than the Anker. This thing could potentially be a weapon because it’s so tough. If I’m walking in a creepy area, I carry this thing for self-defense. Never needed it, but you could blind a bear with this light and bonk its head with the case. Not that I advise getting into fights with bears.
Both of these are tactical lights. What does that mean? Tactical flashlights were originally designed for use with small arms to identify targets in low-light areas. You’ve probably seen them in some TV show or movie where the guy holds a pistol with a small flashlight to see where he’s shooting.
Well, I don’t own any guns, but I do like practical gear. These are small, yet extremely powerful, flashlights. You can use them as much for self-defense and utility as lighting up an area. I wasn’t kidding about blinding a bear. Since I’m sometimes out at night alone, carrying expensive camera gear, I’m aware that I may potentially be a target for some unsavory characters.
Quick access to a tactical light with 1700 lumens and a strobe can temporarily discombobulate an assailant. If need be, you can use it as a weapon to strike.
The tip of my Fenix PD35 can shatter glass. I’d hate to think what that would do to someone’s head if I had to defend myself. Unlike other potential self-defense items (guns or knives), its not the sort of thing you can’t carry with you to a concert, theme park or airplane. They’re much smaller and lighter than the old Maglights that cops used to carry and are much brighter.
I have a few of these things. One in my car, one on my nightstand, and one next to the dog poop bags when I take the dogs out at night before bed. Talk about versatility.
6: Reflector / White card
Light is a wonderful thing. It travels in a straight line, yet seems to bounce everywhere. And yet, it doesn’t always go where you need it. That’s why sometimes you need to bounce it back into the place you need to fill with just a bit of light.
The simplest and cheapest way to do this is with a white fill card. You can get white foam core at hobby and craft stores for just a few bucks. I have them in multiple sizes. For table-top photos, I can get by with a 1×2 foot card. For Lee’s food photography, we break out something about 2 or 3 feet tall.
If you’re into portrait photography, you may get some 4’x8′ foam core boards and tape them together to create v-flats. Those bounce light, or hide lights so you don’t get your backlight splashing on your subject.
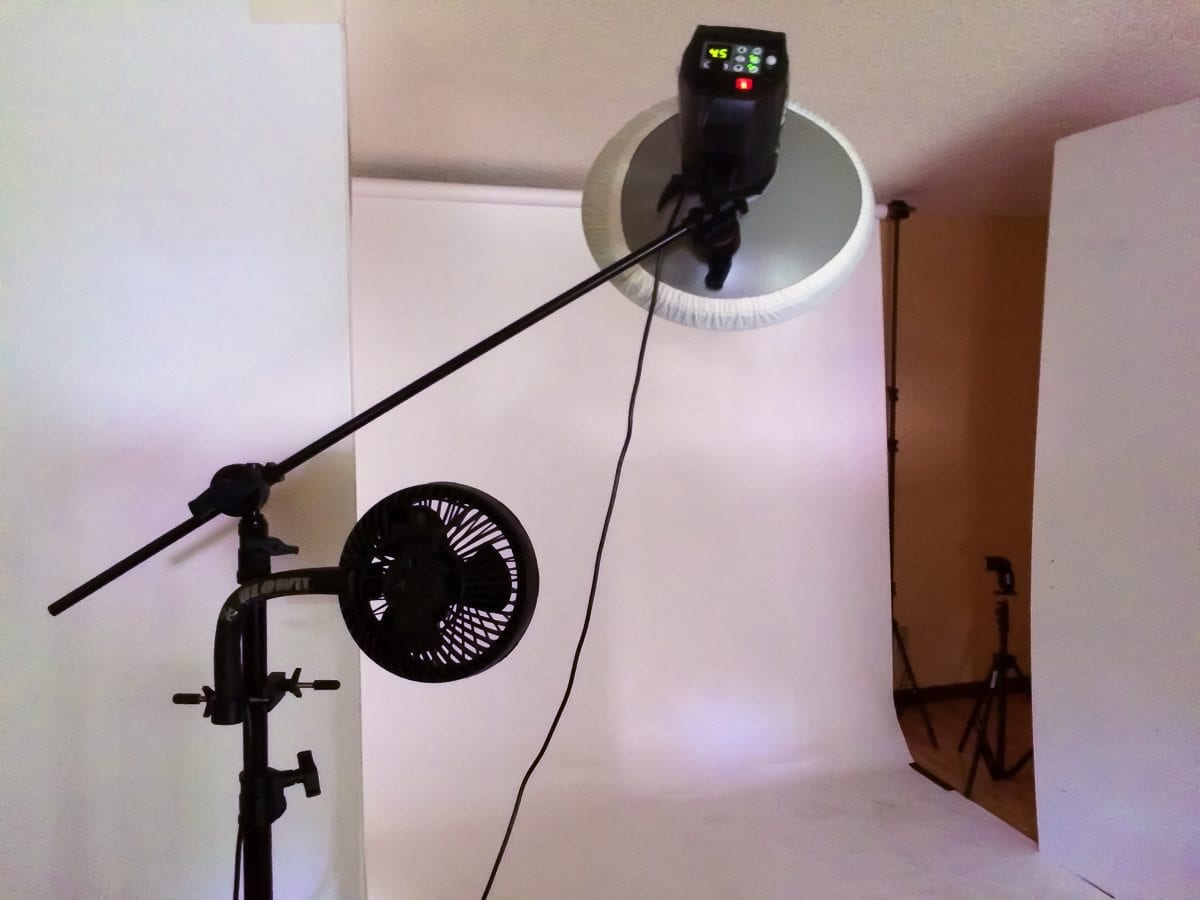
This is an iPhone shot of a home studio setup where I use two v-flats with white seamless. They create some fill light on both sides of my subject. Great for fashion or catalog shoots where you must show the clothes clearly rather than let them fall into shadows.
The problem with the large v-flats is that they aren’t very transportable.
A company called V-Flat World created a solution to that problem. They sell foldable v-flats, white on one side and black on the other. I bought a pair of them, and they work very well. Excellent construction, each with its own carrying bag and can fit into the back seat of my car if I need to take them on a portrait session.
V-Flat World's Foldable V-Flat is a must-have for any photographer or videographer. This versatile modifier can reflect, block, or flag light, making it a versatile tool for any lighting situation. The black and white sides offer different options for creative control, while the foldable design makes it easy to transport and set up. With a weight of only 7lbs., the Foldable V-Flat is easy to carry and use, giving you total control of your lighting.
They aren’t as inexpensive as making your own v-flats, but you’re paying for convenience and portability.
There are a lot of creative possibilities with white or black foam core. You can reflect light as fill, flag off light, or use it as a light source by aiming your flash right into it and having it become a large, soft light source for your subject.
Sometimes your reflection material needs to be a bit stronger than white foam core. That’s why we have reflectors with gold and silver material in different sizes.
The Lastolite 30" TriFlip 8 in 1 Grip Reflector Kit is a great way to improve your lighting techniques whether you're shooting solo or with an assistant. The kit includes a 30" translucent TriGrip collapsible reflector with a padded handle and eight reversible covers that include silver, gold, white, black, sunfire, and the designed for digital colors of sunlite and softsilver.
There are plenty of brands making reflectors. I started with some inexpensive round reflectors and soon learned they were crap.
My favorite reflectors are the Lastolite models. The most important reason is that they’re made with quality materials that don’t tear apart at the seams or get warped into odd shapes when you collapse them. I’m on the same set I bought in 2014, and they’re just as good as the day I bought them.
The rubber grip on the end makes it much easier for me to hold as I take a photo if there isn’t an assistant around. It’s solid, sturdy, and large enough to hold without fiddling about. You can get several variations with the Tri-Grip reflectors for different uses. Sometimes it’s a diffuser. The light on this portrait below flashed through a Lastolite Tri-Grip diffuser.

Then you can turn it into a reflector with covers over the diffuser, with gold on one side and silver on the other. Lastolite has different versions and sizes in its Tri-Grip line, so you have plenty of choices. These things are high-quality light shapers; they collapse in size when not in use, have many options, and LAST a long time.
Just food for thought. The most expensive thing is the thing you have to buy more than once. Those cheap reflectors that come apart are more than I want to spend.
7: Memory Card Case
Organization is an odd thing for me. To look at my office, you’d think that I’m the most disorganized person in the world. Yet there are some things where I’m meticulous about my organization. I want to know where the important things are, so I keep them in the same place. My car keys go in a bowl by the garage door. My memory cards go in a card case in my main rolling bag. If I go out somewhere, I move the card case to the bag of the day, and then I return them to the rolling bag when I get home.
Even the cards in the case have some order. Cards that are ready to use face forward. Cards with data I haven’t yet saved to my computer go back in the case facing backward. That makes it easy to know which cards I can use next, and which ones I need to download when I get home.
You could toss your cards into a pocket in your camera bag. I used to do that. The problem is that it frustrated me when I couldn’t find a card in that mess, particularly because I couldn’t find some shots on it. From now on, I will use a memory card case. What’s the point of capturing all those photos and not knowing they’re safe and easy to find?
Secure your memory cards with the Pixel Pocket Rocket. This zippered wallet holds 6 CF or 6 XQD cards, 12 SD cards, or multiple micro SD cards. It's perfect for keeping track of your cards, and it fits easily in your pocket or attaches to your belt or bag. The clear identification window makes it easy to see which card is which, and the removable lanyard allows you to attach it to your clothing or bag for easy access.
8: Rocket Blower
The Giottos Rocket Air Blaster can quickly and easily clean your camera lens or sensor. Point the nozzle at your camera lens or sensor, giving it a blast of clean, directional air. There's no need to worry about the blast spreading dust around, thanks to the one-way valve that only brings in clean air. The durable construction ensures that this blaster will last you for years.
A squeeze blower lets you get dust and debris off your lenses and other gear. It’s a good idea to do this before cleaning the lens with a microfiber cloth or the lens wipes I mentioned above.
There are plenty of little air blowers on the market, but I like the Rocket Blower for pretty much one reason.
It doesn’t roll away when you set it down.
That’s it. Those fins on the bower bulb allow you to stand it up so it stays put. The fins keep it from rolling away even if you don’t stand it up. Other blowers have an oblong shape that works great for squeezing to blow air, but they absolutely will not stay put when you set it down.
Next thing you know it rolls over into some dirt. Then instead of blowing debris away from your lens, it has a fresh payload of dirt to spray all over it. Not at all what I want.
That’s why it’s always a good idea to give these things a couple of squeezes before you aim it at your delicate camera gear. Make sure there’s nothing stuck in the end of that tube waiting to come out and ruin your day.
9: Shutter Release Cable
If you have a shutter release button on your camera, why would you need to get a longer button on the end of a cable?
1: The main idea is to prevent your hands from shaking the camera when you hit that button. That becomes particularly useful for slow or long shutter speeds.
2: Instead of using a set shutter duration, sometimes you need to eyeball it and hold the shutter open. Fireworks are a great example. You don’t know how long a burst will last, so you open it when it goes off and close when it’s done. How many seconds for a fireworks blast? It depends upon the burst – they vary.
3: You need to lock the shutter open longer than the camera will allow. Most of my cameras have a 30 second max duration for a shutter. If you work with long exposure, particularly with some neutral density filters, then you may need to use Bulb mode to keep your shutter open longer than 30 seconds.
4: Using a shutter release during a portrait session allows you to interact with your subject instead of hiding behind the camera. Once you setup on a tripod and get your focus, then you can actually engage with your subject. Give some direction. Just click the shutter release when you see the right moment. It’s actually much easier than holding the camera to your face.
5: Time-lapse with an intervalometer. Some high end cameras have built-in time-lapse features. Others don’t, so they require an external intervalometer to do the timing. I have one from Nikon, which is silly because my Nikon D800 has interval timing built into it. Even so, there are times when you may get more features on an intervalometer than you have with your camera’s internal interval timing.
Should you get an intervalometer or a much less expensive shutter release?
That depends upon your style of shooting and your camera’s abilities. If you don’t plan on doing time-lapse or hyper-lapse photography, I won’t spend the extra money for an intervalometer. Basic cable shutter releases are pretty inexpensive.
10: Hand Towel
A towel is about the most massively useful thing a photographer can have. It helps you clean things or keeps you from getting filthy. Put it on the ground when you need to kneel for a shot. Use it to wipe the sweat off your face on a long, hot day of photography. Plunge it in water to have something cool to put on your face or around your neck. Swaddle your camera in it to protect it from damage.
Frogg Toggs Chilly Pad Instant Cooling Towel helps you stay cool and comfortable in the heat. Made from Frogg Toggs' exclusive hyper-evaporative material, this towel retains water while remaining dry to the touch. Simply wet the towel in water and it will activate quickly, cooling up to 30 degrees. Perfect for working in the yard, playing sports, working out, golfing, fishing, camping, and more. Plus, the towel provides reusable cooling relief and sun protection.
Fashion it around your head as impromptu sun protection. Put it on the ground as a background for your birdseye shots of “What’s in my bag?” Get a white towel and use it to bounce light off your flash and have a larger light source for your subject than that tiny fresnel head.
Your towel is like Linus’ security blanket. It’s a comforting friend or a sling to hurl rocks at anyone trying to attack you. It’s the most eminently practical thing you can carry with you on a photoshoot.
This may sound silly, but give it some thought. Sometimes a towel is a thing you need the most.





Hi, William,
Thanks for this useful article. May I add a suggestion?
Sometimes, I am using a device that helps me calculate hyperfocal distance with some precision.
It is called a laser rangefinder. There are some very cheap ones that help you in your basic calculations.
Best regards
Juan,
Thanks for the suggestion, that’s awesome. I really appreciate you sharing a tip to help others. This one is extra cool because it involves lasers!